
In this day and age, your digital identity can be as important as your real life persona. Just as you use fashion to convey your desired public image, usernames, email addresses, and the like can influence how people view your on-line identity. For the longest time, everyone just used one of the big free identity pools like gmail.com, outlook.com, or their ISP’s domain.
Recently I discovered that the family and personal editions of Microsoft 365 will allow custom domain names. That got me thinking, what about the Apple side of tech? It turns out that paid iCloud accounts will also host your custom email domain.
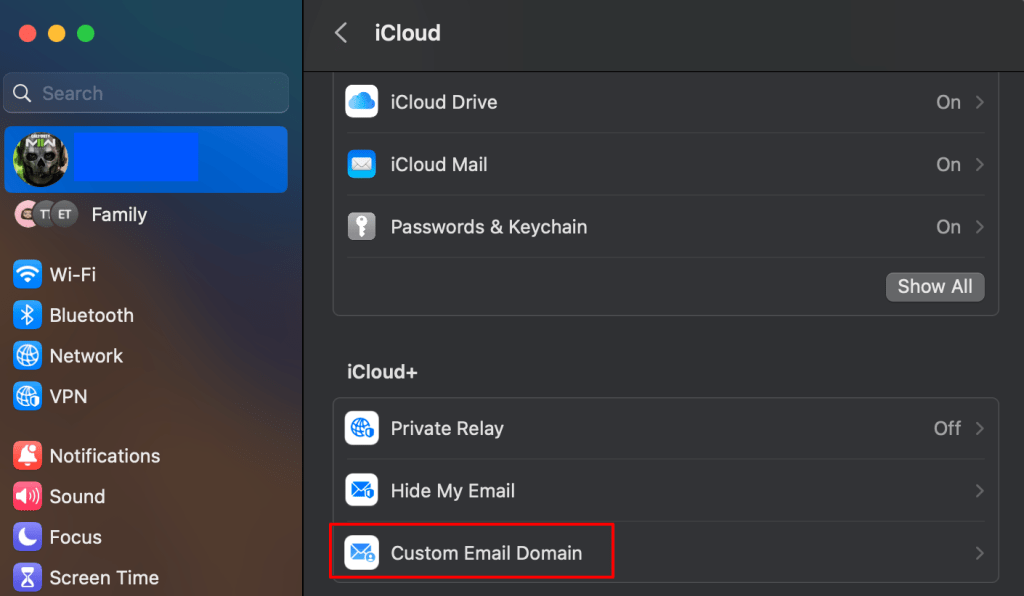
On a iPad, iPhone, or MacBook, open settings then click on your account in the menu on the left. Click on iCloud and scroll down to tap “Custom domain name”. You should also be able to go straight to the iCloud page in Safari https://www.icloud.com/icloudplus/customdomain. If you visit the site from a non-Apple device you will face some authentication hurdles, but I’m told it can still be done.
Sign into iCloud when prompted and the setup process will start. The first thing you’ll need to decide is whether to use a domain you already own, or purchase a new one. Click the appropriate button and follow the instructions. I’m using a domain I already own in these instructions.
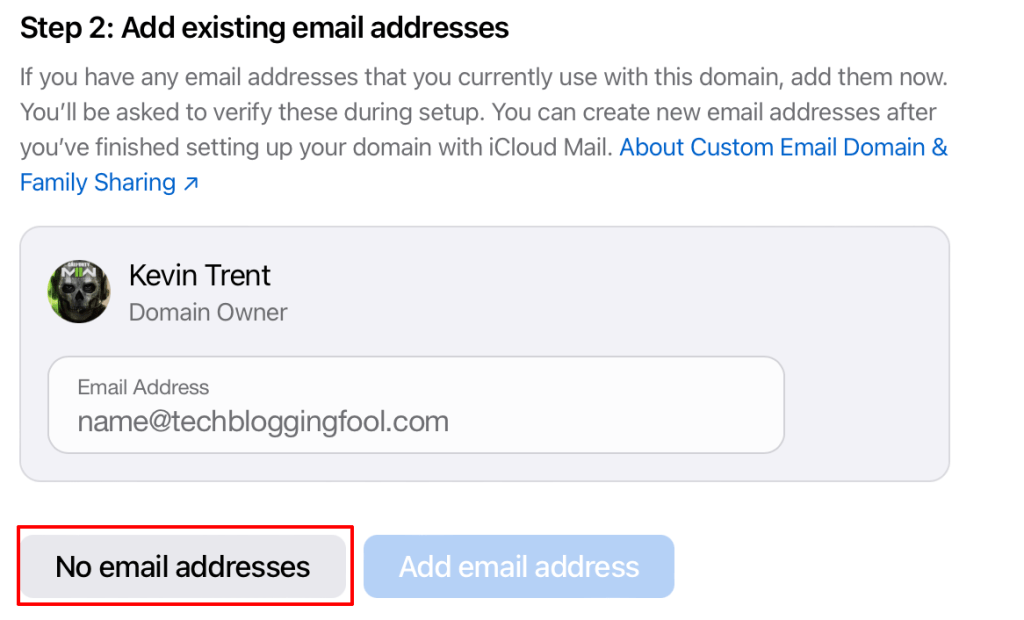
When you reach the step regarding existing email addresses, pay close attention. This is not where you setup up new addresses. If you are not moving email hosting from another service to iCloud, you should click the “No email addresses” button. If you try to add existing addresses, apple will send a verification email and you will be stuck. If you get stuck, use the back button to go to step one and remove the domain to start over.
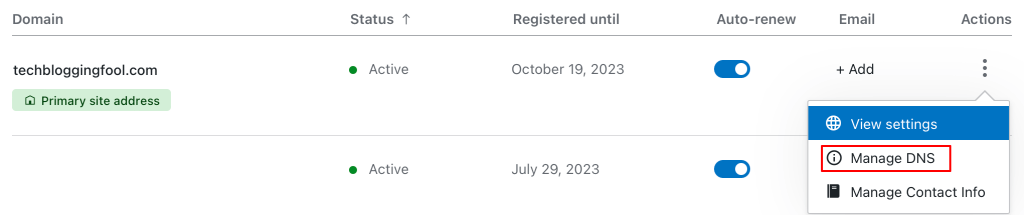
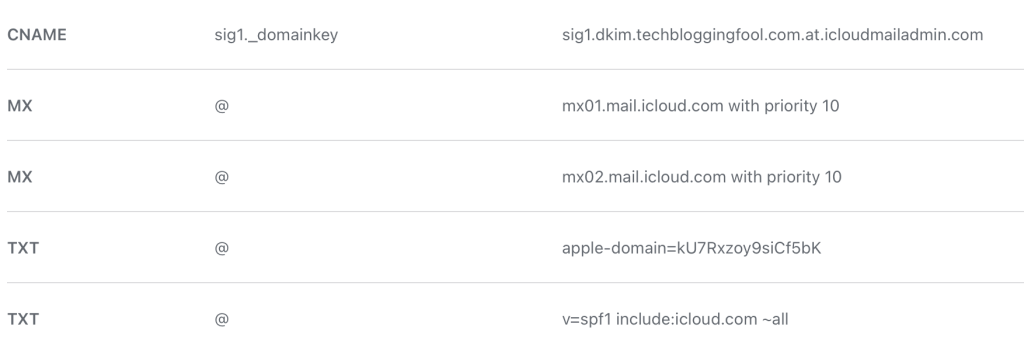
If you have chosen to use a domain that you already own, there are some DNS records that you will need to create. This is typically done on the domain registrar site that you purchased the name from. Logon to their control panel and find the Manage DNS (will vary in name and location) option. Create the records exactly as they appear in the setup portal (View button). Apple also emailed you the records to your iCloud address when you reached this step (look in the Apple Mail app).
Note: The screen that shows the records you need to create includes a trailing period after some of the values. However, most DNS servers cannot accommodate a trailing period in their fields. If your DNS server will not accept the pasted copy, remove the period.
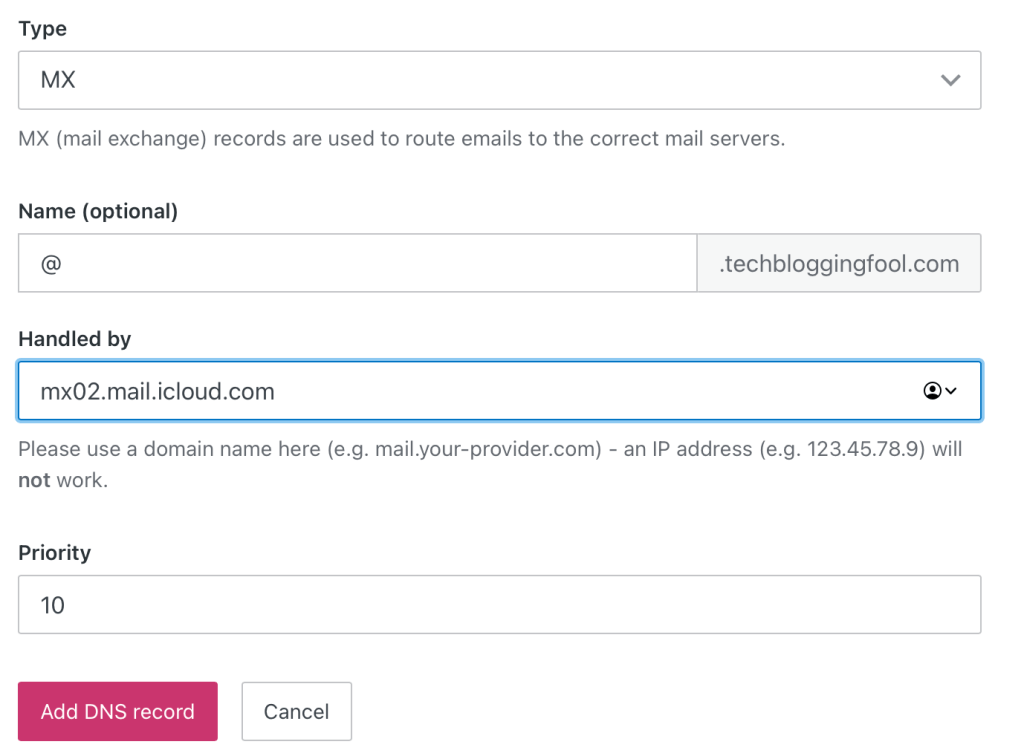
In all you should have created four DNS records. They should look similar to mine below. The data is different for each domain so do not use the values from my screenshot.
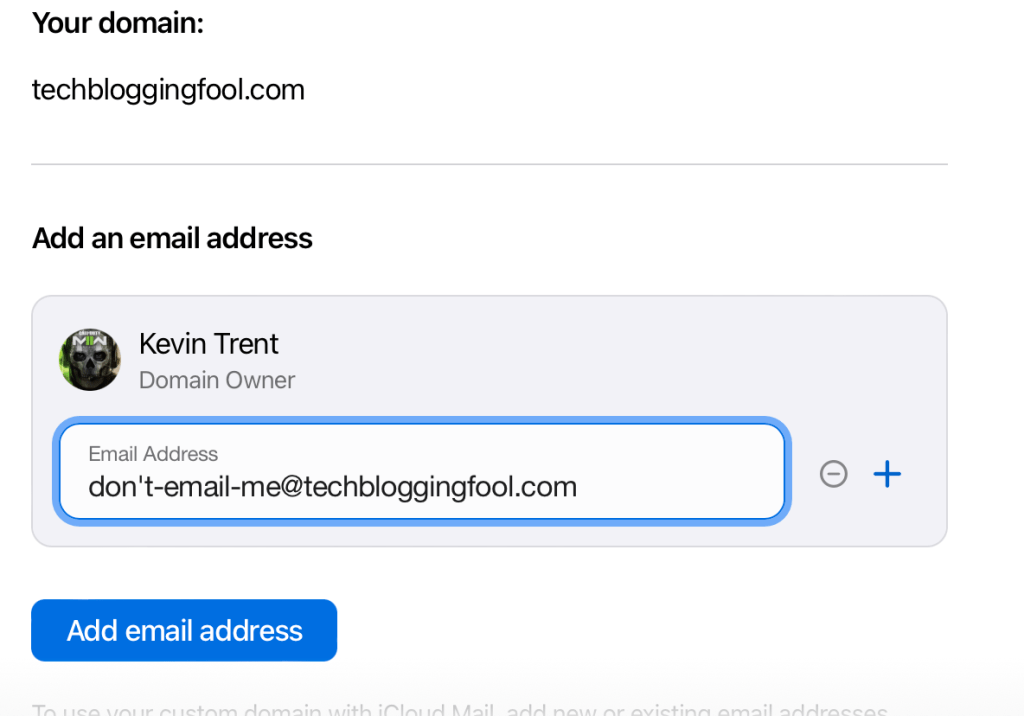
Back on the iCloud setup screen click Finish. Then click Confirm and Apple will verify that you have setup the records correctly. On the next screen you will add your email address(s). You can add up to 5 addresses to your own account or to iCloud family members.
That’s it, you are all setup to use your custom domain. It can take up to 48 hours for the email addresses you created to become fully useable on the internet. You can manage your email settings by access the Custom domain option in the settings app as described above or by visiting https://www.icloud.com/icloudplus/customdomain in your browser. Enjoy.
