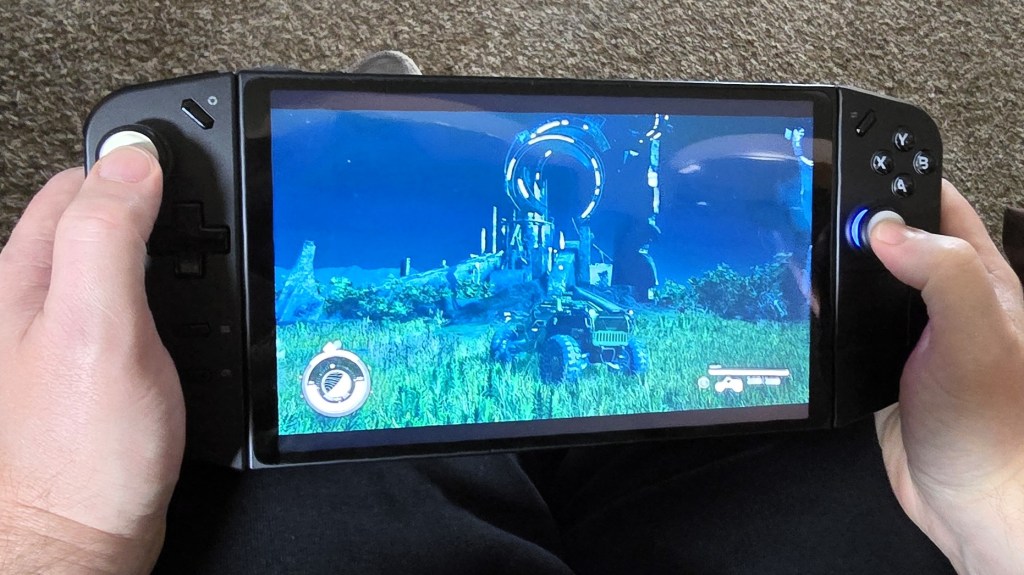
I have learned so much about the Lenovo Legion Go handheld gaming PC over my time owning and using one. I’ve gone to great lengths to tune mine for everyday couch and mobile gaming. It has all my games installed and ready to go. It’s stable, games and power can be suspended and resumed mid play for convenience. Everything runs screaming fast and looks fantastic. Games and media sound so good, too!
Read on to discover the settings, tweaks, and modifications that I’ve used to get the most out of my Go. You won’t believe the difference these settings can make in your experience. As a bonus, most of them are free and easy.
- Sound
- Update Everything
- Touch Screen
- Floating Keyboard
- Hibernation Is Better
- Controllers and Buttons
- GPU Upscaling
- BIOS/UEFI Tweaks
- Optimize Windows 11 for Gaming
- SSD Swap
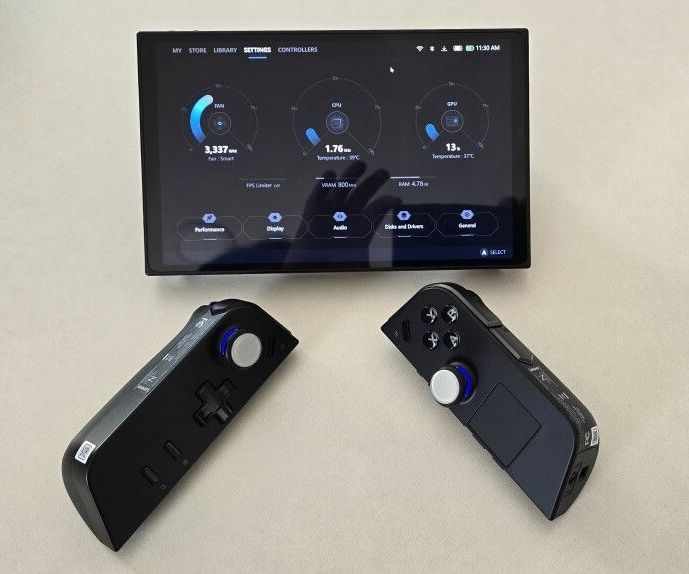
Sound
The first pain point with my precious handheld gaming PC. The speakers are subpar. Left at their default settings, they are high-pitched and struggle with power. Much of the potential volume is lost due to the speaker ports being on the top edge and angled away. Hold your hands up like rabbit ears behind the mesh while watching a video. You’ll be shocked by how much sound the speakers are really pumping out.
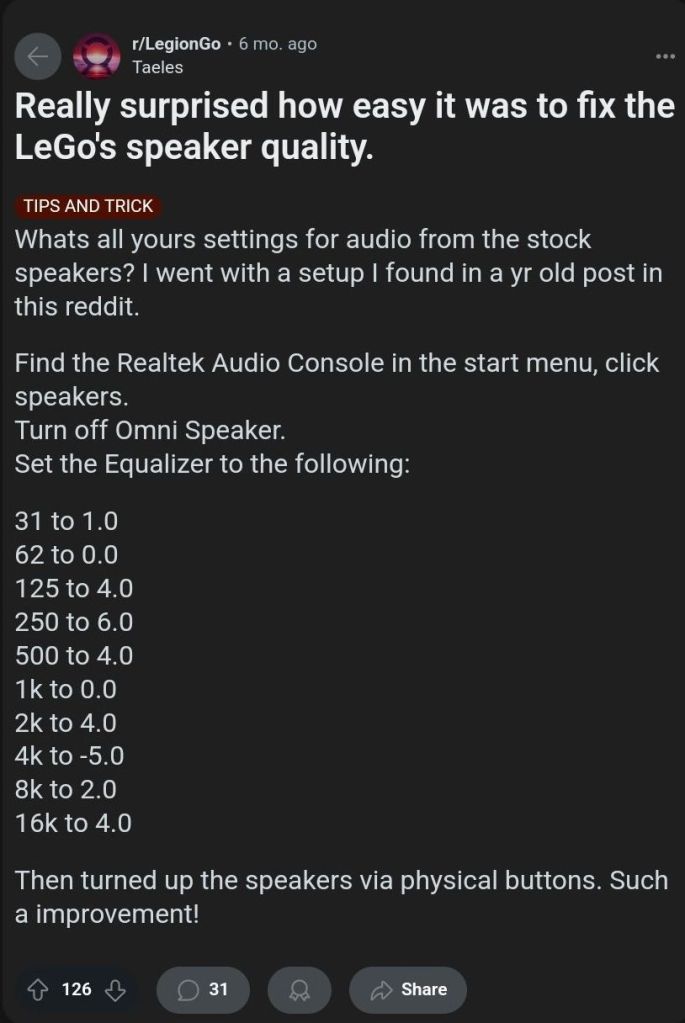
If you research the topic of poor sound, you’ll see there are several software workarounds that help considerably. The easy/free method is to use the Realtek Audio Console. Open it from the Start Menu to toggle off a feature called the “Omni Speaker”. Then use the same software to adjust the equalizer frequencies. Find this idea and lots of others at: https://www.reddit.com/r/LegionGo/
I used the equalizer changes above in conjunction with an app I already owned. Dolby Access is a Windows Store App that applies a Dolby Atmos surround sound effect to your PC’s sound system. The Go’s speakers sound so much better with the effect enabled. The dimensional soundscape achieved by applying some cheap software is surprising.

Dolby’s magic app features a gaming performance mode that increases the accuracy of sound location. This is especially important in competitive games. It works well. I don’t fully understand how they trick your hearing so well. Things that are supposed to be behind you, sound like it.
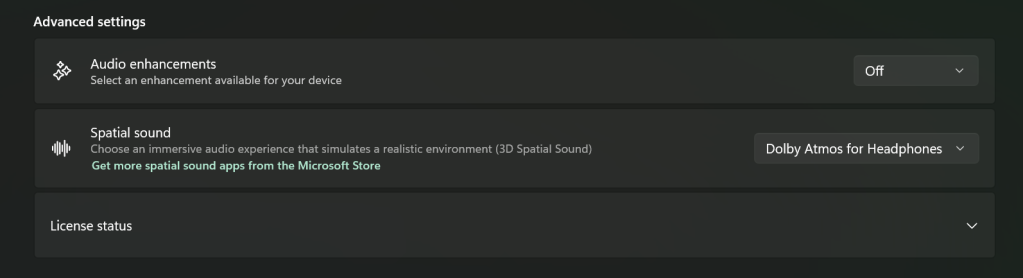
For Dolby Access, or any spatial sound app to be the most effective, disable Window’s sound enhancements. Go to Settings -> System -> Sound and click on the speakers. Advanced -> Audio enhancements toggle off.
If you don’t have or want to purchase Dolby Access, there are some open-source options out there. I haven’t tried it yet, but I’ve seen FXSound mentioned several times while doing my research. It gets a lot of recommendations and positive reviews and is donation-ware.
Update Everything
The Legion Go is a complex machine. Especially its software layer. The sheer number of places you must check for updates is astonishing. Here’s a rundown of everywhere you need to check. I try to do this at least once a week.
- Windows Update
- Accessed by going to Settings -> Windows Update
- I like to open the advanced options and flip on the toggle to receive updates for all Microsoft products.
- Microsoft App (MSIX packages) Updates
- Open the Microsoft Store App (shopping bag icon in start menu). Then click on Downloads (menu on left) from there click the Get Updates.
- Legion Space
- Disks and Drivers. Open Legion Space ->Settings -> Scroll down -> Disks and Drivers -> Check for Updates.
- Controller Firmware Updates. Go to Controllers in the menu, scroll the bottom menu left to More. Scroll to the bottom of More page and click the Controller Firmware Update button.
- App Updates.
- Game Launchers. Steam, Xbox, Ubisoft, and EA Desktop, all have client updates in each app’s settings menu
- Game updates. Each game gets its own updates (usually handled by the launchers).
- Other software.
- Example: The emulator app Dolphin needs updated frequently.
Touch Screen
One quality of life upgrade was realized just by changing my bad habit of touching the screen too much. I had been using the touch screen to enter my PIN and to scroll. This was making my screen filthy. Every time I picked up the little machine to play something, it was covered in fingerprints and smudges.
There were two changes I made to drastically reduce how often I had to clean the screen. First, at the PIN prompt you can usually click the A button to get the on-screen number pad to open. Then you can use the buttons, D-pad, shoulders, and triggers to enter your PIN code just like on an Xbox.

Tapping and holding on the touch pad activates the right-click menu.
Second, the little wheel on the upper rear nook of the right controller is for scrolling. It works better and is more comfortable than touching the screen in most situations. The only trick is to remember that it’s back there.
Floating Keyboard
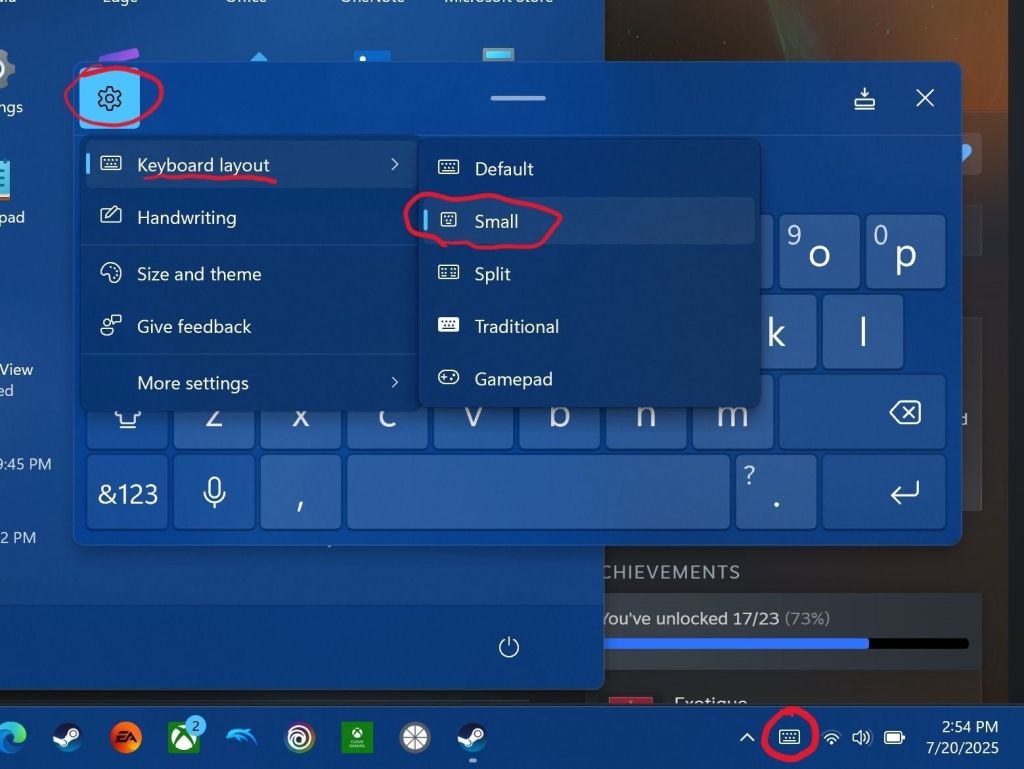
The OSK (On-Screen Keyboard) is huge the first time you try and enter text with it. It takes up the entire bottom half of the screen. This makes entering information into forms very difficult. The form either gets cut in half or squished to an illegible size when the keyboard opens. It’s a good thing there’s a built-in solution. You can resize and float the OSK in Windows.
Open the keyboard by touching or clicking the icon for it near the clock on your taskbar. Click or tap on the settings gear in the upper left corner of the keyboard’s panel. Then select Keyboard Layout from the menu and click small. Now you can use the little dash at the top of the OSK to drag it out of your way!
The small floating keyboard layout is easy to drag at of your way. Clicking Size and theme in the Keyboard’s settings will let you change its color size, and key size.
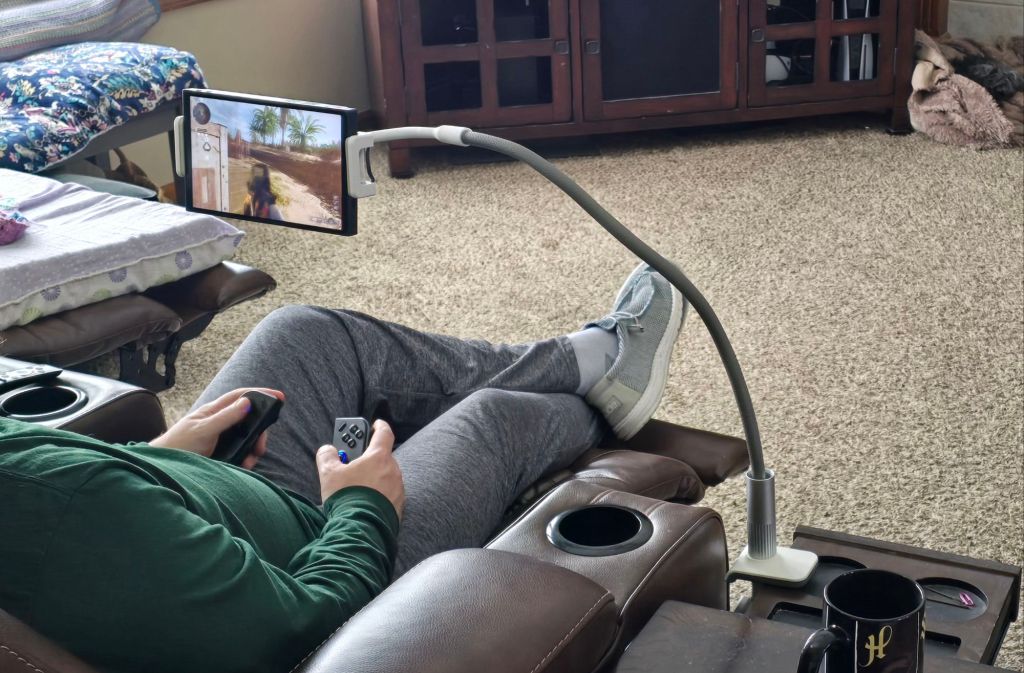
Hibernation Is Better
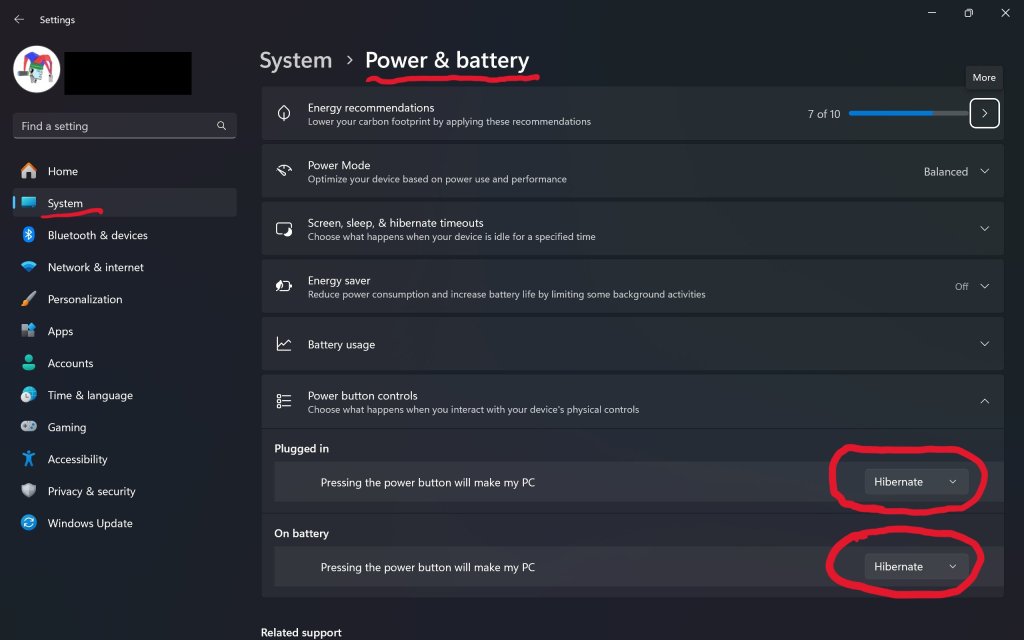
Batteries suck, but we’re stuck with them until some genius invents something else. For some unknown reason, the Go drains its battery in just a few hours of sleep mode. Do yourself a solid and change the power button’s function to hibernate instead of sleep.
There are two benefits hibernation has over sleep mode. The first is that your battery won’t be dead the next time you pick it up. Hibernation uses a lot less power over time than sleeping does.
The hibernation process exports everything in the computer’s memory to a save file on the hard drive. Then it powers down the RAM chips. This reduces power consumption. It also gives us our other benefit.
Everything running in RAM is saved to a file. This includes any game that is actively playing or paused when you pressed the power button. The LeGo can stay in hibernation for days with your game perfectly suspended in time.
The process takes a few seconds at most. In my opinion, hibernation makes the device more usable in real life situations. I play on my lunch break at work. Hibernating when my break is over means my battery and game will be ready to resume on the next day. You usually can’t do that with sleep mode.
Controllers and Buttons
The controllers on the Legion Go are a work of art. They are well constructed, feel great, and are tuned for a light touch. They disconnect from the main chassis like the Nintendo Switch’s do.
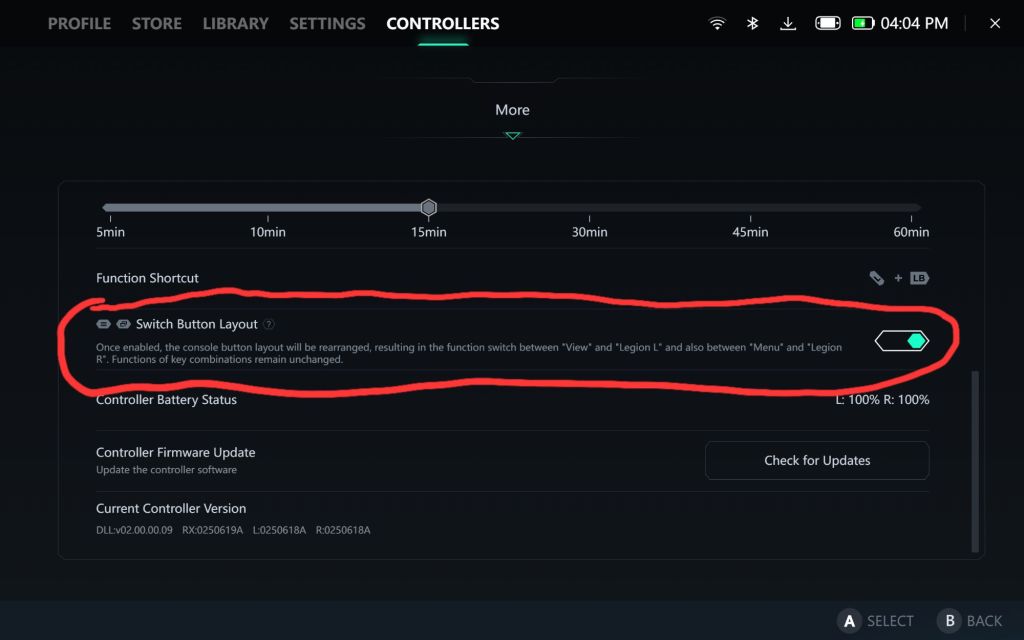
The placement of the menu and view buttons near the bottom of the left controller is a problem though. Those buttons are used in games heavily and stretching your thumb down to click them gets old. Especially in a game like Destiny 2 where you constantly need access to the character menu and maps.
There is an option to swap their functions with the Legion Space and Quick Control menu buttons. Open Legion Space and go to Controllers, then scroll to More. Scroll down the page and flip the toggle to swap the buttons.
My other tip about the controllers is to take the time and map the back buttons. I tie them to crouch/slide, melee, reload, and jump in almost every FPS game that I play. Back buttons allow you to keep both thumbs on the sticks while performing button actions. This can be a big advantage in some games.
To map them, open Legion Space. Go to Controllers in the top menu then click the Button Mapping button in the list at the bottom. Now click the top View/Edit Layout button. Finally, click the Rear-View choice at the bottom of the screen. Click on each button to pull up the mapping menu for it.
GPU Upscaling
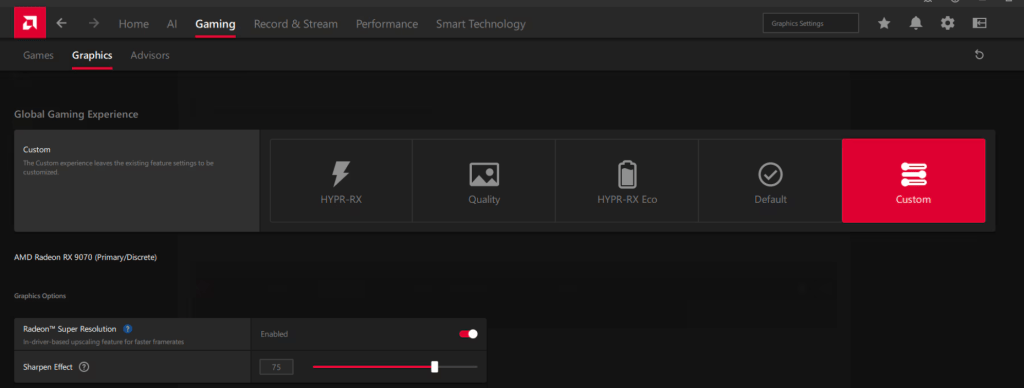
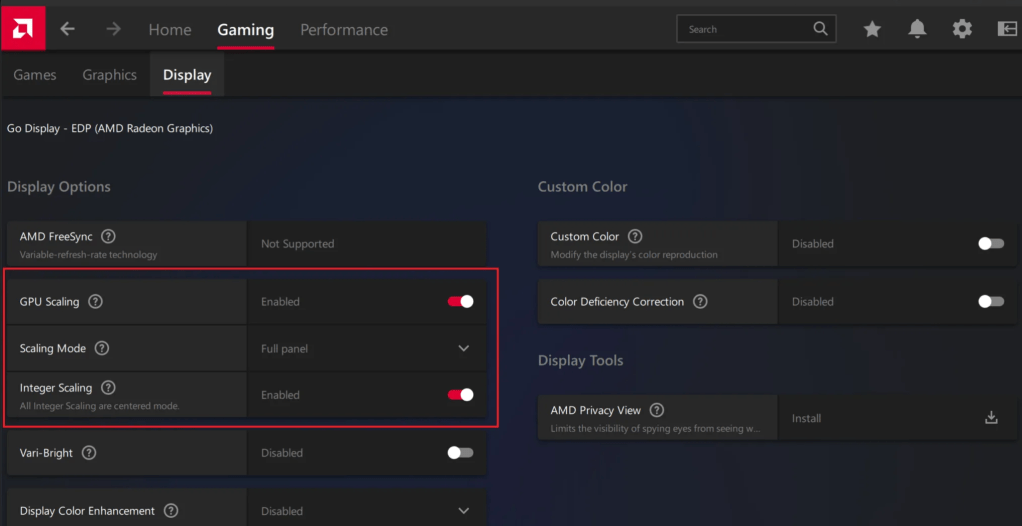
There are lots of tweaks and changes you can make to boost the performance of your Go in various games. One of the most potent is to setup the various upscale options for both on your GO and in your games. The Legion Go supports AMD’s Radeon Super Resolution and their FidelityFX (FSR 3) technologies. Taking advantage of them reduces the load on your GPU which usually translates to an increased frame rate.
AAA titles can run in the 60-110 FPS range with good fidelity once you learn to tune and upscale them. I haven’t written a comprehensive guide to upscale games yet, but the basics are easy. Open the AMD Adrenaline app and turn on the scaling options.
The details of scaling are a rabbit hole of advanced tweaks and changes. Things like algorithms, game resolution options, post-processing settings, and sharpening effects can alter your experience. YouTube and the sub-Reddit mentioned above are good places to start building knowledge if you want to go deep.
Learning to upscale and tweak your games is probably the most impactful performance boost you can get on this system. If you’re not already familiar with scaling, try using 1600X1200 @ 144Hz as your display resolution. Then run your games at 800X600. If you can’t set the game’s resolution to 800×600, change the resolution scale to 50%. It amounts to the same thing.
If you are less than impressed with AMD’s GPU scaling abilities, there are also other options available. While doing research, I noticed that lots of people are mentioning the Steam App Lossless Scaling as a great alternate. The app is $6.99 in the Steam store: https://store.steampowered.com/app/993090/Lossless_Scaling/

BIOS/UEFI Tweaks
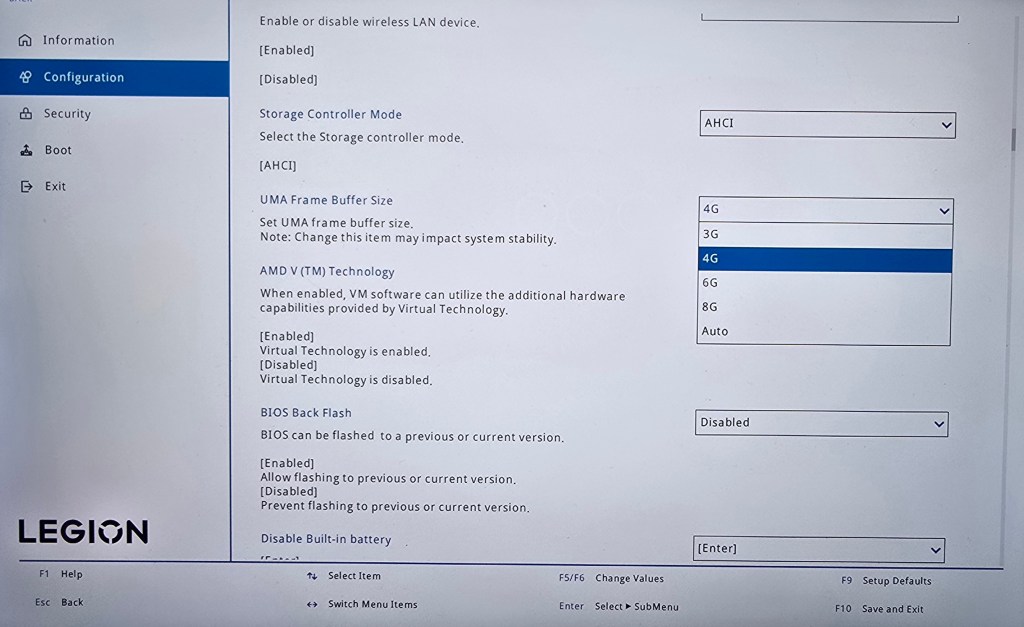
In the Legion Go’s BIOS there are two settings we can adjust that effect game performance. The first is how much of the system’s 16 Gigabytes of RAM is reserved to support the GPU. By default, 3 GB of VRAM is selected but this can slow some games down. I get better performance and game stability with 4 GB assigned to graphics processing. That leaves 12 GB for Windows and your game, which is plenty in most cases.
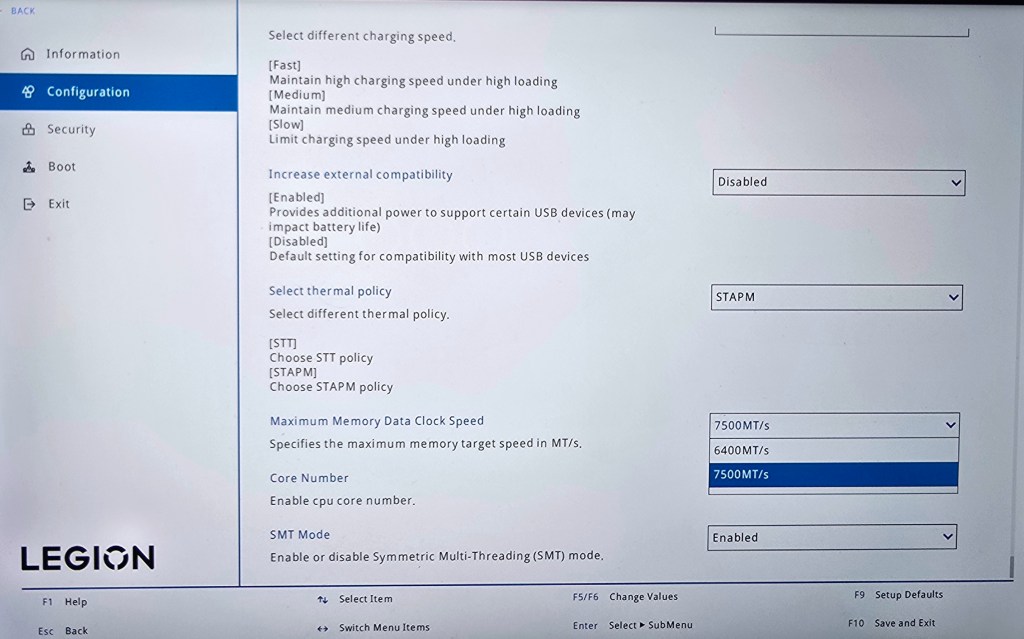
You can also overclock the RAM for an overall performance boost. Increasing the RAM’s speed will cause it to generate more heat. Excessive heat can impact CPU and GPU throttling. Consider the environment you play in.
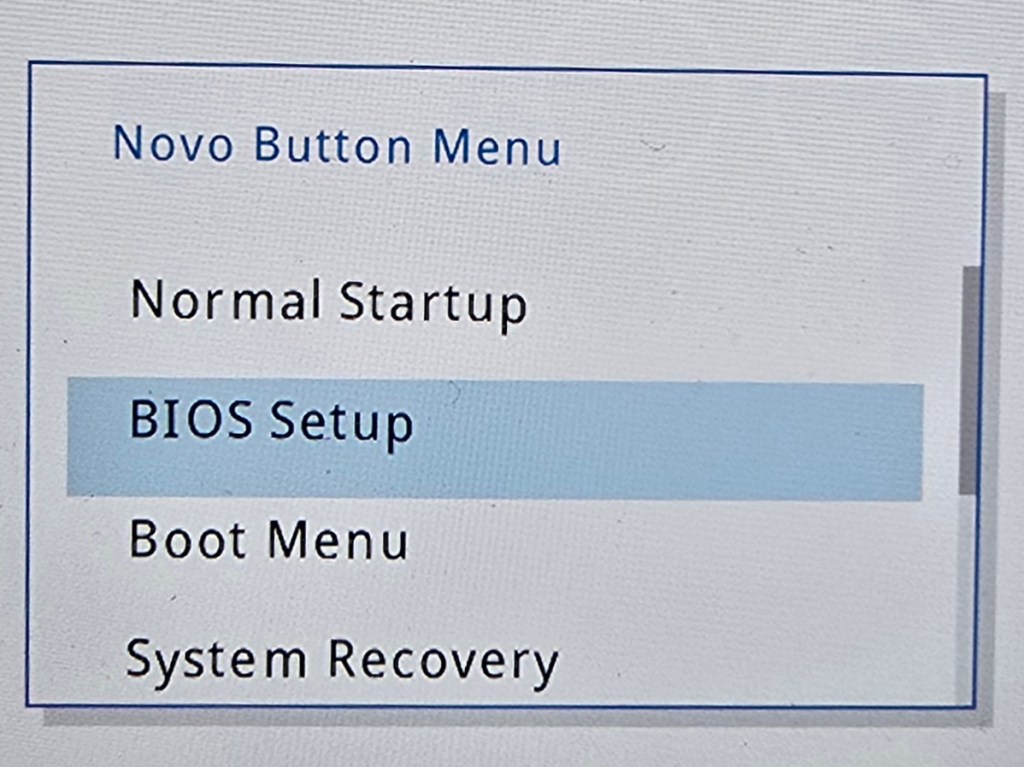
Before you make either change, verify you are on the newest version of the system firmware. You Boot to the UEFI control screen to make these changes by shutting down first. Then hold down the Power and Volume up buttons at the same time for a few seconds.
Optimize Windows 11 for Gaming
The Legion Go is running Windows 11 Home. The default security posture of Windows 11 is not optimized for gaming. Specifically, memory integrity and the Virtual Machine Platform features of Windows 11 can slow down some games.
Turning these features off is a personal choice. You are technically weakening the operating system’s security by doing so. Review Microsoft’s documentation for an explanation and the instructions at: https://support.microsoft.com/en-us/windows/options-to-optimize-gaming-performance-in-windows-11-a255f612-2949-4373-a566-ff6f3f474613
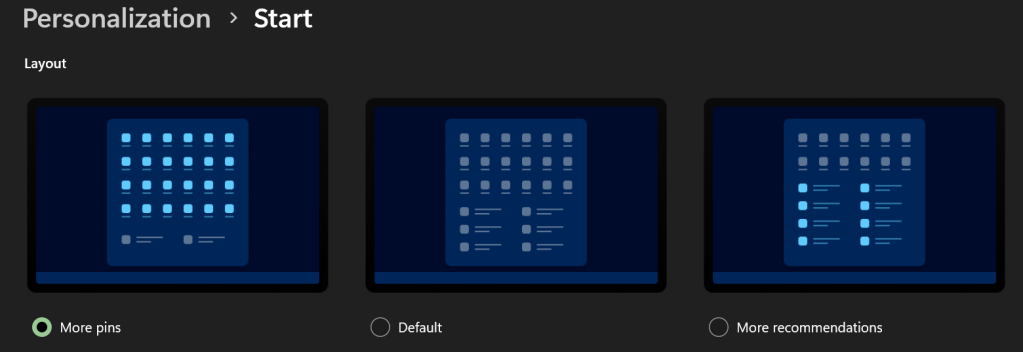
I like to PIN my games to Start. Go to Settings -> Personalization -> Start -> and select the option for more PINs if you do too.
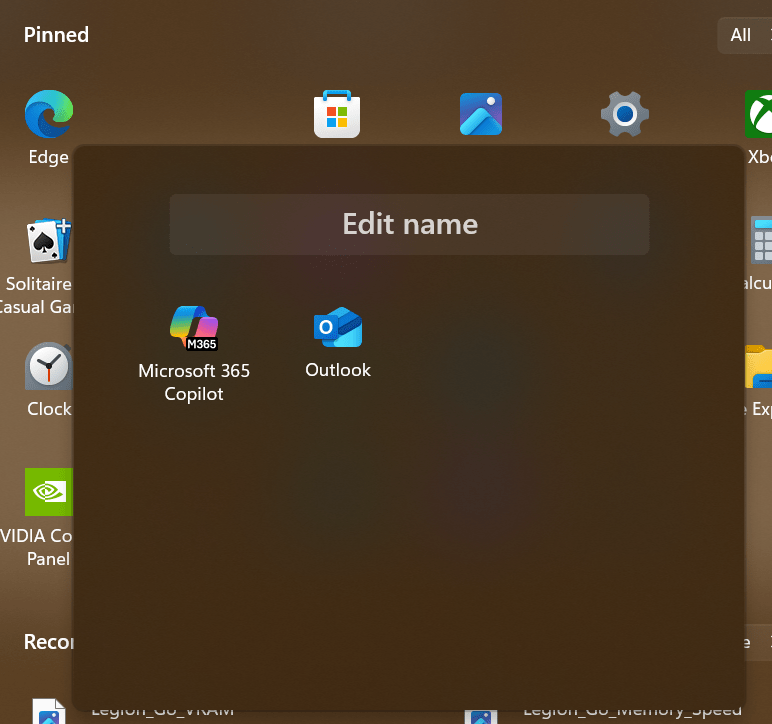
Make folders on the Start Menu. Dragging one icon onto another. Drag and drop icons as needed to add. Rename a folder by clicking into it. Right click on folders in the start menu to move them left or right.
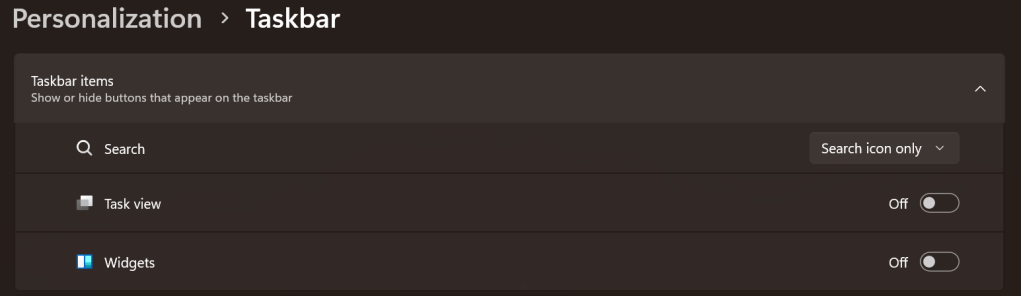
Maximize the task bar space. Settings -> Personalization -> Taskbar:
Search -> Icon.
Disable Task View.
Disable Widgets.
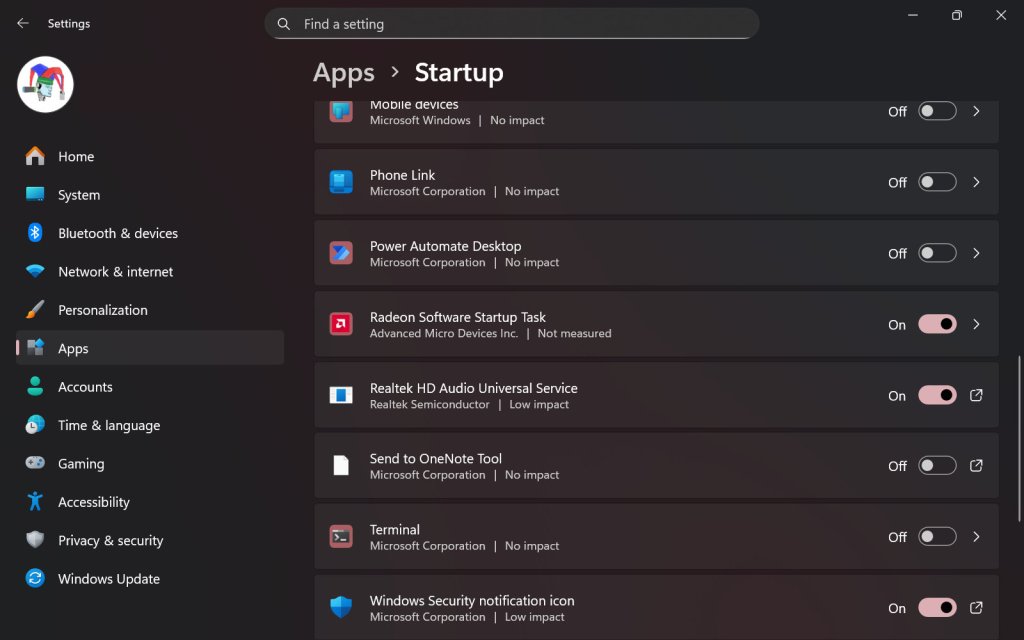
On my Legion Go, I disable most of the start-up apps. It helps conserve CPU cycles, RAM, and disk I/O for the games. Go to Settings-> Apps -> Startup. I only leave three apps toggled on. The Radeon Software Startup Task, Realtek HD Audio Universal Service, and the Windows Security notification icon.
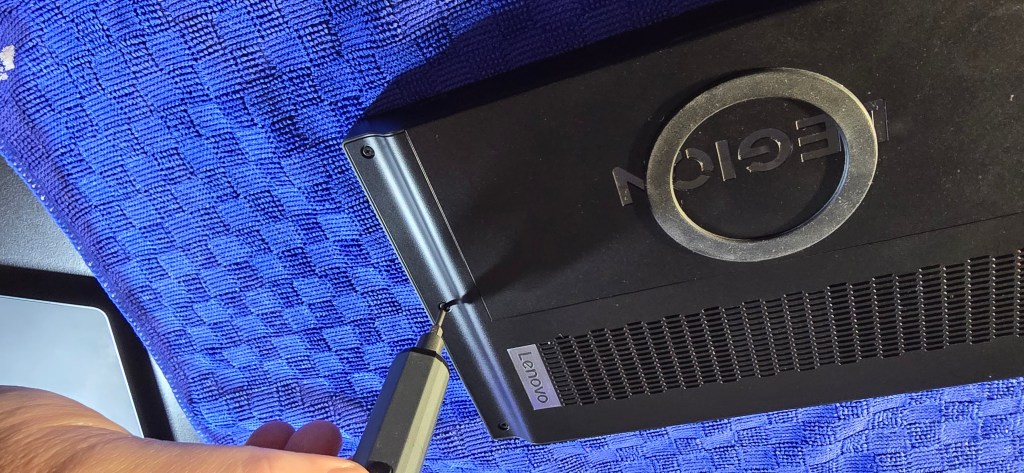
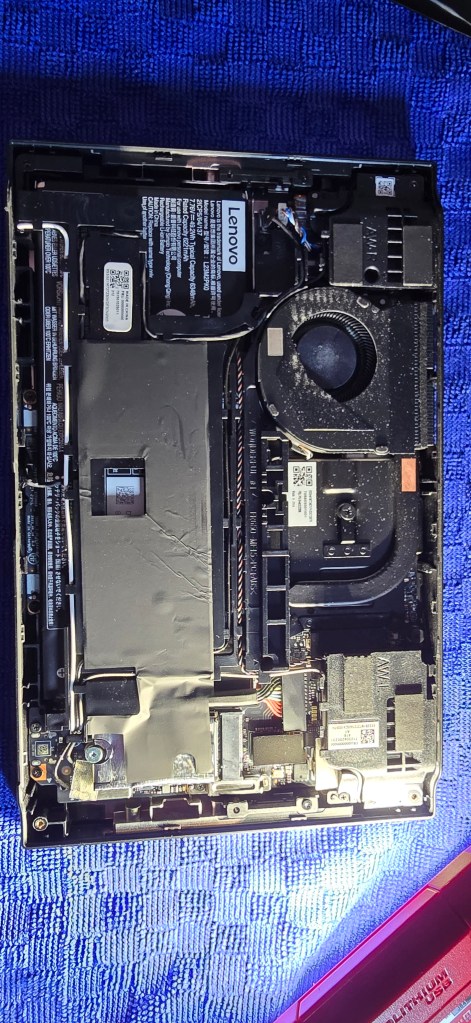
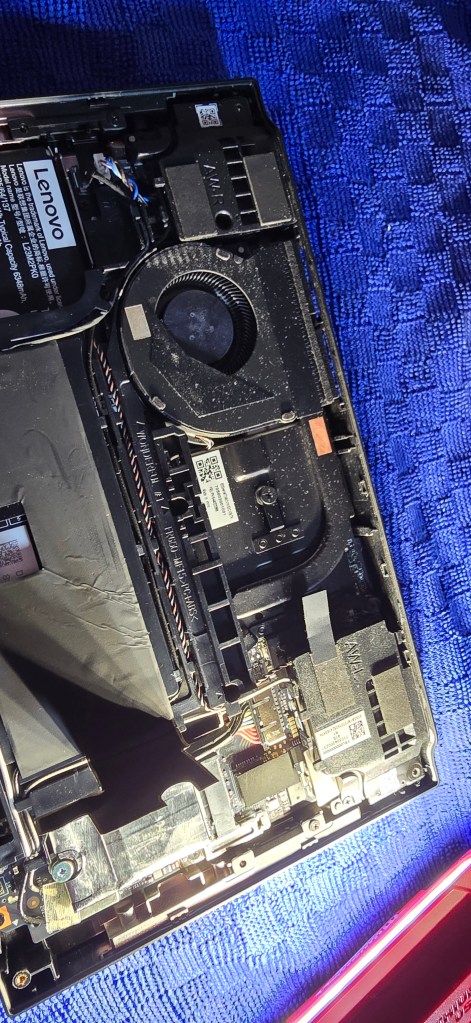
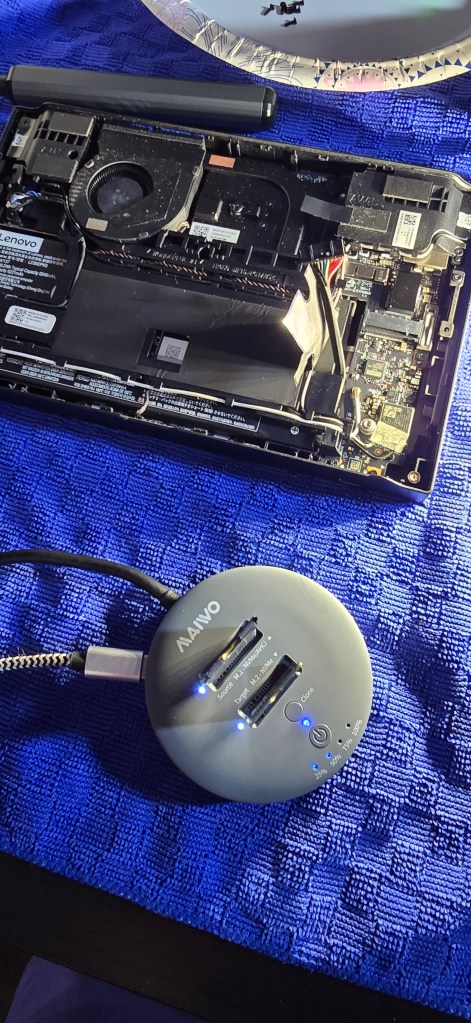
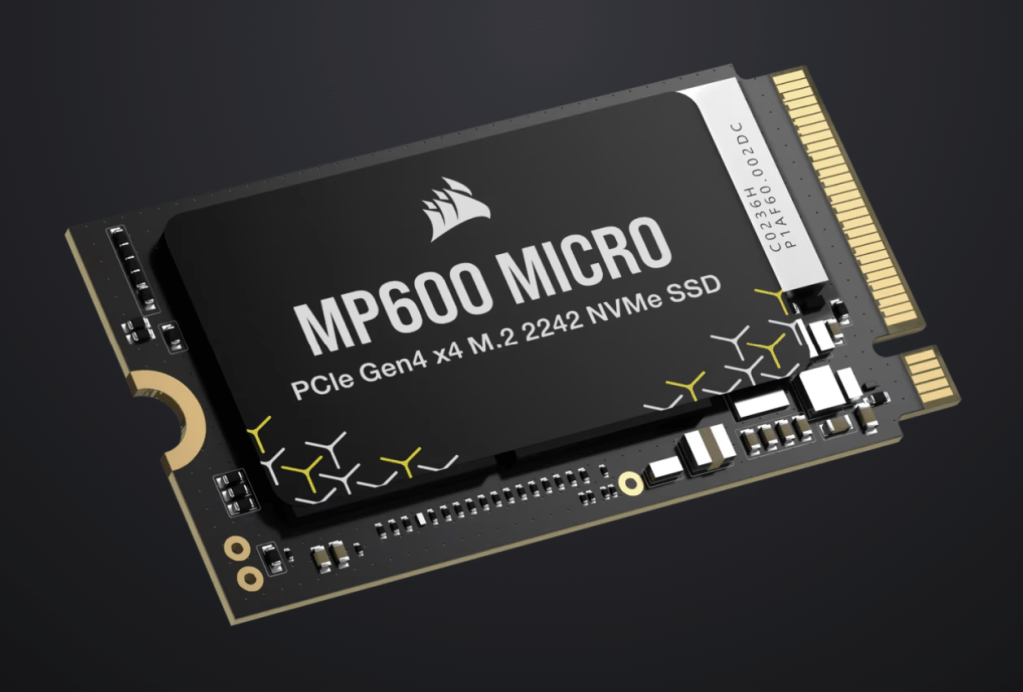
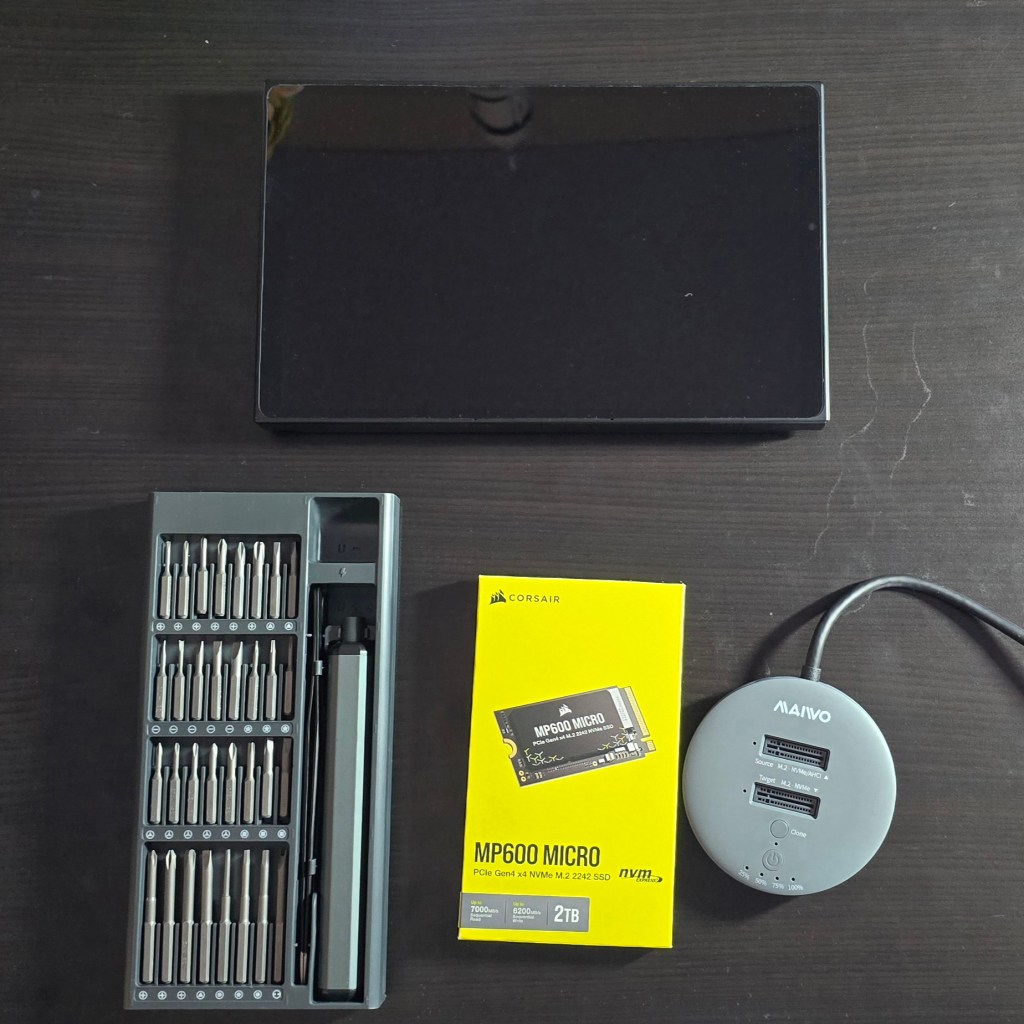
SSD Swap
I replaced the factory storage with a much faster and higher-capacity unit from Corsair. The upgrade has had a major impact on daily life with the LeGo. Downloads, and loading times are much faster. I can store my entire active catalog of games. Everything feels snappy. Read I SSD Swapped My Lenovo Legion Go. It Was Worth It for the details and instructions.
The Legion Go is an excellent gaming computer right out of the box. Tweaks, changes, and upgrades like the ones above help make it even better. I use mine more than any other gaming system and that’s saying something.