When I last wrote about the Nintendo Switch my family had two of them. Now we have five! Clearly we need to work on sharing in my tribe. We’re not in the habit of purchasing each family member their own console but the portability of the system demands it. How are we supposed to share a system that each person wants to take with them? We have Switch docks attached to the TV’s in our living room, basement, and bedroom so big screen gaming is an option for every one too.
Even when we’re all at home, having our own screen is great. You can find us chillin’ on the couch, each playing our own favorite several nights a week. We also play some games together, Splatoon 2 and Mario Kart are our favorite group games. I’m still taking my system to work so I can play it at lunch almost every day and a few of my co-workers have them now as well.
The system is not without its issues; to me the biggest problem is that Nintendo still hasn’t provided a way to back up your save data. The fact that you can move your profile shows that a backup solution is possible; come on Nintendo get with the program. None of your customers want to lose their 200+ hour BoTW saved game data. Also, the kickstand just sucks.
Saved data issues aside, the Switch is still the most played system in our home and we have all the platforms. Our current favorites are the afore-mentioned Breath of the Wild, and Splatoon 2 along with Doom, Skyrim, Mario Oddessy, and Star Dew Valley. Games and updates are released for the console in an ever quickening pace and more developers are jumping on the platform every day.
There have been several firmware updates since my last post about the system and I’ve spent a lot of time playing. Below are a few tips and tricks that you may not have discovered.
USB Wireless headsets are supported – If your USB headset uses a wireless dongle there’s a good chance it will work with your switch now. Plug the dongle into the port on the front of your dock.
There are several cheap, small, USB-C port replicators that work as Switch docks. I have this one and it works great.
If you hold down the home button you’ll get a mini pop-up that lets you adjust your volume and screen brightness in-game.
If you have multiple switches in your home, consider buying games on cartridges. You’ll save money by being able to trade the games back and forth.
I’ve gotten to the point where I manage most things in my day job with PowerShell. It’s a lot faster to type Unlock-Account kjtrent; than it is to launch ADUC and find the account. I also don’t like having to open one tool for AD, one for Exchange, and another for Lync/SfB. Furthermore, I have separate credentials for signing on to my workstation and managing servers.
I’ve created a simple little PowerShell script that will prompt for credentials and use them to open remote sessions (no need to install anything) to the servers. Copy the code below and save it in a PS1 file. Enter the FQDN of your servers in between the quotes for the appropriate variables. Then make a new desktop shortcut with the following path: C:\Windows\System32\WindowsPowerShell\v1.0\powershell.exe -NoExit “C:\Users\profile\Documents\AdminShell.ps1” and pin the shortcut to your start menu. When you double-click it you’ll be prompted for credentials and a PowerShell window will open with the remote sessions loaded. It will stay open until you close it.
#Enter the FQDN for your servers below between the "
$exchfqdn = "your exchange server fqdn"
$sfbfqdn = "your Skype for Business / Lync FE Server FQDN"
$adfqdn = "your DomainController FQDN"

$ErrorActionPreference = 'SilentlyContinue'
$WarningPreference = 'SilentlyContinue'
$UserCredential = Get-Credential -Message "Credentials are required to access AD, Exchange, and SfB; use the detected username or enter a differerent account" -UserName ($env:userdomain +'\'+ $env:USERNAME)
$ExSession = New-PSSession -ConfigurationName Microsoft.Exchange -ConnectionUri http://$exchfqdn/PowerShell/ -Authentication Kerberos -Credential $UserCredential
$SfBSession = New-PSSession -ConnectionUri https://$sfbfqdn/OCSPowerShell -Credential $UserCredential
$ADSession = New-PSSession -ComputerName $adfqdn -Credential $UserCredential
Import-PSSession $ExSession
Import-PSSession $SfBSession
Import-PSSession $ADSession
If you’ve read the first article in this series then you’ll know that I am in the process of helping my wife convert from a paper journaling system to a Windows tablet even though she usually prefers Apple devices. Obviously, I enjoy a good challenge.
In my opinion one of the biggest differences between Apple devices and Windows computers is that an Apple device is largely ready to use out of the box; basically, you just need to load your apps from the store, log on to your accounts, and go. Windows on the other hand is infinitely customizable. These customizations make the operating system more flexible for all kinds of people and uses, but can be source of frustration for those that just want to pick something up and go. Microsoft attempts to start you off with a basic profile that works for everyone, but it just doesn’t cut it for most people.
There are lots of guides about setting up Windows already out on the interwebs. Most of them show you where the settings are and what they do. From my experience in the IT industry, I’ve come to the realization that finding the settings isn’t the hard part. Especially when you can just ask Cortana “How do I turn off the WiFi?” or, “How do I setup a printer?” The hard part is getting your head around how best to organize a system and deciding what settings you should or should not use.
In this post I’m going to show you exactly how I setup a Windows profile to use with a Pen enabled system. It’s going to be a long post so I’ve broken it down into sections. I am assuming that you’ve completed the initial setup of Windows and created a user account. I’m also assuming that you know how to install apps from the app store and logon to your various accounts. If you want to try these settings but would prefer not to mess up your current profile I suggest creating a new user account. Select the Start button, then select Settings >Accounts > Family & other people > Add someone else to this PC. You can always delete it if you don’t like it or switch to it if it works better for you.
A word of warning, my philosophy around the best organization of an operating system is not predicated on reducing the number of mouse clicks/screen taps. I understand that this is important for some, but to me hunting for the thing to click is more annoying than being able to get to it in one. Also, I feel that the indexing provided by modern operating systems already allows for zero clicks with regards to launching applications making pleasing aesthetics and organization in the GUI more desirable than all out efficiency.
The Software
Everyone has specific needs for applications but people who are reading this may just be starting out with Windows 10, so I’m going to list out some applications you should consider installing. Installing software before arranging your start menu and adjusting other settings will make things a little easier in the long run.
Microsoft Store Apps
Windows 10 can operate as both a PC and a tablet (2-n-1) to facilitate this flexibility, it has two methods of installing applications. The Microsoft Store is essentially the same thing as Apple’s App store or Google’s Play store.
Somewhere in your start menu you should see a shopping bag icon. Click it and then search for and install the apps below. If you don’t already have an MS account you’ll need to create one now. Don’t complain, Apple and Google both require accounts, too, LOL. If you’d prefer to set up your account on the web rather than going through the wizard you can do that here.
Alarms and Clock – built-in if your version of Windows 10 is new enough.
Amazon – Amazon shopping, has voice recognition and bar code scanning
Amazon Music – Stream and download Amazon Prime music.
Audible – Audiobooks, this service requires a subscription but you can get two books for free.
AutoDesk SketchBook – A great drawing and sketching app that is easy to use.
CPlus for Craigslist – Lets you setup searches for Craigslist that notify you when those items become available.
Drawboard PDF – A PDF viewer that supports drawing and inking on/over the files. This app is free on some systems or $9.99 on others.
Facebook – I actually prefer the website but installing the app makes it show up as a sharing option in other applications.
Flipboard – The built-in news app is great, but I use Flipboard because it allows me to publish articles from my blog.
Flixster – Movie theatre show times & tickets, reviews, clips, etc.
Fresh Paint – Another great art app that is easy to use.
Google – Easy access to all of google’s services: Search, Gmail, YouTube, ect.
Instagram
Kindle – Book reading app
Messenger – Facebook Messenger app
Merriam Webster Dictionary
Microsoft Jigsaw – Puzzles on your computer
Microsoft Mahjong
Microsoft Minesweeper
Microsoft OneNote – Free tablet edition of the note taking app.
Microsoft Skype
Microsoft Solitaire
Microsoft Sudoku
Microsoft Translator
Nook – Barnes & Noble book reader
Netflix
Scan
Sence Clock – Great nightstand clock but also gives you live tile clock for your smart menu.
Skype
Sway – A new type of document that combines the features of a Powerpoint and a web page
Twitter
Desktop Software
Everybody has their prefered desktop software and programs they require for their profession but there are a few that are ubiquitous from my point of view. As I stated earlier, having the majority of your software already installed will make organizing your start menu (next step) easier.
7zip – File compression utility
Acrobat Reader DC – there are still some PDF files that require Adobe to fully work. I do not make it the default.
I find that one of the keys to enjoying the Windows 10 operating system revolves around spending some time to configure the user interface settings. These settings control what you see in the start menu along with how your system looks and works. We’ll also need to adjust the settings for how our pen works. There are hundreds, maybe even thousands of other settings you can tinker in Windows, but Microsoft does a good job of picking defaults and unless you have a specific reason to change things like the Power settings or the Update frequency I recommend that you leave them as is.
Start Menu
The Windows start menu has a starling number of configuration options most of which are available under the personalization heading in the settings app.
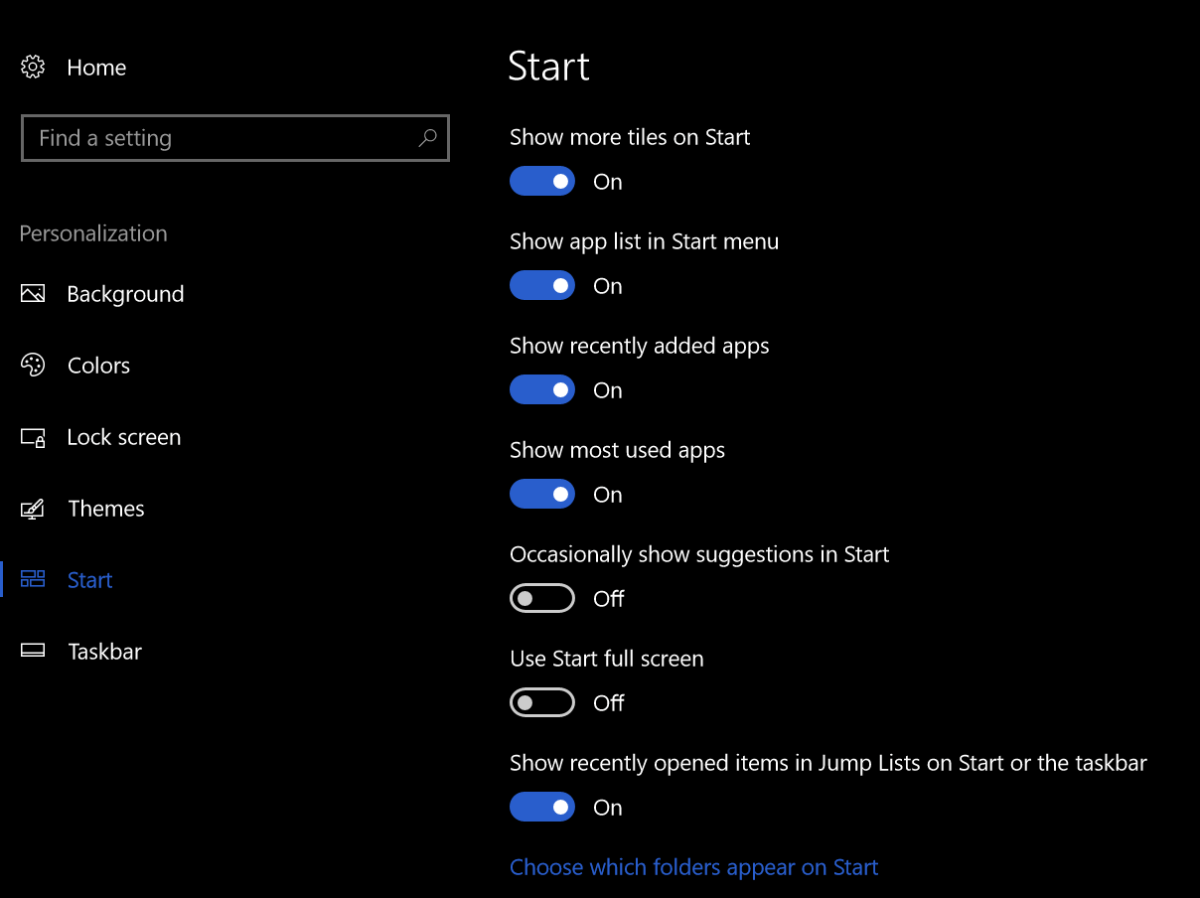
In your search bar type “Start Settings” and adjust the toggles to match the picture below.
Now click the “Choose which folders appear on Start” link at the bottom of the start settings screen and adjust those toggles to match the following picture.
These settings control which folders appear above the start button. They are handy shortcuts that I use often but having too many of them causes screen clutter.
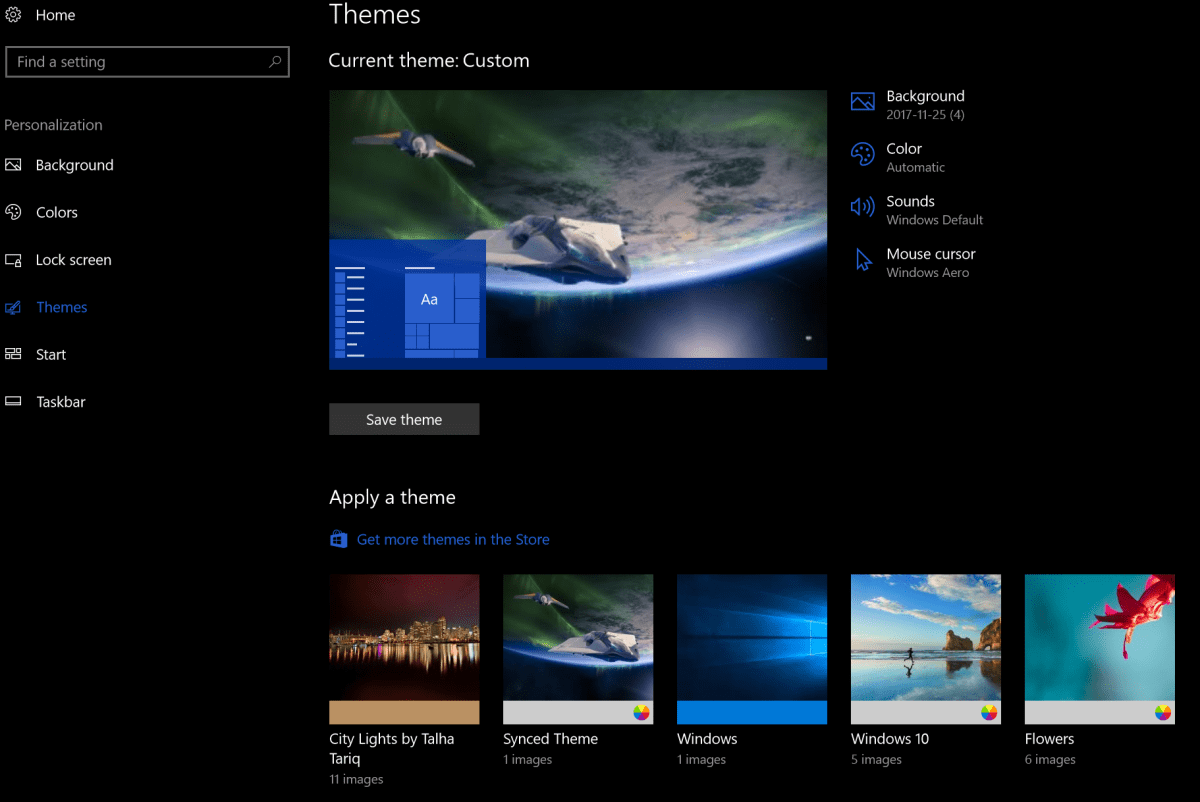
Themes
Themes are composed of background pictures, color schemes, icon packs, sounds and sometimes even screen savers. They do more to personalize the way your computer looks than almost anything else. There are built-in themes, themes in the app store for free and for pay along with countless web sites (google Windows 10 Themes) to get them from. Microsoft has a free library of all kinds of themes organized by subject categories here.
If you choose to download themes from a web-site, exercise caution. You have no idea what’s in the files you are downloading; get them from reputable sites and scan them with AV software (right-click on the downloaded file & choose scan with windows defender) before installing. You can also make your own themes; check out my article on how to turn your favorite pictures into one.
In the search box type “Themes” and click “Themes and related settings” in the results. You will find all the controls along with a link to find more themes in the app store. If you don’t have any downloaded and don’t want make your own I suggest selecting the built-in Windows 10 theme.
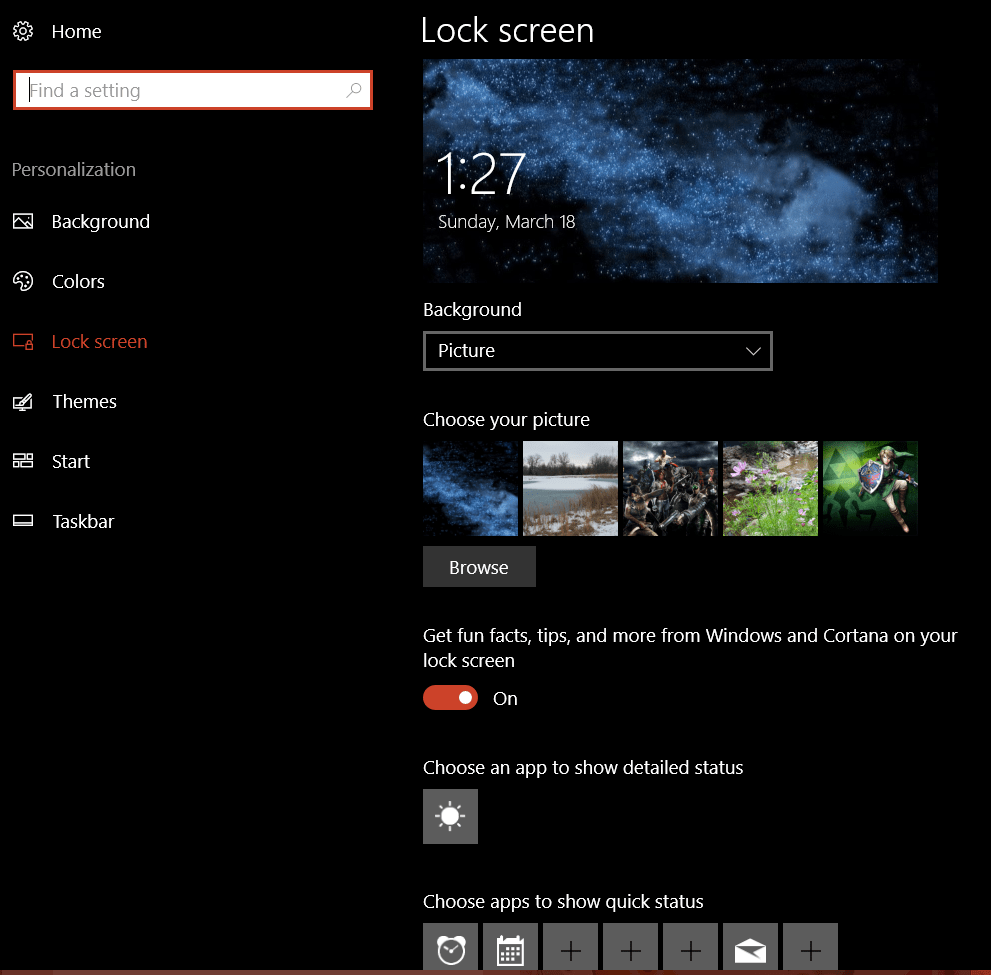
Lock Screen
The lock screen in Windows 10 works just like the lock screen on your smartphone. You can select an image or even play a slide show for the background. Some apps like the weather and calendar are able to display information when the lock screen is on. Just type Lock Screen in your search bar and click Lock screen settings in the results. Adjust the settings to match your preferences.
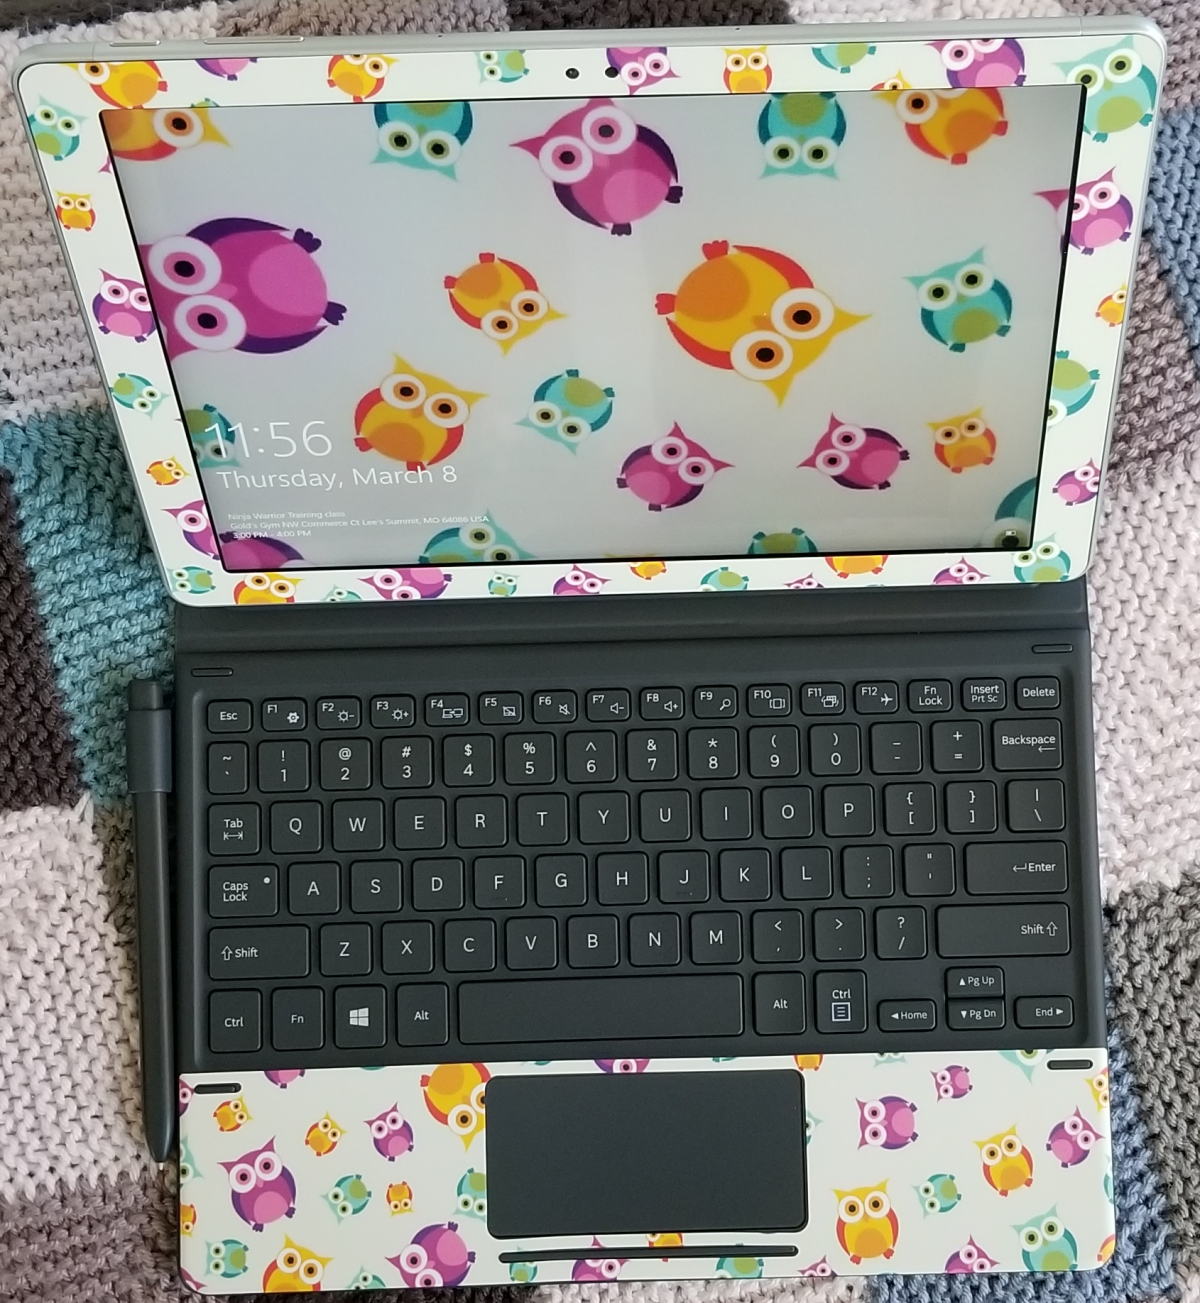
If you have a case or skin that you like, take a photo of it and use it for your lock screen.
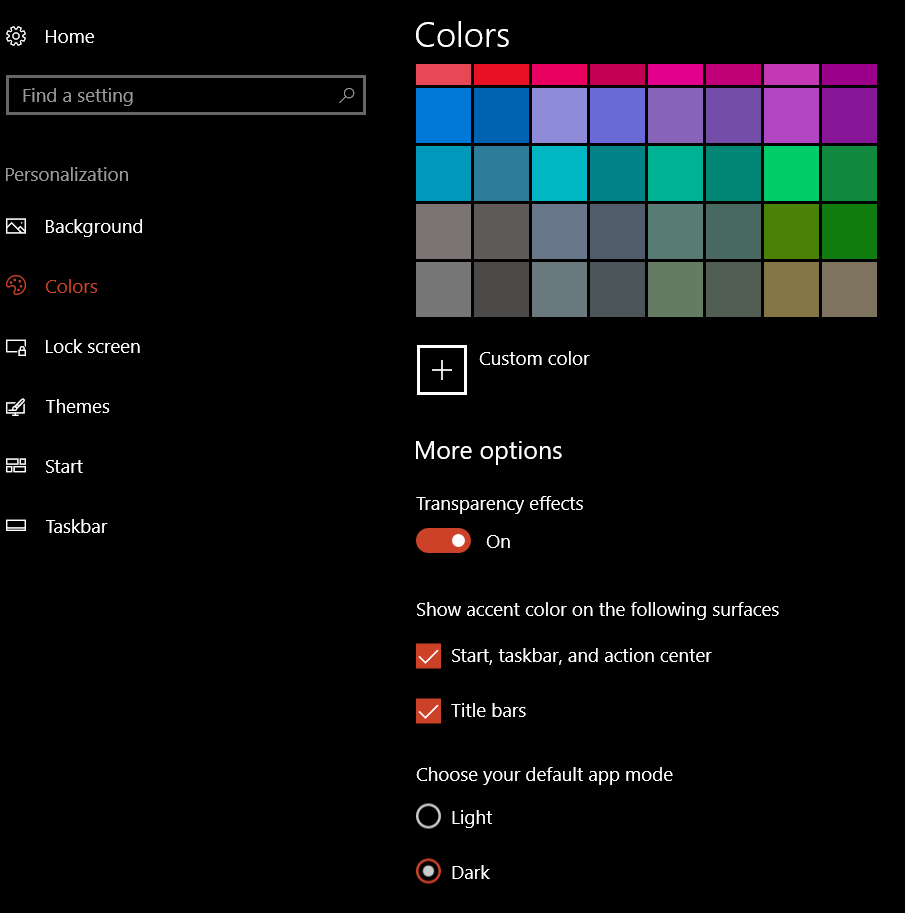
Colors
If you’ve opted to use a theme, it likely set the colors of your Start Menu background, Task bar, and the borders of windows. However there are still some options you’ll want to adjust. Type color settings in your search bar and select it from the results. I reccomend the options show below.
Choosing Dark as the default app mode will cause many applications to have a black background like the screenshots you see in this article.
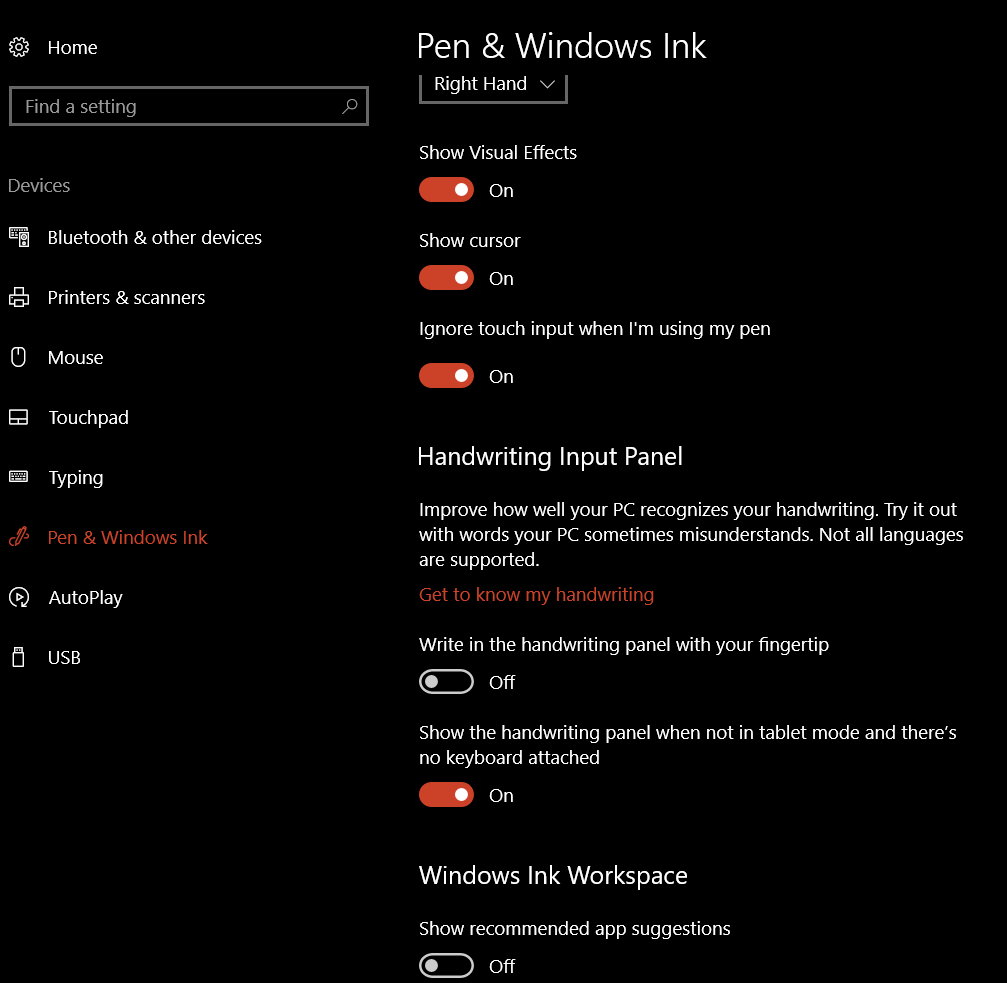
Pen Settings
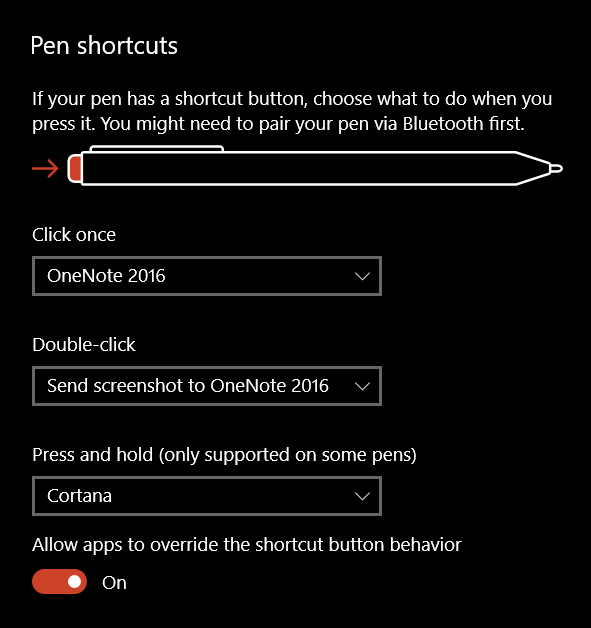
The point of this article is to configure your system for digital journaling, you will want to fine tune the way your pen/stylus operates so that you can get the best experience. Type Pen Settings into your search bar and select it from the results. I suggest the settings below. I also recommend that you click the “Get to know my handwriting” link, this will launch an application that fine tunes the handwriting recognition for even the sloppiest writers (like me). On the same screen you can control your Pen’s buttons.
There are some more pen settings in the classic control panel. Type control panel in the search bar and select it. Find the Pen and Touch icon. Here you can control the tap actions and enable the eraser function if your pen has one. You should also enable Flicks. Just keep in mind that they only work in Desktop Apps and not the Tablet apps (called Universal Apps) that you download from the store. You want to use the practice link at the bottom of the window if you’ve never experienced them before.
The Start Menu
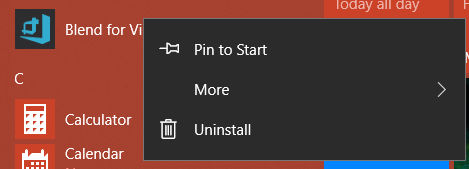
Now we’re ready to organize our Start Menu. First go through your apps list and right-click on the icons for all the software that you use frequently. Choose the option to “Pin to Start”. Note, if you see “Unpin from Start” it means the icon/tile for that program is already in the start screen portion of your start menu.
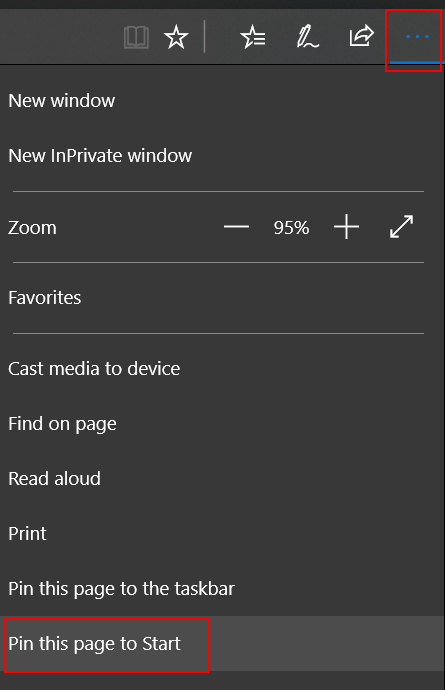
I also like to pin my favorite web sites, like those for my bank, the on-line access to my TV, and Facebook to my start screen. To do this you’ll have to use the Edge browser. Just go to the URL of the site then click the action menu … icon and choose Pin this Page to Start.
Organization is Key
Now you have a mess of icons and tiles all over the place in your Start menu. How did this help? To get the most out of the windows start menu you need to organize your icons into sensible groups.
Tile Sizes
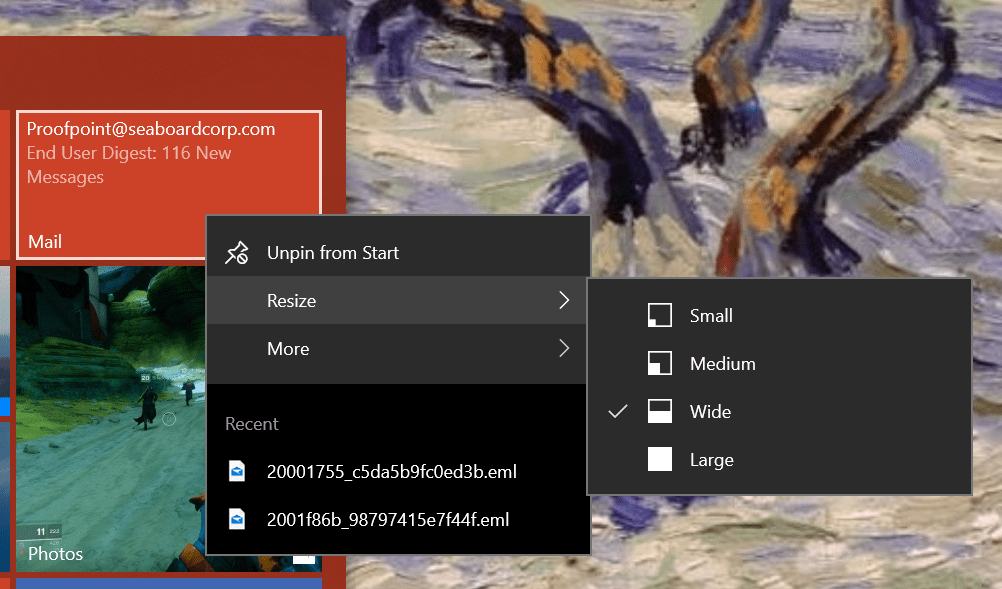
The icons in your start menu are called Live Tiles. Some have the ability to show updated information from the application that they represent. For instance the News tile will flip through headlines, the Photos tile will show your pictures, and the Facebook tile shows the latest posts on your timeline. To get the most out of live tiles you need to adjust their sizes so that they can display the information you want to see. Right click on a tile and go to resize to see its options. Many tiles change what they show in accordance with their size. For example, making the weather tile wide instead of medium will cause it to show the full weeks forcast instead of just the current weather conditions.
Group Tiles
You can group tiles together in named categories. Microsoft usually gives you a group called Life at a Glance to start with. You can make new groups by dragging similar tiles close to each other. When you get two or more tiles next to each other, hover your mouse just above them and you see the option to name the group. I make the following groups on every computer that I use:
Life at a Glance = news, mail, calendar, Facebook, Instagram, Twitter, Messenger, photos, calculator, etc.
Media = Art, photo editing, video editing, audio editing
Office = Any application that I use for documents
Games
Dev Tools
Movies, books, and music (sometimes I name this group entertainment)
Nested Tiles
Besides groups you can also create nested tiles. This works in much the same way it does on a smart phone. Drag one icon on top of another and let go. Add more icons to the nest by dragging them in. When you nest tiles you are able to fit more of them in a much smaller space but you give up the “Live” functionality. They will not show updated information or notifications in most cases.
My Book Apps as a Nested Tile
Conclusion
If you’ve made it through all these steps you should have ended up with a great looking profile that shows your most important information every time that you click the start button. Your pen has been optimized, handwriting tuned, options for the on-screen input adjusted, lock screen and backgrounds set, and more. Once of the nicest features of Windows 10 is that once you do go through this on one computer; the results will replicate to every Windows 10 computer you use afterwards as long as you didn’t turn this option off. Thanks for reading and stay tuned for the next article in this series.
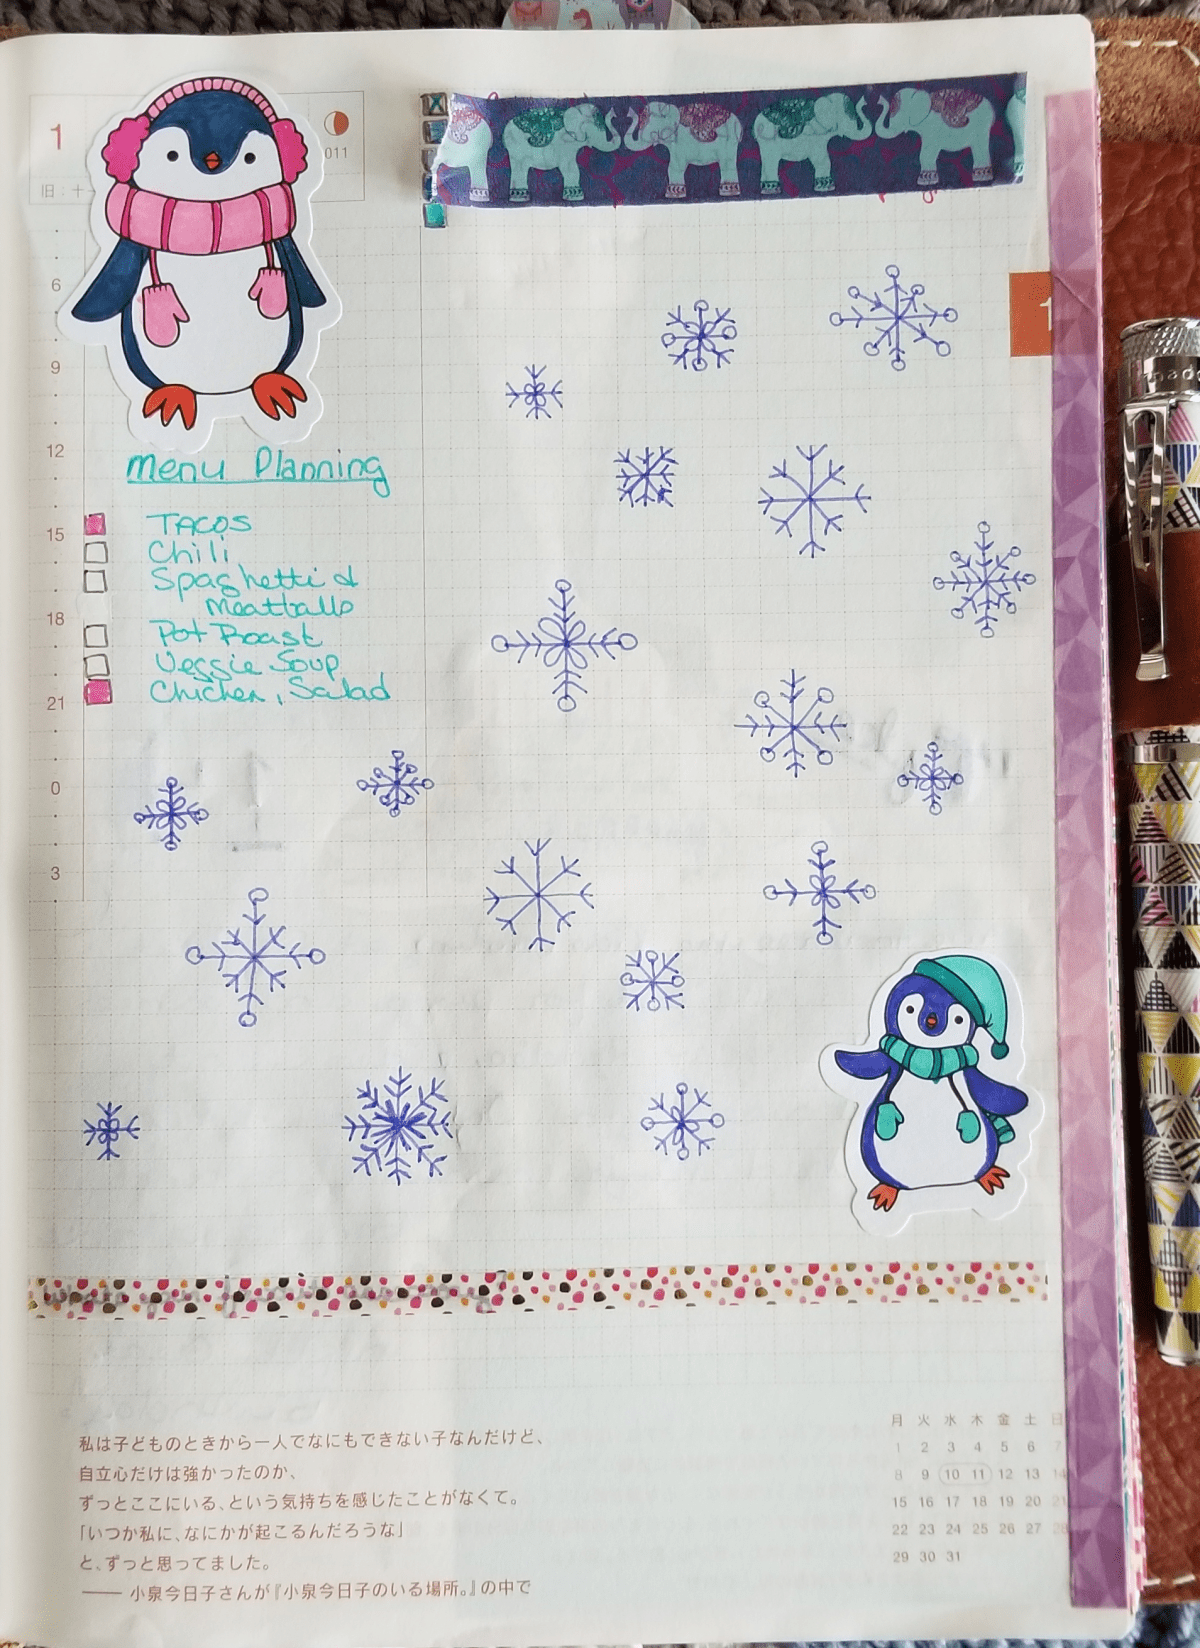
My wife has been looking at the iPad Pro devices for the last few months. She’s seen what I’m able to do with my Surface Pro and Galaxy Note pen enabled devices and has become interested in converting her coloring and more importantly her journaling to a digital format. She uses her Hobonichi Planner and a custom fountain pen I bought her to run our entire household, manage our children’s schooling, track our healthcare, and as a form of creative output. She prints pictures from the HP Sprocket and sticks them on various pages or diary entries about our activities. She colors, doodles, stickers, and even paints on some of the pages. You can see her custom leather journal cover from Chic Sparrow inscribed with the now famous Zelda quote, “It’s dangerous to go alone, take this!” in the featured image above. People don’t go to that expense and trouble for something that isn’t important to them. Convincing her to go digital has been a long, long journey.
Her journal is a very effective tool and an art form in and of itself, but as our family becomes busier and we rely more and more on the information contained within it, the technologist in me can’t help but see several major flaws with the paper system. The biggest of which is that it’s a single copy of important data with no easy method of backing it up. The best I’ve come up with is taking pictures of some of the more important pages. Other problems crop up when we need to incorporate digital information into the system like sites and passwords. The Sprocket lets her add photos but other digital media is out of reach. There are also challenges when she needs to share the info with other family members. I’m concerned about security; if she leaves it at a restaurant whomever picks it up will have access to important personal information just by flipping through the pages.
She’s prefered Apple’s technology for quite some time now. I’ve lost count of how many iPads and iPhones she’s cycled through over the years. As I’ve said in other articles, I’m not a brand oriented technologist, I use whatever works best for the task at hand. For her, that’s been Apple devices, hence her interest in a new iPad with an Apple pencil.
However, I’ve noticed that she needs to borrow my PC to accomplish certain tasks more frequently than she realizes. She likes games like The Witcher 3 and Sims 4 that just don’t run on Apple’s stuff. The full Microsoft Office is required when doing anything complex. Our educational curriculum requires the use of web-sites that still employ Adobe Flash. When it comes to digital pen input, Microsoft and Samsung have had years to perfect their solutions and they work in the entire system across all apps, not just a select few. These reasons led me to convince her to convert to a Windows 10 tablet instead of an iPad with a pencil.
She had been using my Surface for some of the PC related tasks I mentioned above and liked it. To show her Windows was the way to go, I set her up a customized user profile and she played with it for a couple of weeks. She enjoyed it for the most part, but was nervous that the learning curve would cause a lot of frustration. I didn’t argue, just agreed that it might and promised that if the transition wasn’t worth it, we’d return or sell whatever device she ended up with and I’d get her an iPad with an Apple pencil no questions asked.
I think a big part of the attraction to iPads over Windows is the physical size. People assume that the Surface Pro is the only available system; nothing could be further from the truth. For her birthday I got her a Samsung Galaxy Book 10.6″ which is a Windows 10 tablet that is roughly the same size as the smallest iPad (10.5″) that you can use the Apple pencil with. I’ll be writing a full review of it just as soon as I can pry it out of her hands and spend some quality time with it. It really is an impressive piece of hardware and I’m more than a little jealous.
She spent several hours, a couple of days really, getting Windows tweaked and installing software. Things like Google services, Email, Instagram, Facebook, Flipboard, Spotify, Pinterest, Amazon, Nook, Kindle, Audbile, Office 365, Steam, etc. were all just as easy to setup on the PC as they were on the iPad (her words). 75% of the software including Office 2016 came pre-installed and the rest was just a matter of opening the Windows store and finding the apps. Most modern apps store their data in the cloud, so once you get them installed and have logged on with your account everything is just there. I helped with some of the advanced stuff like: making a Windows theme out of her favorite pictures, arranging her Start Menu, enabling surround sound on her headphones, and exporting / importing data from her apple devices. I gave her a quick lesson on how to manage bluetooth and Wi-Fi, where to find all the settings she might need, and how to create and pin shortcuts.
When I followed up with her a few days later she told me how well the transition had been going so far. In her opinion, Microsoft has really nailed it with Windows 10. Cortana kicks the crap out of Siri in every way, she bragged about how awesome it was to have a voice assistant that could actually assist. She loved the speed of her new system and how it could play her favorite full games or stream them from our Xbox, Playstation, or gaming PC. She’d figured out the hand-writing input; had used bluetooth to pair a Dualshock controller, an external mouse, and her Sprocket printer. She setup all of her network connections, synced her iPhone and more. I was impressed. For most of it she just asked Cortana, “How do I….?”.
The trouble started when she logged on to the Windows store to download the Goodnotes app she’d experimented with on her iPad mini. Unbeknownst to me, this specific app was a big part of the reason she was willing to attempt to convert from paper to digital journaling. The Goodnotes app is featured in many journaling groups on Facebook, Instagram, and twitter and has a lot of fan support on Youtube. It wasn’t there. Now what? She likes Windows 10 and doesn’t really want to change to an iPad, but the journaling portion of the project was the most important part to her. Was my plan busted before it really got started? To be continued…..


 On the same screen you can control your Pen’s buttons.