
If you’ve read the first article in this series then you’ll know that I am in the process of helping my wife convert from a paper journaling system to a Windows tablet even though she usually prefers Apple devices. Obviously, I enjoy a good challenge.
In my opinion one of the biggest differences between Apple devices and Windows computers is that an Apple device is largely ready to use out of the box; basically, you just need to load your apps from the store, log on to your accounts, and go. Windows on the other hand is infinitely customizable. These customizations make the operating system more flexible for all kinds of people and uses, but can be source of frustration for those that just want to pick something up and go. Microsoft attempts to start you off with a basic profile that works for everyone, but it just doesn’t cut it for most people.
There are lots of guides about setting up Windows already out on the interwebs. Most of them show you where the settings are and what they do. From my experience in the IT industry, I’ve come to the realization that finding the settings isn’t the hard part. Especially when you can just ask Cortana “How do I turn off the WiFi?” or, “How do I setup a printer?” The hard part is getting your head around how best to organize a system and deciding what settings you should or should not use.
In this post I’m going to show you exactly how I setup a Windows profile to use with a Pen enabled system. It’s going to be a long post so I’ve broken it down into sections. I am assuming that you’ve completed the initial setup of Windows and created a user account. I’m also assuming that you know how to install apps from the app store and logon to your various accounts. If you want to try these settings but would prefer not to mess up your current profile I suggest creating a new user account. Select the Start button, then select Settings >Accounts > Family & other people > Add someone else to this PC. You can always delete it if you don’t like it or switch to it if it works better for you.
A word of warning, my philosophy around the best organization of an operating system is not predicated on reducing the number of mouse clicks/screen taps. I understand that this is important for some, but to me hunting for the thing to click is more annoying than being able to get to it in one. Also, I feel that the indexing provided by modern operating systems already allows for zero clicks with regards to launching applications making pleasing aesthetics and organization in the GUI more desirable than all out efficiency.
The Software
Everyone has specific needs for applications but people who are reading this may just be starting out with Windows 10, so I’m going to list out some applications you should consider installing. Installing software before arranging your start menu and adjusting other settings will make things a little easier in the long run.
Microsoft Store Apps
Windows 10 can operate as both a PC and a tablet (2-n-1) to facilitate this flexibility, it has two methods of installing applications. The Microsoft Store is essentially the same thing as Apple’s App store or Google’s Play store.
Somewhere in your start menu you should see a shopping bag icon. Click it and then search for and install the apps below. If you don’t already have an MS account you’ll need to create one now. Don’t complain, Apple and Google both require accounts, too, LOL. If you’d prefer to set up your account on the web rather than going through the wizard you can do that here.
- Alarms and Clock – built-in if your version of Windows 10 is new enough.
- Amazon – Amazon shopping, has voice recognition and bar code scanning
- Amazon Music – Stream and download Amazon Prime music.
- Audible – Audiobooks, this service requires a subscription but you can get two books for free.
- AutoDesk SketchBook – A great drawing and sketching app that is easy to use.
- CPlus for Craigslist – Lets you setup searches for Craigslist that notify you when those items become available.
- Drawboard PDF – A PDF viewer that supports drawing and inking on/over the files. This app is free on some systems or $9.99 on others.
- Facebook – I actually prefer the website but installing the app makes it show up as a sharing option in other applications.
- Flipboard – The built-in news app is great, but I use Flipboard because it allows me to publish articles from my blog.
- Flixster – Movie theatre show times & tickets, reviews, clips, etc.
- Fresh Paint – Another great art app that is easy to use.
- Google – Easy access to all of google’s services: Search, Gmail, YouTube, ect.
- Kindle – Book reading app
- Messenger – Facebook Messenger app
- Merriam Webster Dictionary
- Microsoft Jigsaw – Puzzles on your computer
- Microsoft Mahjong
- Microsoft Minesweeper
- Microsoft OneNote – Free tablet edition of the note taking app.
- Microsoft Skype
- Microsoft Solitaire
- Microsoft Sudoku
- Microsoft Translator
- Nook – Barnes & Noble book reader
- Netflix
- Scan
- Sence Clock – Great nightstand clock but also gives you live tile clock for your smart menu.
- Skype
- Sway – A new type of document that combines the features of a Powerpoint and a web page
Desktop Software
Everybody has their prefered desktop software and programs they require for their profession but there are a few that are ubiquitous from my point of view. As I stated earlier, having the majority of your software already installed will make organizing your start menu (next step) easier.
- 7zip – File compression utility
- Acrobat Reader DC – there are still some PDF files that require Adobe to fully work. I do not make it the default.
- Audacity – An audio editing tool
- Battle.Net – Video Game Engine
- Dophin – Gamecube / Wii emulator
- Google Chrome
- Google Earth Pro
- Java
- Office Software – If you don’t have Office 365 I recommend the free OpenOffice.
- Origin- Video Game engine
- Paint.Net – Free advanced graphics editing tool.
- PS4 Remote Play – Stream games from your PS4
- Steam – Video Game engine
The Settings
I find that one of the keys to enjoying the Windows 10 operating system revolves around spending some time to configure the user interface settings. These settings control what you see in the start menu along with how your system looks and works. We’ll also need to adjust the settings for how our pen works. There are hundreds, maybe even thousands of other settings you can tinker in Windows, but Microsoft does a good job of picking defaults and unless you have a specific reason to change things like the Power settings or the Update frequency I recommend that you leave them as is.
Start Menu
The Windows start menu has a starling number of configuration options most of which are available under the personalization heading in the settings app.
In your search bar type “Start Settings” and adjust the toggles to match the picture below.
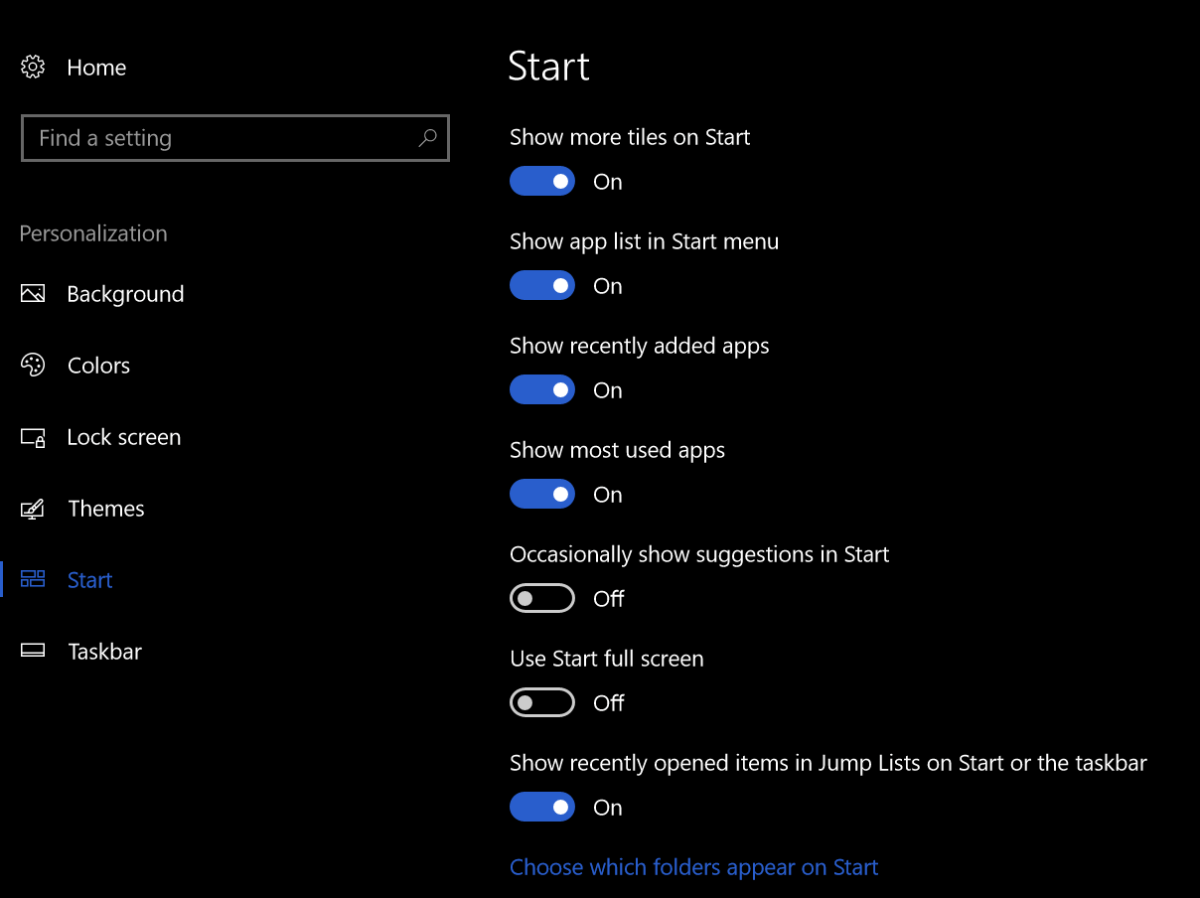
Now click the “Choose which folders appear on Start” link at the bottom of the start settings screen and adjust those toggles to match the following picture.

These settings control which folders appear above the start button. They are handy shortcuts that I use often but having too many of them causes screen clutter.

Themes
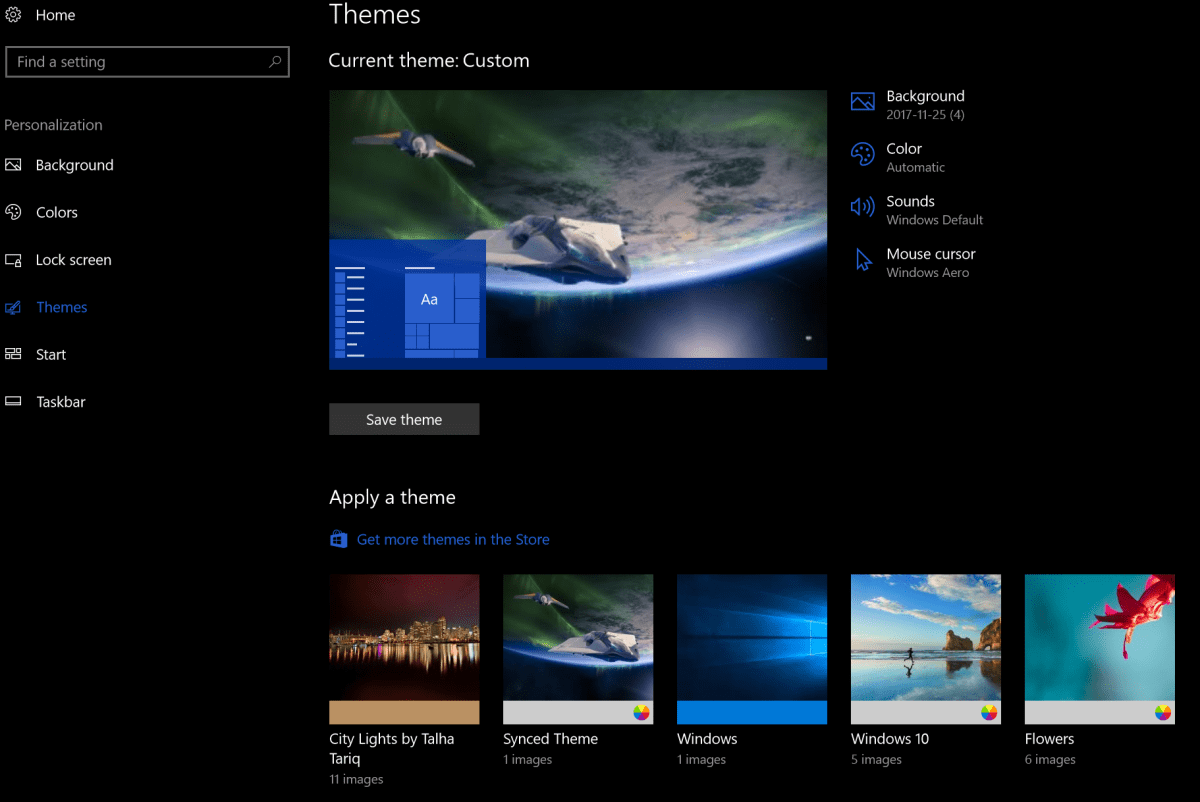
Themes are composed of background pictures, color schemes, icon packs, sounds and sometimes even screen savers. They do more to personalize the way your computer looks than almost anything else. There are built-in themes, themes in the app store for free and for pay along with countless web sites (google Windows 10 Themes) to get them from. Microsoft has a free library of all kinds of themes organized by subject categories here.
If you choose to download themes from a web-site, exercise caution. You have no idea what’s in the files you are downloading; get them from reputable sites and scan them with AV software (right-click on the downloaded file & choose scan with windows defender) before installing. You can also make your own themes; check out my article on how to turn your favorite pictures into one.
In the search box type “Themes” and click “Themes and related settings” in the results. You will find all the controls along with a link to find more themes in the app store. If you don’t have any downloaded and don’t want make your own I suggest selecting the built-in Windows 10 theme.
Lock Screen
The lock screen in Windows 10 works just like the lock screen on your smartphone. You can select an image or even play a slide show for the background. Some apps like the weather and calendar are able to display information when the lock screen is on. Just type Lock Screen in your search bar and click Lock screen settings in the results. Adjust the settings to match your preferences.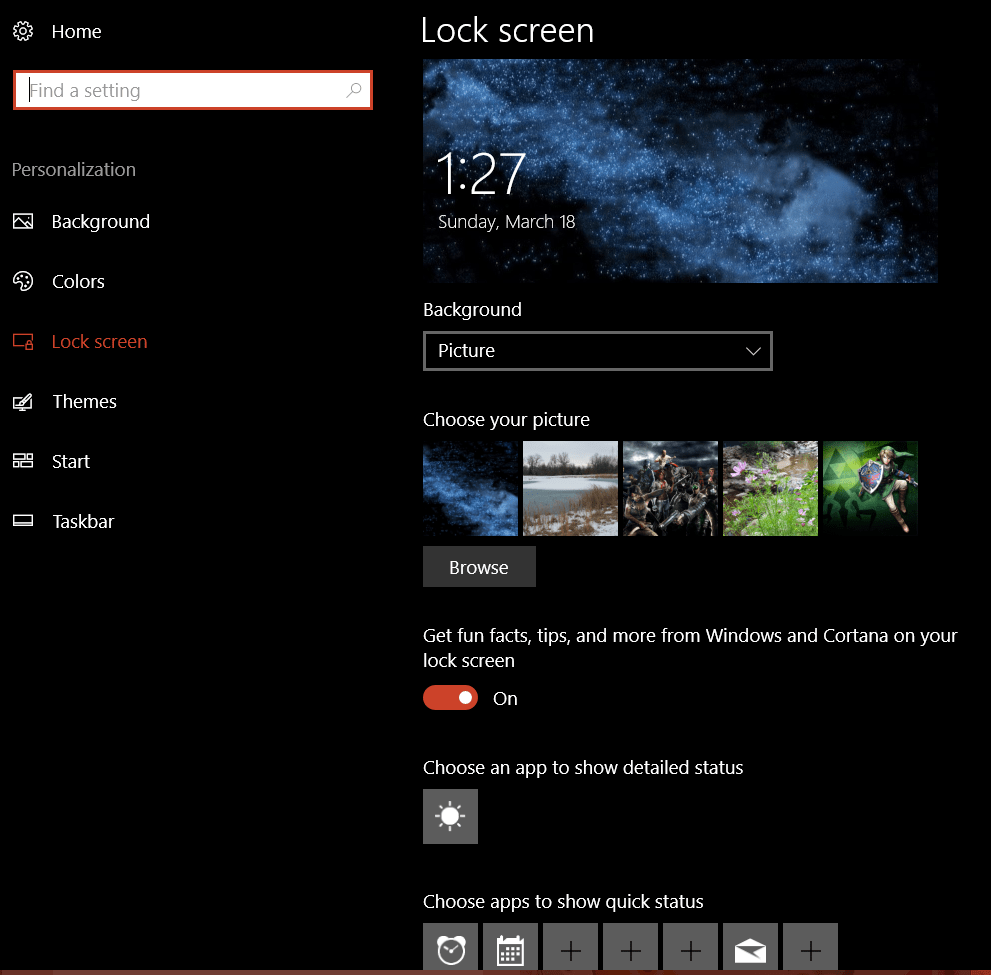

Colors
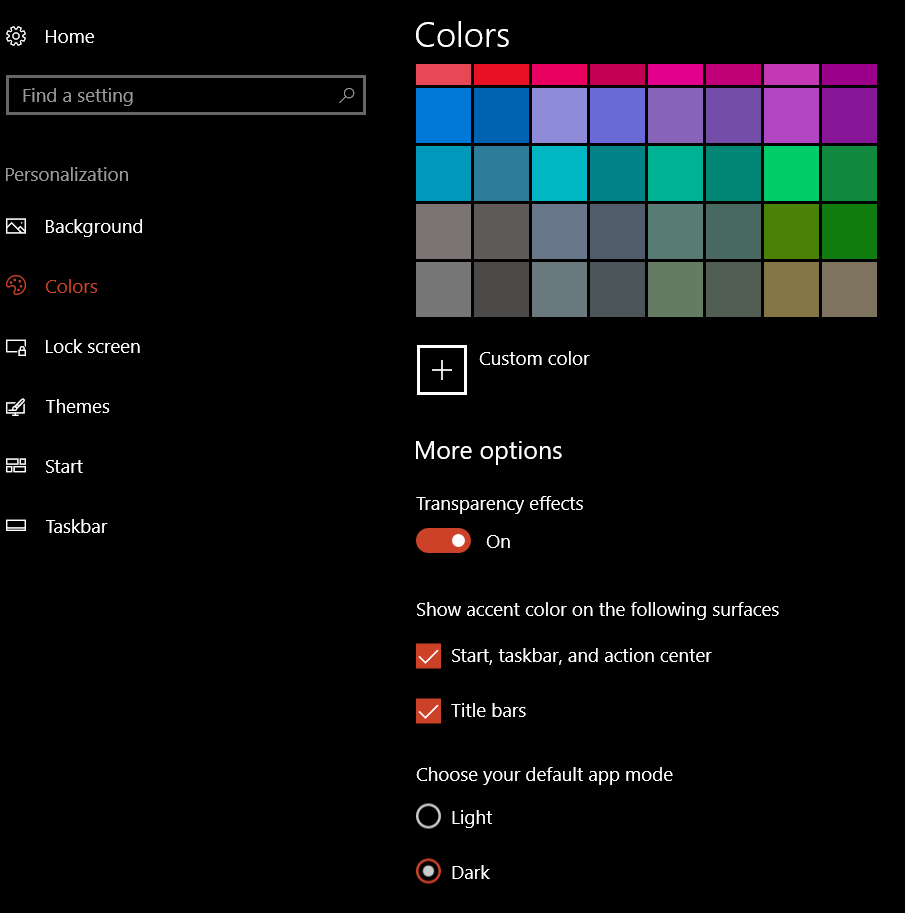
If you’ve opted to use a theme, it likely set the colors of your Start Menu background, Task bar, and the borders of windows. However there are still some options you’ll want to adjust. Type color settings in your search bar and select it from the results. I reccomend the options show below.
Pen Settings
The point of this article is to configure your system for digital journaling, you will want to fine tune the way your pen/stylus operates so that you can get the best experience. Type Pen Settings into your search bar and select it from the results. I suggest the settings below. I also recommend that you click the “Get to know my handwriting” link, this will launch an application that fine tunes the handwriting recognition for even the sloppiest writers (like me). 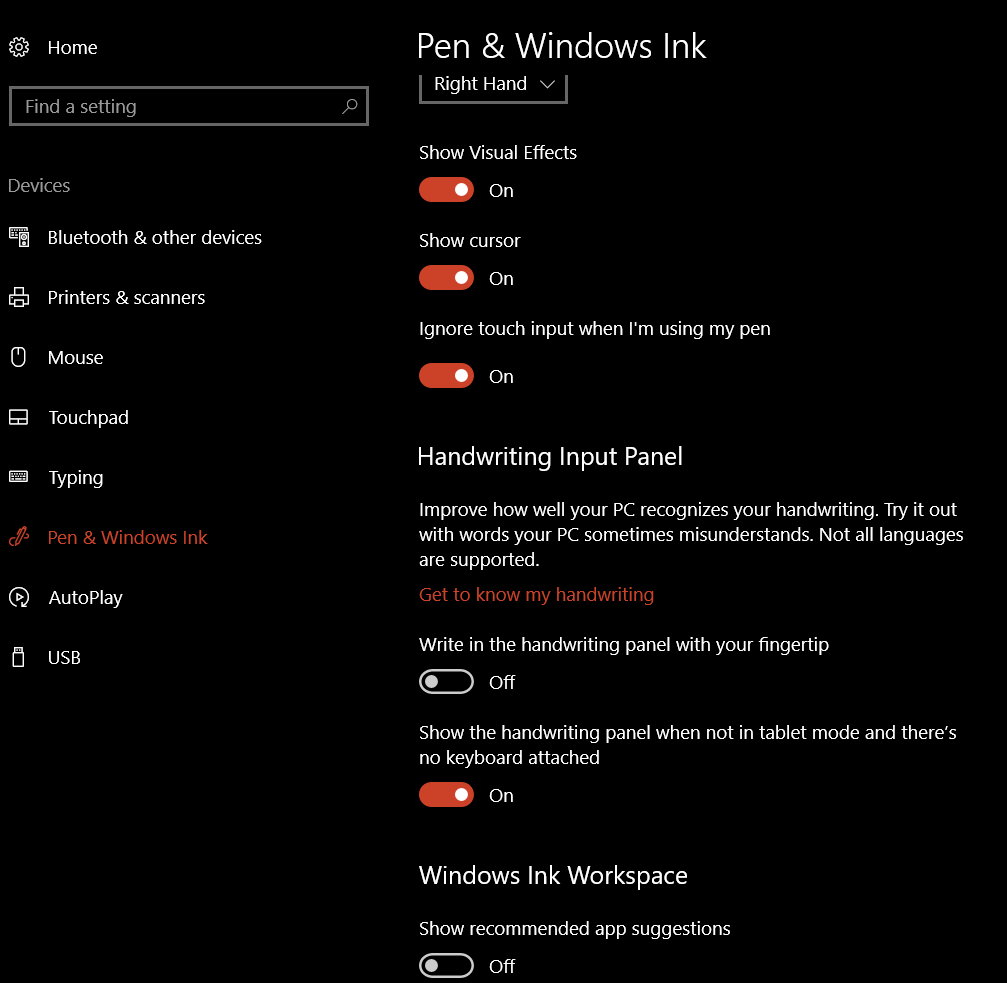 On the same screen you can control your Pen’s buttons.
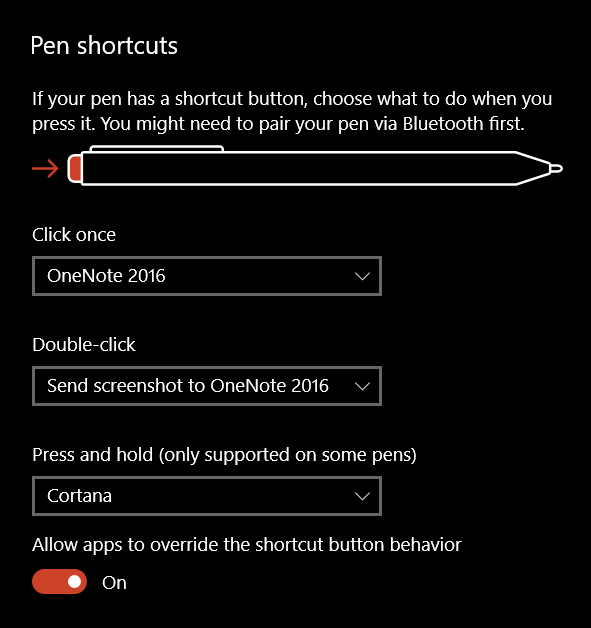
There are some more pen settings in the classic control panel. Type control panel in the search bar and select it. Find the Pen and Touch icon. Here you can control the tap actions and enable the eraser function if your pen has one. You should also enable Flicks. Just keep in mind that they only work in Desktop Apps and not the Tablet apps (called Universal Apps) that you download from the store. You want to use the practice link at the bottom of the window if you’ve never experienced them before.


The Start Menu
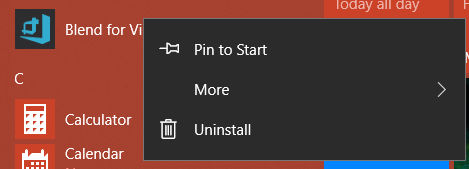
Now we’re ready to organize our Start Menu. First go through your apps list and right-click on the icons for all the software that you use frequently. Choose the option to “Pin to Start”. Note, if you see “Unpin from Start” it means the icon/tile for that program is already in the start screen portion of your start menu.
I also like to pin my favorite web sites, like those for my bank, the on-line access to my TV, and Facebook to my start screen. To do this you’ll have to use the Edge browser. Just go to the URL of the site then click the action menu … icon and choose Pin this Page to Start. 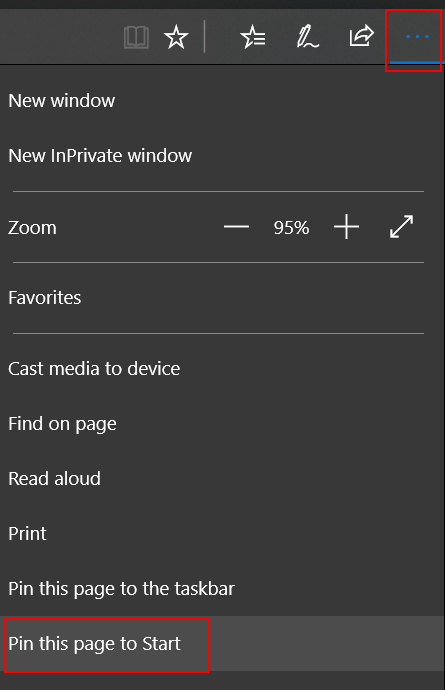
Organization is Key
Now you have a mess of icons and tiles all over the place in your Start menu. How did this help? To get the most out of the windows start menu you need to organize your icons into sensible groups.
Tile Sizes
The icons in your start menu are called Live Tiles. Some have the ability to show updated information from the application that they represent. For instance the News tile will flip through headlines, the Photos tile will show your pictures, and the Facebook tile shows the latest posts on your timeline. To get the most out of live tiles you need to adjust their sizes so that they can display the information you want to see. Right click on a tile and go to resize to see its options. Many tiles change what they show in accordance with their size. For example, making the weather tile wide instead of medium will cause it to show the full weeks forcast instead of just the current weather conditions. 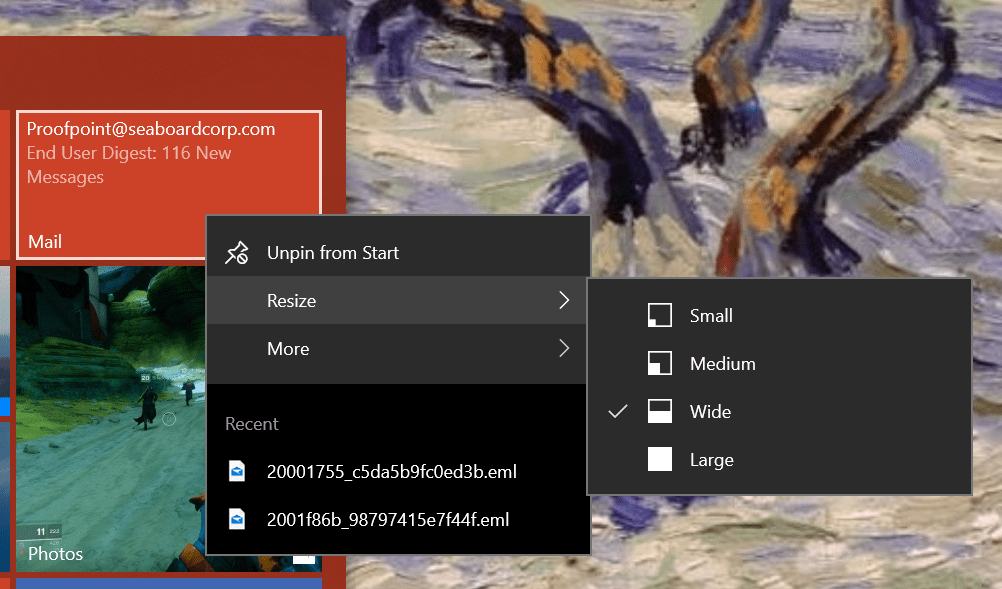
Group Tiles
You can group tiles together in named categories. Microsoft usually gives you a group called Life at a Glance to start with. You can make new groups by dragging similar tiles close to each other. When you get two or more tiles next to each other, hover your mouse just above them and you see the option to name the group. I make the following groups on every computer that I use:
- Life at a Glance = news, mail, calendar, Facebook, Instagram, Twitter, Messenger, photos, calculator, etc.
- Media = Art, photo editing, video editing, audio editing
- Office = Any application that I use for documents
- Games
- Dev Tools
- Movies, books, and music (sometimes I name this group entertainment)
Nested Tiles
Besides groups you can also create nested tiles. This works in much the same way it does on a smart phone. Drag one icon on top of another and let go. Add more icons to the nest by dragging them in. When you nest tiles you are able to fit more of them in a much smaller space but you give up the “Live” functionality. They will not show updated information or notifications in most cases.
Conclusion
If you’ve made it through all these steps you should have ended up with a great looking profile that shows your most important information every time that you click the start button. Your pen has been optimized, handwriting tuned, options for the on-screen input adjusted, lock screen and backgrounds set, and more. Once of the nicest features of Windows 10 is that once you do go through this on one computer; the results will replicate to every Windows 10 computer you use afterwards as long as you didn’t turn this option off. Thanks for reading and stay tuned for the next article in this series.

3 thoughts on “Creative Journaling with Windows Tablets Part 2; The Perfect Windows Profile”