I’m not sure that I ever knew the Home/Family version of Microsoft 365 supported custom domain names. I was changing some settings in Outlook and ran into a notification. It was a warning that the ability to add custom domain name to your Priemium Microsoft account would expire on November 30th of 2023. Not one to miss out on features I am paying for, I decided to dig a little deeper. You can review the notification message yourself here. https://support.microsoft.com/en-us/office/changes-to-microsoft-365-email-features-and-storage-e888d746-61e5-49e3-9bd1-94b88e9be988
If you reading about this feature for the first time like I did, here’s what to know. If you have, or are willing to buy, a custom domain name from GoDaddy.com you can use it for email with your Microsoft 365 subscription. According to the official instructions, public DNS records for the domain must be hosted with GoDaddy.
I already had a domain name from GoDaddy and was able to use it without issue. The process was more complicated than it would have been if had I purchased a brand new domain name from GoDaddy through Outlook. I had to manipulate DNS records manually to make my domain work. It is my understanding that part of the process is automated if you purchase the name though Outlook.com.
Whether you already own a domain or are purchasing one, the setup starts with logging into what is commonly called OWA (Outlook Web Access) aka your Outlook.com account https://outlook.live.com will get you there.
Click on the Gear icon (settings) in the upper right hand corner.
In the pane that opens click View all Outlook Settings at the bottom.
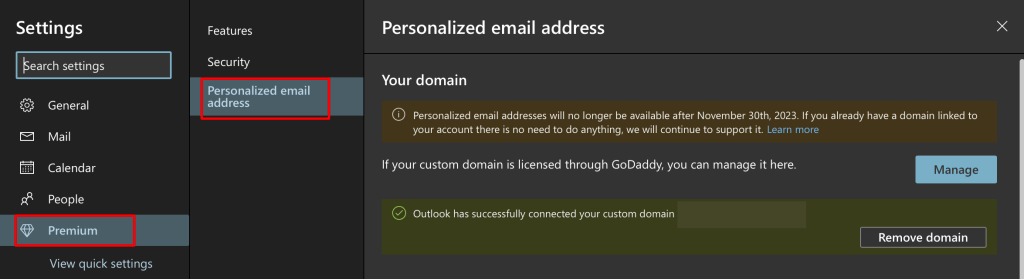
Now click Premium, then Personalized email address.
You can read the notification, use the Manage button to sign-in to your GoDaddy account, or set one up if you don’t already have it. Microsoft’s own documentation on the setup, questions, and troubleshooting is where you should turn for the rest of the configuration. They’ve made the process fairly simple, it took me about forty-five minutes to get my custom email addresses fully working on the Internet. If you complete the setup process before the deadline, your custom email address will not stop working.
I have always been a big fan of racing games. I started with the classics like Pole Position and Outrun and have been playing them ever since. I almost always have a racing game installed on my smartphone. There have been plenty of excellent options over the years. The Real Racing and Asphalt franchises have been some of my favorites.
Recently, I stumbled across Grid Autosport in the Google Play store. I had played a few of the Grid titles on my XBOX so I opted to give it a shot. The game was $10.00. It seemed to be a high price when comparing options in the store, but it has no micro transactions after the initial buy which I prefer. The $10.00 fee also includes texture, track, and car pack downloads that were available the first time I started the game.
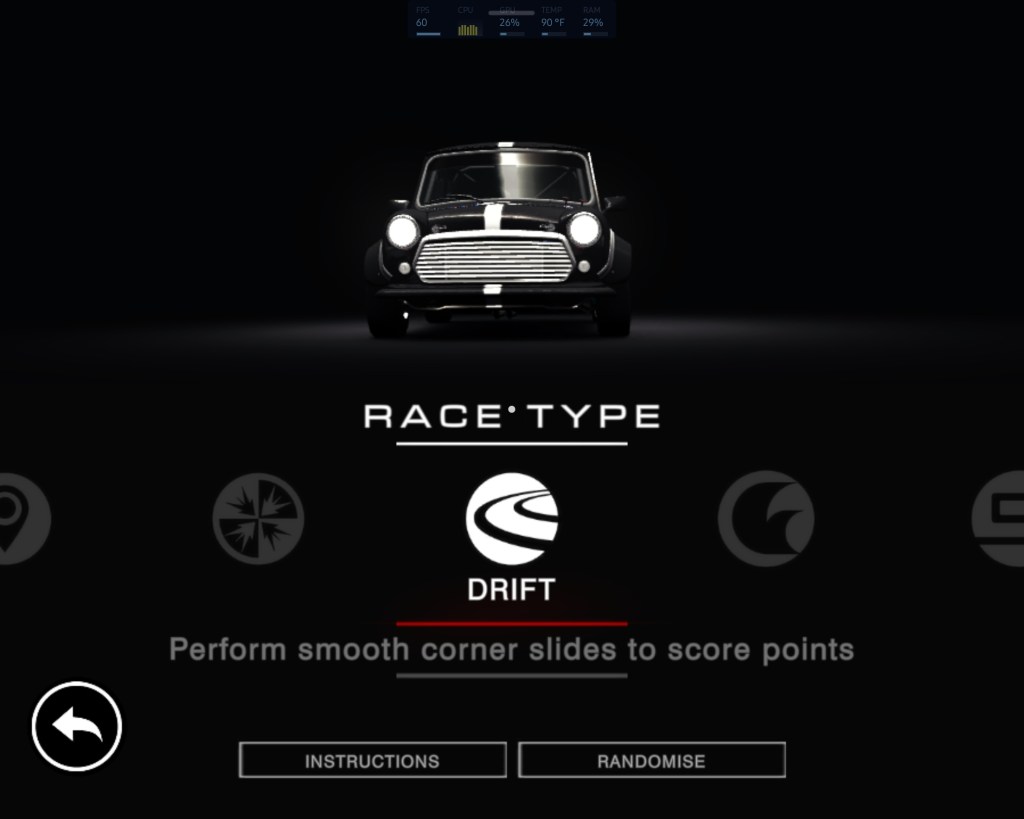
It turns out that ten bucks is a steal given how good Grid Autosport is. The game’s career mode follows the well established class based, earn your garage path, made famous by the likes of Gran Turismo and Forza. What helps set Grid Autosport apart is the number of racing types available beyond that traditional career mode. Everything from Drag racing to Demolition Derby and Drifting are available modes. I’ve had the game for weeks and haven’t managed to try them all yet. Sadly, there’s no multiplayer option.
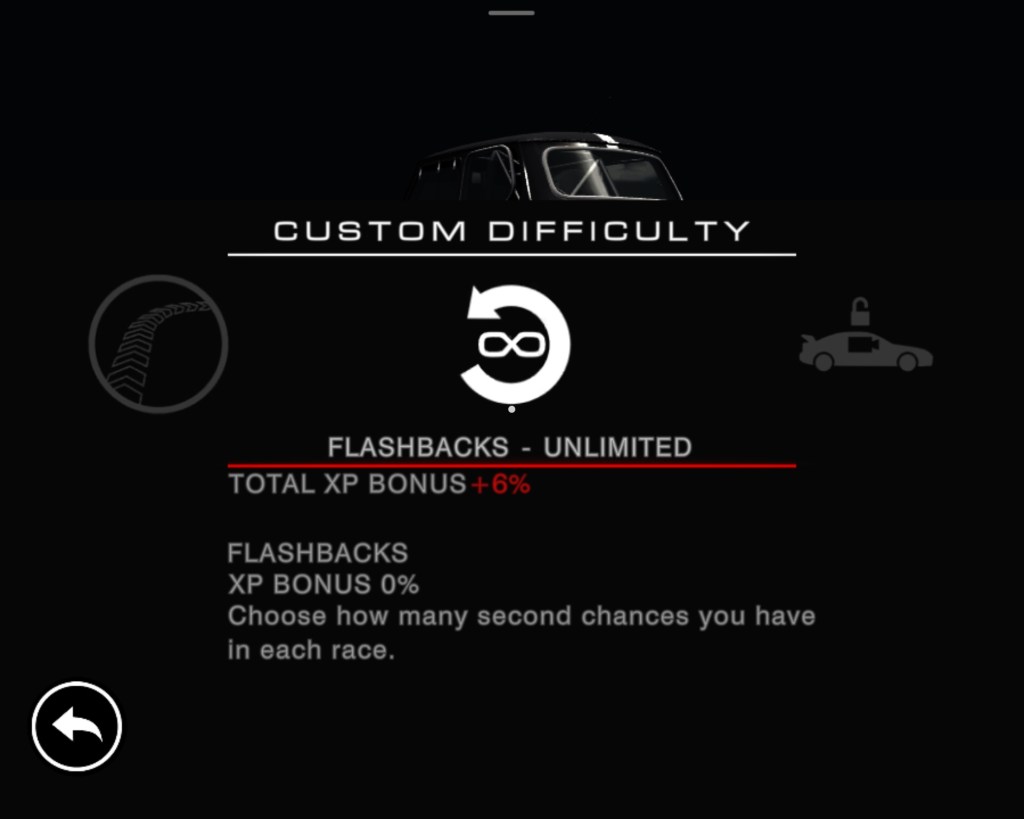
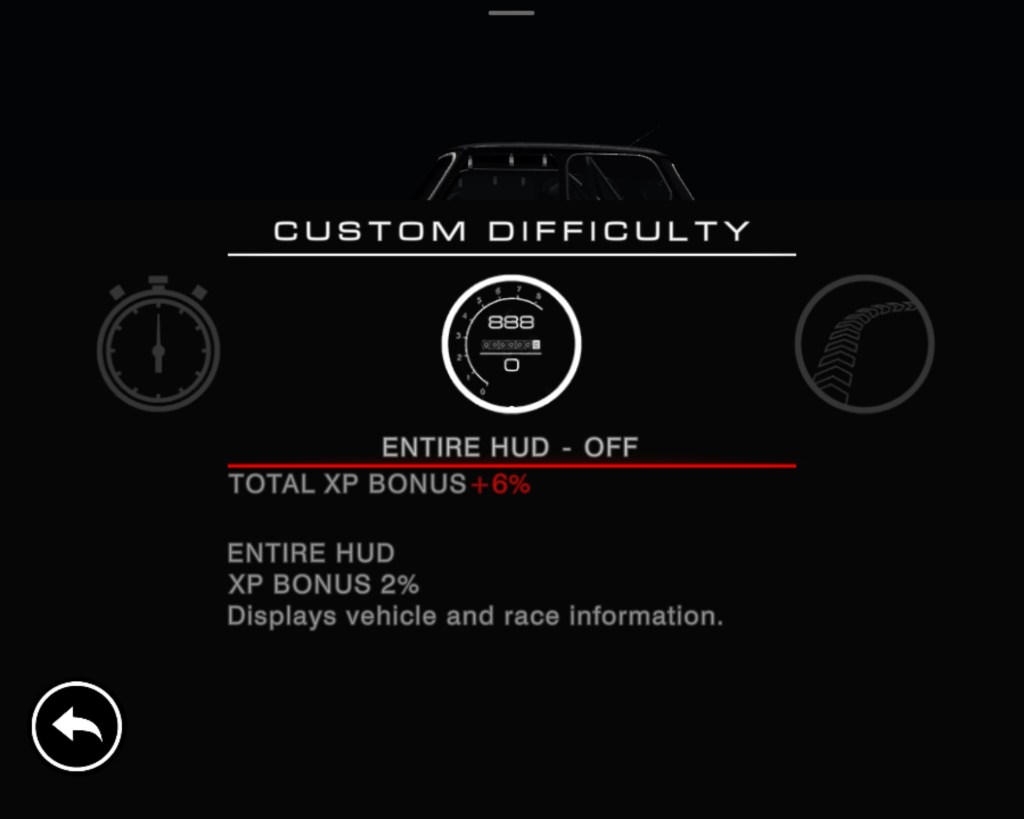
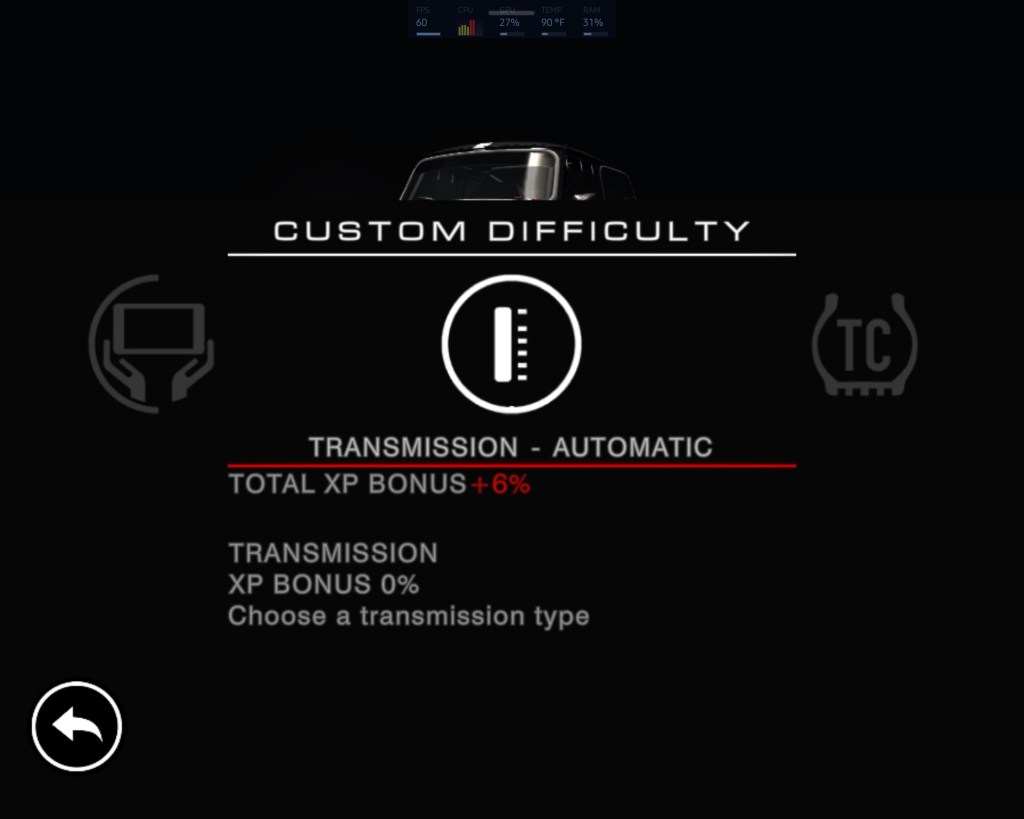
The difficulty options make it easy to tune for your style of driving and skill level. I like to aim for a challenge in which winning appears possible but not probable. There are options for disabling the hud and locking the camera to in-car modes along with turning ideal lines, braking assist, traction control, and others. Besides adjusting how much the game is helping your driving, the AI competition also has its own difficulty levels. When tuning the driving experience, you are increasing or decreasing the XP bonus received for completing the run.
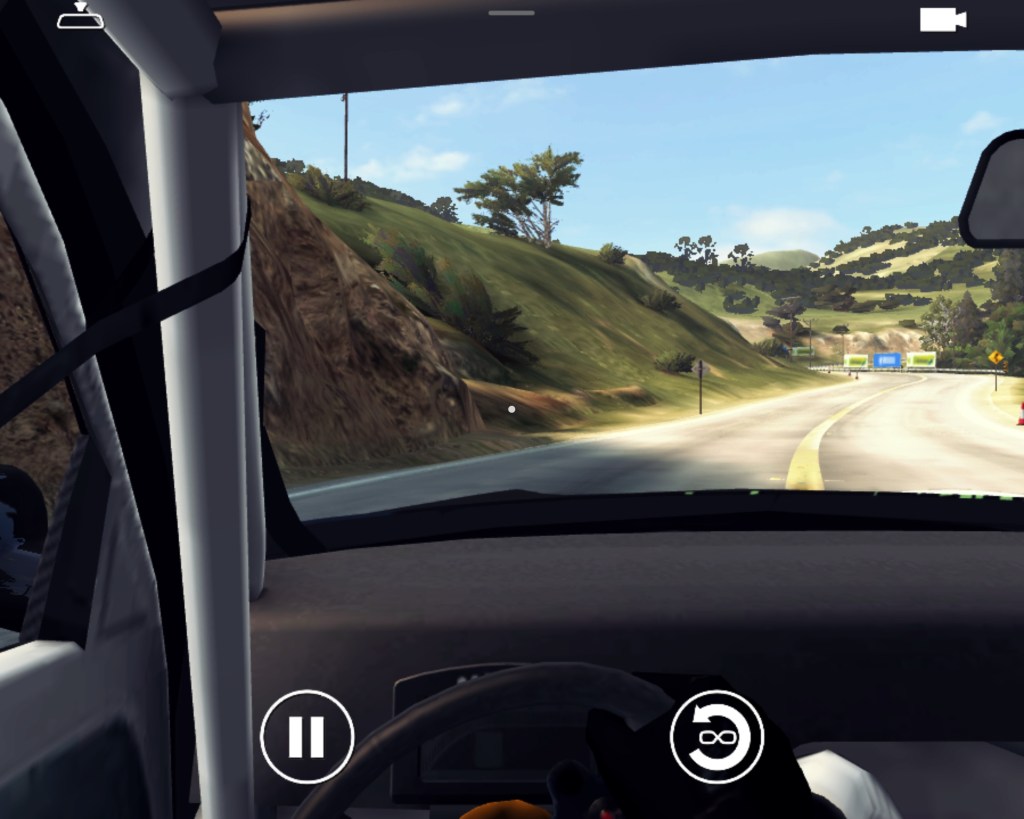
The tilt controls, vibration, and unique touchscreen-sliding throttle combine to deliver a satisfactory level of car control immersion. Twisting the phone in space like a wheel feels more like driving than using a gamepad to me, but the later is fully supported via Bluetooth or cable. The motion controls in Grid are exceptionally accurate, drifting around corners at high-speed feels risky but can be accomplished. The haptic feed back manages to provide some sense of road feel, especially when you encroach on the edge of the track or while traversing surfaces like cobblestone.
The graphics are good enough to justify hooking my phone up to a bigger screen and playing with a controller. I’ve used Android’s wireless streaming option to play on my living-room screen more than once. The experience is on-par with an Nintendo-Switch running in docked mode. On my Galaxy Fold 3, turning the graphics to their maximum, drops my FPS from sixty to thirty. I tend to run the game on the mid-settings because of this. Smooth is better than pretty and the expression of speed is more defined, for me.
There are 100 realistic tracks based on real-world venues and locations. The scenery and environments are exceptional in all the ones I have raced on so far. There are a wide variety of track surfaces and weather elements. NPC fans fill the stadiums and city streets to cheer you on, mountains are majestic, and coast lines glimmer. Sun glare, grime on the windshield, and other touches lend themselves to the realistic environmental experiences the developers were clearly aiming for.
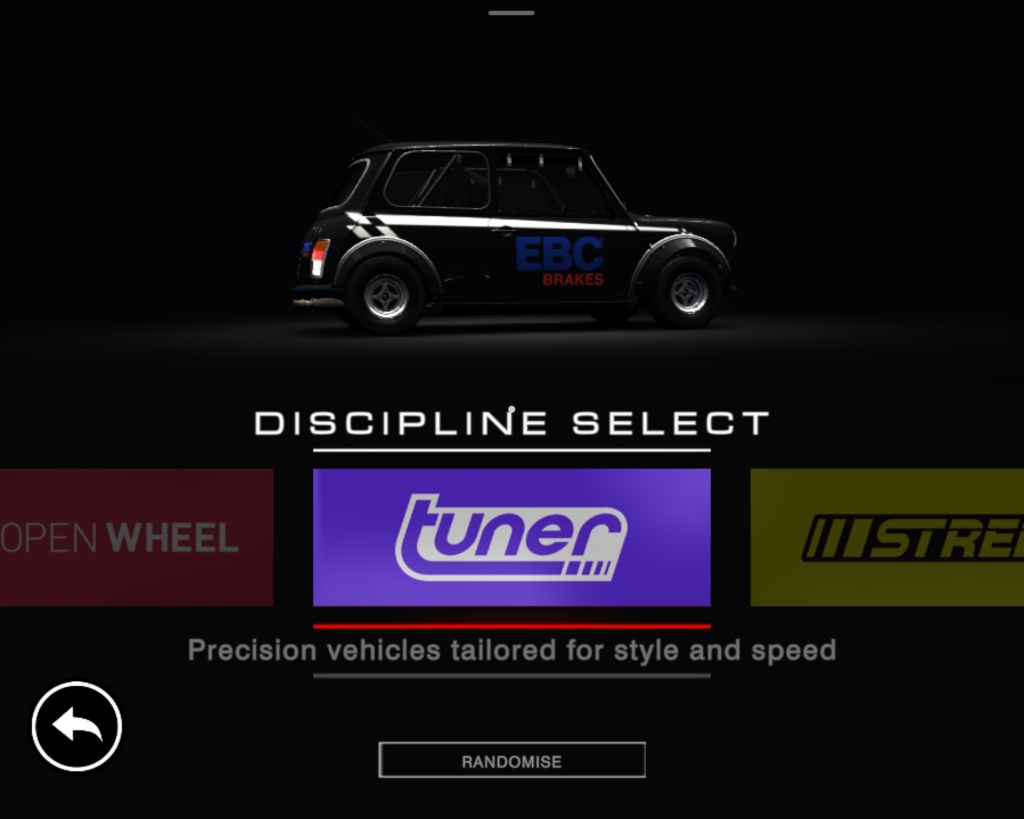
There are also 100 cars in Grid. Multiple driving disciplines like touring, super-car, or open wheeled mean there’s always something new to get into. There’s even a class of racing UTEs, the El Camino style of truck-car you hardly see anymore. The detail in each machine’s exterior is exquisite. I chose to download the optional HD texture pack. The sheetmetal and paint jobs are photo-realistic after you install the add-on. Vehicle interiors are accurately scaled but otherwise lackluster.
The physics feel great. Cornering speeds match my expectations for the type of car being slung around the track. Collisions with other drivers have appropriate levels of mass reaction and damage. The driving impact of that damage is another option that can be toggled on and off in the menus. I keep one driver profile configured for the type of “racing” that takes focus and a light touch to avoid over-driving and sliding into the grass. I have another for casual play where traction control and steering assist make distracted/Netflix driving easier.
As you can tell, I’ve been impressed by Grid Autosport. It would be a great racing game on any platform. The fact that it is always in my pocket is icing on the cake. I often find myself playing it while watching Netflix, or while waiting for things like my turn at the barber-shop.
There are plenty of online guides that explain how to configure Exchange Online to allow external mail forwarding. This isn’t another one, try Microsoft’s own guide if that is what you are looking for. We’re talking about a situation I recently encountered in which mail forwarding was correctly configured (via the linked doc), but still not working.
The problem turned out to be a guest account that contained an email address that matched the forwarding target’s address. I deleted the guest account and replaced it with a mail contact. Everything worked normally afterward.
You may be wondering why I didn’t just configure forwarding to point at the guest account instead of deleting it. That is because there’s no option to do so as far as I can tell. Exchange Online’s people picker does not seem to recognize guest accounts.
The existence of the guest account prevented me from creating a mail contact because another Azure AD object contained the same address. You can’t have multiple objects with the same SMTP address in the same tenant space. Except when you manually enter and SMTP address in the forwarding target of a mailbox?
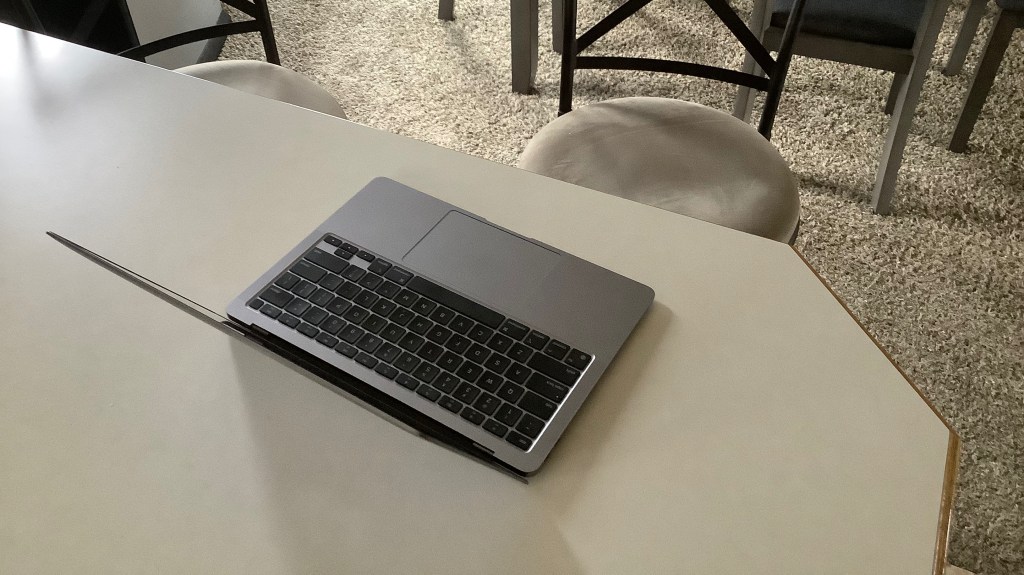
I recently started using a MacBook Air as my primary laptop. In my line of work, I interact with Microsoft 365 and Azure AD through PowerShell on a regular basis. Modern authentication protocols require that the management modules be installed locally. I found the process of getting the MS365 PowerShell modules running on my MacBook Air to be a little more complicated than doing the same on Windows, but it wasn’t difficult.
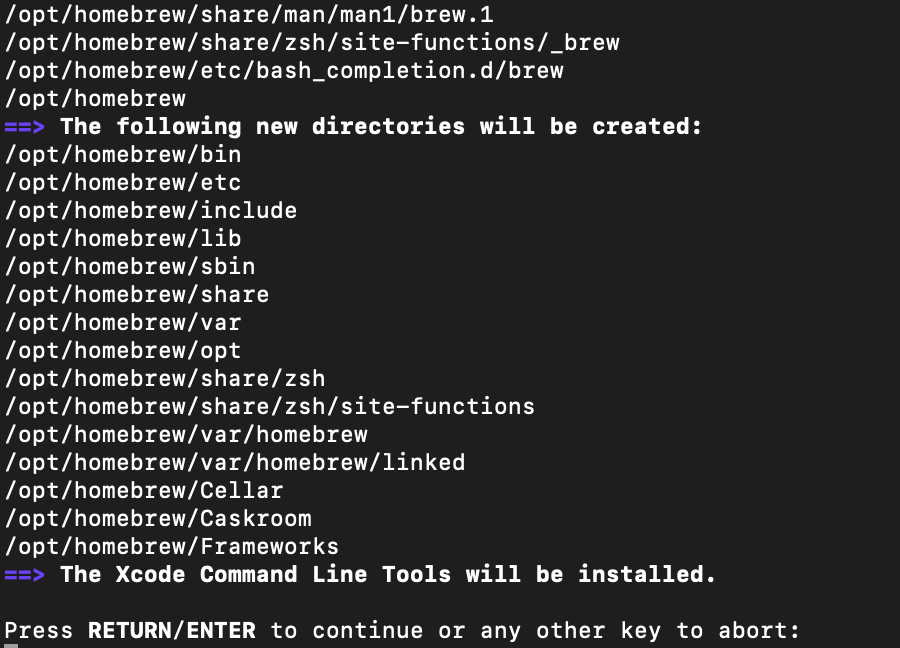
The first step is to install PowerShell itself. The direct method is simple, but you can also use Brew after we install it for OpenSSL in the next step. For the direct route, download the latest (not pre-release) edition as a package from GitHub at https://github.com/PowerShell/PowerShell/releases Once the file finishes downloading, right click on it and chose “Open With” then pick the installer. Follow the on-screen prompts to complete the installation.
The admin modules we want to run require OpenSSL. It is used to facilitate PowerShell remoting. Getting it installed is the next step. The easiest method to install OpenSSL is to use the Homebrew package manager. Follow the instructions on their web site and run the newest version of the installation script in the Terminal app on your MacBook. You can use Brew to install PowerShell as well if you like (Bing/Google it).
Follow the scripts prompts to complete the Brew install, be sure to follow the steps at the end to add Brew to your path.
Once you have Brew installed run the following commands (one line at a time, enter after each) to update Brew, install OpenSSL, and add it to your path.
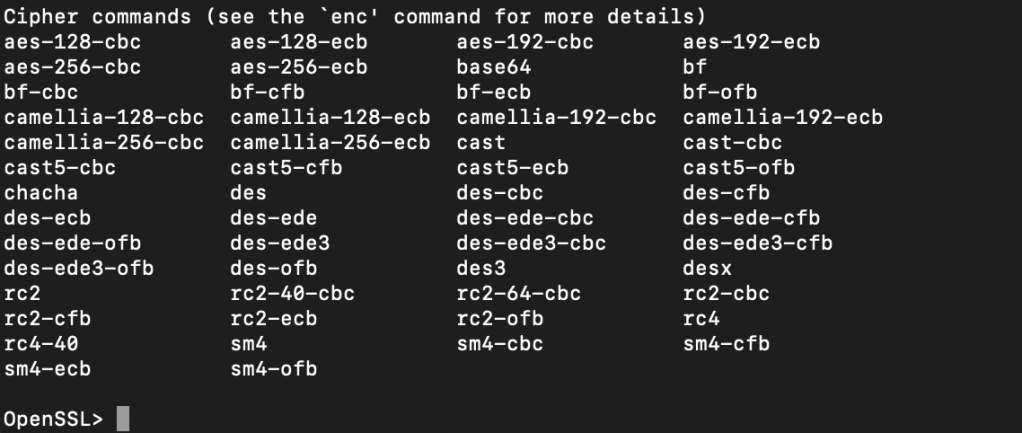
To test the results type “OpenSSL” in the terminal and it should open to a OpenSSL> prompt. Type Help and press enter at that prompt to see a list of OpenSSL commands. Type exit and press enter to leave the OpenSSL session and return to your user prompt.
Now we can install the Web Services for Management (PSWSMan) modules for PowerShell. Again this is to enable PowerShell remoting so that our MacBook can exchange commands with the remote Exchange Online server(s). Open the Terminal and run the following commands, pressing enter after each line. Ignore the REM lines (being with #).
sudo pwsh
#Enter your password when prompted
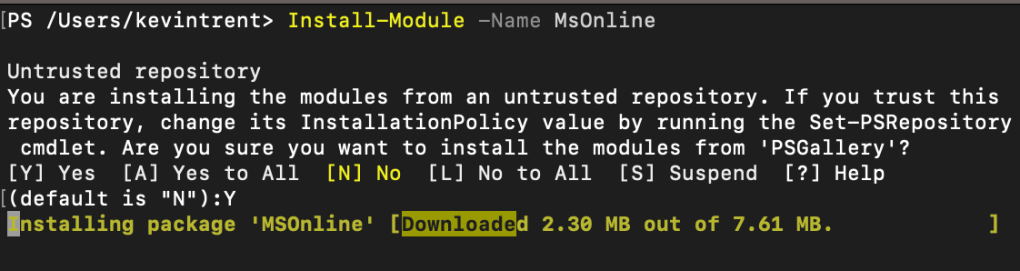
Install-Module -Name PSWSMan
Exit
sudo pwsh
#Enter your password when prompted
Install-WSMan
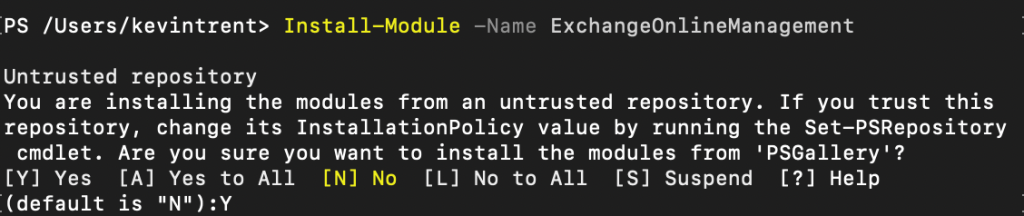
Now we’re ready to install the admin modules themselves. In the same PowerShell console run the line below. Hit Y when prompted.
Install-Module -Name ExchangeOnlineManagement
You can verify that it, or any of the other modules installed with an easy one-liner. Run after each install, change the name to match each time. The command will list information like the version and path so you know it is installed and available.
To manage, report on, and incorporate Azure AD objects in your other code, install the MsOnline module with the line below. Again, you’ll need to enter Y when prompted.
Next up is SharePoint. I admit that I don’t use it for much, but it does come in handy for migrations. You know the drill, the line is below.
There are a few more modules available but these are the ones I use enough to warrant pre-installing them. You see how easy it is to add more on-demand. Any that you install will need to be updated to function optimally, that process is out scope for this post but generally the command Upgrade-Module -Name ***** does the job. For information about maintenance and tips on how to use the modules you’ve just installed, see the source documents from the vendors below.
MacBooks are gaining lots of ground in business deployments. Now that mainstream workers are using them as their only computer, providing support requires a deeper understanding of Apple’s products. I need to install obscure software, control them en masse, connect them to various peripheral devices, and troubleshoot advanced issues quickly and effciently.
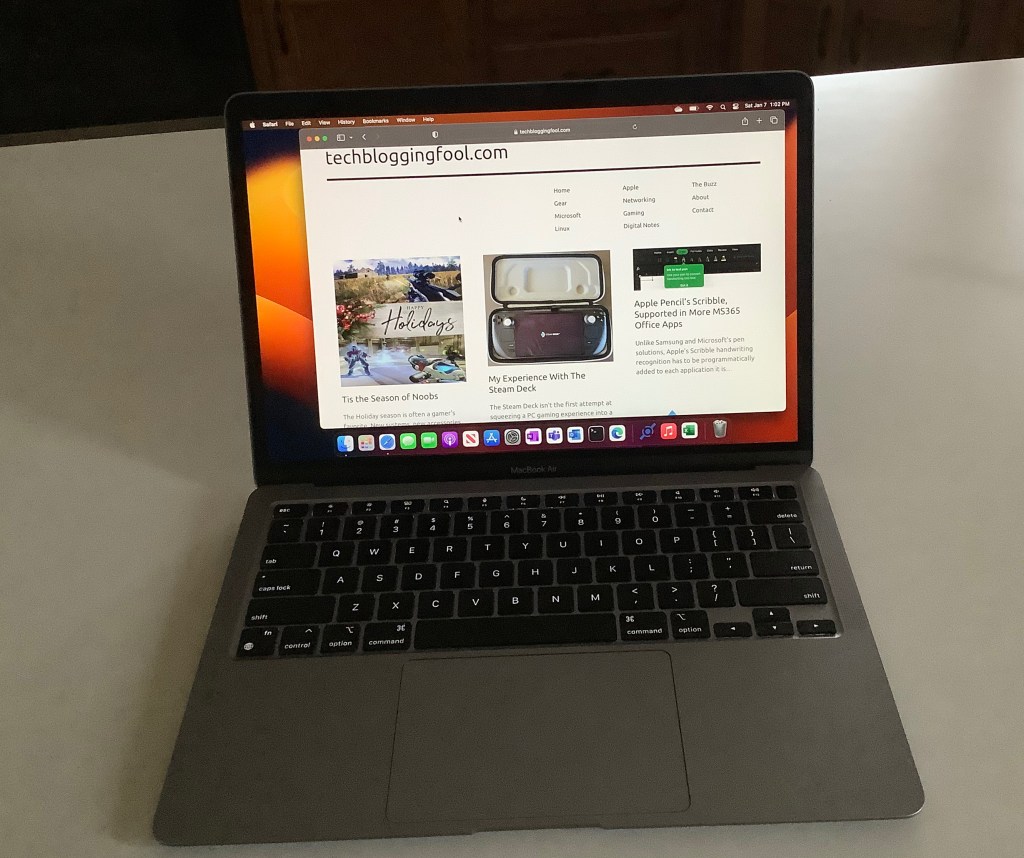
In my opinion, there’s no better way to learn a system, than by using it everyday. I decided to take advantage of the holiday shopping season to purchase a M1 MacBook Air from BestBuy. At $799 it was the least expensive way to get an Apple silicon based computer. $200 off the normal bill.
I’ve had the unit for a few weeks. I am thoroughly impressed. The fit and finish of the hardware is fantastic and the operating system has facilitated easy adoption. I purchased it intending to use it primarily on my lap. The size and weight of the Air make it ideal for that role.
The retina screen looks just as phenomenal on my new laptop as it is does on an iPhone. Bright, clear, and crisp are words that come to mind. The text is so razor sharp that it seems to defy the abilities of a screen with these specs. It almost appears to float above the background of this post as I type.
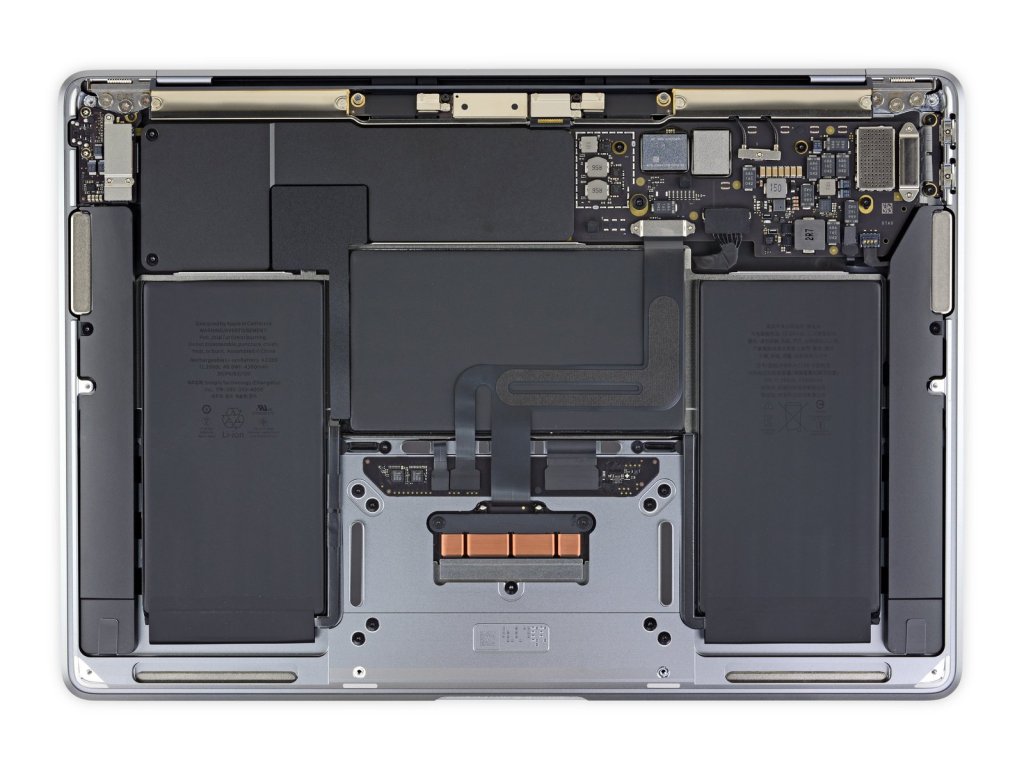
The laptop is totally silent. There are no cooling fans in an M1 Air. I cannot over exaggerate how amazing of a feat this really is. Previous fan-less options traded performance for silence. The Air doesn’t make similar concessions, it runs at impressive speed without overheating.
The battery life is astonishing. I have only charged up twice in the last 8 days and I’ve been using it pretty hard. I’m half convinced there’s some type of Sci-Fi space generator hidden inside. There aren’t many systems that come close to matching the 14 plus hours of runtime that the M1 air is capable of.
Thanks to iFixit.com we can see the internal design is as fantastic as the outside, there isn’t a cooling fan in sight.
Switching between platforms has never been easier, there’s no technical skill involved. Most of it comes down to knowing where your stuff is. All of my data is in the cloud and remains fully usable by all of my computers. I’ve just added another one to the collection, lol. The most tedious task was having to look up a ton of usernames and passwords.
It took me about four hours to get the laptop configured to be my main computer which is pretty average for setting up one of my systems. The most difficult install was the driver/control software for my Logitech MX Anywhere 2S mouse. It took a surprising amount of effort to get my forward and back buttons working properly. I got there eventually, but I’m still not exactly sure how.
My work life requires living in Microsoft’s world no matter whose hardware I’m riding on. To that end, installing the Edge browser was a good move. Microsoft Office and Onedrive were next. I also installed Visual Studio Code and the PowerShell extension for it. All of which already had Apple Silicon compatible editions ready to go.
I was able to easily find the apps, or equivalents for all of the software that I use. All but one program worked natively with the M1’s ARM based architecture. Rosetta mark 2 installed automatically when the app that didn’t required translation from the Intel Mac to the Apple Mac. The Rosetta utility worked perfectly for it.
Microsoft and Other Vendors make it easy to work from a MacBook
Tip: I noticed that some of the software packages would only install if I right-clicked on them and used the Open With option to start the installer.
Apple’s computers are generally not considered gaming machines. So, I was pleasantly surprised at the number of familiar titles I found in Apple’s on-line store. Most iPad software will also install and run on the M1 and M2 MacBooks, and that includes some games.
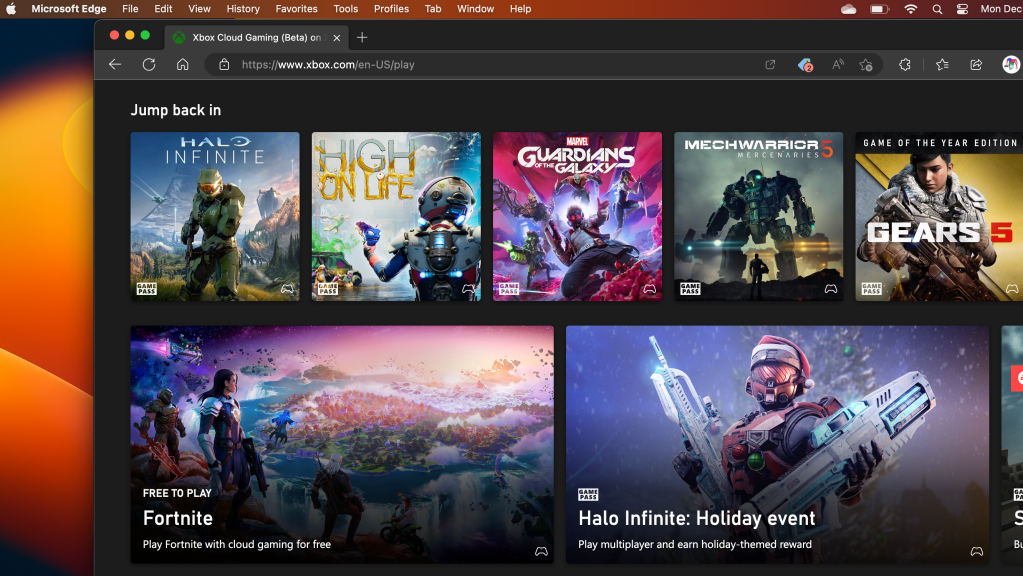
I used the “Install App” feature of Microsoft’s Edge browser to “install” my GamePass Ultimate Subscription as an app. Saving my creds and creating a shortcut makes starting up a game a seamless experience. I also found Steam Link in the App Store which let me stream some of my favorites from my Gaming PC.
Xbox GamePass Ultimate is My Favorite Subscription Service
I expected the learning curve to be steepest while configuring the operating system and software, but that isn’t what threw me for a loop. The adoption challenges have come from the little things. A good example; screen snipping is built-in to both operating systems but activated with a slightly different set of key presses in each.
One of the most troublesome changes has been the lack of interoperability between the new laptop and my phone. I did not realize how fantastic Windows Phone Link really is, or how much I used it until it was no longer available. I know that if I swap to an iPhone I could get the integration features back.
Should my computer manufacturer choose my phone for me? I’m not saying it will never happen but, Apple doesn’t make a mobile with an expandable screen. I did setup a 5th gen iPad mini to experience the tight integration Apple is famous for. I really like the sidecar function.
I have enjoyed my re-introduction to Apple computers. The MacBook Air is perfect for working on the couch and taking on the go. It makes me wonder what the M2 MacBook Pro must be capable of….