Combine XREAL Air Glasses and the XREAL Beam for Makeshift Drone Goggles

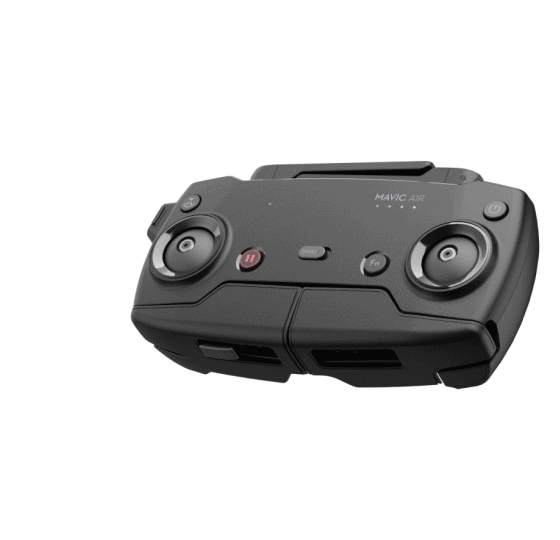
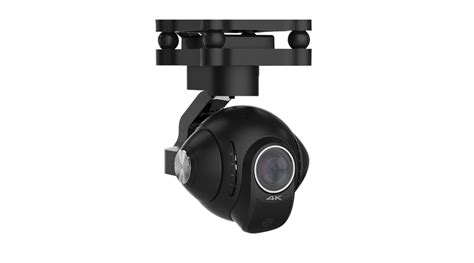
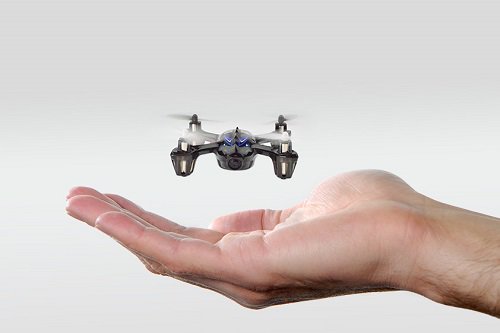
I’ve had a DJI Mavic Air for years. I still get the little craft out from time to time. It’s fun to fly, and the AI keeps my rusty piloting skills from reeking too much havoc when I do.

The Mavic Air is an older drone but is still viable with a 4k camera and its 3-axis gimble.

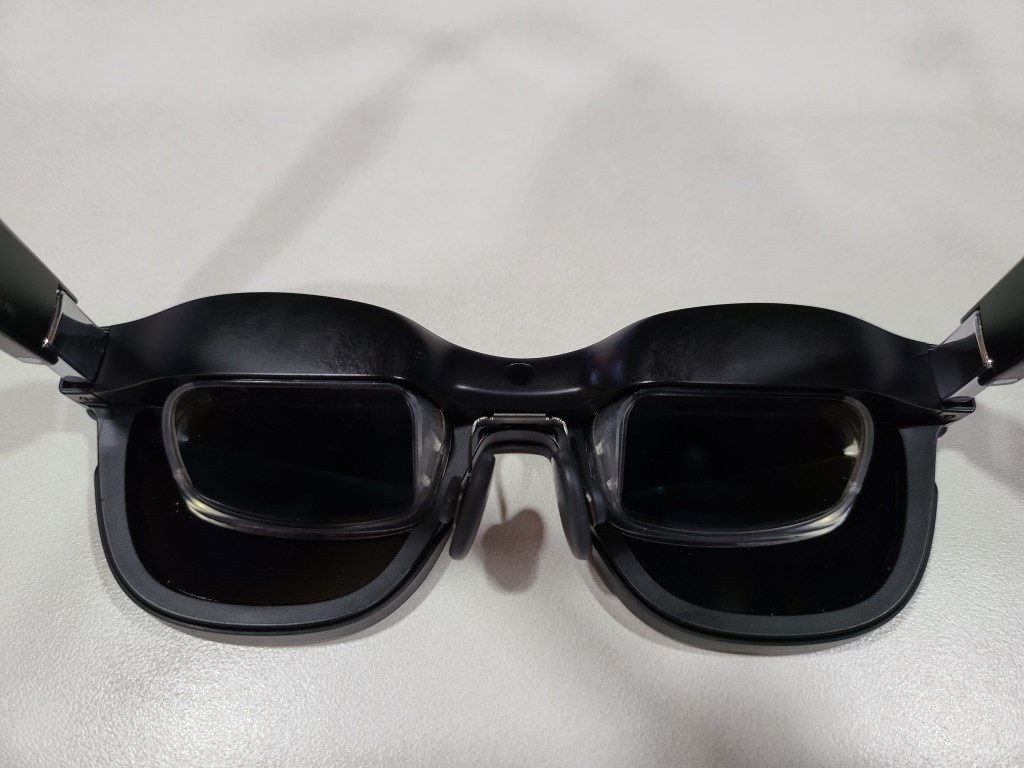
I also have the first generation of XREAL’S AIR glasses. Another gadget I’ve gotten a lot of use out of. I started working on using them as first-person pilot goggles the day I unboxed them.  The challenge has been that both my drone’s remote and the XREAL Air glasses need to connect to my phone via USB-C. Like most phones, mine only has one port.

I prefer AR glasses over external monitors for getting extra screen real-estate when I need it.

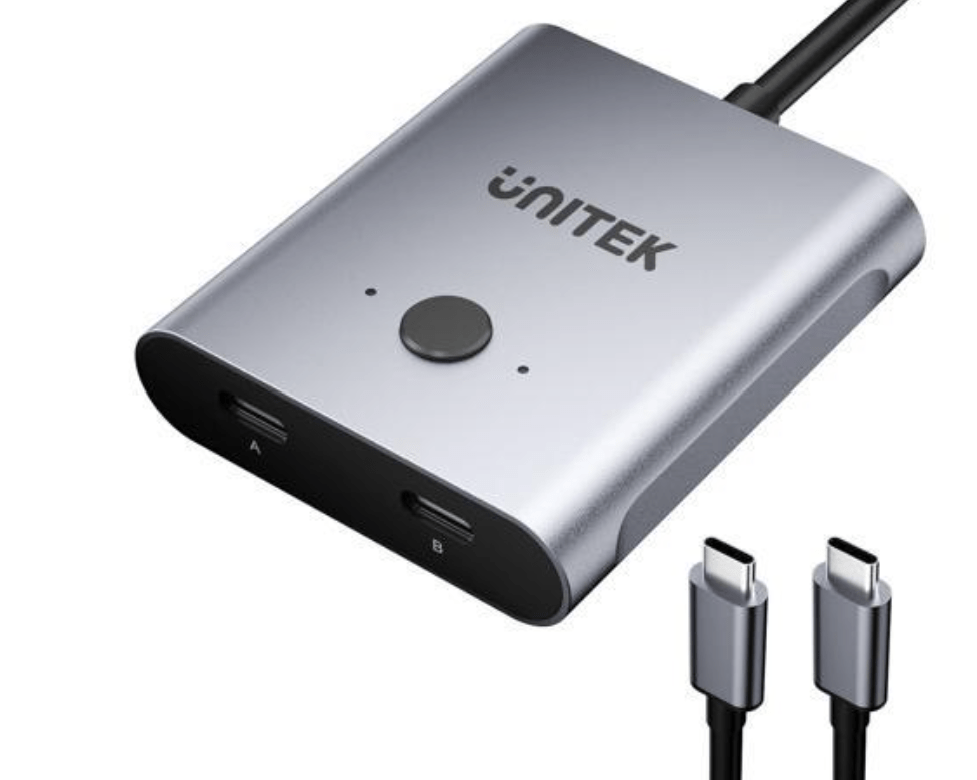
There are such things as USB-C splitters. Apparently, it should be technically possible to split the USB-C port with the correct cables and adapters.  All of the adapters I found online were for power on one side and signal on the other. Or they were true splitters like the one below in which only one connection could be active at a time. The goggles idea would need both power and signal on both channels to work simeltaneously. If you know of something that works, please tell us in the comment section.

I tried several USB-C “Splitters” but was unable to get any of them to work.

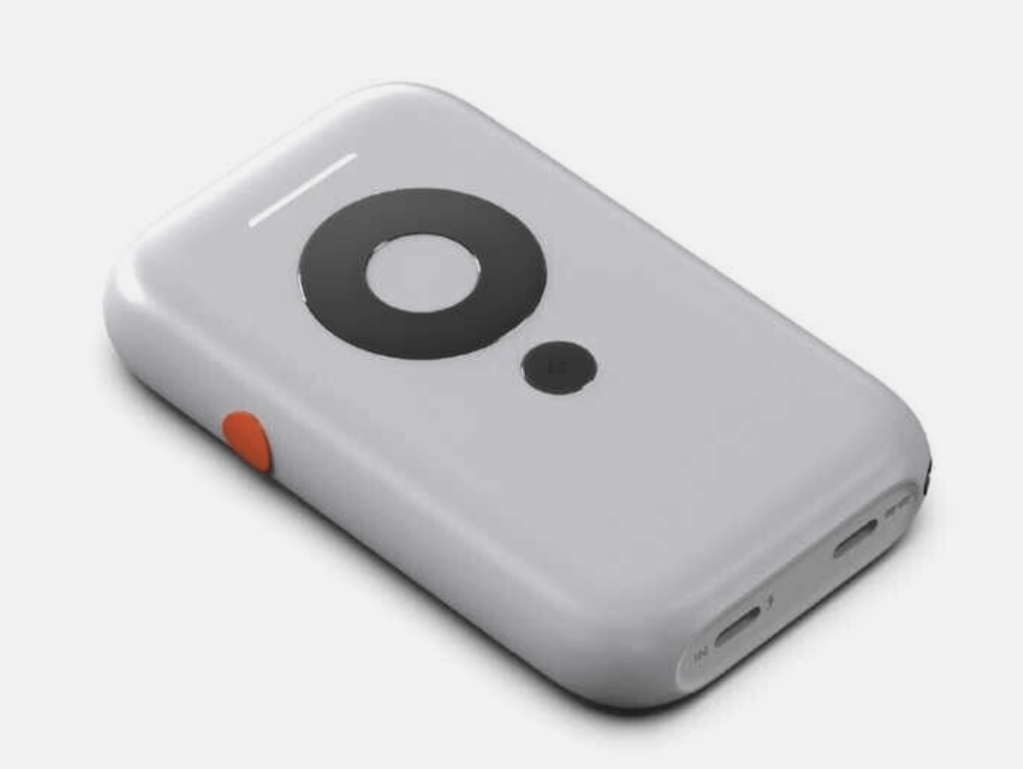
Enter the XREAL BEAM. Just when I was about to give up and order an official pair of DJI goggles, XREAL releases an affordable option. The Beam is a small device that acts as a wireless bridge between the AIR glasses and other devices that can cast their screens. 

You just cast your screen to the Beam in the same way you might cast to a Chromecast from Android or to your Apple TV from your iPhone. The screen or app is then displayed in the glasses. It has a battery that can power the glasses and the Beam itself for a couple of hours. The Beam device is doing quite a bit of the heavy lifting when it comes to processing the wireless video.

The Xreal Beam is a Wi-Fi screen mirroring companion device for the AIR/2 glasses.

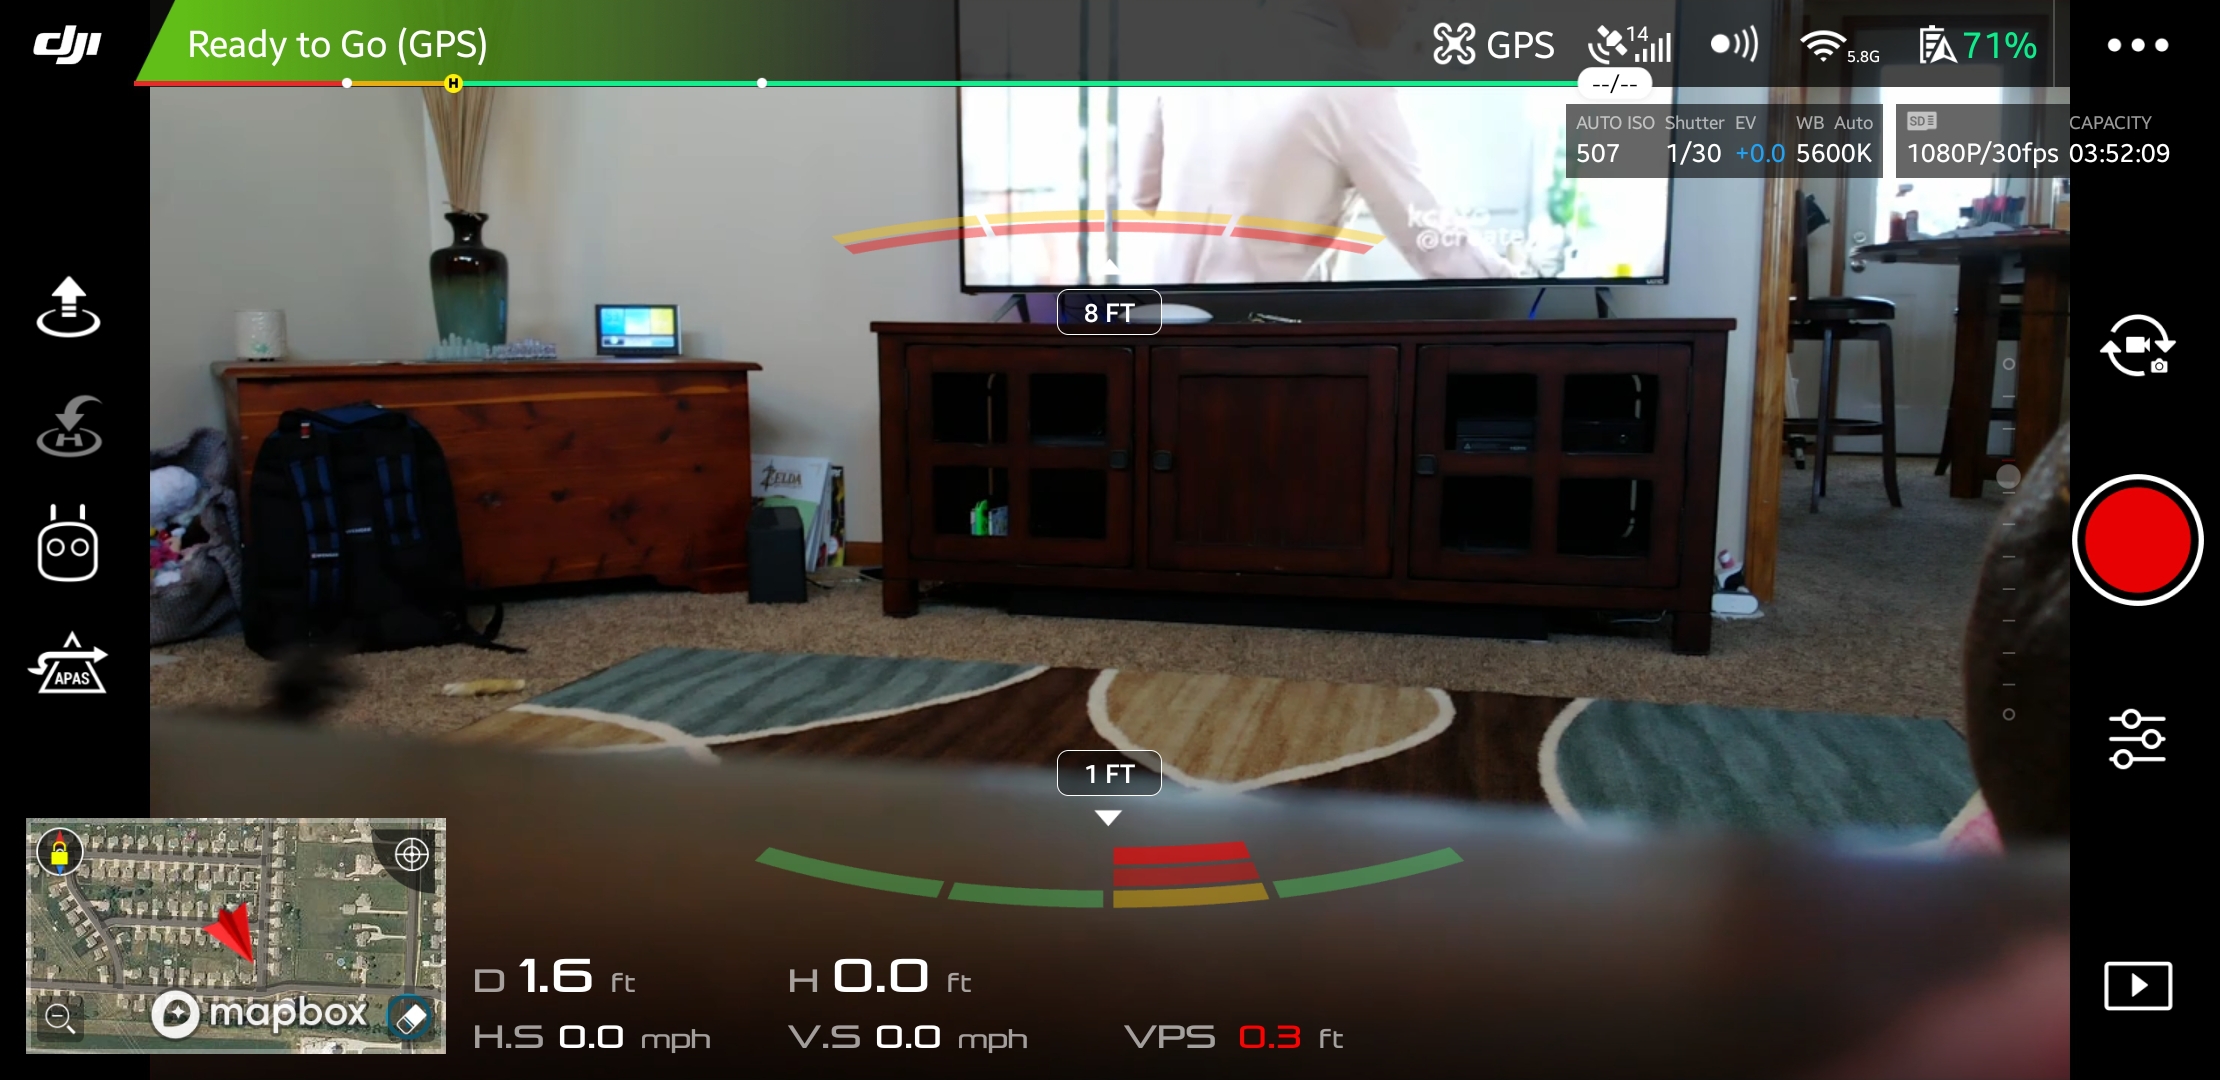
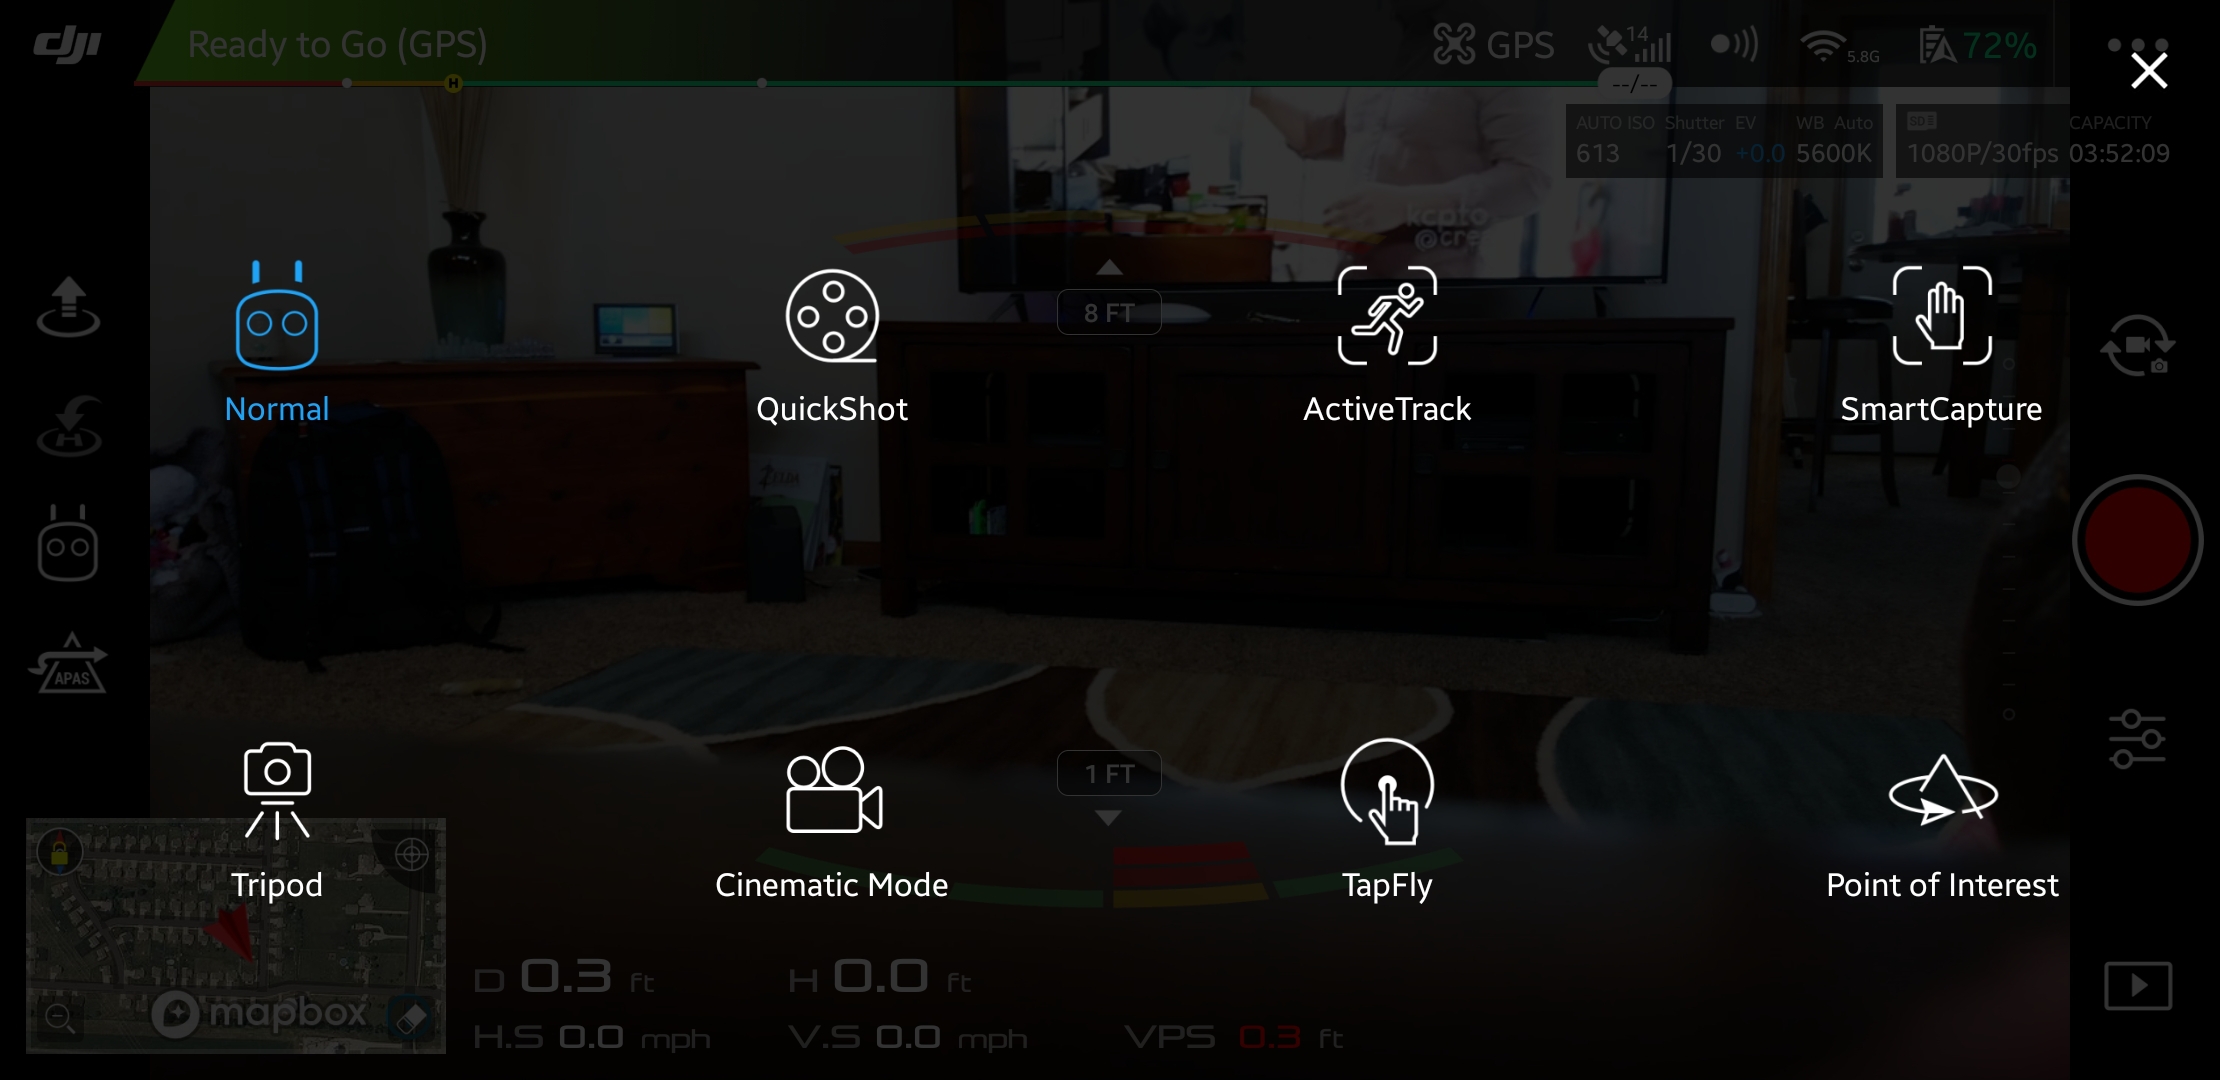
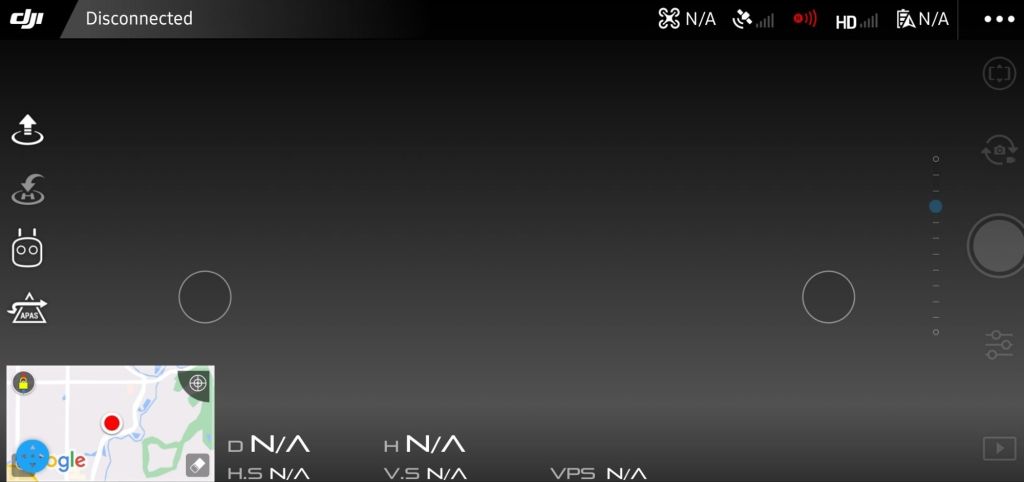
It was all I needed to realize the first-person drone pilot experience. I connected my phone to the drone’s remote as normal. Then, I put on the AIR glasses and connected them to the Beam with their USB-C cable. I opened the DJI 4 Go software and logged in to the drone from my phone after I mounted it in the remote’s clamp, then used Smart View on my Samsung phone to cast its screen to the Beam.

The resulting experience was fantastic. The DJI app is rendered in near life-size on the AIR’s OLED display. The screen inside the glasses looks like a giant monitor because of the proximity to your eyeballs. The app shows the drone’s first-person view that is overlaid with pilot info. The heading, speed, altitude, GPS location, and object detection are all visible and easy to read because they are huge.

Casting the app to the Beam is almost perfect.

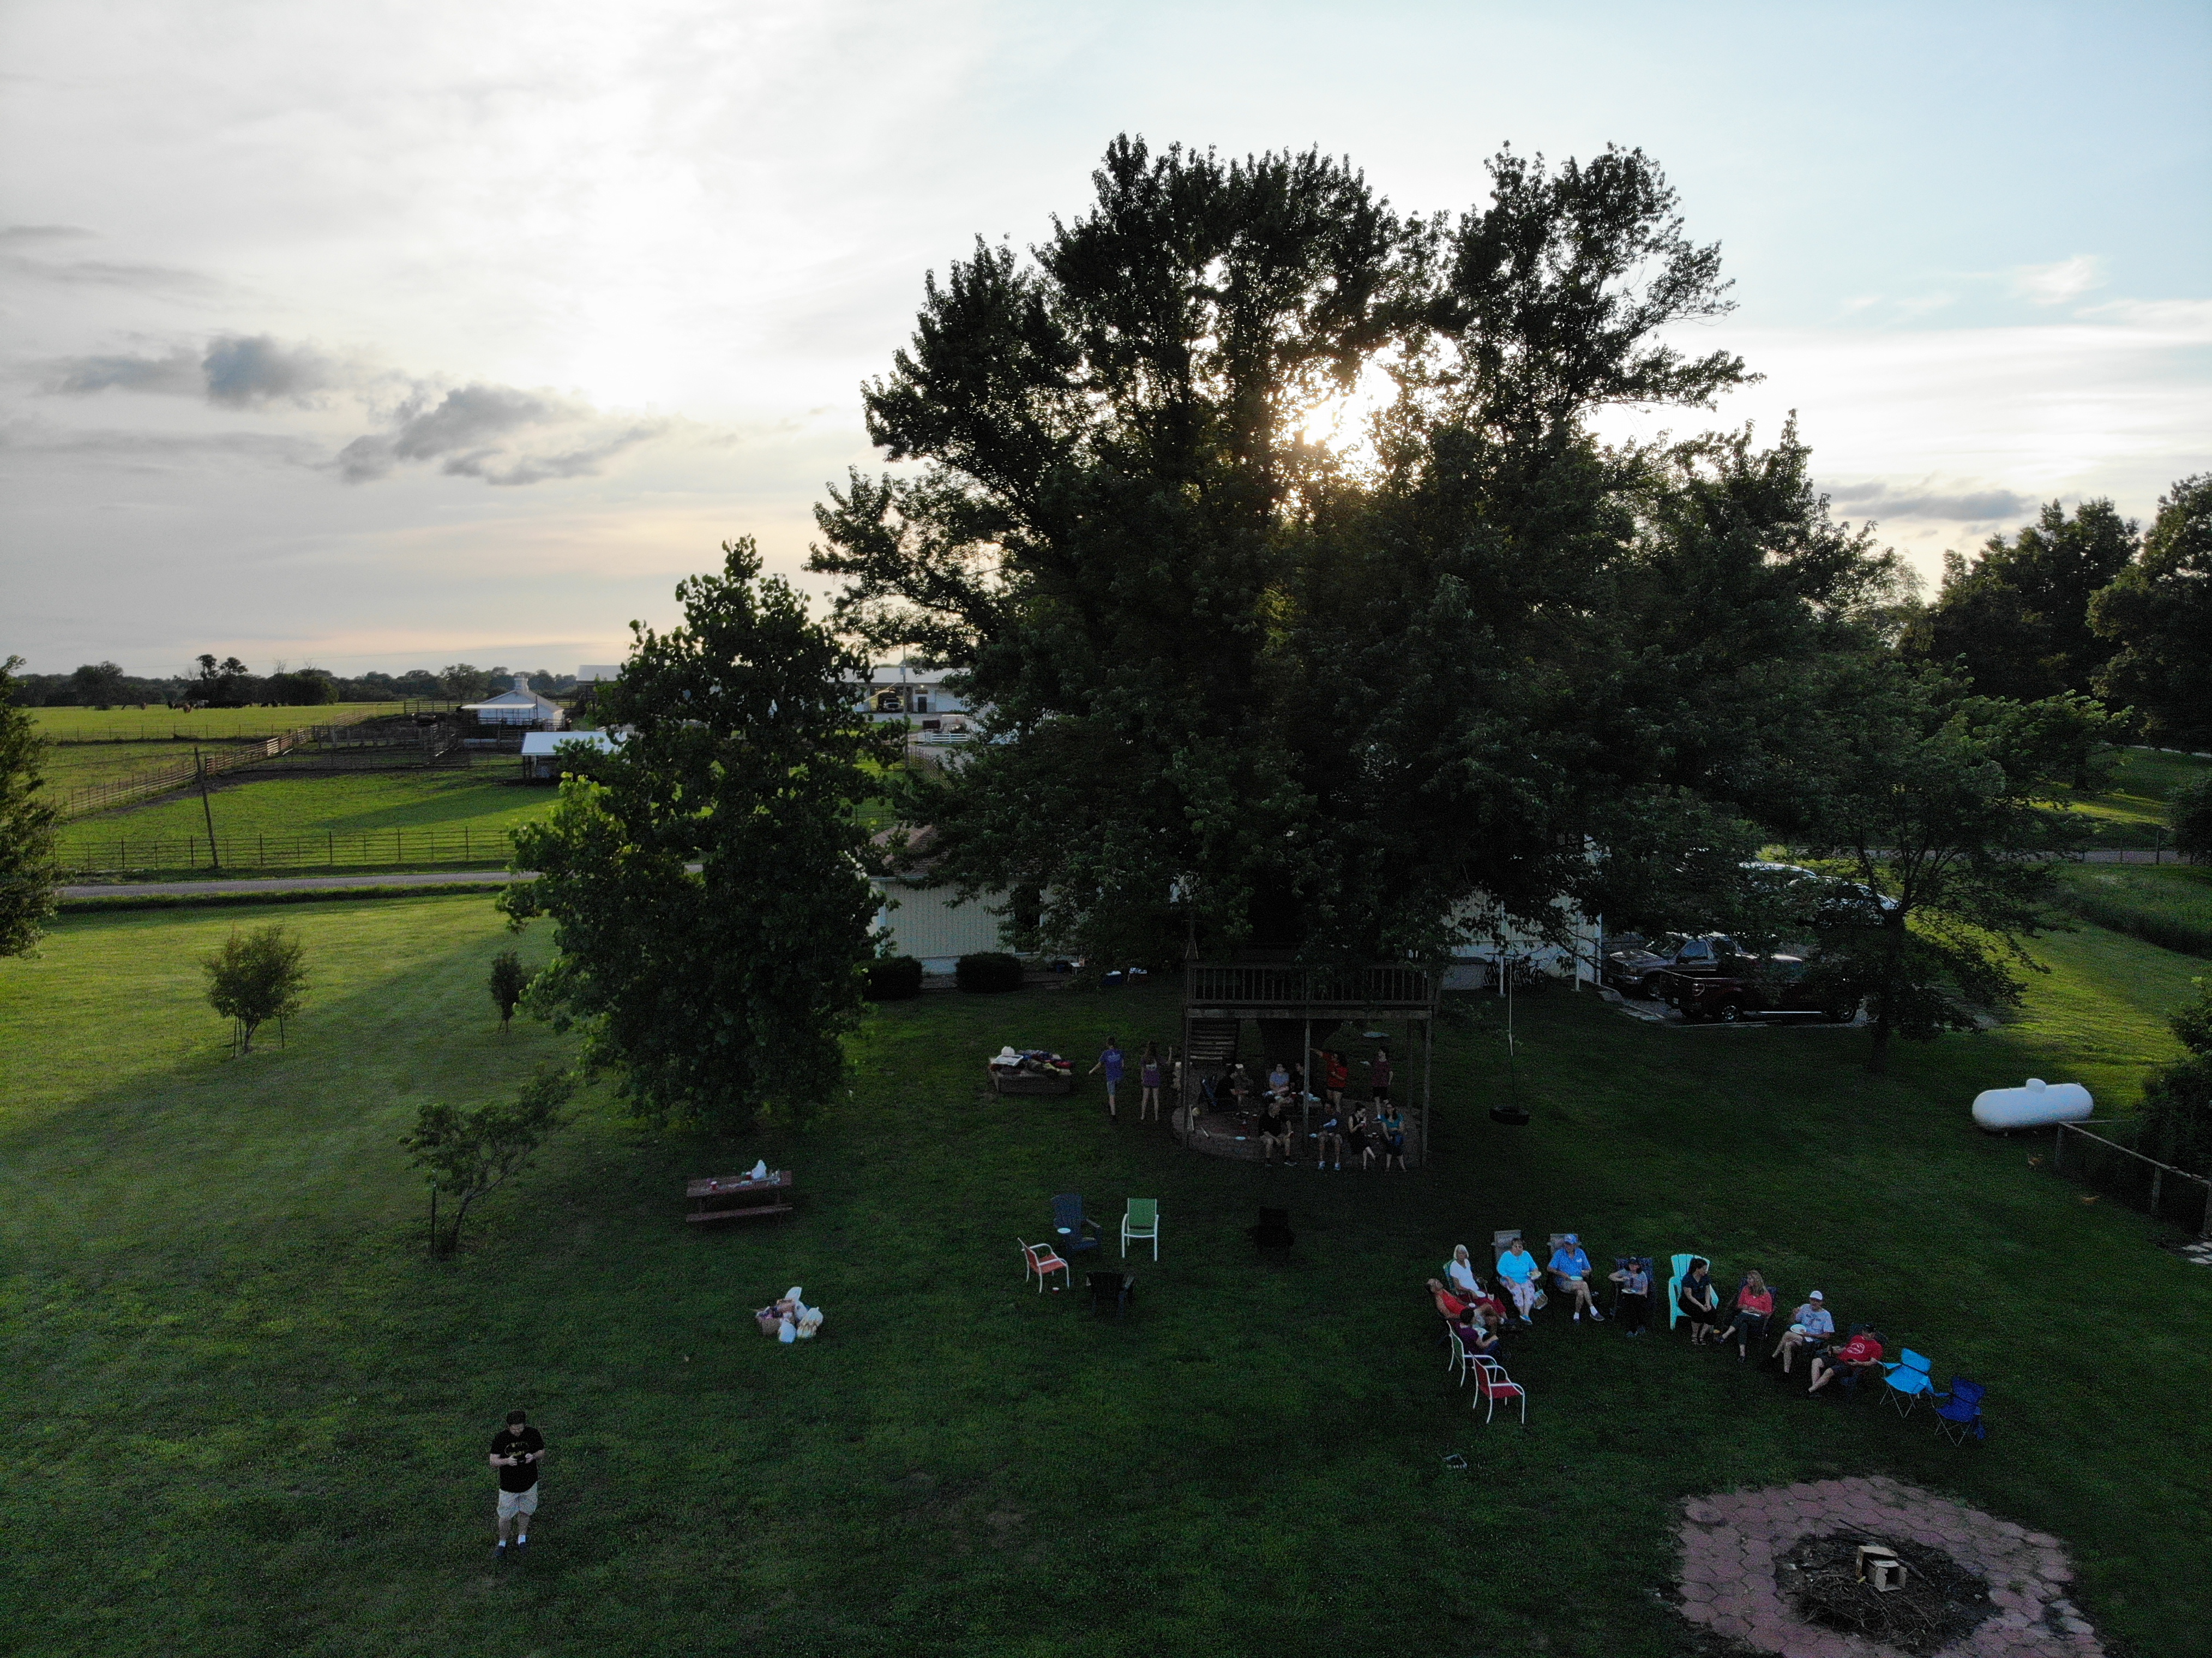
Flying in FPS is so much easier for my video game trained brain than ground piloting is. The thing is, though, when I remove the AIR’s sunshields, they become transparent.  This allows me to see both the FPS view and the drone in reality simultaneously. As far as I know, this feature is unique to a setup like mine.

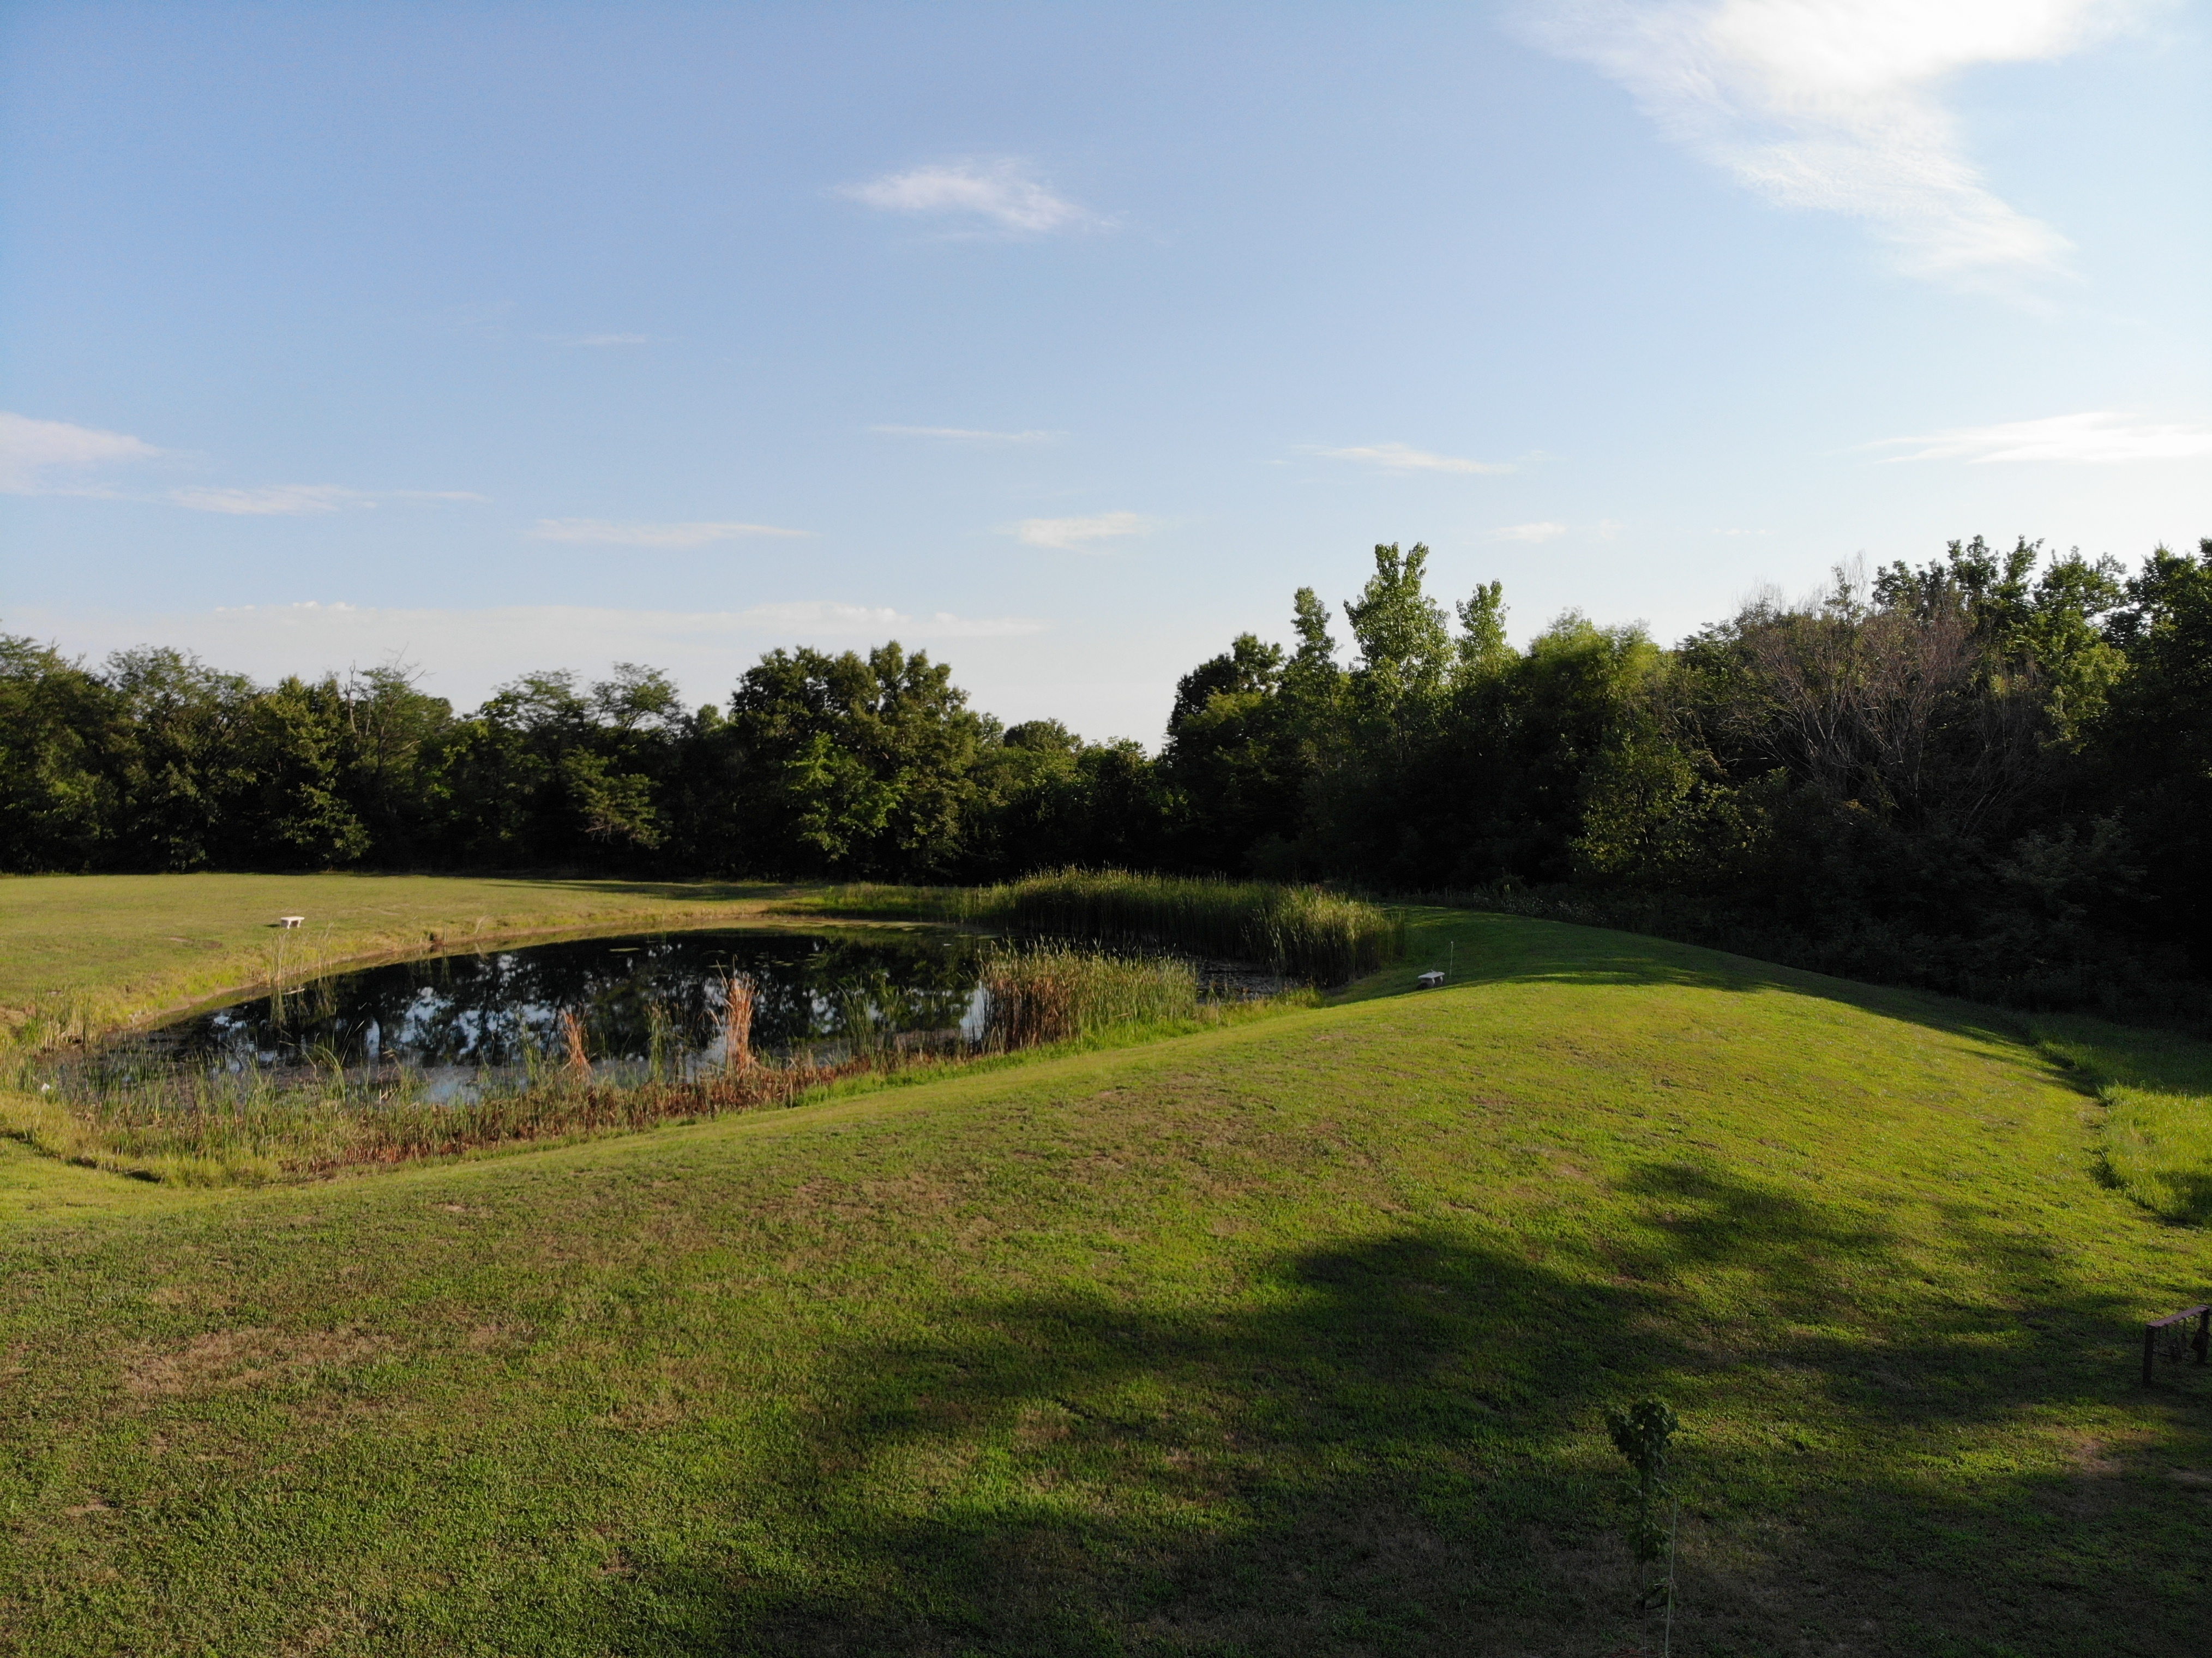
I was at a farm when I tested using the AIR and Beam in combination with my drone and phone. The signals involved are the 2.4 and 5 Ghz Wi-Fi bands for the most part. I was able to pilot the drone about one hundred meters away before the video signal dropped.

The video in the glasses was fast, clear, and smooth enough that I felt comfortable going into Sport mode and pushing the little tone to its max speed (40/64). I don’t think any DRL pilots are going to be ditching their goggle setups for this one anytime soon, but these things are awesome for an amature. Especially if you already have most of the equipment on hand.

A Year with the DJI Mavic Air

I began my journey with quadcopters several years ago. I started out with in-expensive micro drones and gradually progressed up to a DJI Mavic Air. I’m an accomplished pilot now and have captured thousands of pictures and countless hours of video. You can read about my experience in a previous post here.

I’ve had the Mavic Air for a year and I’m more impressed with it now, than I was the day I bought it. One of the most surprising aspects of the powerful little flyer is how durable it is. Even after a year of being hauled around in backpacks, laptop bags, car trunks and plane luggage, there isn’t a mark on it. I’m still using the original props! I can ‘t think of any other flying vehicle that I’ve owned that didn’t need at least, new props a few weeks or months in.

There have been several major software updates for the Mavic Air since I unboxed it. The updates can catch you off guard; you’ll boot up to catch some video of your dog only to be hit with the firmware required message. Thankfully they’ve added a feature to update later. The phone app can hang on the unzipping of files during big updates, but you just need to close and restart it. The software has been noticeably improved. The user interface has remained largely the same but multiple bugs have been corrected. I can’t remember the last time the app froze or crashed during flight, which was a frequent occurrence at the start.

The AI has been in school for the last few months, it now flies the drone better than I do. Object avoidance, pre-programmed dramatic shots, follow me, return to home, and TapFly are all improved. My use of the quadcopter has evolved from that of a flying toy to a camera platform, so I find myself using these automated functions much more frequently.

You might be wondering what a drone could be used for besides taking pictures. They’re surprisingly versatile machines; here are a few of the cases I’ve encountered so far:

  • Lost pet locator
  • Sky surveys of friend’s homes and property
  • Examining roofs for hail damage and lost toys
  • Chasing off various unwanted creatures: stray dogs & cats, racoons, opossums, bats, it’s a long list
  • Getting close to dangerous things: Fire, Fireworks, Wildlife, Guns, Bees, Wasps, etc. the FPS view makes you feel like you’re there in the action

While looking back through the photos and videos for this article, I can’t help but smile. I’ve got some fantastic shots that would be impossible to get without the little machine. Quadcopters are not just for aerial pictures and videos. They’re great for anywhere that a human doesn’t easily fit, or places that would be too dangerous to be in, they make great tripods too.

Now that I’ve had a great camera drone for a year, I can’t imagine not having one. Especially a compact unit like the Mavic Air. I carry it with me almost everywhere since it folds up and fits in my laptop bag. I was a little skeptical about how much I would use it when I first purchased it and was concerned that it would be a waste of a considerable amount of money. Luckily, it turns out that my instinct to get one was justified. I consider it to be one of my favorite gadgets and look forward to all the things I’ll be doing with it in the future.

My journey from drone zero to hero with the DJI Mavic Air. Part 2.

To get stellar shots with a camera drone, it needs to have a gimbal mount. Preferably a three-axis gimbal. This technical marvel will allow your camera to stay steady and level while the drone moves around it. It’s a miniature version of the device you see mounted on the nose of news choppers and attached to Hollywood camera rigs. They come in various versions and styles; some are part of the drone itself and others can be bolted on to any vehicle powerful enough to carry them. My research led me to believe that the bolt on types were more flexible but required more adjustment to get the best results. I have little enough free time already, so I decided to go with a quadcopter that included a built-in gimbal.

gimbal_camera.jpg

Deciding on a built-in gimbal reduced my choices in hardware. There were a few other requirements for my flying camera purchase that cut the list down further. I wanted a true “drone” this time, something that had brains of its own. Features like return to home, follow me, and GPS location were important for my plans. I also needed portability. Monster octocopters with full DSLR rigs are cool, but I wanted something that could easily fit in a backpack or laptop bag.  As always, I did tons of research online and talked to a lot of people, including my brother who is an avid quadcopter pilot. In the end, I narrowed my list down to just two choices.

I’ve had the DJI Mavic Air for almost three months now. I picked it because DJI has an excellent reputation and offers an accident replacement program similar to Apple Care. I was also very impressed by its automatic flight abilities. This drone has followed me down multiple trails in the woods weaving in and out of the trees in an eerie “the robots are taking over” manner. It has sensors on the front, back, and bottom that let it hug terrain and navigate nearly any path. It’s truly amazing to see it fly itself. It also has touch and go flight, touch a spot on your screen and it will go there all by itself.

DJI makes some of the best Gimbals in the business and the one on the Mavic Air is no exception. Pictures and video look like they were taken with a camera on a tripod even when the Mavic is flying at over forty miles per hour.

I ended up getting what DJI refers to as the “Fly More” package. It comes with the drone, controller, 2 extra batteries, a multi-battery charger, extra props, and a very nice carrying case. I’ve been happy with my decision, if you go with this drone you will almost certainly want more than one battery and this package is the least expensive way to get them right now. A single battery lasts somewhere between 15 and 20 minutes in real-world conditions, depending on how fast you are flying and how hard the wind is blowing.

I’ve had the Mavic out in 12 mile per hour winds and it stays steady as a rock. Rather than me tilting into the wind, the drone’s AI automatically does it. It even auto-brakes. As you level off the pitch during a high-speed run, it automatically tilts in the opposite direction until it comes to a hover all on its own. Where was this tech back in part 1 when I was bouncing my micro-drone off the walls?

created by dji camera

Flying the Mavic compared to the micro-drone I started out with is like comparing a Yugo to a BMW.  I will say that before the Mavic, the piloting was all me. Avoiding the wall, my dog, and my wife’s face while screaming down the hallway at what seemed like mach two, was all my skill. Much like modern supercars, the Mavic can do the same with or without my input. It’s onboard AI is a better pilot than I am, but that doesn’t stop me from shifting the the switch on the remote into sport mode and fully controlling it by myself.

The Mavic Air isn’t the fastest drone on the market but something this size traveling at forty miles per hour is astonishingly quick. You will want to leave the drone in beginner mode which limits the speed and distance the vehicle can travel from the controller until you get the hang of flying. I also suggest turning on the AVS option which is the vision based obstacle avoidance.  In the video below you can see this system keeping me from hitting the trees. Watch it work out how to exit the dry creek bed and make its way to the road I touched on the map.

Now you know what drone I chose and why. At this price point, it met all my requirements and exceeded my expecations. The software, camera, and drone itself are all impressive. Watch for the next post in this series in which I’ll do a full review of the Mavic Air including shots of its software, features that aren’t commonly discussed, and more. I’ll finish the series with an article discussing useful things you can do with a drone that you might not have thought of.

My journey from drone zero to hero with the DJI Mavic Air. Part 1.

Growing up I really liked remote control vehicles and toys. They’re what I asked for almost every Christmas and I was a regular pest at the local hobby store. As a young adult, I got more serious about the pastime and ended up with several gas-powered and electric models. I’ve always been interested in RC flying too, but the expense and learning curve of scale model planes and helicopters have kept me on the ground until recently.

I realize that gyro helicopters have been on the market for a long time. I’ve had several of them. In my opinion they have a few drawbacks. Chief among them being no good way to change pitch to generate thrust. My dual rotor HC “swims” through the air by wiggling its tail back and forth and barley achieves walking speed. Some models have a tail rotor that can lift the rear to change pitch, but I found them awkward to pilot and only marginally effective. Scale RC helicopters with a full collective and tail-rotor are fairly expensive and have a massive learning curve to fully master. I watched my novice neighbor shatter his bird into a thousand pieces on our street after a botched take-off; even with the safety spokes attached.

gyrocopter

Quadcopters and multi-roter drones are the great equalizer amongst flying vehicles. They typically have a gyroscope that keeps them balanced which makes them easier to fly. They change direction by varying the speed of their rotors rather than by changing their wing shape like a traditional plane or helicopter. This results in more precise control and the ability to fly in any direction equally well.

When I started out with quadcopters, I knew that I eventually wanted to do areal photography and videography. I didn’t want to risk crashing an expensive camera drone right out of the gate so, I decided to learn in stages. First I purchased an in-expensive indoor micro drone for less than $15.00 .This little rocket can cover the entire length of my home in just a few seconds. In addition, it can do flips, impossible turns, and other impressive maneuvers that take a lot of practice to get the hang of. They really are quite fun to buzz around the house with, most can stay in the air for five to ten minutes on a charge and include a simple controller.

Minidrone

At first, piloting a quadcopter was difficult. The smallest input on the controls would lead to the little machine bouncing off a wall or careening to the floor at break-neck speed. I learned to hold the sticks between my thumb and index fingers rather than with just my thumbs. I also discovered that throttle control is paramount to keeping your vehicle in the air. In all, it took somewhere around twenty hours of practice before I could fly around my home with confidence.

After forty hours and a bag of replacement props, I could do flips, fly in and out of door-ways at full speed, circle the ceiling fan, and buzz my pets like a fighter pilot on a bombing run. Speaking of pets, if you have any, you’re going to want to keep a pair of tweezers handy. Almost every time that you crash, you’ll need to pull hair or carpet fibers off of the prop shafts before you can fly again.

Once I had mastered the micro-drone, I upgraded to a slighty larger and more powerful indoor/outdoor model that included a camera. At less than $100.00 it wasn’t overly expensive but it was faster and therefore more difficult to control. I could pilot it indoors right out of the box, but the first time I took it out to my backyard the wind blew it over my neighbors fence right after takeoff.

medium_drone
I’m pretty sure this won’t handle the mountains shown on the phone’s screen.

It turns out that balancing against the wind is a skill unto itself. You learn to tilt the drone into the wind and then back off when it lulls. It requires quickly reacting to changes in the machine’s pitch that you know you didn’t initiate. React too harshly on the sticks and the over-correction will cause a crash or mess up your shot. The upside is that I got to know my neighbors better from having to knock on their doors to retrieve my toy from their yards.

After I was comfortable flying in my yard, I began to push the flights higher and faster. It wasn’t long before I could comfortably fly over my whole neighborhood above tree level faster than most kids can ride a bike. The camera worked and it was neat to see the jittering low quality video and grainy pictures. With no gimbal, every twitch in the air resulted in a jerky, out of focus, picture. Still, I could see enough potential to dream of the areal shots I would be getting with my next upgrade.

Eventually, I got too brave and suffered a fly-away. This is when the wind blows your rig so far that you can’t find it. Wind blows different speeds at different altitudes. I was a couple of hundred feet up, trying to get a picture of a small lake, when a gust took hold and carried my baby out of sight. Since it didn’t have a GPS locator I had no chance of finding it. I was ready to upgrade anyway. Or, at least that’s what I told myself. Continue on to part two for the rest of the story.