
Most Exchange administrators have probably experienced the nightmare that is caused when the storage for the transaction logs or a DB runs out of room. By some hidden law of corporate IT the problem will undoubtedly occur just after you fall asleep and right when the CEO is trying to conclude a multimillion dollar transaction that requires a confirmation email. There are plenty of articles out there that will help you get the problem resolved; one of the most common tricks is to run a “fake” backup to truncate the transaction logs and free up some room. Another easy trick is to compress the log drive (an option in Windows Explorer). I’ll trust that you can search for these options and decide whether to use them or not on your own (they both have drawbacks). There are some more advanced ways and I plan on writing about a couple of them in the future.
This post is more about helping you stay out of the “no space” pickle in the first place. In larger organizations Exchange can be spread across multiple servers in multiple sites with multiple storage systems in play. Relying on the storage teams to give you head up is risky. Windows applications that use distributed storage models like Exchange DAGs can be tricky for monitoring tools to cope with. My current employer’s Exchange footprint is a worldwide stretched DAG solution and each location uses different hardware, different storage platforms, etc. I created this report to compensate for what the tools weren’t showing the administrators. We haven’t had a storage problem since.
First we’ll need to get a list of all our Exchange servers, which we can do with Get-ExchangeServer cmdlet. We need the FQDN of each server but if you do Get-ExchangeServer|Select FQDN you will get a list of servers in a column with FQDN at the top and that’s no good for our next command. We just need to expand the column property to remove the column name.
$Servers = Get-ExchangeServer|Select fqdn -ExpandProperty fqdn
Next we’ll run that list of servers though a loop and ask WMI to get the drive information we’re after. If we didn’t do any formatting we’d get back the data in bytes; it isn’t very easy to read that way. We’ll use hash tables to do calculate Gigabytes and percentages.
$report = ForEach ($server in $servers)
{
 Get-WmiObject Win32_Volume -Filter "DriveType = 3" -ComputerName $server|`
 Where-Object {"Label -ne 'System Reserved'"}|Sort-Object Freespace|`
 FT -Property @{Name="Mount Point";Expression={$_.Caption}},`
 @{Name="Capacity(GB)";Expression={[math]::Round(($_.Capacity/1GB),2)}},`
 @{Name="FreeSpace(GB)";Expression={[math]::Round(($_.Freespace/1GB),2)}},`
 @{Name="% Available";Expression={[math]::Round(($_.Freespace/$_.Capacity)`
* 100)}} -GroupBy SystemName -AutoSize
}
I’ve noticed that when running this script that some older version of Powershell on Exchange 2007 / 2010 don’t like the ` marks which just mean to continue to the next line. If this happens to you just remove the backtiks and paste the command in a single line. I only have them here because it looks nicer on the page.
I choose to email the report to all the Exchange Admins as a text attachment because it works on everything; you could easily output it to HTML, Excel, or whatever format you like. To email an attachment you need a file to attach; we’ll use the out-file command to send our $report to a text file.
$report|out-file C:\Path\To\File.txt` Send-MailMessage -SmtpServer nameofyourexchangeserver` -To recipient@mydomain.com -From sender@mydomain.com` -Subject "Exchange Storage Report" -Body "Please see the attached file"` -Attachments C:\path\to\file.txt
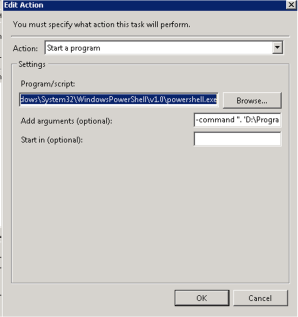
You’ll want to run this from an Exchange server using the task scheduler. This way , the task scheduler will handle authentication , accessing the Exchange Management Shell, and the actual scheduling itself. You can do all of this in PowerShell itself of course, I just find it to be more work that way. Scheduling a task for Exchange is a little different than others. You set the time and credentials as normal but the action is different. You’ll need to specify the path to Powershell and in the arguments call EMS and pass it your script. like this (change the paths to match your environment):
C:\Windows\System32\WindowsPowerShell\v1.0\powershell.exe
-command “. ‘D:\Program Files\Microsoft\Exchange Server\V14\bin\RemoteExchange.ps1’; Connect-ExchangeServer -auto; C:\scripts\Exchange-Storage.ps1”
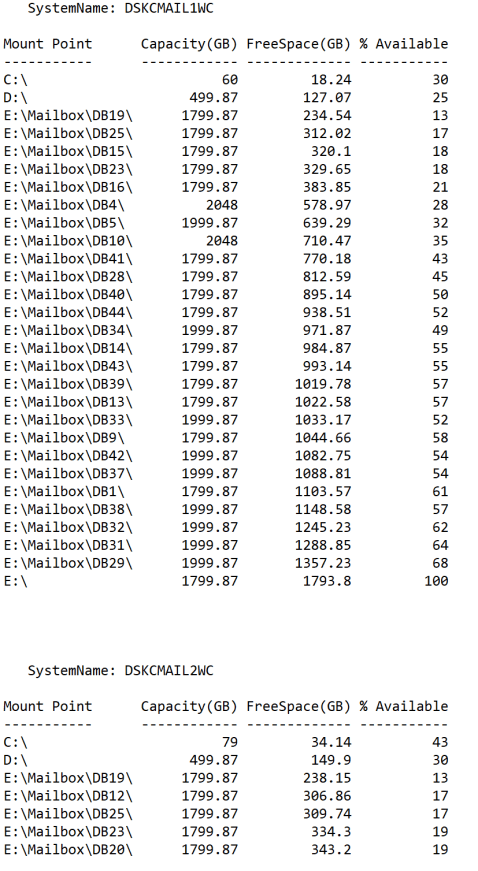
Once you have it all working your report will look like this:

One thought on “PowerShell – Exchange Storage Report”