Invest in the Stock Market with no fees or minimums.

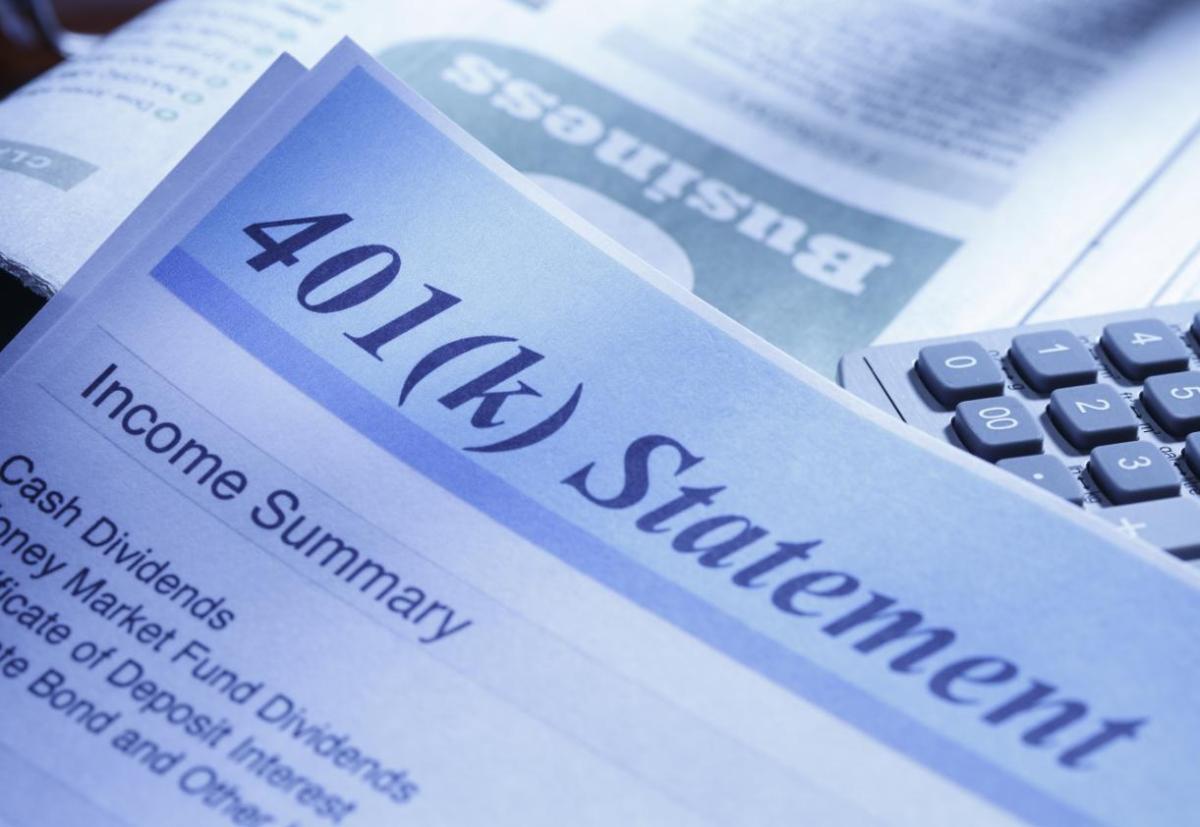
Most of the stocks I have invested in were purchased through my 401K retirement program. These stocks are mananged by a company and my involvement is limited to picking a few options around how agressively I think they should attempt to generate returns for my account. I am by no means a financial expert, I am not being paid to write this article. Following any advice, or using any software mentioned in the post is a choice you are making at your own risk.

401k

A while back I had decided that I wanted to try my hand at the markets. As my readers know, I’m a gamer at heart and what is the stock market if not a giant game? One that risks real capital, but a game none the less.  My knowledge of the markets was pretty limited so I did what I always do, a bunch of research on-line and pestered the people I know for advice. The consensus at the time was that opening an E*TRADE brokerage account was one of the best ways for a novice person to get started trading on their own.

I liked the tools that E*TRADE offered, the app was fairly simple to figure out, and they had some of the lowest fees in the business. Over time I noticed that I mostly bought stocks and then did little with them. I came to the conclusion that I didn’t like the fees I was dinged with every time that I made a transaction. I wanted to learn how the markets worked by experimenting, but those experiments could be costly.

Home_Page

While discussing the situation with a friend, I learned that he had found another option. He told me that the brokerage he used didn’t have transaction fees or account minimums and that he could buy and sell stock for free. If it hadn’t been a person I trusted, I would have suspected that I was being pitched a scam-ball.

Robinhood really does let you trade for free. Mind that you have to purchase the stocks you want to trade.  Except for the first one that is. If you sign up for an account via a referral from an existing customer you’ll get a free stock. It comes in the from of a game and you have a chance out getting a premium share like Apple. If only you knew someone who would send you an invitation…

Top_Movers

Setting up an account couldn’t be easier. Download the app from the Play store, App store, or logon to the web-site and click or tap the option to create a new account. If you want to take advantage of the free referral stock, you’ll need to use the link you were sent to start the account. Once you get started you’ll be asked for your financial information: Name, SS#, Phone Number, Address, Employer, Marital Status, etc., you’ll also have to tie the Robinhood account to your bank. After you give them the routing information for your account they will verify it by making  a couple of small deposits. You won’t get your free stock until all of this has been completed.

private-data

While helping a buddy setup his account, he mentioned that he was concerned about Robinhood asking for all of this private information. Buying and selling stocks is a taxable form of income. When you generate a profit or receive dividends, your broker will report it to the IRS so they need the same information your employer does. You link your Robinhood and Bank accounts in order to enable fast financial transactions. If Netflix is low and you want to buy a few shares you wouldn’t want to have to wait for a check to clear before the funds were available in your account. Linking anything to your bank account involves taking some risk but it’s no different from the automatic payments in use by many entities today.

Once your account has been created and your bank account verified (took two hours for me), you’ll be ready to rock and roll. I approach this form of investing in the stock market the same way I do playing a slot machine at my favorite casino. I never invest more than I can afford to lose because loss is inevitable. I never use credit to purchase stocks because paying interest on losses is painful. I also never trade while drinking.

Slots

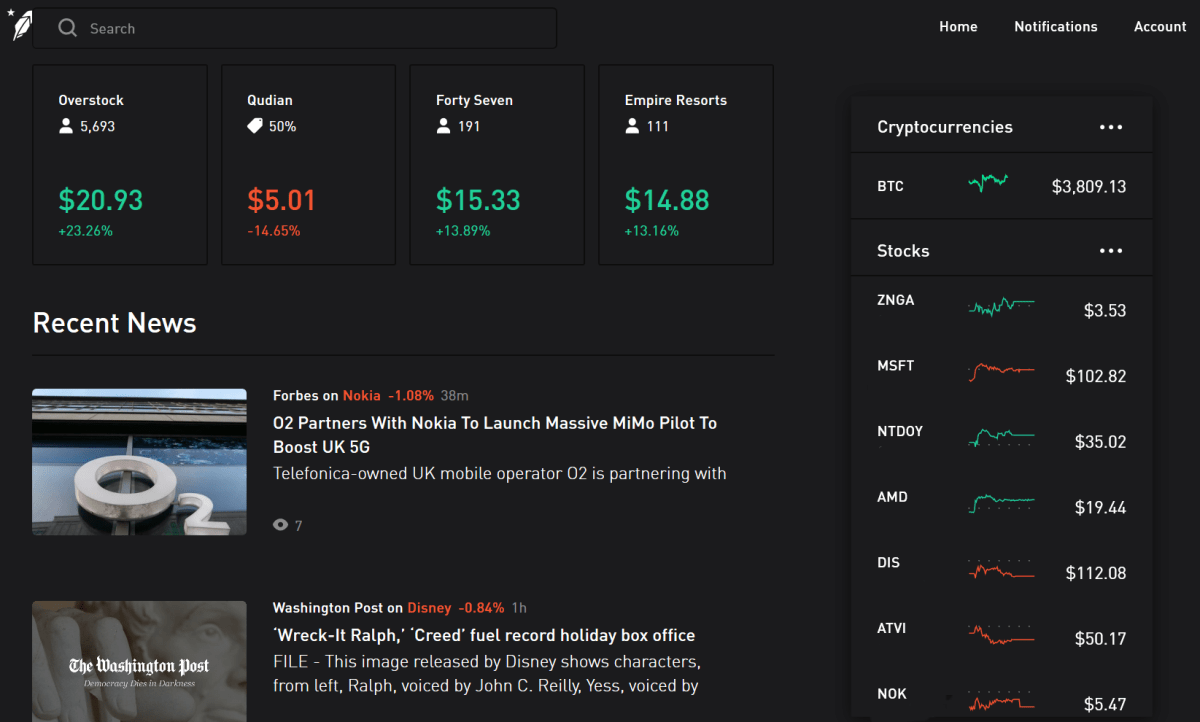
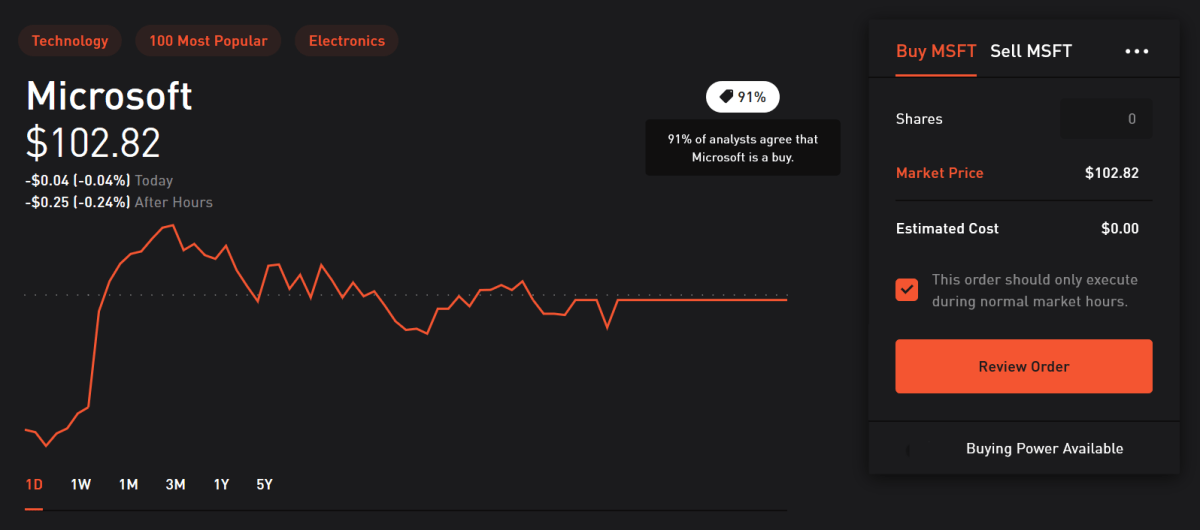
Much like that slot machine, the trick to making money in the markets is knowing when to cash out at move on. To help you make that call, Robinhood provides all kinds of charts, news, analyst’s opinions, and various other tools. Analysis paralysis is a real problem when playing the markets. You can get lost in all the data if you aren’t careful.

Buy_MSFT

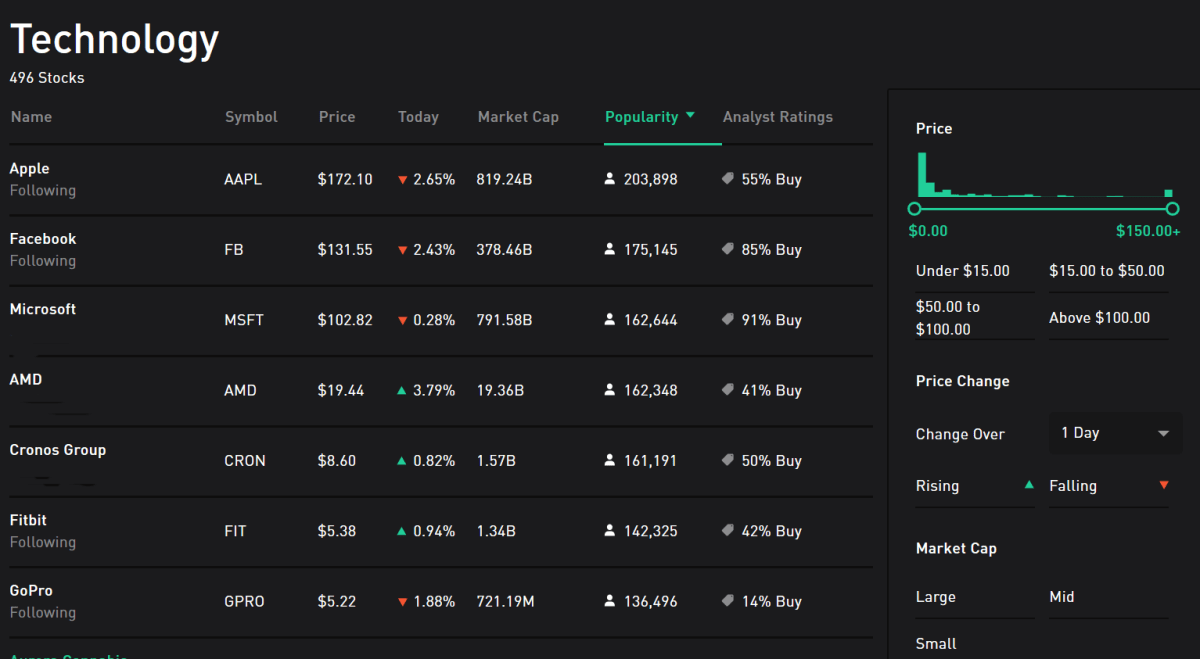
I often use the collections tool to find interesting new stocks. This table shows you a category of stocks and basic information about each company. Clicking on any of them drills in to a detailed analysis of that companies’ performance.

Tech_Collection

Most investors suggest that you wait for market prices to fall before you start investing. As luck would have it, that is occuring right now. Getting started is easier than ever, I wish I would have setup a broakerage account years ago. Best of luck if you decide to invest on your own and send any good leads you find my way.

Enterprise IT Monitoring, Alerting, and Dashboarding with Solarwind’s Orion

A while back, I wrote a series of articles on using PowerShell to create a decent monitoring system . It’s nothing fancy, but it gets the job done and costs nothing but time and effort to implement. If your needs continue to grow you’ll be left with two choices: continue to pound out code to expand functionality, or purchase a commercial solution.

Once you’ve reached the time wall and have decided to invest in a commercial monitoring application, the question becomes, which one should you get? In my career as a consultant and IT employee, I’ve setup and worked with countless monitoring solutions, Altiris, Nagios, System Center, BladeLogic, GFI, Spiceworks, Appdynamics, and Cacti just to name a few. One option that never lets me down is Solarwind’s Orion platform.

Solarwinds has been a player in IT for quite some time. Their Network Performance Monitor frequently makes the “best of” lists. I’ve run into their Web Help Desk ticketing and change management application at multiple companies including my current employer. They may be best known in computer worker circles for their free IT tools like Network Device Monitor and Kiwi Syslog Server. Not everyone is aware that they also make a full enterprise monitoring platform.

Monitoring Funnel

Orion is a platform in the true sense of the word. Modules that you choose plug in to Orion to add functionality. For example, the Network Performance Monitor collects netflow and SNMP data from your switches and routers and adds that information to your Orion databases. The Server Application Monitor uses SNMP, WMI, or an agent to collect data from almost all operating systems and countless applications. Modules also typically include dashboard widgets, reports, alerts, and other useful items that allow you to better utilize the collected data.

I use NPM and SAM at my current employer everyday to monitor and manage our sprawling network. Network equipment, Windows severs, Linux servers, countless SQL databases, Exchange, AD, and even their AS\400 servers are all covered by the platform. Much like golf, it takes a few hours to get the basics (install / discover) and a lifetime to master. The amount of customization Orion offers can be overwhelming but once you get your feet wet, you can accomplish some truly impressive feats. Watch for more articles on Solarwinds Orion in the near future. We’ll be talking about creating custom dashboards, alerts, reports, and more.

Orion-VMware

My journey from drone zero to hero with the DJI Mavic Air. Part 2.

To get stellar shots with a camera drone, it needs to have a gimbal mount. Preferably a three-axis gimbal. This technical marvel will allow your camera to stay steady and level while the drone moves around it. It’s a miniature version of the device you see mounted on the nose of news choppers and attached to Hollywood camera rigs. They come in various versions and styles; some are part of the drone itself and others can be bolted on to any vehicle powerful enough to carry them. My research led me to believe that the bolt on types were more flexible but required more adjustment to get the best results. I have little enough free time already, so I decided to go with a quadcopter that included a built-in gimbal.

gimbal_camera.jpg

Deciding on a built-in gimbal reduced my choices in hardware. There were a few other requirements for my flying camera purchase that cut the list down further. I wanted a true “drone” this time, something that had brains of its own. Features like return to home, follow me, and GPS location were important for my plans. I also needed portability. Monster octocopters with full DSLR rigs are cool, but I wanted something that could easily fit in a backpack or laptop bag.  As always, I did tons of research online and talked to a lot of people, including my brother who is an avid quadcopter pilot. In the end, I narrowed my list down to just two choices.

I’ve had the DJI Mavic Air for almost three months now. I picked it because DJI has an excellent reputation and offers an accident replacement program similar to Apple Care. I was also very impressed by its automatic flight abilities. This drone has followed me down multiple trails in the woods weaving in and out of the trees in an eerie “the robots are taking over” manner. It has sensors on the front, back, and bottom that let it hug terrain and navigate nearly any path. It’s truly amazing to see it fly itself. It also has touch and go flight, touch a spot on your screen and it will go there all by itself.

DJI makes some of the best Gimbals in the business and the one on the Mavic Air is no exception. Pictures and video look like they were taken with a camera on a tripod even when the Mavic is flying at over forty miles per hour.

I ended up getting what DJI refers to as the “Fly More” package. It comes with the drone, controller, 2 extra batteries, a multi-battery charger, extra props, and a very nice carrying case. I’ve been happy with my decision, if you go with this drone you will almost certainly want more than one battery and this package is the least expensive way to get them right now. A single battery lasts somewhere between 15 and 20 minutes in real-world conditions, depending on how fast you are flying and how hard the wind is blowing.

I’ve had the Mavic out in 12 mile per hour winds and it stays steady as a rock. Rather than me tilting into the wind, the drone’s AI automatically does it. It even auto-brakes. As you level off the pitch during a high-speed run, it automatically tilts in the opposite direction until it comes to a hover all on its own. Where was this tech back in part 1 when I was bouncing my micro-drone off the walls?

created by dji camera

Flying the Mavic compared to the micro-drone I started out with is like comparing a Yugo to a BMW.  I will say that before the Mavic, the piloting was all me. Avoiding the wall, my dog, and my wife’s face while screaming down the hallway at what seemed like mach two, was all my skill. Much like modern supercars, the Mavic can do the same with or without my input. It’s onboard AI is a better pilot than I am, but that doesn’t stop me from shifting the the switch on the remote into sport mode and fully controlling it by myself.

The Mavic Air isn’t the fastest drone on the market but something this size traveling at forty miles per hour is astonishingly quick. You will want to leave the drone in beginner mode which limits the speed and distance the vehicle can travel from the controller until you get the hang of flying. I also suggest turning on the AVS option which is the vision based obstacle avoidance.  In the video below you can see this system keeping me from hitting the trees. Watch it work out how to exit the dry creek bed and make its way to the road I touched on the map.

Now you know what drone I chose and why. At this price point, it met all my requirements and exceeded my expecations. The software, camera, and drone itself are all impressive. Watch for the next post in this series in which I’ll do a full review of the Mavic Air including shots of its software, features that aren’t commonly discussed, and more. I’ll finish the series with an article discussing useful things you can do with a drone that you might not have thought of.

My journey from drone zero to hero with the DJI Mavic Air. Part 1.

Growing up I really liked remote control vehicles and toys. They’re what I asked for almost every Christmas and I was a regular pest at the local hobby store. As a young adult, I got more serious about the pastime and ended up with several gas-powered and electric models. I’ve always been interested in RC flying too, but the expense and learning curve of scale model planes and helicopters have kept me on the ground until recently.

I realize that gyro helicopters have been on the market for a long time. I’ve had several of them. In my opinion they have a few drawbacks. Chief among them being no good way to change pitch to generate thrust. My dual rotor HC “swims” through the air by wiggling its tail back and forth and barley achieves walking speed. Some models have a tail rotor that can lift the rear to change pitch, but I found them awkward to pilot and only marginally effective. Scale RC helicopters with a full collective and tail-rotor are fairly expensive and have a massive learning curve to fully master. I watched my novice neighbor shatter his bird into a thousand pieces on our street after a botched take-off; even with the safety spokes attached.

gyrocopter

Quadcopters and multi-roter drones are the great equalizer amongst flying vehicles. They typically have a gyroscope that keeps them balanced which makes them easier to fly. They change direction by varying the speed of their rotors rather than by changing their wing shape like a traditional plane or helicopter. This results in more precise control and the ability to fly in any direction equally well.

When I started out with quadcopters, I knew that I eventually wanted to do areal photography and videography. I didn’t want to risk crashing an expensive camera drone right out of the gate so, I decided to learn in stages. First I purchased an in-expensive indoor micro drone for less than $15.00 .This little rocket can cover the entire length of my home in just a few seconds. In addition, it can do flips, impossible turns, and other impressive maneuvers that take a lot of practice to get the hang of. They really are quite fun to buzz around the house with, most can stay in the air for five to ten minutes on a charge and include a simple controller.

Minidrone

At first, piloting a quadcopter was difficult. The smallest input on the controls would lead to the little machine bouncing off a wall or careening to the floor at break-neck speed. I learned to hold the sticks between my thumb and index fingers rather than with just my thumbs. I also discovered that throttle control is paramount to keeping your vehicle in the air. In all, it took somewhere around twenty hours of practice before I could fly around my home with confidence.

After forty hours and a bag of replacement props, I could do flips, fly in and out of door-ways at full speed, circle the ceiling fan, and buzz my pets like a fighter pilot on a bombing run. Speaking of pets, if you have any, you’re going to want to keep a pair of tweezers handy. Almost every time that you crash, you’ll need to pull hair or carpet fibers off of the prop shafts before you can fly again.

Once I had mastered the micro-drone, I upgraded to a slighty larger and more powerful indoor/outdoor model that included a camera. At less than $100.00 it wasn’t overly expensive but it was faster and therefore more difficult to control. I could pilot it indoors right out of the box, but the first time I took it out to my backyard the wind blew it over my neighbors fence right after takeoff.

medium_drone
I’m pretty sure this won’t handle the mountains shown on the phone’s screen.

It turns out that balancing against the wind is a skill unto itself. You learn to tilt the drone into the wind and then back off when it lulls. It requires quickly reacting to changes in the machine’s pitch that you know you didn’t initiate. React too harshly on the sticks and the over-correction will cause a crash or mess up your shot. The upside is that I got to know my neighbors better from having to knock on their doors to retrieve my toy from their yards.

After I was comfortable flying in my yard, I began to push the flights higher and faster. It wasn’t long before I could comfortably fly over my whole neighborhood above tree level faster than most kids can ride a bike. The camera worked and it was neat to see the jittering low quality video and grainy pictures. With no gimbal, every twitch in the air resulted in a jerky, out of focus, picture. Still, I could see enough potential to dream of the areal shots I would be getting with my next upgrade.

Eventually, I got too brave and suffered a fly-away. This is when the wind blows your rig so far that you can’t find it. Wind blows different speeds at different altitudes. I was a couple of hundred feet up, trying to get a picture of a small lake, when a gust took hold and carried my baby out of sight. Since it didn’t have a GPS locator I had no chance of finding it. I was ready to upgrade anyway. Or, at least that’s what I told myself. Continue on to part two for the rest of the story.