Do you need to know the last time a user logged on, or who created an AD account? As long as you have audit logging enabled, the data you are after is in the event logs of your domain controllers. The problem is, if you have more than one domain controller (you should) the record that you need can be on any of them.
At my day job, we have quite a few DCs and I needed to know which admin created a particular AD account. There was no way I was going to logon to dozens of servers and search them one at a time. PowerShell to the rescue!
Import-Module ActiveDirectory

$keyword = Read-Host "Enter Keyword"
$eventid = Read-Host "Enter EventID"
$logname = Read-Host "Enter the name of log you want to search, application, security, etc."

$domains = (Get-ADForest).domains
$dcs = Foreach ($domain in $domains) {
     Get-ADDomainController -Filter *|Select Name -ExpandProperty Name|sort-
     object|get-unique
}
$events = ForEach ($dc in $dcs) {
     Get-EventLog  -ComputerName $dc -LogName $logname -InstanceId $eventid -
     Message *$keyword*|Select-Object -Property *
}
$events|out-file $env:usersprofile\documents\dc_log_search.txt
This short ‘n sweet bit of code will scan your domain and find all the domain controllers. Occasionally DCs run more than one role and show up multiple times in the output of this cmdlet so we drop the duplicate names.
Then it will prompt you for a keyword to search for. In the case of account data you’d enter the samaccount name. You could also enter the name of a workstation or server for example. Next it will ask you for an Event ID Number. Finally it will ask for the name of the log; application, security, system, etc. to search.
The script will loop through each DC and find the events you’ve described. Each matching record will be output to a text file named dc_log_search.txt in your documents folder. It wouldn’t take much effort to turn this data into an HTML report, email notification, or even an archival tool.
As and Exchange Architect, I often get asked to report on who belongs to a particular distribution list. It is easy enough to open Outlook or ADUC and find the DL group and view the DL members. If your organization has Skype for Business you can also use it to view the membership of a DL. However, exporting information from these tools can be tricky.
PowerShell makes the export task easier if you know how to use it. A quick run of the get-distributiongroup cmdlet with a pipe to out-file, will get you what you want in a hurry. The problem is that we have few employees that are able to use PowerShell from the console but, there are requests to generate this type of report multiple times per day.
What we need is a graphical tool that anybody with enough AD permissions can use to get the data they need. Sure I could write something in C# but I don’t have the time to develop a full app. I know PowerShell already has everything I need to make the report because that’s what I use every time I get asked for it. What if I add a simple graphical interface to a PowerShell script so that my non PS coworkers can easily use it? In the words of Tim Allen; “It’s Tool Time”.
The script below uses the Grid View to display a list of all the Distribution Lists in your Exchange DL OU (you’ll need to input the correct OU path). The user then uses the grid view to sort, filter, or search for the DL they need data from. When they select it, an Excel Spreadsheet will pop up on the screen with the data.
Modern versions of Exchange Server store their DLs in AD as groups so there’s no need to install or load the Exchange PowerShell module to get the data we’re after. This also means we don’t need to give the people who use our tool any special permissions. We will be using the Active Directory module so you may need to install the RSAT depending on the version of Windows.
Make sure that you replace the Searchbase path with the Active Directory location for your Exchange distribution lists. After that, the instructions are easy. Save the file as a .ps1 and place it on the user’s hard drive.
The person using the tool will need to follow these directions:
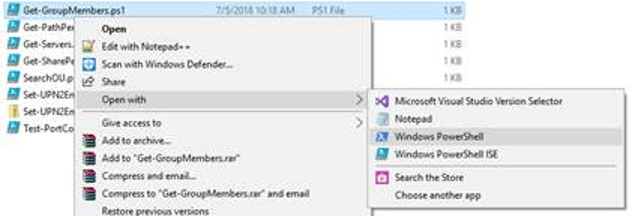
Right click on the script –> Open With -> Windows PowerShell
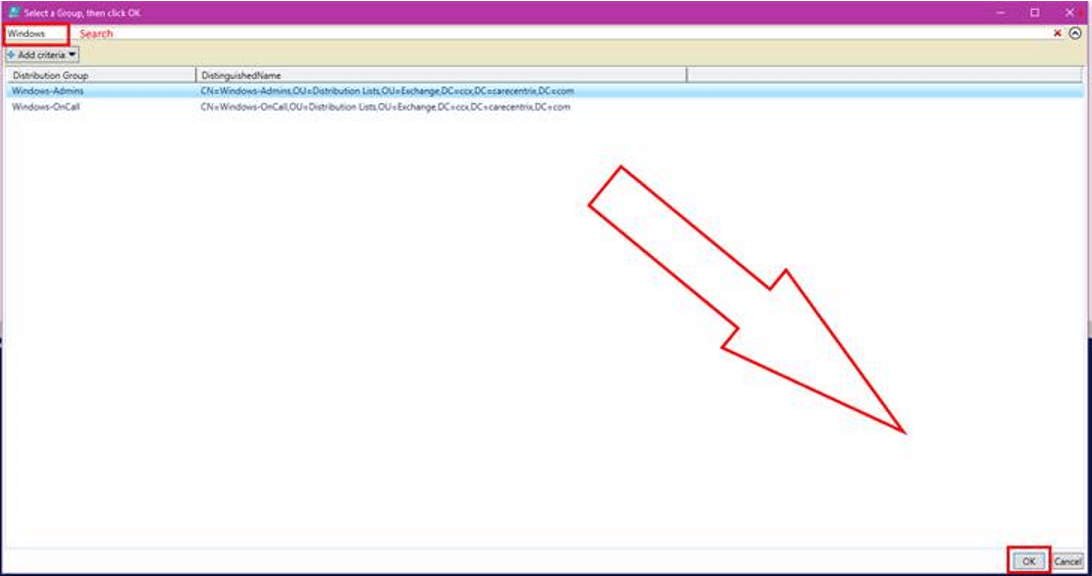
Search for or scroll through and click the group or groups (to pick more than one use CTRL + Click).
Click the OK button at the bottom of the list.
A file named groupmembers.csv will be created in the user’s default documents folder and will automatically open with the application associated to that file type (usually Excel).
From the point of view of the person running it, this is a once use app. In reality, its a simple PowerShell script. It wouldn’t take very much effort to convert this report to HTML, use it to cross-referrence mailboxes and other accounts, find the memebers managers, or anything esle you may need. Enjoy.
I was recently asked what tool would be best to report the number of items in, and the size of, every folder in a particular file share. As an IT Architect I have numerous tools at my disposal that would be able to acquire the data my business partner needed. A few lines of PowerShell was the easiest to implement.
If you’ve used PowerShell for long you already known that Get-ChildItem is the cmdlet to retrieve things under a parent. Files, Folders, Items, you can list them all with GCI. Open PowerShell and type GCI then press enter, depending on your PowerShell profile settings, you should see a list of all your user profile sub folders. This cmdlet will form the basis of our report script.
Of course, the full solution is a little more complicated than that. To generate a useful report we’ll use the Get-ChildItem command to get a list of folders in our path. Then we’ll loop through each folder with the same command again to get a list of the files.
We’ll build an array that contains the count and length (size) properties of each file. Finally we’ll export that array to a csv file in your documents folder. With a little more effort you could generate an HTML report and upload it to a web page or embed it in an email. See some of my other articles for how.
# Get-FileReport.ps1
#Author: Kevin Trent, Whatdouknow.com
#Right click .ps1 file and Open with PowerShell
#Enter Filepath or share path.

$location = Read-Host "Enter Top Level File Path"
$folders = Get-ChildItem -Path $location -Recurse -Directory

$array = @()

foreach ($folder in $folders)
{
$foldername = $folder.FullName

# Find files in sub-folders
$files = Get-ChildItem $foldername -Attributes !Directory

# Calculate size in MB for files
$size = $Null
$files | ForEach-Object -Process {
$size += $_.Length
}

$sizeinmb = [math]::Round(($size / 1mb), 1)

# Add pscustomobjects to array
$array += [pscustomobject]@{
Folder = $foldername
Count = $files.count
'Size(MB)' = $sizeinmb
}
}

# Generate Report Results in your Documents Folder
$array|Export-Csv -Path $env:USERPROFILE\documents\file_report.csv -NoTypeInformation
We recently acquired the new iPad Pro 12.9 and it’s updated stylus. Right off the bat, I’ll say the new system is a massive upgrade, even from the relatively new 2018 iPad 9.7. The new premiere iPad is faster, slimmer, its battery lasts longer, obviously it has more screen space, not to mention the improvements in the Apple pencil. These advances come with a hefty price tag, is it worth the cost?
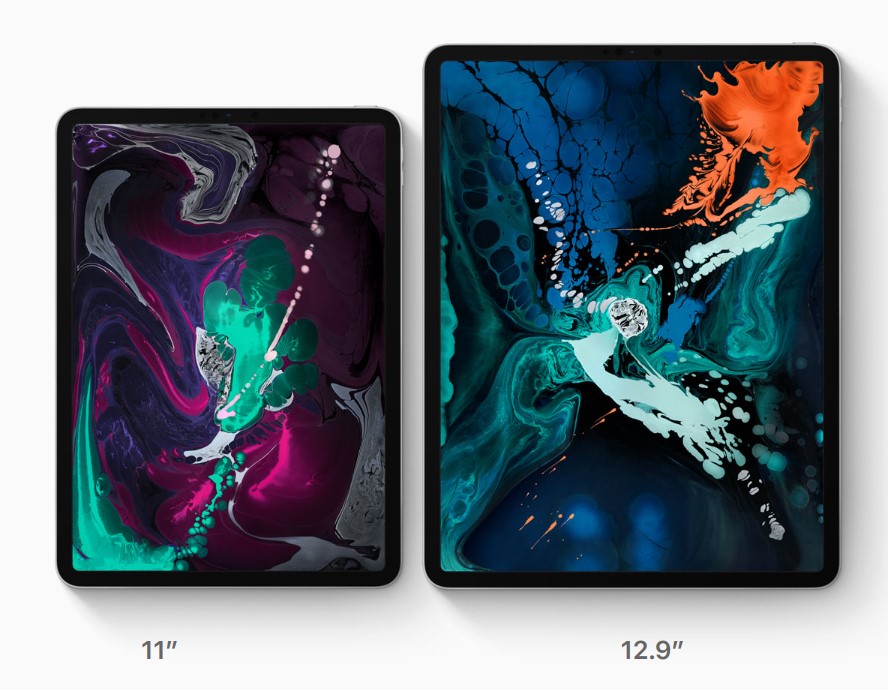
Lisa was coming from the afore-mentioned iPad 9.7 and we decided that she would be best served by the smaller eleven inch model of the Pro. She wanted something that would fit in a bag and be with her throughout her day. We headed to our local Apple store to pick it up.
Once we got to the store we found the iPad table and immediately began questioning our predetermined choice. The the twelve point nine-inch screen on the bigger model draws your line of sight to it like a magnet when you see it in person. We found ourselves on the struggle bus to decision town, again.
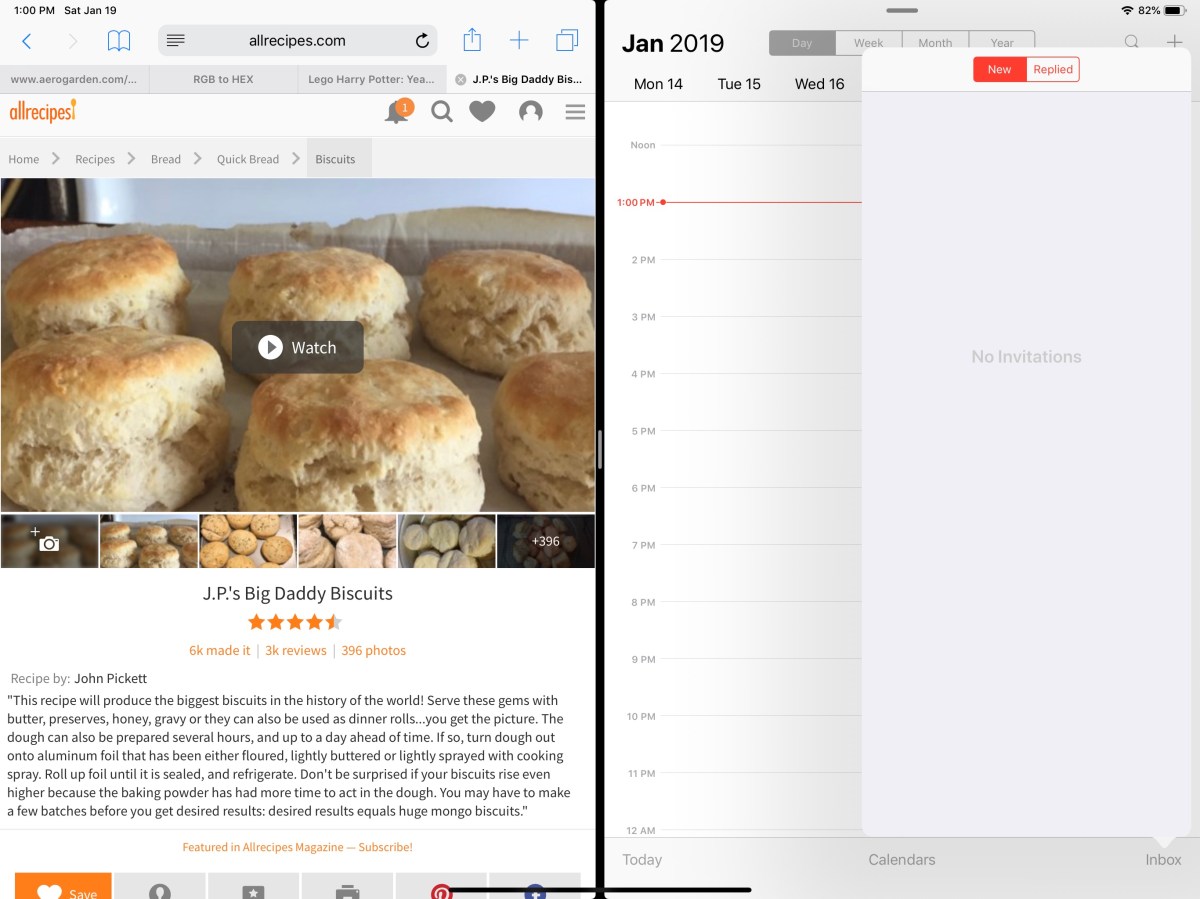
In the end, we reasoned that the twelve point nine-inch model still weighed less than a pound and a half (1.3 lbs) and thanks to the smaller bezel, its physical dimensions were manageable. What really sealed the deal was splitting the screen and realizing that each of the two halves was the size of an iPad mini.
Two iPad mini sized windows make screen splitting truly useful.
We’ve traveled all over the place with it and I can honestly say that you probably won’t notice the difference when it comes to holding it on your lap or carrying it. The only place there has been a slight issue was fitting it on an airplane’s seat table when the person in front was reclined, but even that was doable with minimal effort. Your eyes will be much happier and that outweighs any slight inconvenience you may encounter, in my opinion.
The performance of the third generation devices is spectacular. It’s hard to believe that something this thin and light can be so powerful. Apps open instantly, games run stutter free, even running two apps and streaming a video doesn’t slow it down. The iPad 9.7 suffered from lag when using the pencil to lasso objects in various artistic software, but there isn’t a hint of hesitation here.
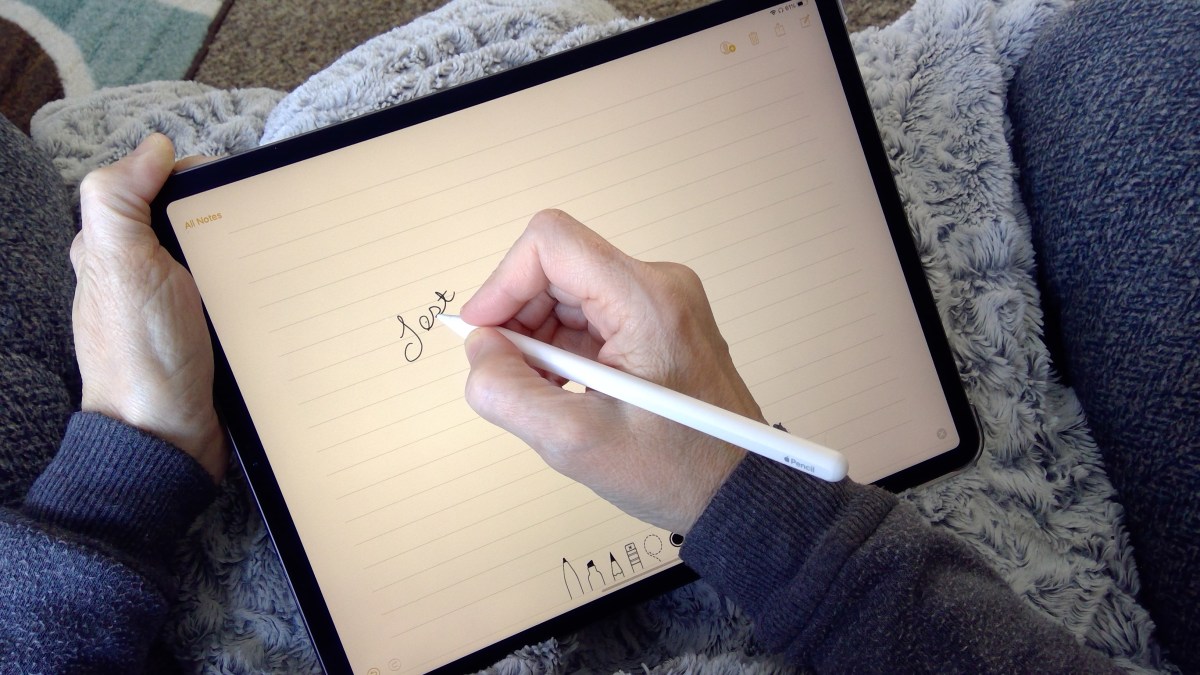
Speaking of the pencil, it’s been re-engineered as well. The most talked about benefit is the magnetic charging. I can’t overstate what a huge deal this is. Not only is it convenient, but the chances of a broken stylus are drastically reduced. For me, the shape and material changes are nearly as important. The second generation instrument feels better in your hand and the flat edge gives your thumb a natural place to rest. They haven’t gone so far as to add buttons, but the double tap feature is a good start. It lets you switch tools without having to click on a toolbar first and is a real time saver.
The Surface Pen is still my favorite digital stylus. Apple’s lack of native handwriting recognition is just embarrassing at this point. A few developers have taken it upon themselves to add the feature into their individual applications, but this is no substitute for the operating system level version found in Windows and certain Android devices.
Add the keyboard folio case and the iPad Pro becomes something you could replace your laptop with. Microsoft’s Office apps have nearly reached parity with their desktop counterparts and Adobe has announced it will publish the full version of Photoshop to the App Store in 2019. If your business software is iOS friendly, or if your company provides access to some type of VDI environment, you should be all set to ditch the boat anchor you’ve been lugging around all of these years.
To answer the question we started with, the upgrade from the standard to pro iPad is worth the cost if you use your device as a productivity tool. It’s power combined with the new accessories make it something you can easily work from. If you mostly shop on Amazon and watch Netflix, save the almost one-thousand dollars and stick with the original.
The new magic of digital notes is the ability to scale up or down to your heart’s content without loosing visual acuity. Microsoft’s OneNote has always been able to achieve this feat but lacks some of the creative features bullet journal users covet. Enter Zoomnotes, an iOS application from Deliverance Software Ltd.
Zoomnotes has the creativity features of Goodnotes with some of the business features you would find in OneNote. Zoomnotes will allow you to use the many PDF planner templates found on Etsy and Pinterest but also offers built-in templates and functionality for more traditional note taking. For example, there’s a wizard that will allow you to build a custom linked view calendar with all your personal preferences.
The software’s infinite whiteboard allows you to write forever without creating a new page or section. By comparison, in OneNote when you fill a page you have to use the add space button on the tool bar to continually expand the note. With Zoomnotes you only need to zoom out with your fingers.
Goodnotes is not able to use custom fonts. This is more than a little annoying. Thankfully Zoomnotes supports any font that you can install on your iPad. This means that digital planner templates look the way the artist intended and everything fits in the designated pages.
Some of the other features you’ll find in Zoomnotes that are missing from other iOS note apps are: Table support, custom color palettes, color matching tool, custom links, and layers.
Lasso any object on the screen; images, handwriting, pictures you’ve inserted, etc. and with a couple of clicks you can add them to your sticker library to make the item easier to re-use. This feature alone is worth the $8.00 purchase price.
Zoomnotes is one of the most Powerful note taking applications available on iOS. I suggest that you visit their web site and then download the free version to try it out. I’m still a OneNote fan because I need my notes to work across all devices but if Zoomnotes ever adds PC and Android support I would consider switching.
I never thought that I would consider a garden to be one of my favorite tech gadgets. When I first saw my wife’s AeroGarden l thought something along the lines of, “That’s dumb, I can setup a grow light and some small pots for a few bucks”. I freely admit my initial impression was a big mistake. Do you remember that seen in Back to the Future II when future Marty grabs some fruit from a garden that popped down out of the ceiling?
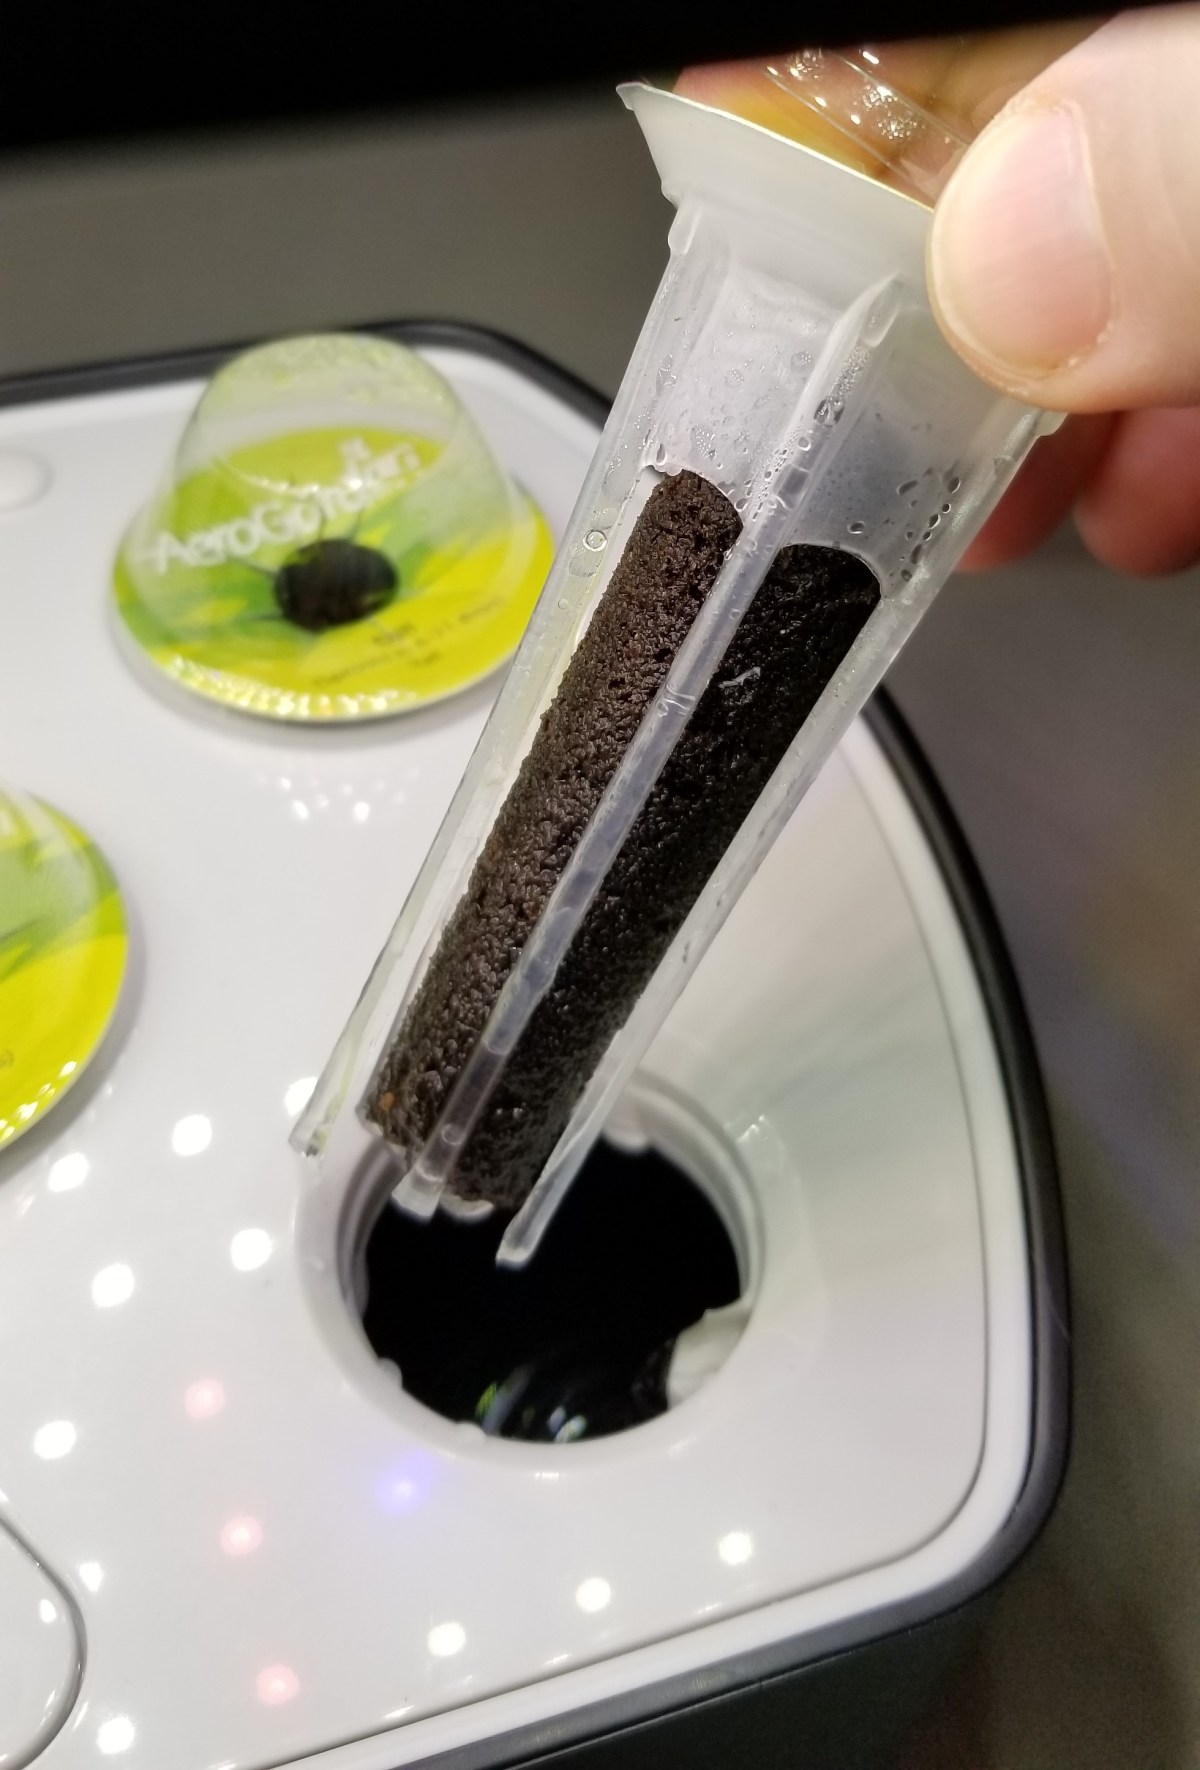
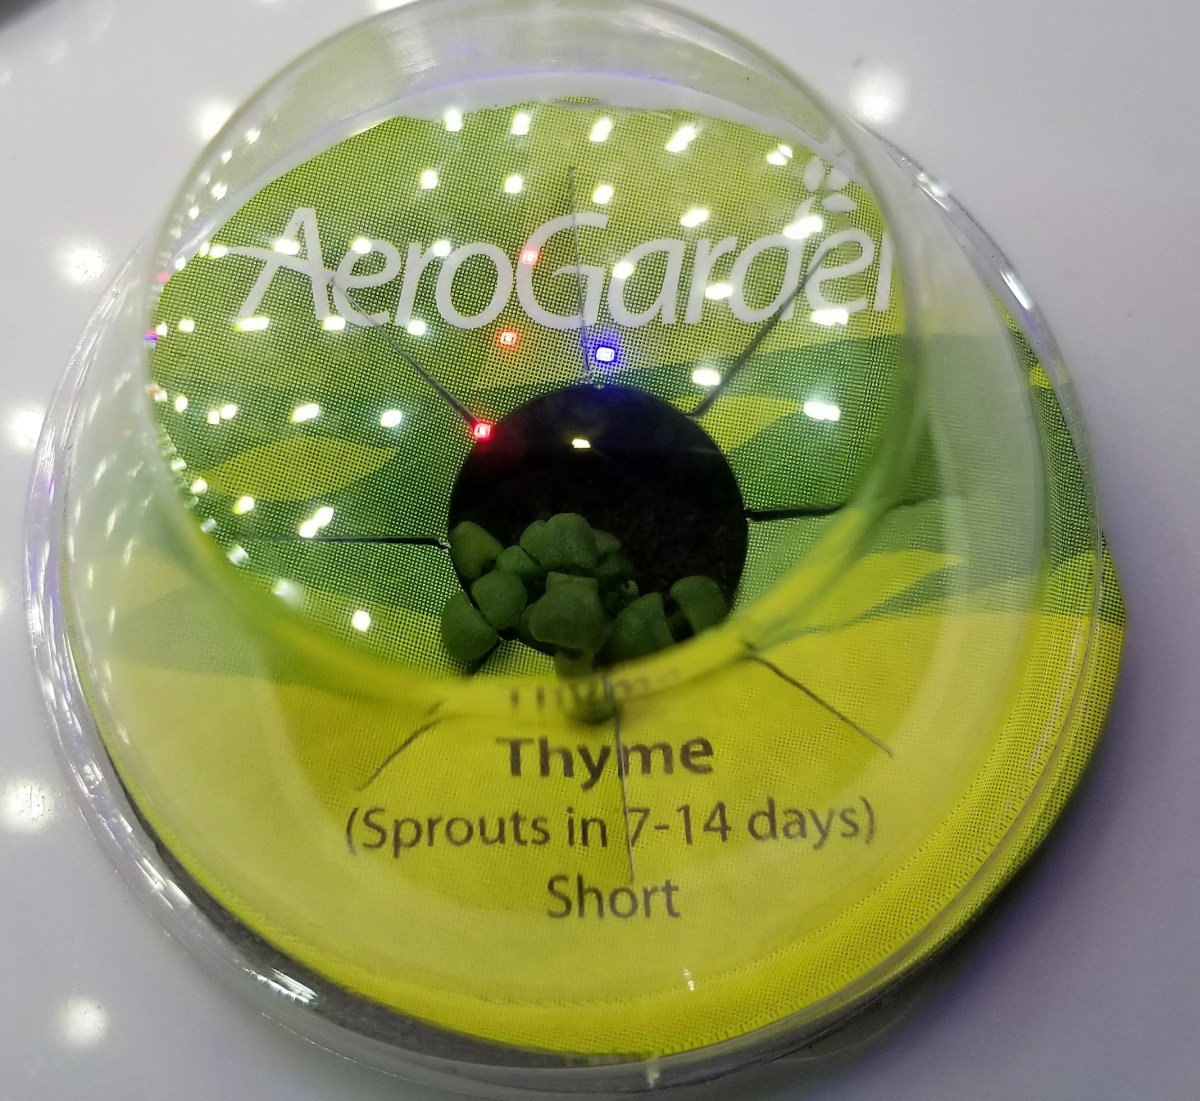
The AeroGarden is that thing, a personal hydroponic garden system. If I were so inclined, I could make a mount to lower it out of the attic through the ceiling and match the movie perfectly. Water and liquid plant food are stored in a resovior and a pump circulates the solution through the plant’s roots on a scheduled basis. Each seed pod contains a vegetable, herb, or flower marked with the height of the plant, a greenhouse dome, and enough solid growing medium for the roots to take off in.
All the farmer needs to do is add the water and food as directed and place the pods in the holes. Tall stuff goes in back, short stuff up front. You pop the little plastic domes on top of each pod to keep the temperature up while the seedlings germiniate and you’re off to the races. Within a few days you’ll have baby plants all over the place.
The full spectrum LED lights are mounted on a stalk that allows them to be raised as your plants grow. The model of your unit determines the size of plants that you can grow. The larger farms can handle up to twenty-four plants and have motorized light panels that can raise up to thirty-six inches. The smallest hold two plants and go to twelve inches.
Lights on the front of our unit tell us when to add water and food but some are app enabled. The lights stay on for fifteen hour cycles and we’ve found that purposefully timing it so the lights are on in the evening makes a nice night-light in our kitchen. Our system came as a kit that included six different herbs and the plant food. We had seedlings in four days. I intend on writing a follow up post once we’re able to havest something, so check back later.