Virtual Reality For Everyone with the Oculus Quest

Almost everyone agrees that virtual reality represents the future of entertainment and education. Many predict it will serve as the primary interface between the world we were given and those we create displacing monitors, phones, and televisions. Before V/R can assume this role, there are several hurdles it must overcome.

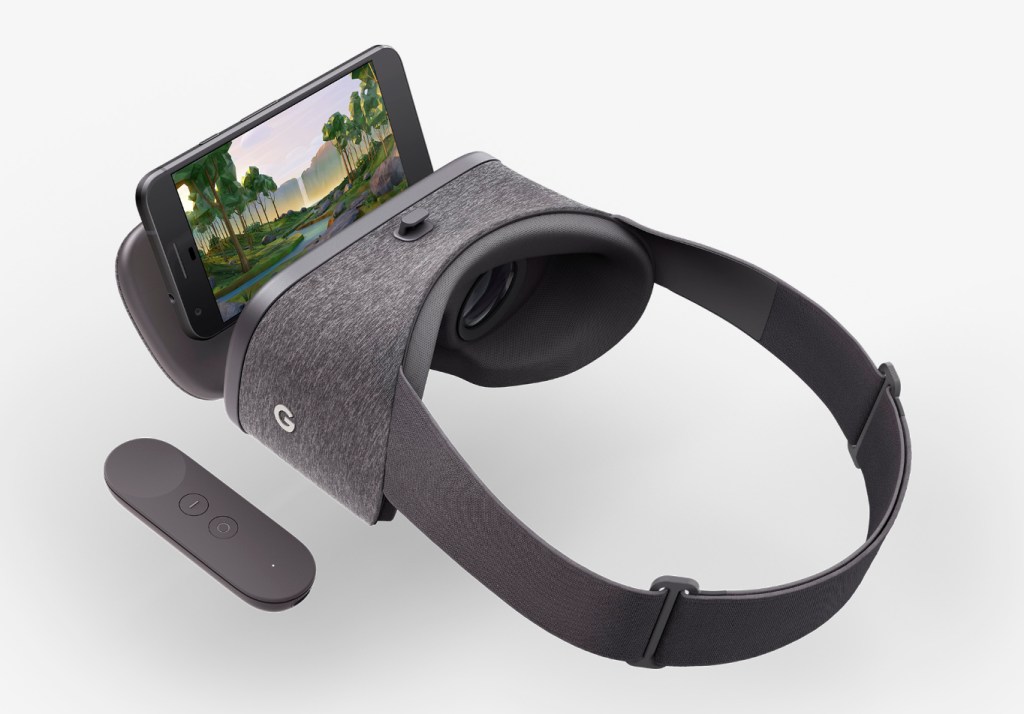
Chief among the obstacles of virtual reality’s wide-scale adoption are the cord and high-end PC that are required to experience it. Google Cardboard and the many phone based V/R sets like it, attempted to bring tether free immersion to fruition and were successful in many regards. They gave us a taste of what could be and sold in numbers sufficient to warrant the capital investment required for innovation.

In my opinion, Facebook’s marketing of the Quest as, “just like the Rift, without the cord” has hurt initial sales. I think they’ve made the same mistake that Nintendo made with the Wii U. I personally looked at the Quest multiple times and decided it didn’t offer enough difference from the Rift to justify purchasing it. My lovely wife got me one for Christmas. Now I understand how wrong I was.

Facebook’s Oculus Quest hit the streets in May of 2019. The headset is physically similar to the other Oculus offerings, but is fully self contained. No computer and no cord. Just slide the goggles down over your eyes, pick up the controllers, and you’re in. The Quest does for V/R what the Wii did for gaming consoles. Within a few minutes of gearing up, anyone, including your grandparents, can easily navigate their way to an untold number of adventures, entertainment options, and venues.

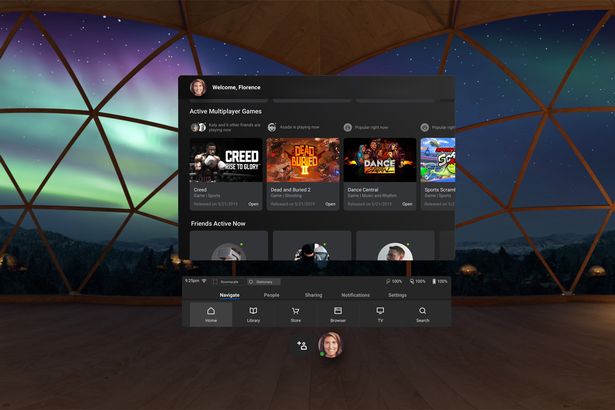
The experiences that are available cover almost every conceivable genre. I’ve hung out in Adam Savage’s (Mythbusters) workshop and watched him build a sheath for his priceless sword. I took a guided tour of the British Museum and went shark diving off the coast of South Africa. I watch Netflix in my own personal theater with a view of snow capped mountains. I attended a basketball game and chatted with my fellow fans. Virtual Reality is so much more than games.

Don’t get me wrong, there are plenty of games to play. Adventure, Shooters, RPG, Cards, Strategy, and more are represented. Some are of poor quality, some are nothing short of amazing. Nothing quite compares to being in your game. Developers are really starting to understand how to deliver V/R experiences that blow meat-space options away.

One major difference of the Quest is that like an iPhone, it is locked to the Oculus App Store. This makes it easier to use, but limits choice. With a little tech know-how you can enable the option to side-load software and there is an underground app store for those that choose take the chance. Checkout SideQuest if you’re interested in that sort of thing.

Besides SideQuest, you can also gain access to more games through a Quest Link compatible cable. If you have a strong gaming PC, use it to access the full V/R experience including Steam V/R and Oculus games that don’t nativity support the Quest. For a list of supported cables and GPU’s see https://support.oculus.com/444256562873335/.

Directly comparing the Quest to the Rift or Hive is a misnomer. It wasn’t created to compete with, or replace them, yet. Sit in a chair and watch a movie on your Rift and you’ll soon be annoyed by the cable draped across your lap and sitting in your computer chair instead of your recliner. How would you provide an entire classroom of students with full gaming PCs and all that goes with them, so their teacher could take them on a tour of the International Space Station? The Quest was made to simplify V/R and make it portable, it does both of those things well. I look forward to seeing what the world does with this technology now that it is here.

PowerShell – Combine Data from Multiple Modules

If you use PowerShell long enough you will inevitably need to combine data from more than one module, method, or object into a report of some kind. As an example, I ran into a situation where I needed to show mailbox sizes by city. Exchange doesn’t have the city attribute, but we know Active Directory does.

First we will get the mailbox size from the Exchange module; Get-MailboxStatistics user@domain.com|FL TotalItemSize should do the trick.

We know that Azure Active Directory has our address in it; Get-MsolUser -UserPrincipalName user@domain.com|Select City -ExpandProperty City will show the city name to us.

I’ve witnessed people resorting to complicated procedures to combine the output from two different modules. Copying and pasting the data from each module into Excel seems to be very popular. There are many problems that can occur with these types of solutions. The best way to accomplish our goal is to use a construct called a Hash Table.

What’s a hash table? In the simplest terms it is an array (a spot in memory) that stores key/value pairs. In our case, we are going to store a key (the name of our column) and a value (the results of a command) in the array. It sounds complicated, but is actually quite simple once you get the hang of it. The trick with hash tables in PowerShell is to get the syntax right. @{Name = “Name of Column”; {Expression = {Value, or Command}}  is the formula.

To create the hash table from our example the command is: Get-MailboxStatistics user@domain.org|FL TotalItemSize,  @{Name = “City”; Expression={Get-MsolUser -UserPrincipalName user@domain.org|Select City -ExpandProperty City}} We get the mailbox size and then insert a hash table that contains the city. The comma in between TotalItemSize and the @ symbol that starts our hash table is what tells PowerShell this is a new column of output.

Keep in mind this technique works with any number of PowerShell modules. SQL, SharePoint, Lync, Teams, most Microsoft server products and even many third party Windows based programs have a PowerShell module at this point.

An Inexpensive, Easy to Use, All Seeing, Security Camera

There has long been a Ring doorbell keeping watch over the front door of our home. The tireless sentry has become an indispensable part of our lives. Being able to see who, or what is on our porch from wherever we might be is a superpower we won’t be giving up, ever. I’ve written before that door cameras should be standard equipment for any residence and I still feel that way.

No matter if you choose Ring, Nest, or some other brand, all doorbell cameras suffer from a similar issue. Seeing a small section of your front porch 24/7, is the gateway drug for a full fledged security camera addiction. In “Knock, Knock, Anybody Home” you can watch a strange man ring our doorbell. When we don’t answer, he grabs a ladder out of the back of a truck and heads up our driveway, out of the Ring’s view! It’s incidents like these that drive the urge to survey your property at all hours of the day or night.

Searching the Internet for security cameras is like going to a restaurant who’s menu is too long. Do you want NVR, ONVIF, IP, or BNC? What do all of the acronyms even mean? More or less, the major choice boils down to those that stream to your phone, or the multi-camera systems that you see in businesses. Most of us are going to be more comfortable with the kind that work with our home network and stream to our mobile devices.

Once you’ve chosen streaming cameras, you will be very tempted to install the version that matches your doorbell. There’s nothing wrong with that decision, they will work well together. I wanted some features that didn’t seem to be available from Ring’s security cameras. Specifically, I wanted to be able to pan, tilt, and zoom the camera remotely. I needed to be able to track someone, or something anywhere on our section of the street, not just the front yard.

One might think that deciding on a PTZ IP Cam rated for outdoor use would limit the choices to a handful of options, that isn’t the case. The market for these things is huge. You end up left on the ole, “Most bang for the buck” quest. You’ll be choosing between options like: wired or Wi-Fi, optical or digital zoom, flood lights or night vision, recording or streaming, and on and on, forever.

I was lucky and stumbled across a unit that has all of the options in one device. The Zosi ZPTZ-B220W-W has a 5X optical zoom, digital zoom, pans 355°, tilts 90°, infra-red night vision, flood lights, two-way audio, SD card recording, motion detection, and will connect to a wired or Wi-Fi network. It’s all in a weather proof case that screw mounts to any flat surface in almost any orientation. The list price on Zosi’s site is $129.00, but I purchased mine on Amazon for $99.00.

Installing the camera was pretty straight forward. I marked and drilled four pilot holes into the siding under the garage’s eve. Then drove the included screws through the mounting bracket’s holes. I plugged the power supply into the same ceiling outlet that my garage door opener uses. All-in it took about two and a half hours to finish the project. Amazon offered the camera with professional installation for $179.00, but I’m a full member of the ISECDISCI clan (If Someone Else Can Do It So Can I).

The camera’s configuration is handled by the app that you install on your phone, tablet, or PC. To setup the connection, I just needed to scan the QR code on the back of the unit. If only I had known that before I climbed down the ladder and put it up! Once you get the app connected to the camera, the rest of the configuration is down to your personal choices.

My family and friends have all been very impressed with how well this thing works. The 1080P video is clear, the zoom allows me to see details of far away objects; I.E. read the license plates of passing cars. The night vision reaches all the way across the street and the flood lights illuminate the entire driveway. Day or night, I can see what is going on all the way to the end of my block.

Adjustable motion detection sensitivity and intelligent lighting allows the camera to pickup and record moving objects with precision. If you program the unit to record 24/7 and enable motion detection, it will flag motion events in the playback timeline by coloring them red. This makes finding a specific event incredibly easy. There’s also an alarm function, if the camera detects motion it will play one of several alarm tones through its built-in speaker.

Cloud storage is available for a small fee from the app, but an SD card has been working well for us so far. Our testing shows around 0.33 GB per hour is consumed. A 32 GB card will record around 3.5 days worth of continuous video. For those of you who don’t like multiple trips up ladders, put the card in before you mount the camera.

My wife has installed the app on an old iPad and leaves it running on a stand next to her seat in our living-room. She calls it her window and really enjoys being able to glance at the screen to get an unobstructed view of the neighborhood, sunset, and weather. Every once and a while we screen cast the iPad to our big screen TV to watch the snow or rain. We also use it from bed to keep an eye out for our departing and arriving teenagers. More than once I’ve pulled it up to see what that noise in the middle of the night was.

Whether you go with the cameras that match your video doorbell, or purchase a standalone solution you’ll almost undoubtedly enjoy the benefits of remote surveillance. Now if someone would just write an app to coordinate my security cameras with my drone. Imagine if motion detection triggered my drone to go inspect interesting items, hmm.