
Until now, wirelessly streaming games to the Oculus Quest 2 has been limited to using development drivers in combination with specialized software like Virtual Desktop. I’ve written step by step guide to getting that option working here. Now, Facebook has enabled Oculus Air Link which allows streaming of Oculus Store apps too. It was a little tricky to get working on my network so I decided to share what I’ve learned.
Your desktop system must be connected to your network with at least 1Gbps. Your desktop system needs to have at least one USB-C port to connect your Quest with. I’ve heard that a USB-3 port with an adapter works but have not tried it. Your wireless network must support AC or AX (Wi-Fi 5 or Wi-Fi 6) and be capable of sustaining 800 Mbps in the area you intend on playing in. You must have at least WPA2 security enabled on the wireless network. If you don’t meet these requirements you should not proceed.
Assuming your gear all checks out, you’ll need to install the Oculus app on your desktop if you haven’t already. Download it from Setup Your Oculus: Quest, Quest 2, Link, Rift S & Rift | Oculus once you’ve downloaded and installed the software, complete the basic setup by connecting your Quest to your PC via the USB-C cable that came with it and following the wizard.

Your Quest will need to have at least software version 28 installed. In the Quest, go to Settings then About. There’s not much you can do to get the new version if you don’t already have it. Facebook pushes it out slowly like an Android mobile update. You just have to wait for it.
If your network is a mesh topology, the access points can not be wirelessly uplinked. Each one needs to be cabled. Air link is a multicast protocol, your network will need to have Multicast DNS, Multicast IGMP, and IGMP Snooping enabled. These settings are in different places depending on the brand of network gear you are using.
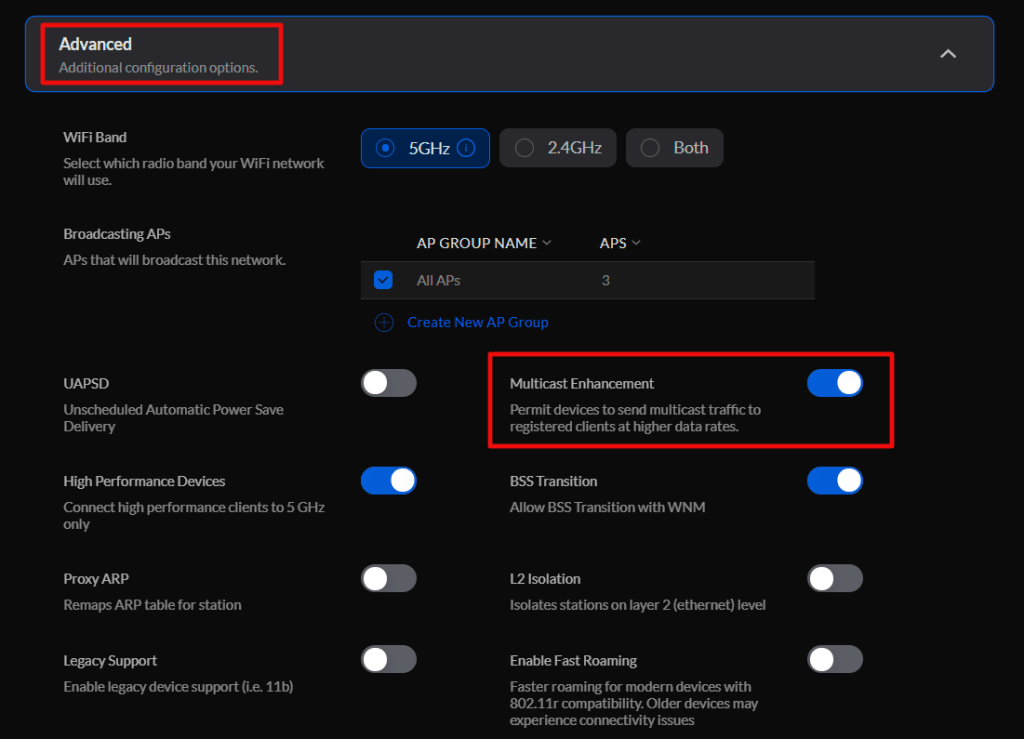
On Unify networks, enable Multicast Enhancement in the advanced settings for the WLAN you will connect your headset to.
Enable IGMP Snooping in the advanced settings for the network your WLAN is connected to.

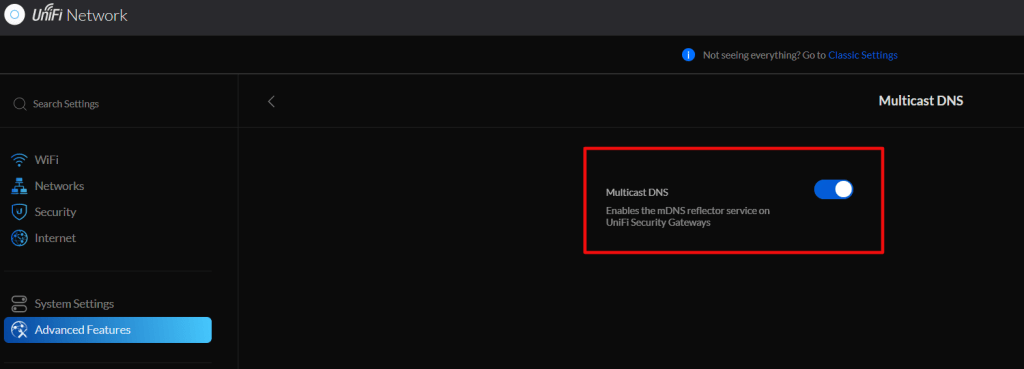
Finally, turn on Multicast DNS in the Advanced Gateway settings under the Advanced Features menu.
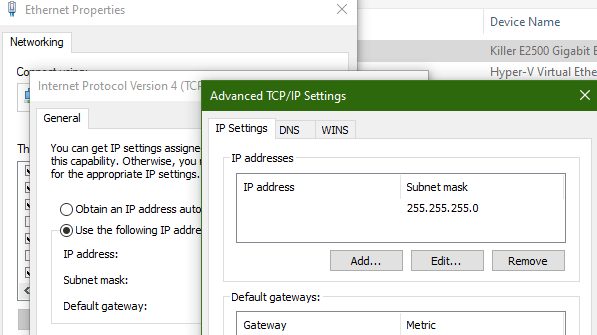
The PC running the Oculus desktop software can not have more than one IP address assigned to the network adapter that is on the same network as the Quest. This causes the Launch button to be greyed out, the Quest will pair but multicast will not function properly. Check the advanced IP settings for your network card and ensure that only one address is listed there.
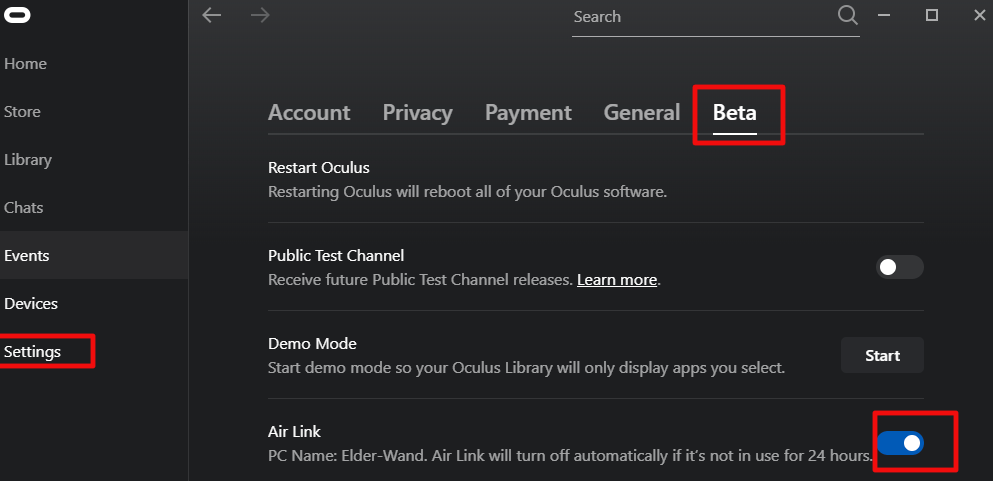
Now enable the Air Link option in the Oculus desktop software under Settings -> Beta.
All that is left is to put on your headset and go to the Settings menu. Then go to Experimental Features and turn on the slider for Air Link. Now go to the Quick Action menu in Settings and select the Air Link button at the far right. The first time you run Air Link you will need to pair your headset with your computer. Then tap the Launch button. After a few moments the Oculus Desktop Home should load and work just like it does from a link cable or Rift.

Great write up, however, still having issues with my setup (pretty the same as yours from what I can tell). Any notes on the your firewall setup?
LikeLike
I put everything I did into the article. The router is plays a minimal roll in all this, the traffic is all local to your network. You might check and make sure the firmware in your wireless access points, switches, and etc. are all updated.
LikeLike
Switching on IGMP Proxying in the WAN settings in my Netgear Nighthawk fixed the issue. Your guide lead me to this, and I cannot see any other guide like yours online.
Thank you for saving me hours and hours of troubleshooting.
LikeLike
Thank you very much, you saved my day. Before it was extremely bugging, sometimes I could connect, sometimes not.
LikeLike