By default you can not pass sound through to your host Windows system’s audio devices from a Linux virtual machine. I struggled finding reliable instructions for getting this to work and ended up using a third party solution called PulseAudio.
Attention: If you are using a newer edition of Ubuntu these instructions will not work. The more modern versions do not include XRDP in the base image. There is an updated version of these instructions that will get sound working at https://techbloggingfool.com/2020/12/26/deploy-a-linux-vm-on-hyper-v-with-sound-20-04-edition/
To get started, you’ll need an Ubuntu VM to work with and we’ll need to install Hyper-V if you haven’t already. Open PowerShell as an Administrator and install the Hyper-V components. Run: Enable-WindowsOptionalFeature -Online -FeatureName Microsoft-Hyper-V -All

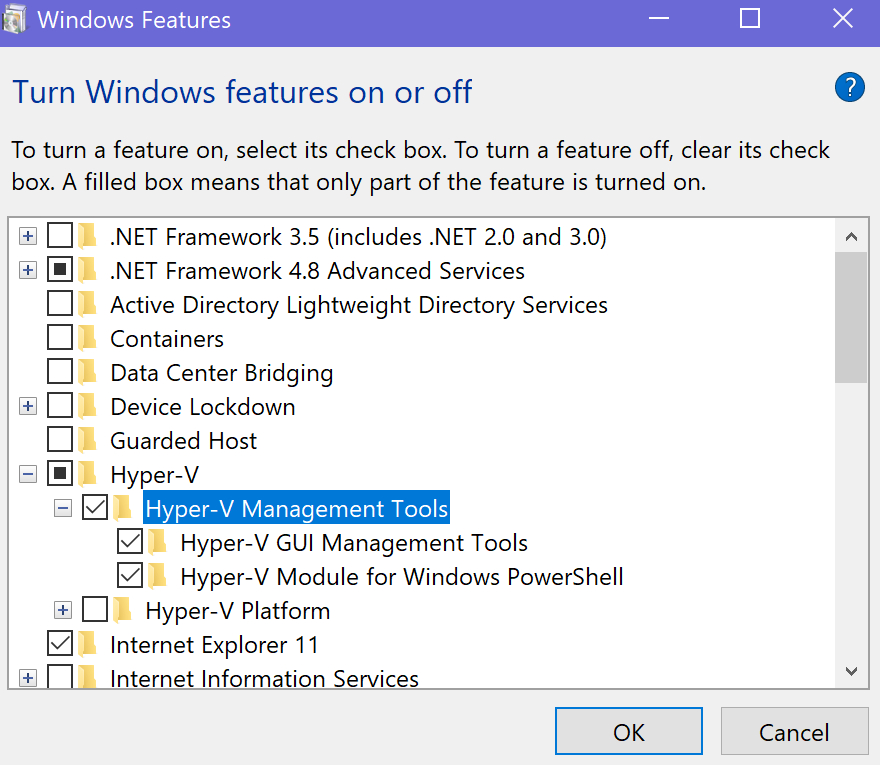
Hyper-V can also be installed using the GUI. Go to the Control Panel -> Programs and Features > Turn Windows Features on or off and choose it from the menu (both boxes).
Once you have the Hyper-V tools installed, launch the Hyper-V Manager and use the Quick Create feature to automatically install and configure and Ubuntu Linux VM.

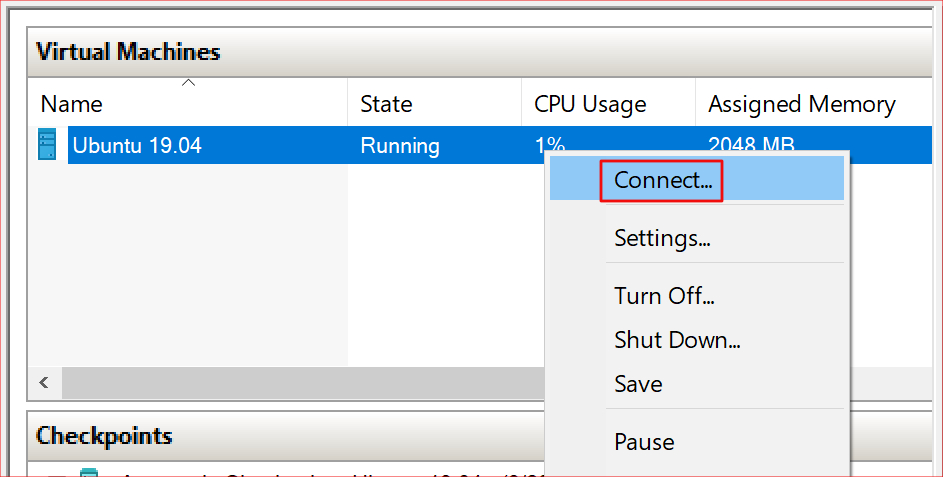
After the creation of your new VM has finished, right click on it in the Hyper-V Manager and start the virtual machine. Right click on it again to connect to the console.
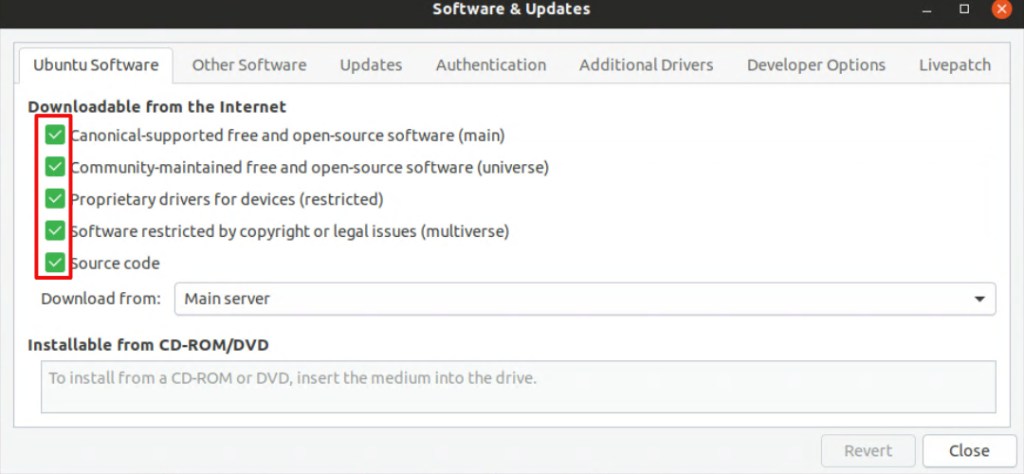
After you get logged on to your new Linux machine, the first thing we need to do is to configured the repos so that you can download the PulseAudio software we will be using to enable your VM’s sound. In the show Applications menu, open Software and Updates. Go to the Ubuntu Software tab and select all of the boxes.
Now, open a terminal from the Show Applications menu and run the following lines to install and configure PulseAudio. Reboot the Linux VM when you are finished.
cd /tmp
sudo apt source pulseaudio
cd /tmp/pulseaudio*
sudo ./configure
cd /usr/src/xrdp-pulseaudio-installer
sudo make PULSE_DIR="/tmp/pulseaudio-11.1"
sudo install -t "/var/lib/xrdp-pulseaudio-installer" -D -m 644 *.so
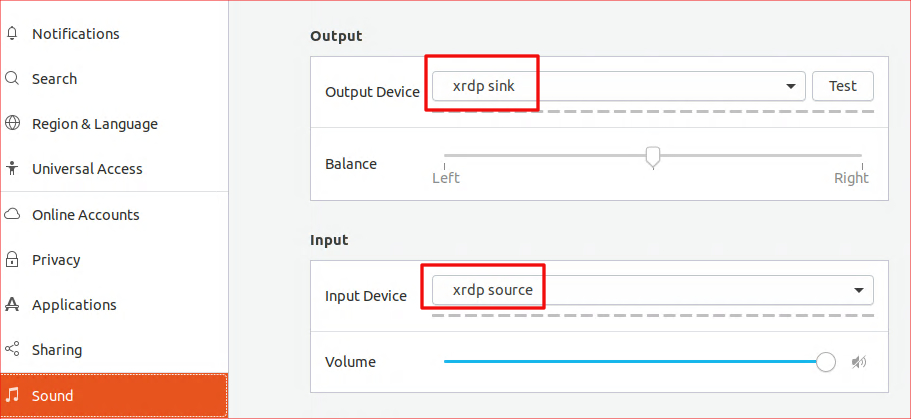
When the system comes back on line, connect again and use the Show Applications menu to open Settings. Go to the sound section and set the Output device to xrdp sink. Set the Input Device to xrdp source. That’s it. If everything went according to plan, your Ubuntu VM should be able to pass sound through to your Windows Host.