
Kolab is a full featured messaging and collaboration (aka Groupware) server that rivals Microsoft’s Exchange Server and IBM’s Lotus Notes in both functionality and features. It can run on most versions of Debian Linux. It can be installed on single server or distributed among many. It supports load balancing, LDAP directories, shared calendars, shared mailboxes, sharing files, notes, tasks, resource scheduling, and has an easy to use web based admin console. You can even use Outlook as its client. It has a robust web interface and IMAP support for mobile devices. Can it replace Microsoft Exchange in your orgainziation? There’s only one way to find out. We’ll explore Kolab and its abilites in several documents over the next few weeks. First up, is how do you go about installing it.
One might ask, why am I installing this Linux app on a Windows virtual machine? The anwser is: I wanted to demo it for my company but didn’t want to wait for the VMware server team to spin up a server for it. If you have an old laptop or desktop you may prefer to load the Linux OS directly onto it. You can also dual boot a system between Windows and Linux but this requires you to choose one OS or the other whereas a VM will allow both systems to run simultaneously, sharing the hardware. Since our Kolab VM will not require many resources, a virtual machine will not drastically impact my computer’s performance.
Windows 10 Professional allows me to use the built-in Hyper-V but if you have a non-pro version of a Microsoft OS you can still run VMs; you’ll need something like VirtualBox to make it possible. Use the links below for detailed information on setting up your chosen hypervisor.
- Hyper-V – https://docs.microsoft.com/en-us/virtualization/hyper-v-on-windows/quick-start/enable-hyper-v
- Virtualbox – https://www.virtualbox.org/manual/UserManual.html
Once you have your hypervisor up and running, download the ISO for the Linux operating system of your choice. You can download CentOS (my choice) from here: http://isoredirect.centos.org/centos/7/isos/x86_64/CentOS-7-x86_64-Everything-1611.iso .
Create a Hyper-V VM
The instructions that follow are for creating a VM in Hyper-V but the process is much the same regardless of the hypervisor you are using; the menus will, of course, be in different places, but the concepts are the same.
- Use the “New VM” menu option in your hypervisor to start its creation wizard.
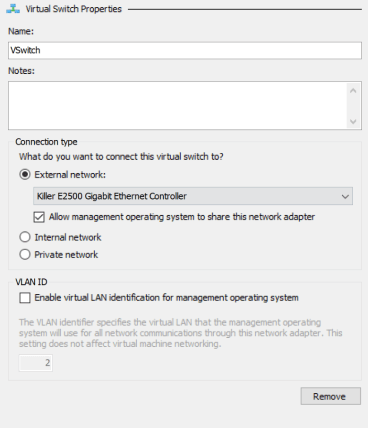
- Create a V Switch so that your VM can use your network.
- Virtual Switch Manager -> Create Virtual Switch -> External (name it Vswitch).
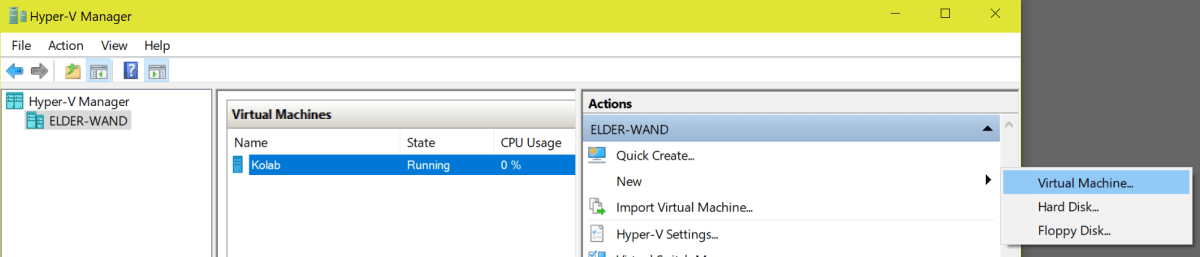
- Open the Hyper-V Manager and select New -> Virtual Machine
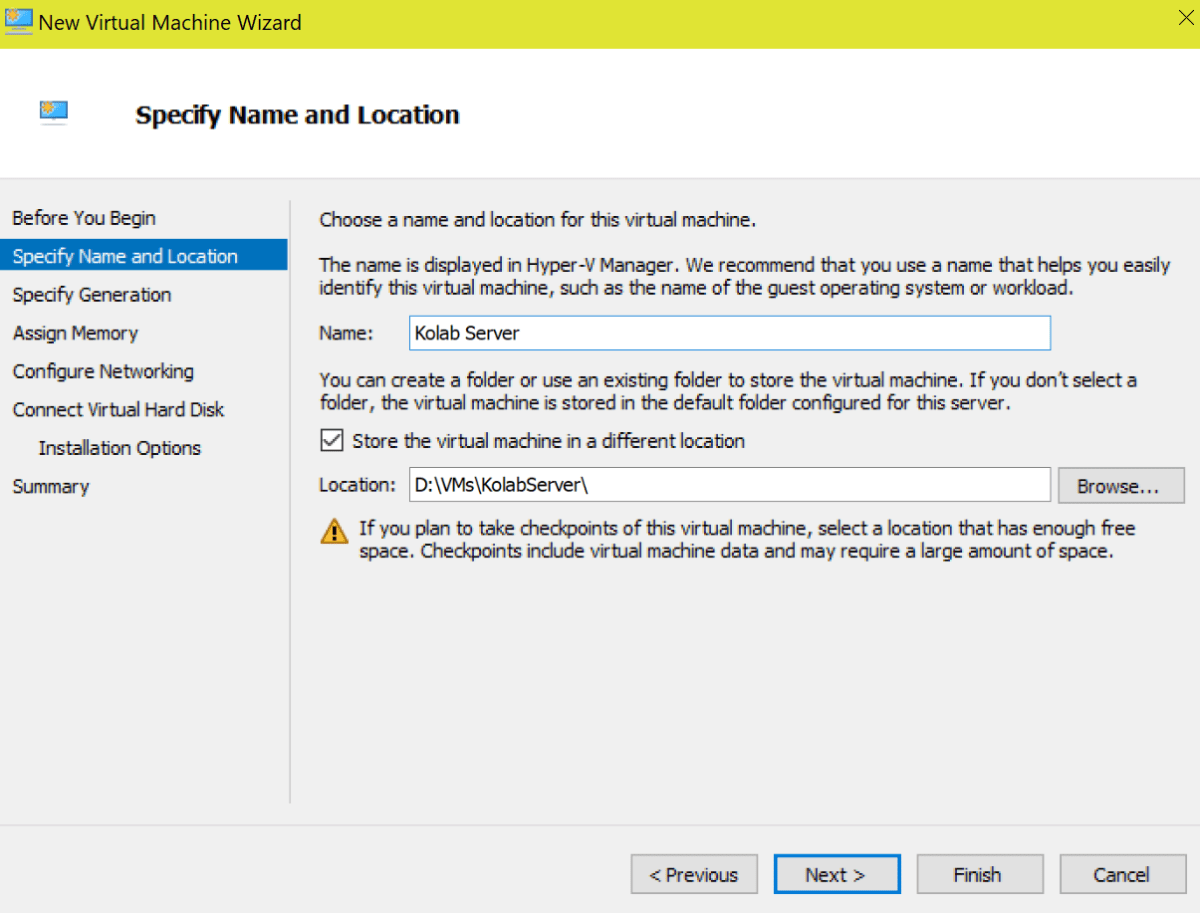
- Name your VM something logical and choose where to store the files. Pick a disk that has plenty of room. You can see I’ve chosen my D drive because it is large and mostly empty. Choosing a drive sperate from my OS partition will also help to limit the performance impact my VM(s) will have on my overall system performance.
- On the next page select Generation 1 (few Linux operation systems support UEFI).
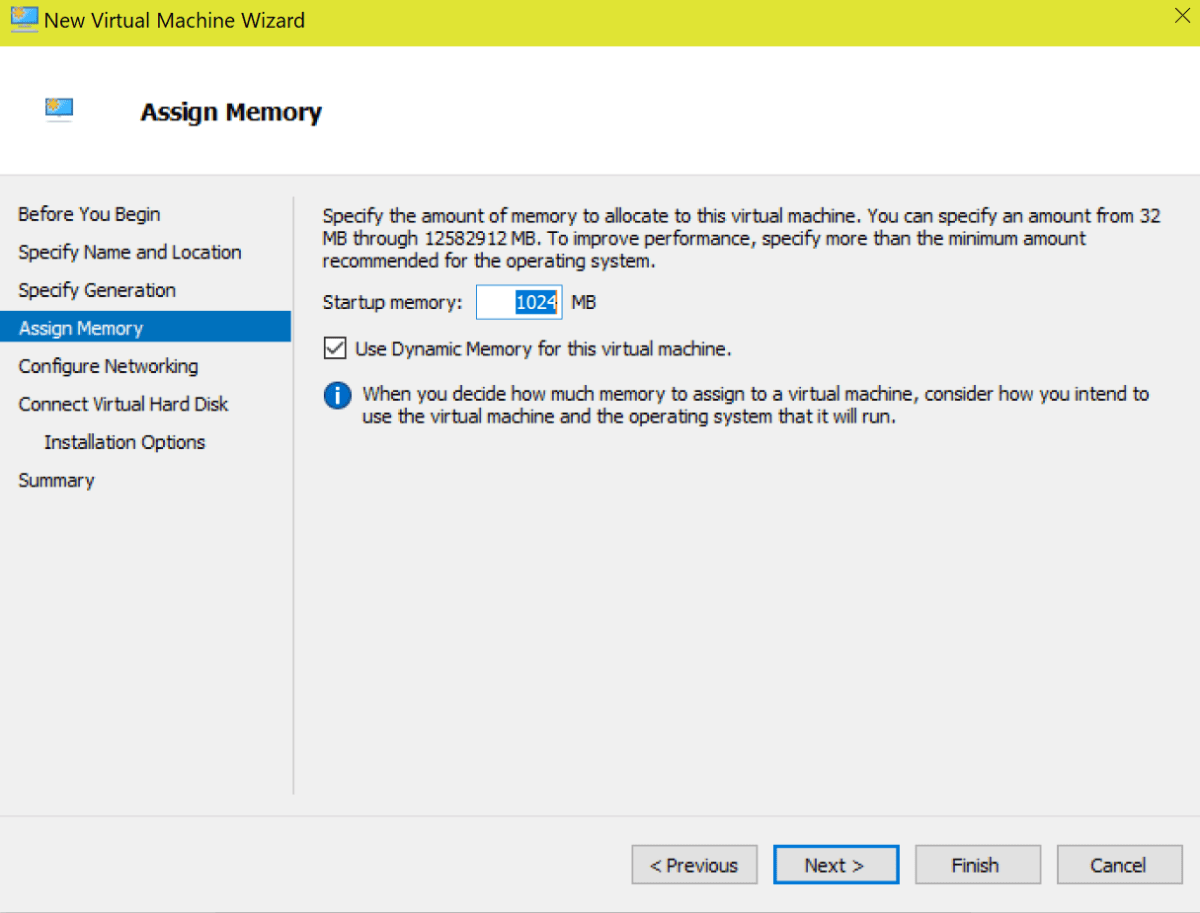
- Assign memory to your VM. More memory will make your VM perform better at the cost of lowering the performance of the Windows host machine. It’s a balancing act but the default 1GB is a good place to start. Leaving the Dynamic option selected will allow Windows to provide more memory to the VM if it is available.
- Configure your network by selecting the virtual switch that you created in step one.
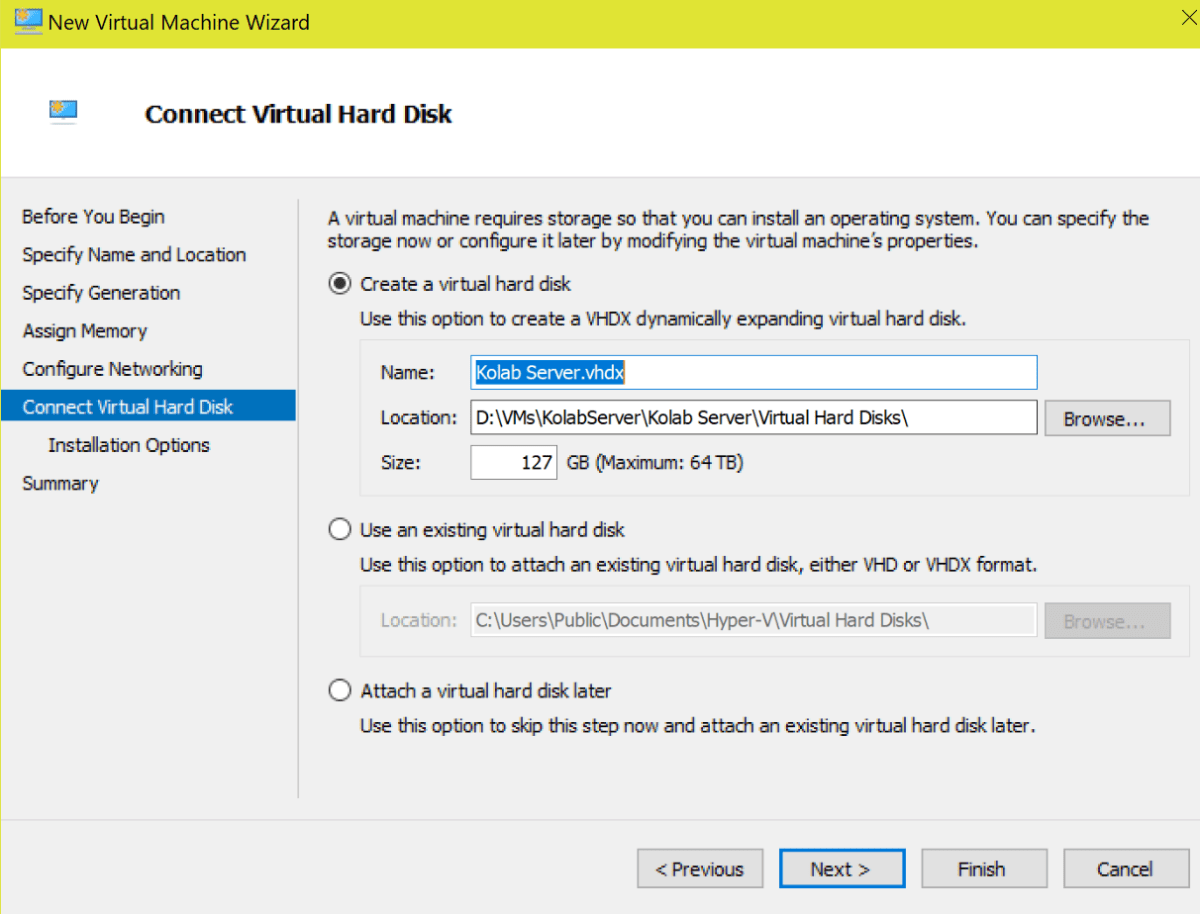
- Storage is essentially a file (.vhdx) on your hard drive that will be used for the VM. Do not assign more space than you can afford to spare. Hyper-V / VirtualBox will create a file large enough to store your virtual machine and will allow it to grow to the maximum size you have entered.
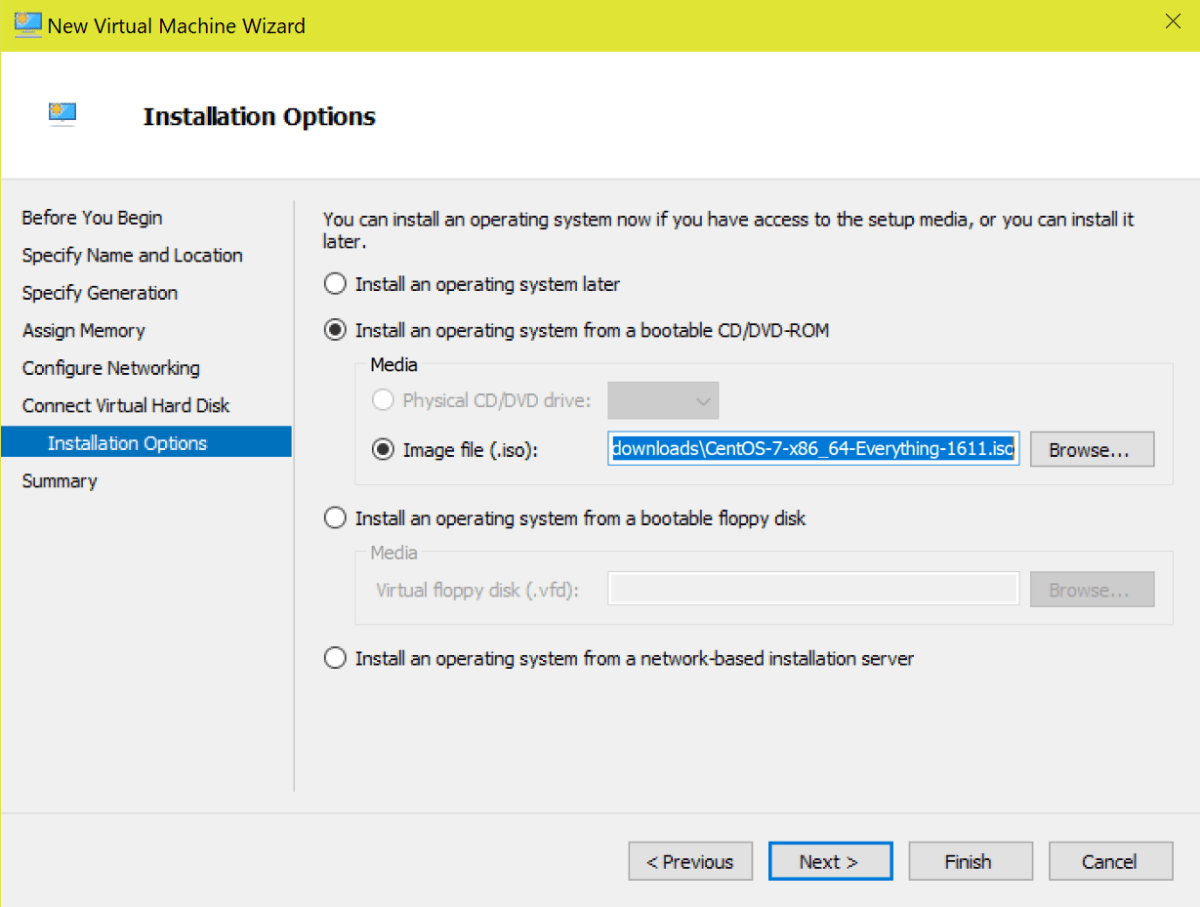
- Specify the location of your Linux ISO on the next screen.
- When you click on the Finish button your VM will be created in Hyper-V but the OS is not installed. To start the installation right click on the VM and start it. Then right click again and choose Connect. This will open a window that displays your VM screen and will allow you to interact with the server.


Linux OS Configuration
The first time you connect to your server it will boot from the ISO you selected during the creation wizard. Each Linux installation is slightly different and not in the scope of this document. For a Kolab server there are some configuration options you need to consider regardless of the distribution you are installing.
- You might be tempted to select the Email role if your chosen Linux distribution has one. Don’t. It will probably install Sendmail and that will cause issues when we try to install Kolab. I recommend the generic server role or application server role.
- I recommend choosing to install the GUI (GNOME Desktop) if possible.
- Your server’s hostname needs to be an FQDN that is resolvable (in DNS) on your network or the Kolab services will fail to talk to each other. For example, my primary SMTP domain is whatdouknow.com our hostname is kolab.whatdouknow.com. Names like localhost, localdomain, etc. will not work correctly. If you don’t run your own DNS server you can use a hosts file on the VM itself. Sudo gedit etc/hosts will open the file for editing.
- If you have set your Vswitch as I suggested above your VM will get an IP from the same DHCP server that your host computer did. You will need to reserve this address in that DHCP server for this machine or set a static address manually.
- If you are installing CentOS 7, this is an excellent guide: http://www.tutorialspoint.com/articles/centos-7-step-by-step-installation-quick-guide
- Once you have completed the installation you will need to update it. The GUI tools for most Linux installations usually include a software updating application. If yours doesn’t then: sudo apt-get update and sudo apt-get upgrade should do the trick (you’ll need both commands).
Kolab Prerequisites
Now that we have our Linux VM up and running it is time to install Kolab but there are quite a few pre-requisites we’ll need to configure first.
- Open a Terminal and give the session root access by typing: sudo -i then press enter.
- Kolab doesn’t support SELinux yet (advanced security module) depending on your Linux distro, you might need to disable it.
- gedit /etc/selinux/config (use vim /etc/selinux/config if you chose not to install a GUI)
- change the line SELINUX= from enabled to disabled and save the file.
- Open the firewall ports that Kolab needs to function by pasting the following script into the terminal session.
- for s in ssh http https pop3s imaps smtp ldap ldaps
do
firewall-cmd –permanent –add-service=$s
done
for p in 110/tcp 143/tcp 587/tcp
do
firewall-cmd –permanent –add-port=$p
done
- for s in ssh http https pop3s imaps smtp ldap ldaps
- Restart the firewall so the settings take effect.
- firewall-cmd –reload
- Now we’ll need to install the Kolab repository so that we can download and install the packages.
- Paste the following line in your terminal session: rpm -Uhv https://dl.fedoraproject.org/pub/epel/epel-release-latest-7.noarch.rpm
- Change to the following directory: cd /etc/yum.repos.d/ and run the following command to add the kolab repository.
- Retrieve the GPG key by running:
- rpm –import https://ssl.kolabsys.com/community.asc
- Install the yum-plugin-priorities package.
- yum install yum-plugin-priorities
- This command is going to prompt you for (Y/N) at least twice so don’t walk away.
- yum install yum-plugin-priorities
- Finally, we need to set some service priorities.
- for f in /etc/yum.repos.d/Kolab*.repo; do echo “priority = 60” >> $f; done
Kolab Setup
Now it’s time to install and configure Kolab.
- Install command
- yum -y install kolab
Next we’ll launch a text based wizard and answer its questions. It will ask for five passwords so have your generator handy. To be sure that all the prerequisite changes have taken effect, I recommend rebooting your Kolab VM before continuing.
- Open a terminal session and give it root access
- (sudo -i)
- At the prompt
- setup-kolab
- Enter and confirm the application’s administrator password
- Enter and confirm the LDAP administrator password
- Enter the user the service will run under
- pressing enter will select “nobody”
- Enter the group the service will run under
- pressing enter will select “nobody”
- Enter and confirm the Cyrus administrator password
- Enter and confirm the Kolab service password
- When prompted for the MySQL installation
- choose option 1 and
- enter (the preset password is blank)
- Enter the time zone UTC in Country/City format example; USA/Chicago would be the CST.
- Enter and confirm the password for the Roundcube webmail interface.
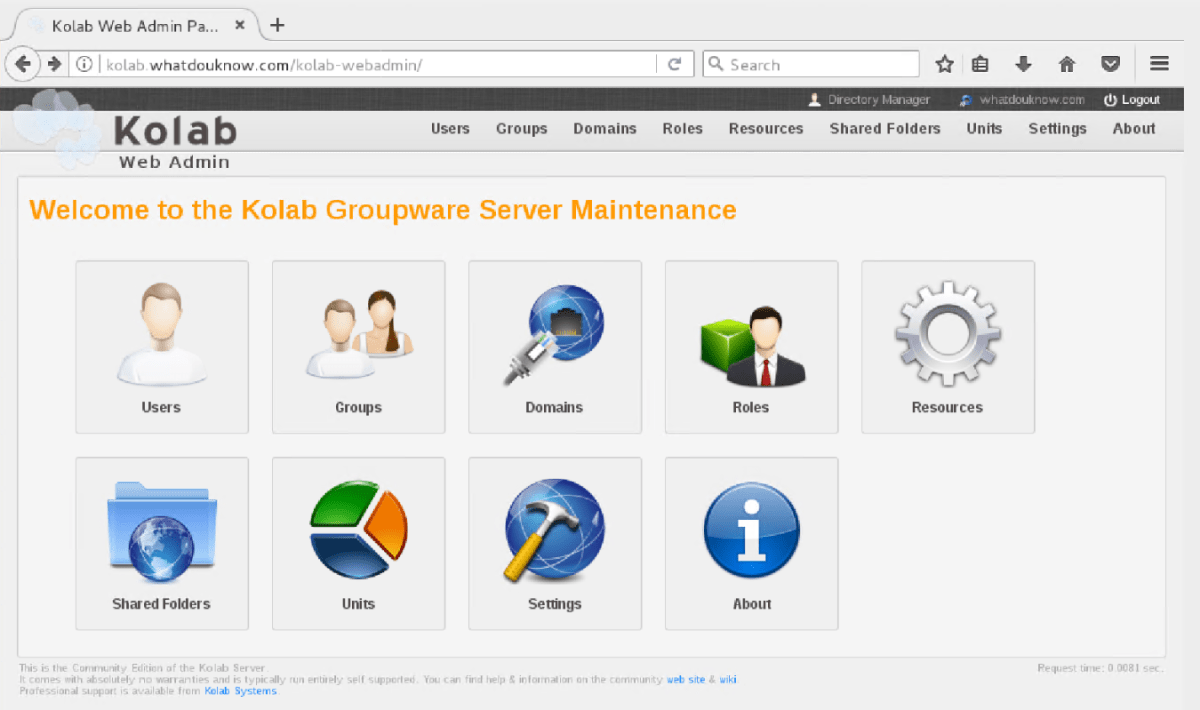
Congradulations you have installed Kolab. You should be able to launch a web browser that has network access to your server; if you installed a GUI the one on your server will work fine. Open the URL http://yourhostname.yourdomain.com/kolab-webadmin and logon with cn=Directory Manager and the password you configured for it. You will be presented with the Admin control page if everything went according to plan.
Retry
If everything didn’t go to plan you can run setup-kolab again but there 2 things you need to do first or you will get error messages.
- Clear the LDAP server configuration.
-
remove-ds.pl -i slapd-$HOSTNAME -a (replace hostname with the name of your system)
-
- If the databases were created you will need to drop them.
- MySQL (password is blank)
- Show Databases; (the ; is part of the command)
- Drop Database kolab;
- Drop Database roundcube;
- quit;
- Reboot your server before running setup-kolab again.
In the next article in this series we will examine how to get Kolab setup and running including routing mail, configuring users, setup clients, configure sharing of all types, and more.

One thought on “How to Install a Kolab Linux groupware server on a Hyper-V virtual machine”