In this series we’ll be investigating the options for digital journaling on the iPad. We’ll take a look at the available software along with various techniques for bullet journaling in a digital format. First we’ll say hello to the new iPad 9.7 with Apple Pencil support. This series has a twin based on Windows Tablets: Part 1, Part 2, and Part 3 that you may also enjoy.
Until now, if you desired to use an instrument for writing or drawing on your iPad, other than your finger, there were only a couple of options. None of which were particularly grand.
The first thing most of us try is a capacitive stylus; a mesh tipped stick that works for tapping but is too wide for precision marking. Next up are the 3rd party active pens like Fifty-three’s Pencil. These these types of tools use various electronics to send more data about your strokes to the tablet, usually over bluetooth. They work better, but not great, and have some severe limitations; chiefly, they only work in the app that comes with them more often than not.
Your other option was to shell out some serious cash for the iPad Pro and the Apple Pencil. I’ve enjoyed being teased by the wealthy Apple fans of the world that could drop close to $1000.00 so they could draw with precise results on their tablets.
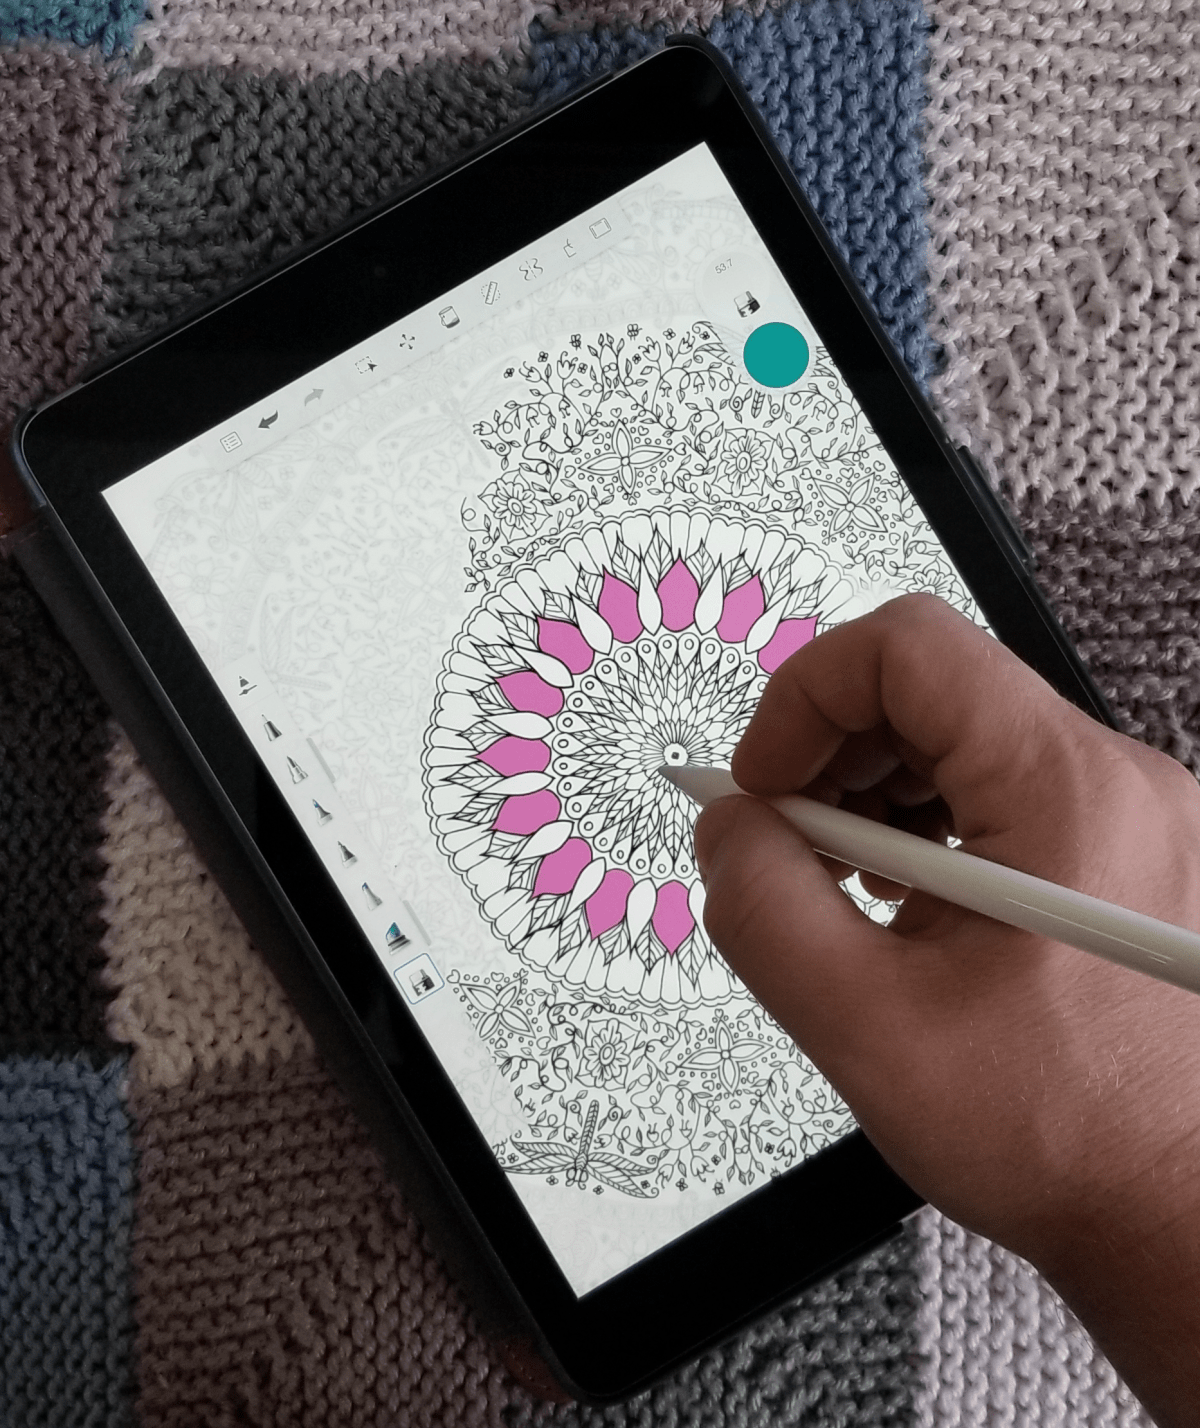
Lucky for me (and my wife) Apple has decided to grace the rest of us poor sobs with a non-pro tablet that works with the treasured stylus. The new iPad has pencil support and pricing starts at $329.00. Of course, the pencil itself is just shy of $100.00. I was able to find the 128GB iPad for $399.00 and decided that model was the winner.
So, what’s it like you may be wondering? It’s both amazing and frustrating. Allow me to explain. The pencil itself is well-balanced, totally round, the same lenght as a #2 pencil, and pleasant to hold in your hand. The iPad supports pressure sensitivity, tilt (used for shading), and it tracks well. It’s fantastic when using it in one of the supported apps.
A fine line trace done in Autodesk’s Sketchbook
Unlike Windows Ink or Samsung’s S-Pen, Apple’s Pencil only works in designated apps. You can use it to tap on the screen anywhere but there’s no handwriting recognition, you can’t just draw and scribble on any screen, it’s not a general system input tool. It also lacks the hover mode (think mouse pointer) that is typical for most active writing tools. For someone who writes with a digital pen most of the time (doing it now) this is a big let down. Apple is still fairly new to the digital pencil club, so hopefully future editions of iOS will add handwriting support. There are a few apps that have built-in handwriting recognition like Writepad that are a step in the right direction but using them to write WordPress and Facebook posts is clunky.
Fire up your favorite drawing app and you’ll soon forget all about the handwriting thing. Personally I like Autodesk’s Sketchbook, it has most of the pro level tools but is far less complicated than Photoshop. There’s not much resistance between the pencil’s tip and the iPad’s screen. Some artists may not like the slide. Personally, I’ve grown to prefer less resistance; drawing on paper feels slow and awkward to me now. Especially when coloring and shading. The pencil is responsive and the tilt and pressure sensitivity work well in apps that support the features.
An original freehand done in Autodesk’s Sketchbook
The new iPad is fast, really fast. It runs on Apple’s new A10 brain chip and it sings. Now that iOS supports multiple (2 + a video) windows and has the horsepower to run them, it’s capable of replacing a traditional computer for general use. The 9.7 inch screen looks great. The rest of it is what you’ve come to expect from the latest generation of Apple’s tech. It feels great to hold in your hand and because it shares a footprint with the previous 9.7 there are a plethora of accessories already available for it.
Some reviewers and owners complain about the screen bezel on this and other tablet devices. I see not having a bezel causing another issue. Without it there would be nowhere to put your thumb(s) when holding the device that didn’t interfere with the view.
Overall I really like the new iPad and am thrilled that Apple added pencil support to the base model. For me, the lack of handwriting input and hovering will keep me using Windows or Android based pen tablets. Alas, I didn’t purchase it for my use. My wife absolutely loves it. If you’ve followed my blog for long, you’ll know that I was trying to convert her to a Galaxy Book. She learned to use it but never truly enjoyed Windows. That’s ok, it means the Galaxy tablet is mine now. Look for a review of it soon.
If you’ve been following along with this series, you’ll know that I am hip deep in the process of converting my spouse from an iPad to a Windows tablet and from paper to digital journaling. So far, we’ve chosen the perfect tablet and set up the best windows profile for pen enabled machines. Now it’s time to dig into journaling and note taking.
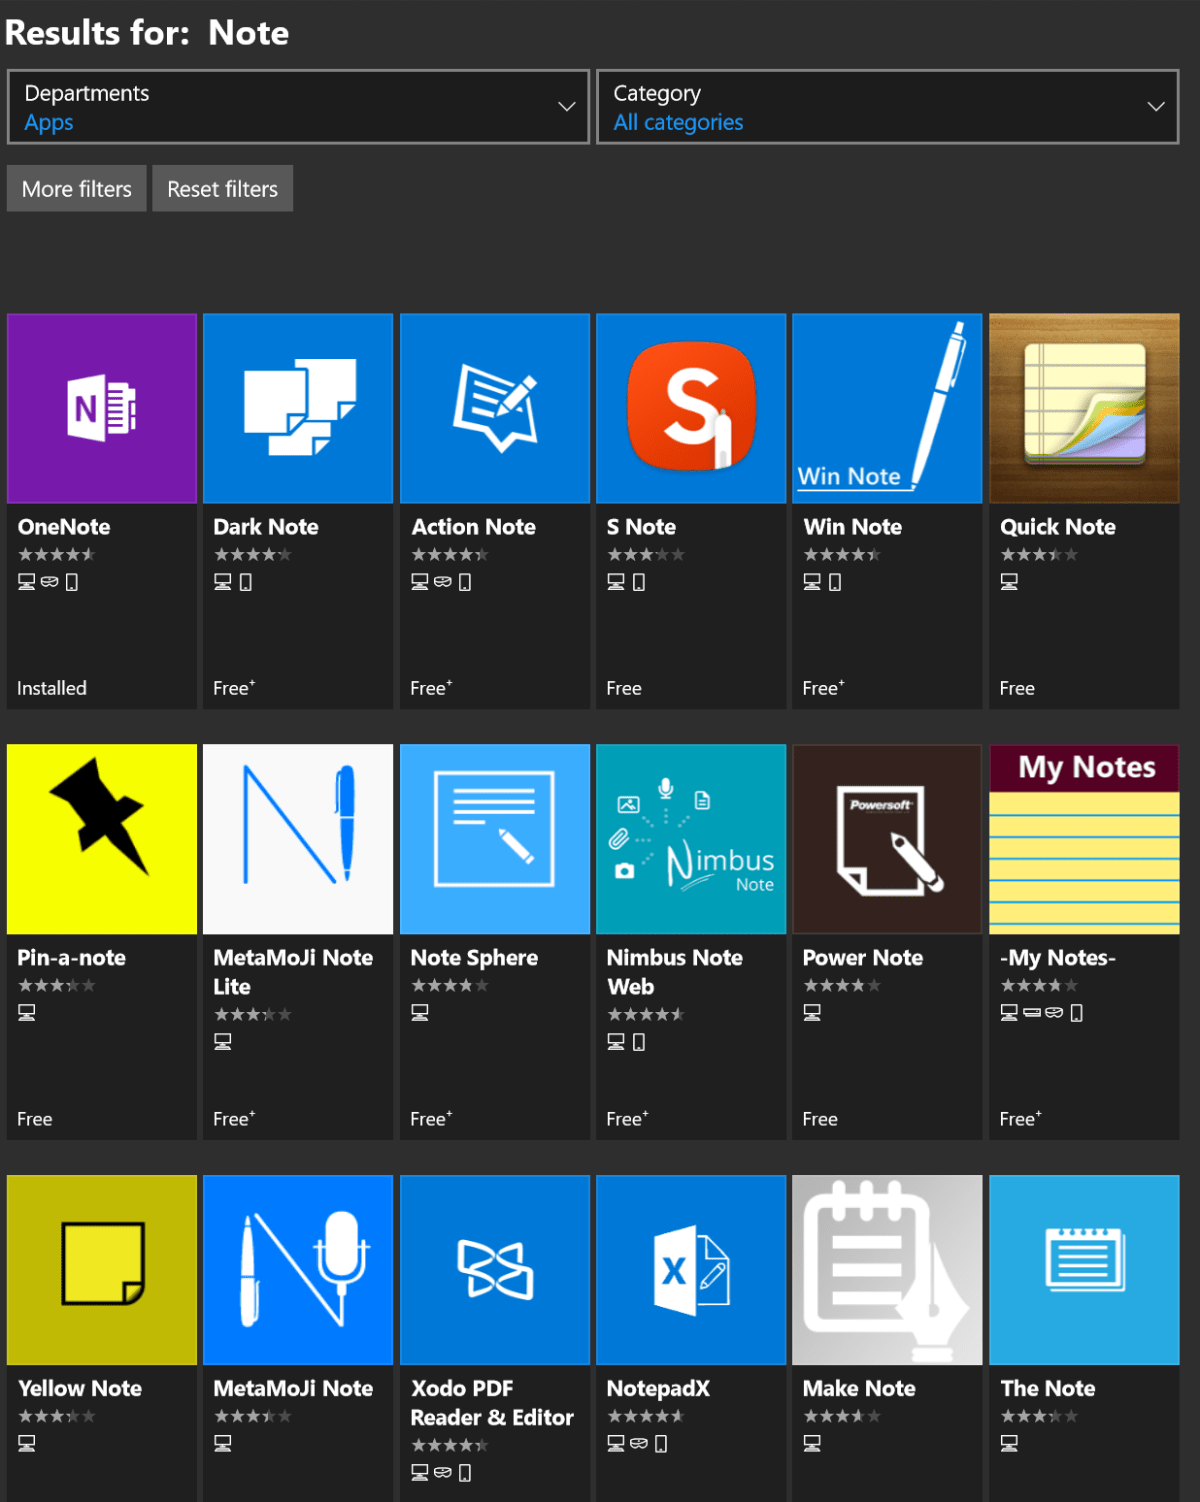
A quick search of the Microsoft Store will return an overwhelming number of applications dedicated to taking and organizing notes. We’ll examine a few of them in detail with future posts in this series. The patron saint of notes, doodles, and mind-dumps in Microsoft’s world is OneNote and that’s what we’re focusing on this time around.
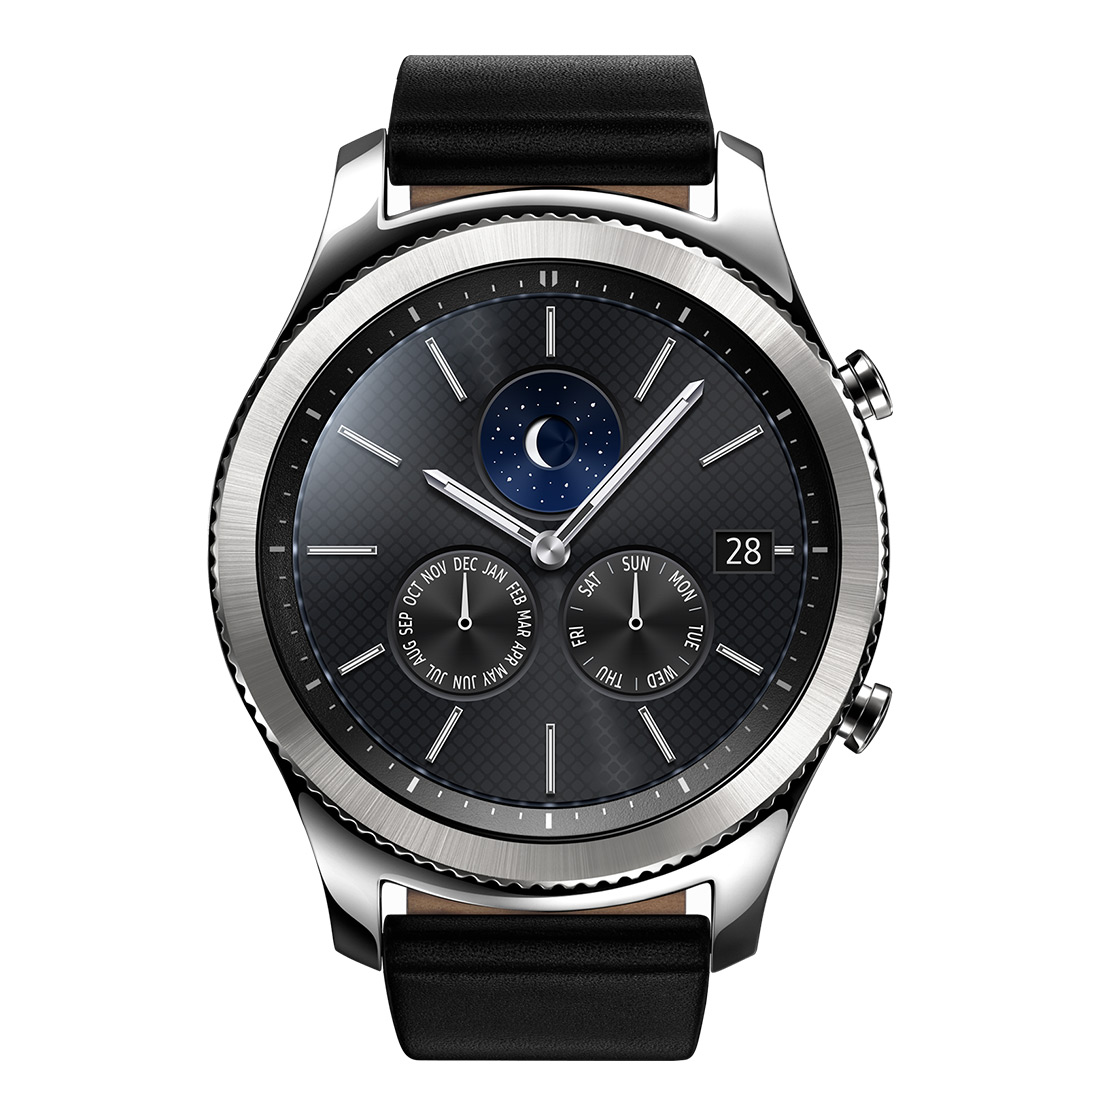
As a long time fan, I consider OneNote to be one of Microsoft’s greatest achievements and a core contributor to my success. I have thousands of pages of memory augmenting documentation from every job or project I’ve ever been involved with. Every computer problem that I’ve ever encountered, all of the code and scripts I’ve written along with plans, meeting notes, article ideas, book ideas, things I am planning on building or buying, manuals for the stuff I already have; it’s all in OneNote. All searchable in a moment from any of my computers, my phone, or even my watch.
It is difficult to explain the full value of having all of this data available on-tap but a couple of situational examples might help. How many times have you sweated it out trying to remember what you did all year for your review at work? This never happens to me. In IT work, running in to the same problem months or even years apart is common. Can you remember what you did to fix that IIS app pool last summer? Get yourself organized and documented people! Next to exercising it’s the most stress relieving thing you can do. My boss thinks that I have a photographic memory but I can barely remember my own birthday.
Enough evangelizing, on to the good stuff. Microsoft publishes OneNote in three different versions. There’s the desktop edition that comes with Office; it’s icon name matches the version of Microsoft Office that you have installed, in my case OneNote 2016. The tablet/mobile version named OneNote, is free and can be found in your device’s app store; including the Microsoft Store for Windows 10. Finally, if you subscribe to Office 365 or have SharePoint at your workplace you can access a web edition that runs entirely in your browser. All three versions can share data and have the same core feature set but there are slight differneces between them. Through out the rest of this article when you see (DE) I am referring to something that can only be accomplished in the Desktop Edition. Microsoft will be phasing out the desktop edition after 2016. They are concentrating their efforts on the UWP (Universal Windows Platform) AKA the App Store version. Already they’ve added features to the UWP version that are unique to it. When you see (UWP) I am referring to something that is available only in the Universal Windows Platform (app store) verion of OneNote.
OneNote uses a hierarchical organization system that imitates your high school trapper-keeper. Notebooks -> Section Groups -> Sections -> Pages -> Sub-Pages is how the train flows. You can (and should) have multiple notebooks; personally I have one for Work, one for Home, and one for Writing. In a notebook you create sections and occasionally it makes sense to group several sections together. For example; in my Work Notebook I organize major categories like Software, Networking, Troubleshooting, etc. as section groups. Inside the software section group you might find sections named Windows, Exchange, Lync, and so on.
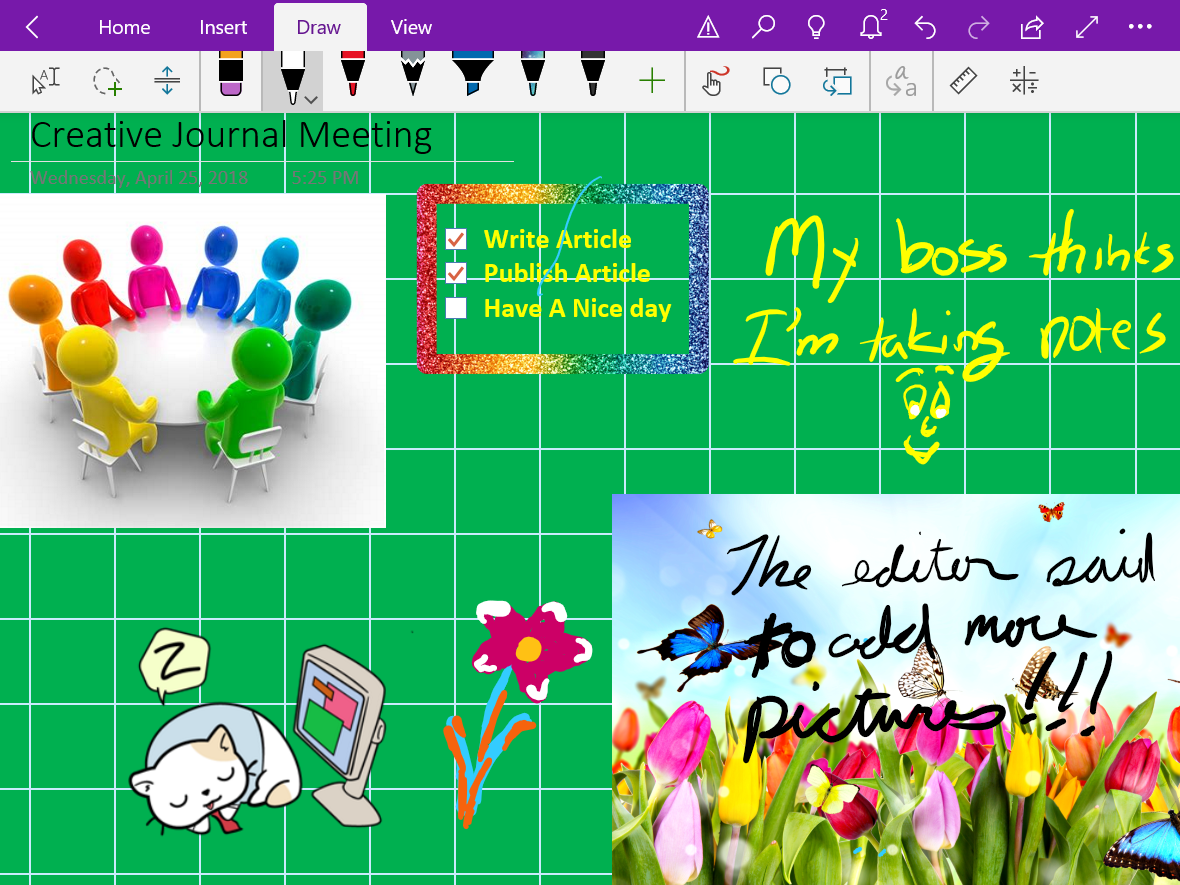
The first time you open OneNote it will create a notebook for you. The pages of this first notebook are actually a tutorial on how to use the software. The instructions are well thought out and more than good enough to explain how the software works; do yourself a favor and spend a few minutes reviewing them. This post is not about how to use OneNote , that is easy enough to figure out and there are already plenty of How To guides on-line. Being successful with any note taking system requires a lot of forethought and setup. As with most projects of this type, the hard part is figuring out how to get started. In this post we’re going to step through creating a OneNote notebook for tracking a typical office worker’s responsibilites but with a creative flair. Nothing will inspire you to use your notebook more than making it visually appealing. Like your living room, you want it be a comfortable place to be.
Step One – How To
Read the afore mentioned tutorial notebook pages so that you are able to follow along. In most cases I will not be explaining every action in minute detail. You can also get some excellent instructions via Microsoft’s quick start guides, they include one page cheat sheets for both the UWP and DE versions.
Step Two – New Notebook
Make a new notebook named for your job. I always name mine after the company I am working for. In DE Goto File -> New. In UWP Goto the +Notebook button at the bottom of the notebooks section.
Step Three – Organize
Now we’ll create the basic structure of your notebook. You’ll want to make a section for every major function of your profession. There are a few that are ubuiquitos among office jobs so we’ll start with those but you’ll want add any that are unique to your position. Create the following sections to start with:
People – Here you’ll keep tabs on the people that you interact with. People you manage, co-workers, vendors, contractors, and bosses; you’ll want to record details about them all in this section. What they like and don’t, personality traits, and information they provide about their lives can all be valuable later. Tip: insert hyperlinks to these “people pages” on pages in the other sections for quick reference.
Projects – I like to make Projects a section group and then create sections for each project that I’m involved in under it. To do this just click tap and hold or right click in the navigation pane and choose new section group from the pop-up.
Meetings – If everyone took good notes in meetings we could probably have a lot fewer of them.
Tasks – This is where I track all the little actions I have to do that are not part of a project. I need to pull a report on sever storage once a quarter and I’ve detailed how to do it along with the script I use in this section.
Instructions – Manuals, written instructions, and even videos off Youtube get posted in this section. Onenote will index all of this stuff (even the dialog from video and text in pics). This means that the next time you search for ” use postage” the manual will pop-up.
Ideas – Self explanatory, everybody gets ideas about how to do something better, easier, or faster; the trick is in remembering them at an appropriate time.
Issues – If you want to solve problems or have one you need help solving, track them here to ensure you don’t waste time repeating fixes or worse yet forget all together.
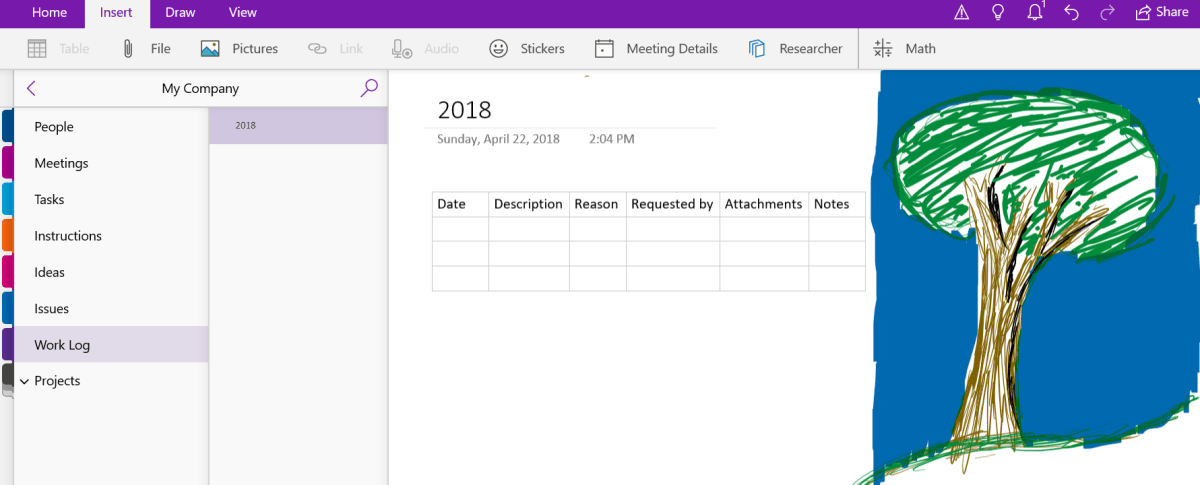
Work Log – In the lead-in I mentioned that I never freak-out come review time. This section is why. I make a page for each year and on them I insert a table with the following columns: Date, Description, Reason, Requested By, Attachments, and Notes. At the end of everyday I spend 10 minutes jotting down what I spent my time on.
What your notebook should look like when finished. Be sure to doodle in the margins.
Step Four – Create
Now that we’ve got a notebook up and running, we can dive into the creative part of journaling with OneNote. Drawing and doodling in OneNote is a cinch; just select the draw tab in the ribbon, pick a tool and color and knock yourself out. It works best on a system with an active stylus but capacitive pens and even your finger will get the job done.
Draw
The draw options available in the ribbon offer a lot more than just your standard pen and marker choices. Poke around and you’ll find premade shape tools, and in the UWP edition there’s a straight-edge as well as ink-shapes that turn the sloppy circles that you usually make into to perfect ones. There are also highlighter markers (which I use often) and a lasso select tool that will help you move stuff around no matter the shape.
View
Under the view tab in the ribbon you can add lines and grids to your pages. You can also change the background color of your pages from this tab. The DE version will allow you to set a picture as the background for a page. Right-click (tap-hold) any picture that you’ve inserted and pick save as background. Tip: for the best effect edit your photo in paint or Photoshop first and turn down the opacity or turn up the transparency before setting the image as your background.
Insert
The insert tab presents a lot of possibilities. You can of course insert photos but also, videos, files of all types, audio recordings, and more. OneNote will attempt to index the audio from multimedia files and the text from images to make them searchable. It will also index the text from any files you embed on a page.
There are two options here that don’t get mentioned much; one is on-line pictures, the other is stickers. Both let you search for and insert an unlimited amount of artistic flair even if your best drawing is of a stick figure. In fact it is these two options that allow OneNote to compete with the likes of Goodnotes in the creative journaling market.
All Together
Of course you’ll get the best results if you combine all of the options available in the ribbon. If you’re using the DE versions you can get your page just right and then save it as a template so it can be used over and over. Look for the Page Templates button on the insert tab. Need some inspiration? Try an image search for OneNote Art to see what people are doing with this tool.
My Tech Monkey and lack of brand loyalty have compelled me to end up with all of the major smartwatch operating systems. From the first gen Gear S1, Sony Android Wear, and Apple watch to the current equipment; I’ve had them all and witnessed their evolution. How do they stack up in the real world? I’ve worn them in every conceivable situation: work, work-outs, hikes, vacations, date night and everything in between.
I’ll start by declaring that I like them all. For my lifestyle there’s a best fit, but they’re all useful pieces of gear. Second, I must say that I’ve always enjoyed gadget watches. Calculator watch? Check. TV remote control watch? Got it. Casio Databank? I have two. I also had the Timex DataLink. I mention this because it causes a bias in my overall opinion when comparing smartwatches and standard time pieces.
My grandfather sparked my interest in time pieces at an early age. He was an antique watch trader and often took me to watch shows, pigeon swaps, and other various gatherings to obtain some of most beautiful pocket watches and clocks you can imagine. Railroad pocket watches with cases of multi-colored gold and jeweled internal mechanics were his specialty. Some of them were able to show the time, date, and phase of the moon with nothing more than spring powered gears.
Why wear a smartwatch in the first place? They don’t do anything that your phone can’t already do better. This is what more than a few members of my social group think. The valuation is accurate. They really don’t do anything that your smartphone won’t. But isn’t that true for lots of tech? What does your iPad do that your iPhone or laptop can’t? For me, the point of a smartwatch is not to provide unique functionality but to augment your other devices and to look cool while doing it. Seriously, the best feature of smartwatches from my point of view is the ability to change the watch face at will. I often match my watch to my clothing on any given day just because I can.
I use my watch to primarily do the following (no particular order):
Fitness Tracking – Specifically I need to track my heart rate, distance, and ideally my location.
Notifications – Text, email, and calendar alerts are the biggies here, but Facebook, Xbox Live, PSN, Skype and Instagrahm are appreciated.
Directions – I spend a lot of time navigating various downtown areas and have found glancing at my wrist for the next turn to be safer than having my phone up in my face.
Tell the time – This would include all of your basic watch functions; stopwatch, timer, alarm, ect.
All three of the major operating systems can perform these functions as can most of the secondary vendors like Fitbit, Garmin, and Pebble (if you can still find one). So what ends up setting the devices apart are the looks and secondary features that are most helpful to you. I’m not going to spend much time discussing specifications, there are countless articles on-line to enlighten you about the hardware options. In a nutshell Apple is square and Android is round, LOL. The watches themselves break down just like their phone counterparts.
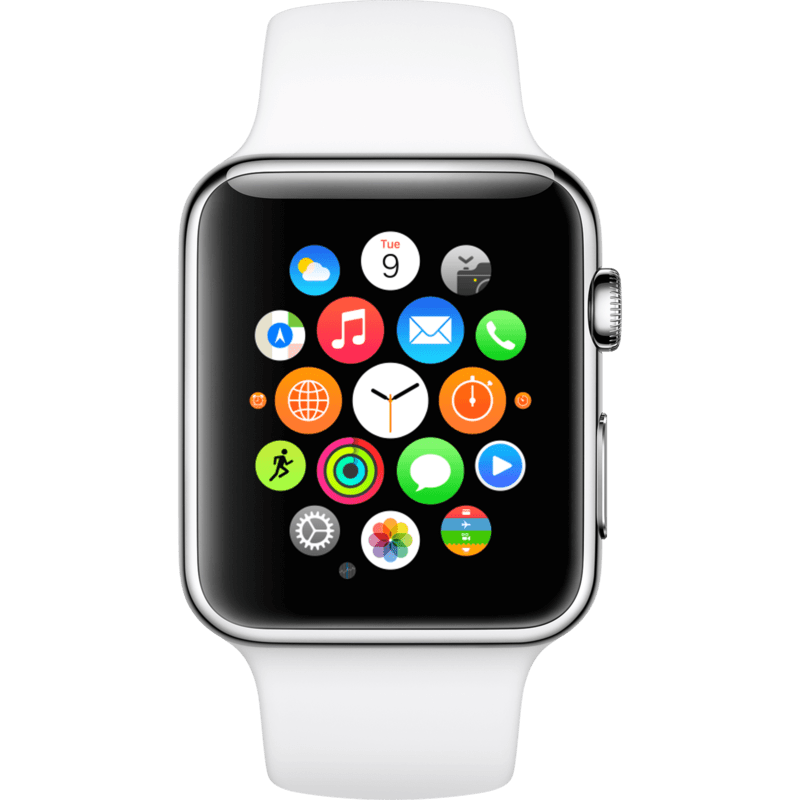
The Apple Watch is the easiest to use right out of the box; strap it on your wrist and pair it with your phone. That’s it. Sure there are apps you can install for everything under the sun, but most people don’t need them and won’t use them. The design is elegant, but I’m not a fan of square wrist watches in general. The fit and finish on Apple’s wrist computer is second to none. The tolerances between components are minuscule and the case feels like a premium device. My biggest complaint about the Apple is that you’re stuck with the watch faces they give you. If it wasn’t for this limitation, it could have ended up being my favorite.
You can use the Apple Watch with an Android phone, albeit in a limited fashion. I wouldn’t recommend purchasing one specifically to pair with an Android device, but it’s a nice option for people who are moving between platforms. My wife is the Apple fan in our home, so the Apple Watch belongs to her. I borrow it from time to time just to see what Apple has changed on it . I really enjoy wearing it, but the lack of 3rd party watch faces is maddening to those who’ve grown accustomed to the ability. It does everything else on my list of requirements exceptionally well. The Medical ID feature could prove invaluable to someone with drug allergies or other need-to-know health conditions.
Android Wear, now renamed to just Wear OS, matches its phone counterpart. Rather than a hardware and software solution like the Apple Watch, Wear OS is an operating system that many manufactures use on their watches. Not all Wear OS devices are created equally! They can have drastically different features, functions, and shapes. Due to these differences, you need to be careful when choosing a device to be sure it has the hardware to support the functions you are after. For example; choosing a Wear watch that doesn’t have an integrated GPS receiver will prevent it from tracking your run locations unless you take your phone along.
Wear OS takes more work and know how to get up and running. You will be installing apps on both your phone and the watch before it is fully functional. It is more difficult to use but ultimately offers more functionality than the Apple Watch, assuming you got top-end hardware. Plus, you can load different watch faces to your heart’s content! Up until a few weeks ago my everyday watch was a Wear based Moto 360 Gen 2. It’s Google voice functionality is the best of the voice assistants and having the full Google maps was great. You can pair most Wear OS watches with an Apple phone but you’ll get less functionality if you choose to.
Samsung wasn’t happy with Google’s Wear OS so, they created their own. Like Wear OS, Tizen is a Linux-based smartwatch operating system. Similar to Apple’s approach Samsung makes both the hardware and the operating system for the Gear S3 series of watches. If you are pairing it with a Samsung phone, the process is just as easy as Apple’s. No apps to install and configure, just pair the devices and go. Of course Samsung has their own app store full of apps for you to fiddle with, but most of the main features are controlled by the built-in software. The watch can be paired with any Android or even Apple phone.
I’ve just recently switched to a Gear S3 and for my lifestyle its the best choice of the three systems. It doesn’t have as many apps as Google’s Wear OS, and isn’t as simple as the Apple Watch; it sits comfortably in-between them. For me, the always online LTE connection and excellent fitness app (Samsung Health) are the best features. It offers some truly excellent watch faces (not as many as Wear) and looks nice. The LTE connection means I don’t need a phone at all when I head out for a run, I can stream music, track my run and heart, and even take calls and texts all from the watch. The bad news is that it requires a service plan from your carrier. I was also disappointed in the S Voice assistant and had to learn to use a new map provider.
Smartwatches aren’t for everybody but they can be a life saver if you rely on tech for your livelihood or are required to be in constant communication. They don’t do anything your phone already doesn’t, but they do extend your digital life to something that is always visible. I’ve stopped wearing out my pants pockets since I’ve started wearing them, LOL.
I have been employed by the tech sector for my entire working life. Somehow I always wind up in positions that demand on-call service. As a result, I rarely leave my home or office without a laptop and it’s accessories in tow. I have never been on vacation or a business trip without one.
I’ve tried every Palmpilot, Pocket PC, Windows CE, Psion, tablet, and mobile ever made in an attempt to free myself from “The Bag”. Sometimes I feel like Lydia from Skrim ” … sworn to carry your burden”. Until now, the mobile devices always fell short for me to use them as anything other than companions. They lacked power, storage, input options, apps, something was always missing.
I’ve had my Note 8 since launch day and have been locally venturing away from base without “The Bag” for a while now. My company has a VDI infrastructure that I can easily connect to with my Note. The hover mode afforded by the S-Pen acts as a wireless mouse and the awesome handwriting recognition handles my input needs with ease. Openvpn on my home network means I can RDP to any of my personal equipment as well. The Google play store is fully fleshed out with engineering and development utilities along with any productivity software that you might require.
The Note 8 has one more brilliant trick up its sleeve that has allowed me to end up on this flight to San Antonio with nothing in the overhead bin but my jacket. The Dex dock in my luggage means I have access to a full PC experience should it be required on my journey. I only need to hook the dock to the hotel TV (HDMI) and connect my portable keyboard / touchpad to one of the USB ports and I’ll be in business. Many of my apps like Word, Excel, and Outlook will run in fullscreen or windows in Dex mode and if I need more power I only have to logon to the VPN and connect to my VDI or RDP to the system that needs attention.
The Dex dock also increases my entertainment options by letting me stream fullscreen video, browse the web, and even play games. Not all applications work with it but more than enough to get by do.
So I sit here on the plane writing this post and try to suppress a chuckle as my seat neighbor tries in vain to get his laptop to fit on the tray-table in a manner that allows him to comfortably type. All the while, reflecting on what a different experience airport security is without “The Bag”. OMG, I never knew how easy it could be!
It can be difficult to know what applications are installed on the machines in any given company. Not knowing what is installed where, can lead to all kinds of trouble when updates are pushed and changes are made. Enterprise class tools like System Center that can create a CMDB are expensive. So what’s an Admin supposed to do?
If your budget won’t allow you to purchase a tool or pay a DEV team to write you one; you’ll have to do it yourself. PowerShell is always my goto tool for this kind of thing on a Windows network. You could accomplish the same goal with VBS or even CMD batch files, but if you are running systems so old that you have to resort to those tools, you have bigger problems than worrying about what apps are installed.
If you’ve spent time researching this, you’ve probably seen several techniques to get the data that you’re after. I like connecting to the registry and searching the 32 bit and 64 bit uninstall keys because it is fast, accurate, and has a lot of info available. You could also use WMI/CMI, scan the Program Files directories for exe files, and more. As with everything in any kind of programming; the hard part isn’t getting the data, it’s out-putting it into something useable. Lucky for you I’ve included that feature in my script.
The code below will locate your AD Forests and find domain controllers in each of them. Next it will scan for objects that contain “Windows Server” in the Operating System description and add those object’s DNS host names to an array. It will ping each server in that array to see if they are real and on-line, because AD can have dead objects in it. Then it will add the systems that are up to another array and for each of those, the script will remotely access the registry keys that contain the uninstall data. The uninstall data will be used to create a CSV report that lists each application’s name, version, help link, and install date along with the name of the machine.
You’ll need to have the RSTAT tools installed or run the application from a Server that has them. To be successful you’ll also need enough privileges to scan the remote machines registry and your network can’t be blocking WinRM. Other than that, just save the code to a PS1 file and run it. The report will be in your Documents folder named windows_servers_cmdb.csv.
If you want to adjust to scan apps on workstations just change the filter keyword to “Windows Workstation”; you could also do both. To fully automate it just add a line at the bottom to email the attachment and schedule it to run as a task. If you want to get really creative convert the table into HTML and upload it to an IIS or Apache host every day. If you have SharePoint you can upload it to a custom list and then create some pretty killer reports. Views that filter for key words like “Exchange” or “SQL” are helpful for everyone.
Be sure to tell your boss it took you all week to do this LOL.
Bethesda graced all of the PC virtual reality adopters with one of the best RPG games every created. Skyrim arrived on the PC in all its VR glory on April 2nd. I had pre-ordered it and took the day off from my day job for the occasion. We patiently checked Steam every 5 minutes after the estimated launch time of 5:00 PM waiting for the game to unlock. I don’t think I’ve ever seen my son so excited. In true Steam fashion, it was late; the game unlocked at or around 6:00PM.
We have Skyrim for the Xbox 360, the Xbox One, the Switch, and the HD Edition for the PC. My wife, oldest daughter and son have more than 500 hours of play time in the world each. We’re a family of experienced players to say the least. We all agreed to let the youngest go first. He signed on to his profile and fired it up.
Before we get too far into discussing the game let’s talk a little about what I’m running it on. This title takes some serious power to run clean. I’ve got an i-7, 32 GB of 3000 SDRAM, a TB M2 disk, an MSI Gaming OC Edition RX-480 8GB, and a 1000 watt PS. The system and GPU are both overclocked (ask in the comments if you want the settings). I am able to run the game on high graphics with supersampling turned all the way up and still hit the 90 FPS all VR players are looking for.
When you first pop into the game world it looks pretty blurry. You need to go into the settings and turn up the supersampling if your system can handle it. This will drastically clear up the blurry textures and text. Besides the game’s supersampling, your video card drivers, as well as, the Oculus and Steam VR software also have settings for this function that might help you get the best picture possible. At some point I intend to write an advanced guide on configuring the Rift but for now: Google “Increase Oculus Pixel Density”, your ability to use supersampling is entirely dependant on your GPU. Cooling is going to be very important, I don’t recommend attempting this on a gaming laptop.
Once you’ve gotten the settings all sorted you’ll have to restart the game so I recommend getting them all squared away before you start the actual campaign. The intro will have you set your mode of locomotion. You can choose between teleportation, ala Robo-Recall and Doom, or you can use smooth motion via the analog sticks. If you pick the analog option, a blinder effect will restrict your field of view when you move. This is to help prevent motion sickness. It works; I turned it off and was almost instantly dizzy but I’ve trained my brain to let it pass and after a few minutes I was fine. The setting is under the VR menu look for FOV limiter down near the bottom of the list. While you’re in there you might also want to turn off the cross-hairs and dialog captions because they ruin the immersion.
Back to the game; my son fired it up went through the settings and started the story. Wagon ride with the prisoners begin! Holy crap the people look real. Jeez, the scenery is amazing. Is that guys mouth taped shut? It was a non-stop love fest. The execution is exactly that; we all cringed during our respective turns. The dragon; I won’t ruin it for you but a full-scale fire-breathing 3D creature………
Talking to the NPC’s feels almost like a conversation with a real person. The blacksmith’s wife is actually pretty hot. If they can patch voice recognition into this thing I know several people who will probably live in Skyrim more than here. The world feels like somewhere you are going to rather than a game you are playing. Of all my family and friends I’m the only one that hasn’t played very much Skyrim. That is about to change.
Is the game perfect? Nope. Not even close. You can fight just by wagging your hand back and forth, the float bugs are still present, and the controls are tricky to master. Is this best VR adventure I’ve seen so far? Absolutely. Does it suck that they expect you pony up another $60.00 for a game you’ve probably already purchased more than once? Yes, but after having spent some time with it I would have paid double. Don’t nitpick it; just live it. Go for a swim (enable realistic swimming and sneaking), climb a mountain. try not to freak out the first time a frost spider charges you. Its one of the best entertainment experiences I’ve ever had and I’ve only spent a few hours with it. If you’re not on the VR train already you should think about jumping on. Its going to be a wild ride from here on out.