
If you’ve been following along with this series, you’ll know that I am hip deep in the process of converting my spouse from an iPad to a Windows tablet and from paper to digital journaling. So far, we’ve chosen the perfect tablet and set up the best windows profile for pen enabled machines. Now it’s time to dig into journaling and note taking.
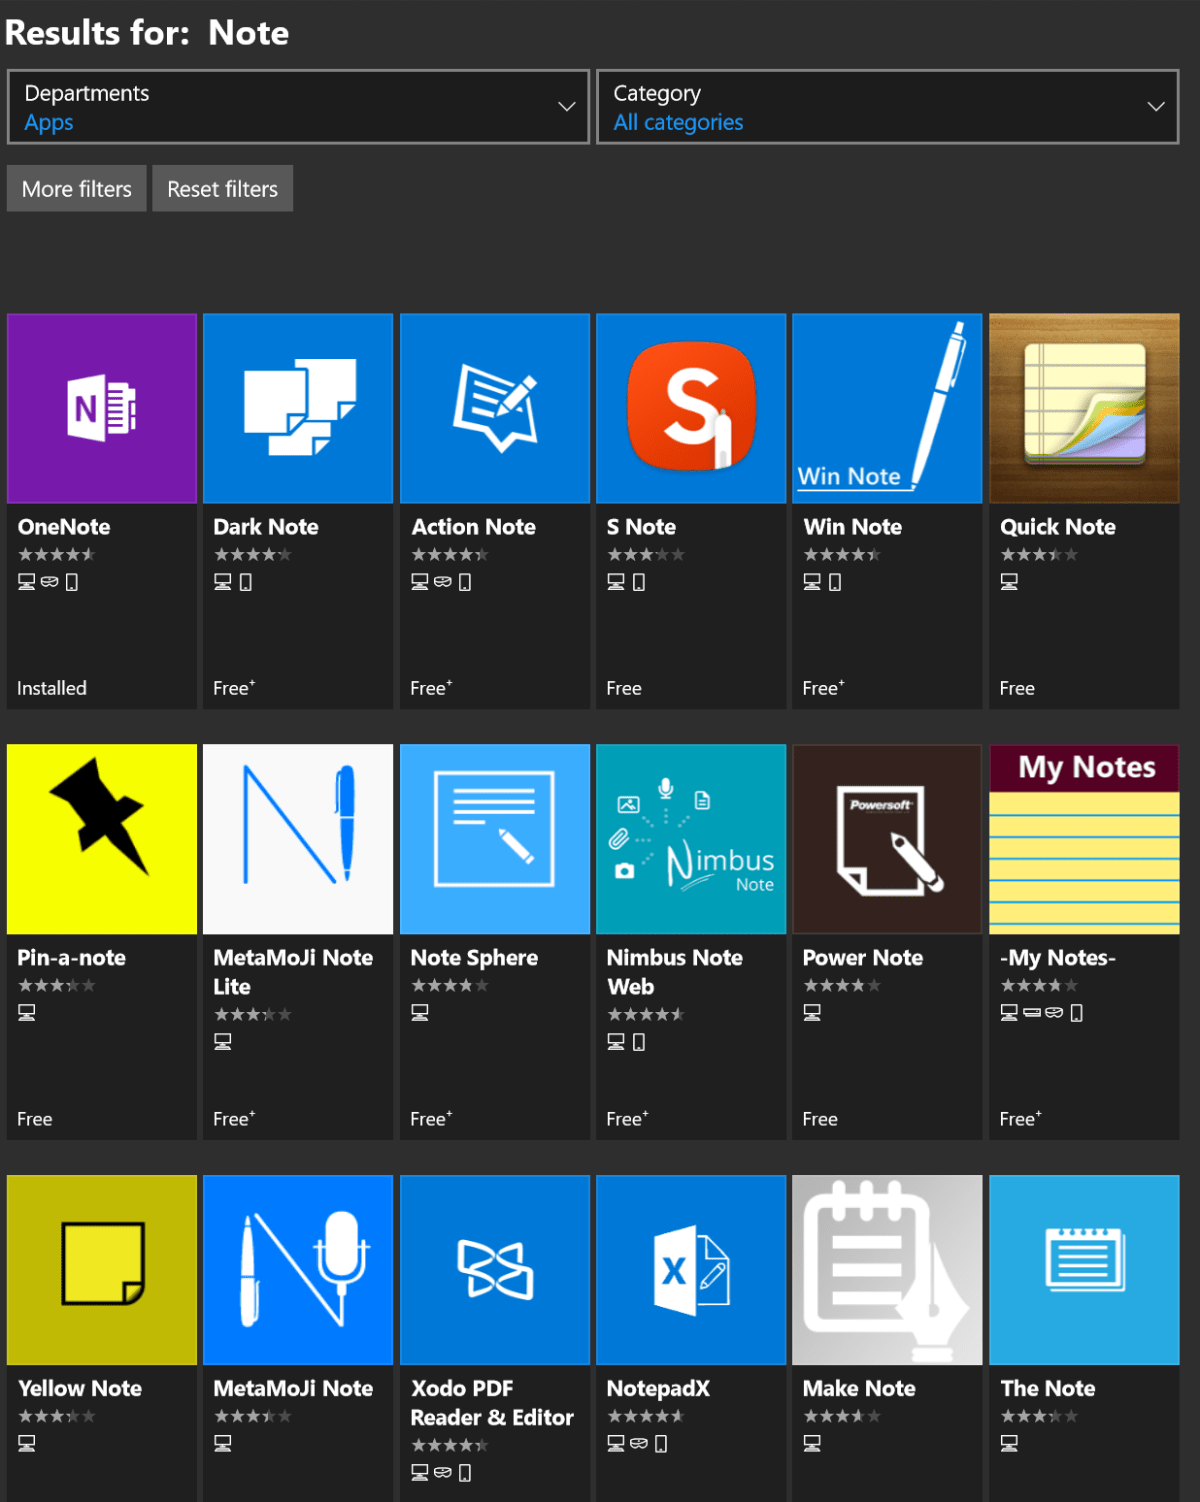
A quick search of the Microsoft Store will return an overwhelming number of applications dedicated to taking and organizing notes. We’ll examine a few of them in detail with future posts in this series. The patron saint of notes, doodles, and mind-dumps in Microsoft’s world is OneNote and that’s what we’re focusing on this time around.
As a long time fan, I consider OneNote to be one of Microsoft’s greatest achievements and a core contributor to my success. I have thousands of pages of memory augmenting documentation from every job or project I’ve ever been involved with. Every computer problem that I’ve ever encountered, all of the code and scripts I’ve written along with plans, meeting notes, article ideas, book ideas, things I am planning on building or buying, manuals for the stuff I already have; it’s all in OneNote. All searchable in a moment from any of my computers, my phone, or even my watch.
It is difficult to explain the full value of having all of this data available on-tap but a couple of situational examples might help. How many times have you sweated it out trying to remember what you did all year for your review at work? This never happens to me. In IT work, running in to the same problem months or even years apart is common. Can you remember what you did to fix that IIS app pool last summer? Get yourself organized and documented people! Next to exercising it’s the most stress relieving thing you can do. My boss thinks that I have a photographic memory but I can barely remember my own birthday.
Enough evangelizing, on to the good stuff. Microsoft publishes OneNote in three different versions. There’s the desktop edition that comes with Office; it’s icon name matches the version of Microsoft Office that you have installed, in my case OneNote 2016. The tablet/mobile version named OneNote, is free and can be found in your device’s app store; including the Microsoft Store for Windows 10. Finally, if you subscribe to Office 365 or have SharePoint at your workplace you can access a web edition that runs entirely in your browser. All three versions can share data and have the same core feature set but there are slight differneces between them. Through out the rest of this article when you see (DE) I am referring to something that can only be accomplished in the Desktop Edition. Microsoft will be phasing out the desktop edition after 2016. They are concentrating their efforts on the UWP (Universal Windows Platform) AKA the App Store version. Already they’ve added features to the UWP version that are unique to it. When you see (UWP) I am referring to something that is available only in the Universal Windows Platform (app store) verion of OneNote.
OneNote uses a hierarchical organization system that imitates your high school trapper-keeper. Notebooks -> Section Groups -> Sections -> Pages -> Sub-Pages is how the train flows. You can (and should) have multiple notebooks; personally I have one for Work, one for Home, and one for Writing. In a notebook you create sections and occasionally it makes sense to group several sections together. For example; in my Work Notebook I organize major categories like Software, Networking, Troubleshooting, etc. as section groups. Inside the software section group you might find sections named Windows, Exchange, Lync, and so on.
The first time you open OneNote it will create a notebook for you. The pages of this first notebook are actually a tutorial on how to use the software. The instructions are well thought out and more than good enough to explain how the software works; do yourself a favor and spend a few minutes reviewing them. This post is not about how to use OneNote , that is easy enough to figure out and there are already plenty of How To guides on-line. Being successful with any note taking system requires a lot of forethought and setup. As with most projects of this type, the hard part is figuring out how to get started. In this post we’re going to step through creating a OneNote notebook for tracking a typical office worker’s responsibilites but with a creative flair. Nothing will inspire you to use your notebook more than making it visually appealing. Like your living room, you want it be a comfortable place to be.
Step One – How To
Read the afore mentioned tutorial notebook pages so that you are able to follow along. In most cases I will not be explaining every action in minute detail. You can also get some excellent instructions via Microsoft’s quick start guides, they include one page cheat sheets for both the UWP and DE versions.
Step Two – New Notebook
Make a new notebook named for your job. I always name mine after the company I am working for. In DE Goto File -> New. In UWP Goto the +Notebook button at the bottom of the notebooks section.

Step Three – Organize
Now we’ll create the basic structure of your notebook. You’ll want to make a section for every major function of your profession. There are a few that are ubuiquitos among office jobs so we’ll start with those but you’ll want add any that are unique to your position. Create the following sections to start with:
- People – Here you’ll keep tabs on the people that you interact with. People you manage, co-workers, vendors, contractors, and bosses; you’ll want to record details about them all in this section. What they like and don’t, personality traits, and information they provide about their lives can all be valuable later. Tip: insert hyperlinks to these “people pages” on pages in the other sections for quick reference.
- Projects – I like to make Projects a section group and then create sections for each project that I’m involved in under it. To do this just click tap and hold or right click in the navigation pane and choose new section group from the pop-up.
- Meetings – If everyone took good notes in meetings we could probably have a lot fewer of them.
- Tasks – This is where I track all the little actions I have to do that are not part of a project. I need to pull a report on sever storage once a quarter and I’ve detailed how to do it along with the script I use in this section.
- Instructions – Manuals, written instructions, and even videos off Youtube get posted in this section. Onenote will index all of this stuff (even the dialog from video and text in pics). This means that the next time you search for ” use postage” the manual will pop-up.
- Ideas – Self explanatory, everybody gets ideas about how to do something better, easier, or faster; the trick is in remembering them at an appropriate time.
- Issues – If you want to solve problems or have one you need help solving, track them here to ensure you don’t waste time repeating fixes or worse yet forget all together.
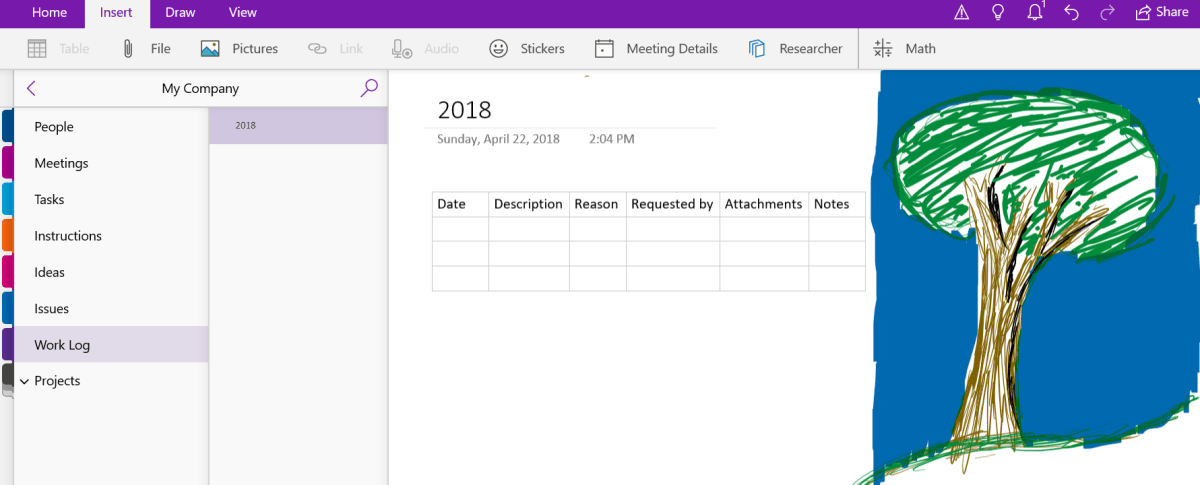
- Work Log – In the lead-in I mentioned that I never freak-out come review time. This section is why. I make a page for each year and on them I insert a table with the following columns: Date, Description, Reason, Requested By, Attachments, and Notes. At the end of everyday I spend 10 minutes jotting down what I spent my time on.
Step Four – Create
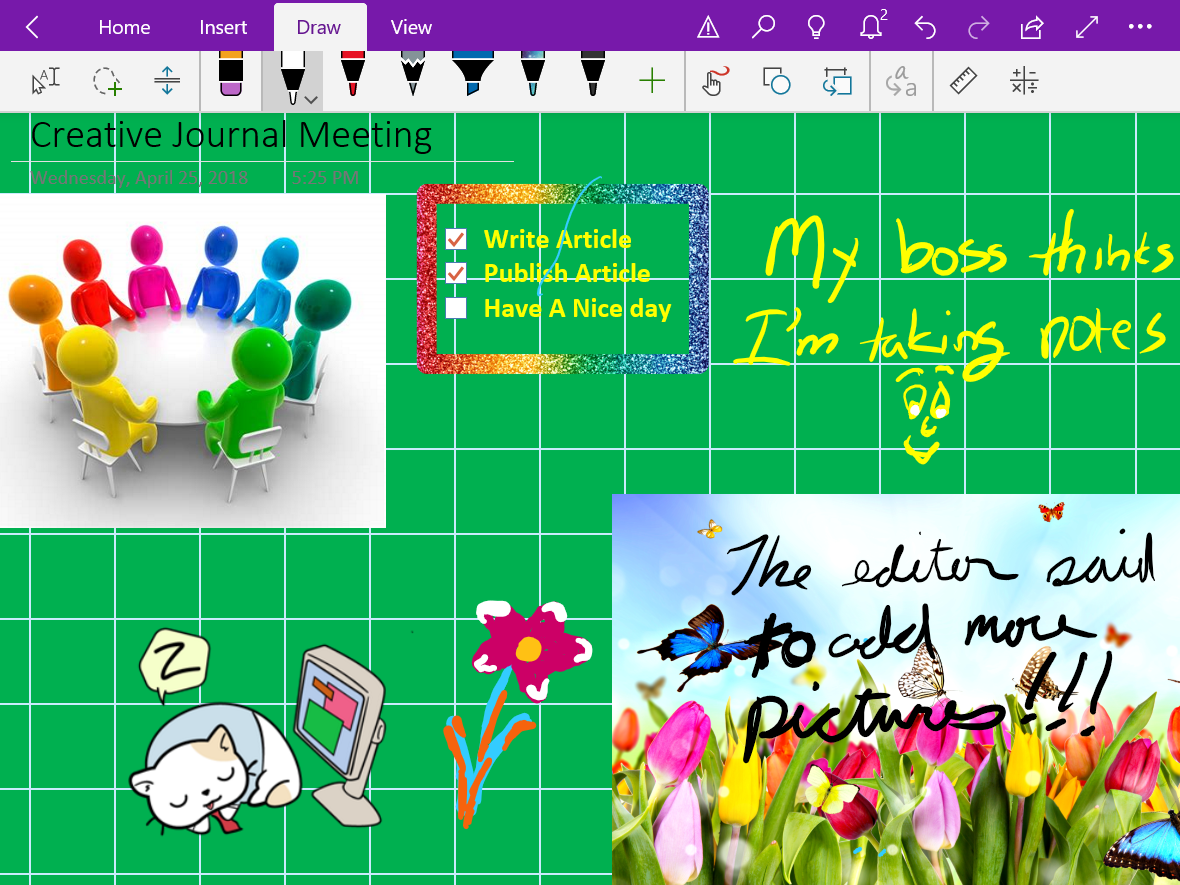
Now that we’ve got a notebook up and running, we can dive into the creative part of journaling with OneNote. Drawing and doodling in OneNote is a cinch; just select the draw tab in the ribbon, pick a tool and color and knock yourself out. It works best on a system with an active stylus but capacitive pens and even your finger will get the job done.
Draw
The draw options available in the ribbon offer a lot more than just your standard pen and marker choices. Poke around and you’ll find premade shape tools, and in the UWP edition there’s a straight-edge as well as ink-shapes that turn the sloppy circles that you usually make into to perfect ones. There are also highlighter markers (which I use often) and a lasso select tool that will help you move stuff around no matter the shape.
View
Under the view tab in the ribbon you can add lines and grids to your pages. You can also change the background color of your pages from this tab. The DE version will allow you to set a picture as the background for a page. Right-click (tap-hold) any picture that you’ve inserted and pick save as background. Tip: for the best effect edit your photo in paint or Photoshop first and turn down the opacity or turn up the transparency before setting the image as your background.
Insert
The insert tab presents a lot of possibilities. You can of course insert photos but also, videos, files of all types, audio recordings, and more. OneNote will attempt to index the audio from multimedia files and the text from images to make them searchable. It will also index the text from any files you embed on a page.
There are two options here that don’t get mentioned much; one is on-line pictures, the other is stickers. Both let you search for and insert an unlimited amount of artistic flair even if your best drawing is of a stick figure. In fact it is these two options that allow OneNote to compete with the likes of Goodnotes in the creative journaling market.
All Together
Of course you’ll get the best results if you combine all of the options available in the ribbon. If you’re using the DE versions you can get your page just right and then save it as a template so it can be used over and over. Look for the Page Templates button on the insert tab. Need some inspiration? Try an image search for OneNote Art to see what people are doing with this tool.

One thought on “Creative Journaling with Windows Tablets Part 3; Microsoft Onenote”