
After you have used Microsoft Teams for a while, your navigation bar is likely to become a befuddled mess. Chats, meetings, people, and channels end up all over the place. Some folks thrive in that environment. I get it, using search for everything is a successful strategy for today’s deluge of data and messages.
Searching works, but sometimes it can be a lot slower than I would like. The new Teams client has added the ability to insert sections into the Teams nav bar. At first, it might not seem like that change would be very helpful in taming the mess. However, they have also added the ability to drag nearly any Teams object into those sections.
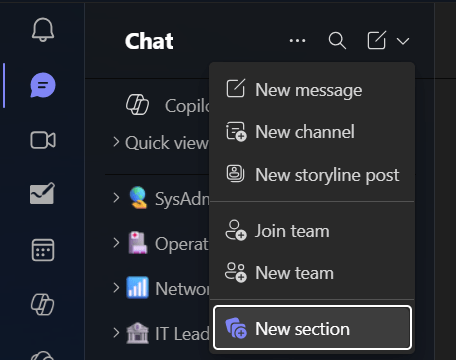
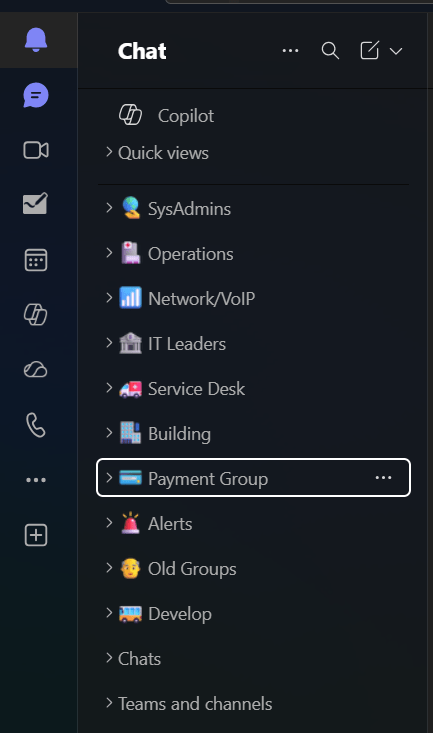
I like to create a section for each department that I work and meet with on a regular basis. Then I drag the respective people chats, meeting chats, group chats, and channels into their corresponding departmental sections. I also pick an icon for each section for faster recognition.
For me, the result of doing the work up-front, is less friction during day-to-day communications. I spend less time trying to locate the right Tom Smith from HR and not the one from finance, in the company directory. I also have the chat from the meeting we were in last week right there next to his name in HR section.
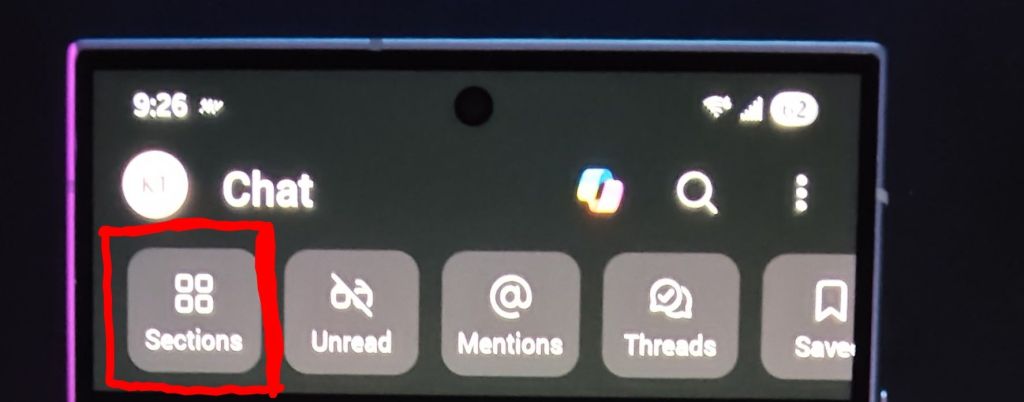
I was happy to discover that I only needed to do the work of organizing the sections once. The changes sync to my other computers automatically. They also replicate to my mobile phone and tablet. It isn’t entirely obvious how use sections in the Mobile client. There’s a “Sections” button at the top of the Teams mobile menu bar, tap it and the view will change to your neatly organized groups.
When you receive a new message, the entire section that the sender was in will light up. I find that I can collapse the sections by rolling up the chevrons. Then, I am able to shrink the Team’s window to just large enough to show the collapsed section list, like the screen shot above. I move the smaller window into the lower right corner of my screen. Then I use the handy Power Toys always on top feature (CTRL + Win + T) to pin it there. This setup lets me see and respond to pings quickly without consuming a lot of screen real estate.
If you have a difficult time using Teams efficiently, sections might be helpful. I’ve found the time that it took to be more than worthwhile. Friends and co-workers that have adopted them report an improved experience over the standard UI. I know that I prefer the organization over chaos.

