PowerShell Monitoring Part 5. Putting it all together. HTML and scheduled tasks.

In part one of this series, we wrote a script that would get errors and warnings for the last hour for a list of servers and output the results to an HTML file in a simple table. In part two, we capture all services for a list of servers that are set to automatic but not currently running, and output that list to an HTML table. Part 3 describes how to use the Windows Server Status Monitor script available at GitHub and the PowerShellGallery to monitor Online status, CPU Load, Memory Load, and Disk Space.  Part 4  dynamically generates the lists of servers that the first three scripts will need to run.

To make the monitoring system work, there are still a few things we need to do. First, we need to set up a server with IIS or some other web hosting engine. To be honest, I like SharePoint, the newest version isn’t available in a free edition, but if you have an Office 365 subscription it is included. If not, the last free version you can get is SharePoint 2013 Foundation. Speaking of SharePoint, you could add some additional code to the scripts to upload the results of our scans straight into a SharePoint library, but this isn’t as easy as it sounds. I prefer to add another IIS site to the SharePoint server and then proceed with the architecture out-lined below. After you’re done, you’ll use SharePoint’s content viewer web part to build cohesive system report pages which I’ll get into further on in this post.

I’m not going to go through all the steps needed to get a web server up and running here. You can search for the instructions easily enough and including them would make this article a book. In any modern version of Windows server, you add the web server role. If you’re going with SharePoint, when you run the installer it will guide you through the pre-requisites.

Once you have IIS up and running you need to add virtual directories for each group of servers that you want to monitor. Before you can add the VR directories you need to create the actual folders on whichever drive you want to store all of this data on. Make a folder for each environment that you’re going to monitor for example: development and production. Then, under each of those, create a folder for each group of servers: AD, Exchange, SQL, that you built lists for.

The virtual directory alias is the path you will use to access the html files placed into the matching folders by the scripts. You’ll type http://www.webservername.com/vr_directory_alias/name_of_file.html to access the reports for each group of servers. To make a new virtual directory in IIS, right-click on the site that you are using and pick new virtual directory from the drop down menu. Then fill out the pop-up form.

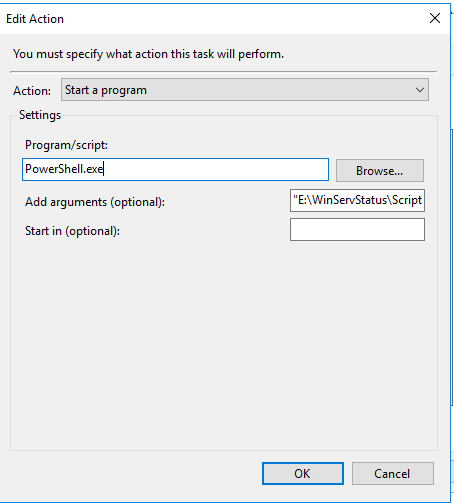
Once you’ve gotten your directory structure and web host all squared away, it’s time to start scanning servers and creating the files that get dumped into the folders you’ve just made. If you followed the instructions in the preceding articles, there should be three scripts in the C:\Program Files\WindowsPowerShell\Scripts folder. We put them in this particular folder to make calling them with additional scripts easier.

We’re going to make another series of scripts that call our scanning tools with the lists we’ve made as input parameters and the folders we’ve made as output paths. Then, we’ll schedule our calling scripts as automated tasks that run every few minutes and wallah, a full system monitoring tool is born.

I like to add a timer and an alert email to my scanning task script so that I know how long each group takes to complete. You will need to change the paths, SMTP server and email addesses in the script below to match your environment. You will make one of these scripts for each group of servers you want to montior (match the folders you made above). Store them all somewhere that makes sense to you, placing them in the VR directory folders will work fine.


$ErrorActionPreference = "SilentlyContinue"

$adtimer = [Diagnostics.Stopwatch]::StartNew()

WinServ-Status.ps1 -List E:\Prod\ad_servers.txt -O E:\ServerStatus\Prod\AD\ -DiskAlert 80 -CpuAlert 95 -MemAlert 85 -Light

Get-StoppedServices.ps1 -list E:\Prod\ad_servers.txt -outputpath E:\ServerStatus\Prod\AD\stoppedservices.html

Get-ServerEvents.ps1 -list E:\Prod\ad_servers.txt -outputpath E:\ServerStatus\Prod\AD\errorevents.html

$adtimer.stop()

$time = $adtimer.Elapsed

Send-MailMessage -SmtpServer smtp.mymailserver.com -From ServerStatus@mydomain.com -To me@my.com -Subject "AD Status Elapsed Time" -Body "All prodcution Active Directory servers processed in $time (Hours, Minutes, Seconds) HTML pages updated."

Once you’ve finsihed creating the scanning task scripts, we’ll need to schedule them as repeating tasks using the Windows task scheduler. Be sure the account that you choose to excute these scripts with has enough permssions to scan the servers and that WinRM is enabled on the systems you are collecting data from.

Scheduled_Task_Folder
Add a folder for all the tasks
Task_trigger
This task runs every 15 minutes, note the Daily and Repeat options.
task_action
Powershell.exe goes in the program or script box. Enter the full path to your script between “” in the arguments.

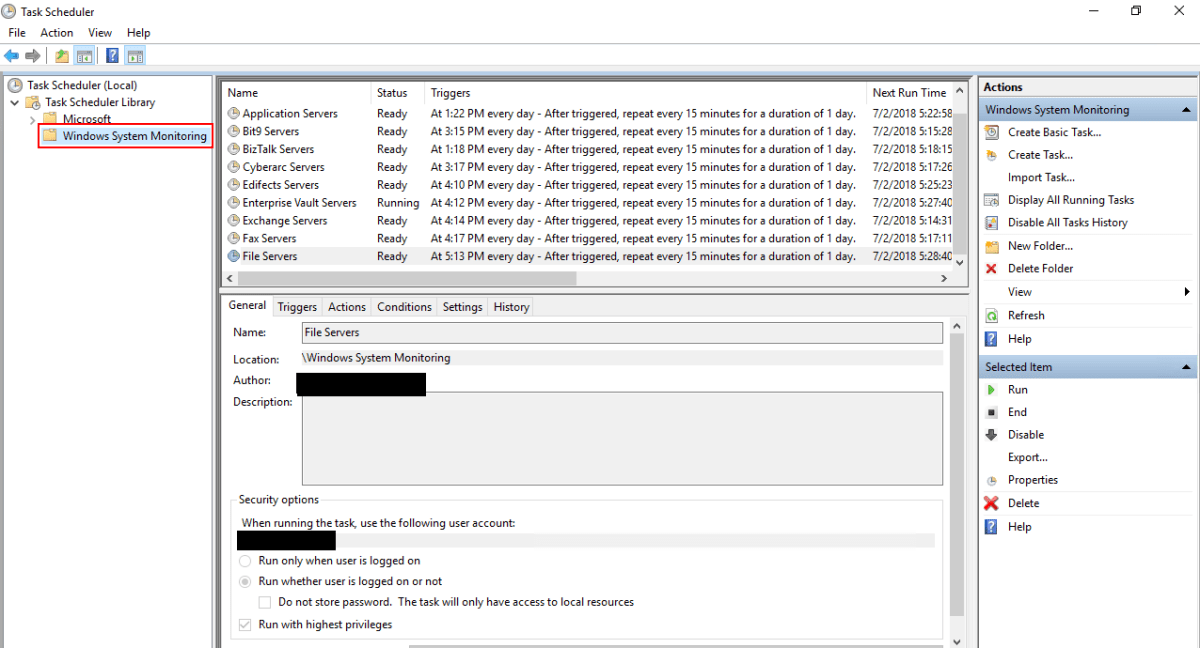
When you save the task you’ll be prompted for the credentials to run it with. Running the scripts does consume resources from the server(s). Tune your schedule to be frequent enough to be useful, but not too taxing on the servers. Every 15 minutes works well in my environment.

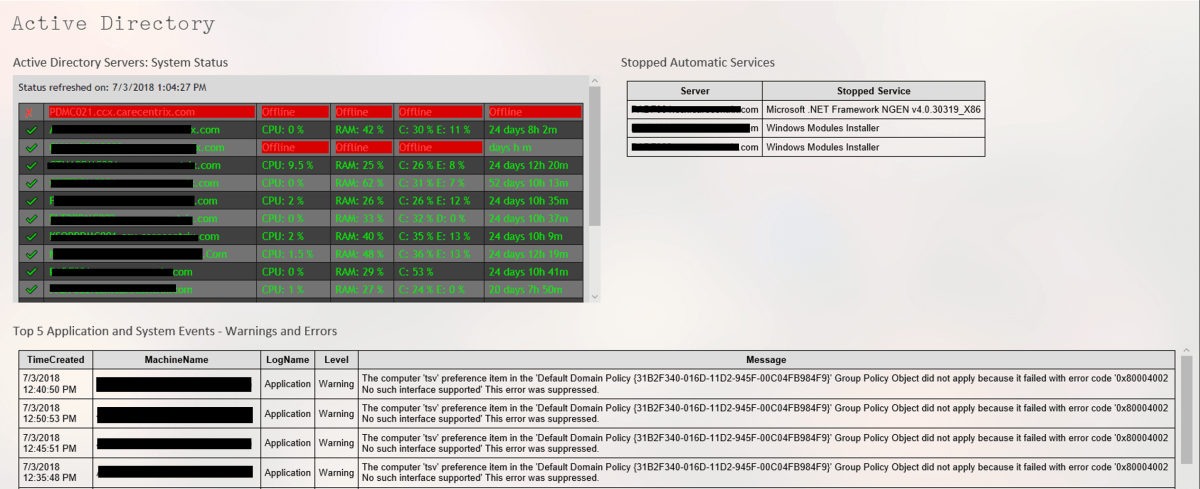
Assuming you’ve followed all the articles in this series and that your scheduled tasks have executed at least once you should now be able to access the pages for each group of systems. In your browser you’ll go to: http://nameofserver/virtualdirectory/errorevents.html
http://nameofserver/virtualdirectory/stoppedservices.html
http://nameofserver/virtualdirectory/winservstatus.html
The system is functional but not very convienient. It would be better to see each group on their own page; all AD status, or all Exchange status for example. There are several ways you could accomplish this.

If you have SharePoint, build a site for ServerStatus. Add a page for each group of servers (AD, Exchange, etc.) and on each page insert three content viewer web parts. Each content viewer web part will reference the output html page of one of the status scripts. Take your time and be sure to title the web parts appropriately. If you’re careful, you can end up with something that looks like a professional monitoring tool. SharePoint’s menu system will build the drop down menus that you see in the title image automatically.

Iframed_Pages

If you don’t have SharePoint you can get a simliar effect by using iframes. You’ll need to create a master html page for each group. AD.HTML for example, then use an iframe to embed the output of each of the three scripts onto the page. The HTML to create an iframe is:


With a lot of work and time you can build a tool that keeps watch over your servers while you work on other things. There’s no limit to how far you can take a tool like this. Alerts for thresholds, reports, and more are just a few lines of code away.

Use layers in Autodesk Sketchbook to draw anything on any device for free.

When I was little, my dad would sometimes entertain me by drawing my favorite cartoon characters. He would sketch them on napkins or scraps of paper while we were waiting for a table at a restaurant or sitting through some other equally boring event. I was always amazed that the Fred Flintstone, Mickey Mouse, or Donald Duck that he drew in a few minutes looked exactly like they did on the Saturday morning cartoon shows.

When I tried to draw them, my best efforts looked like stick figures that had suffered horrible head injuries. I was determined, and enjoyed the process, so I stuck with it. Art was always one of my favorite classes in school. Eventually, I had learned enough technique and developed enough motor control that I could draw nearly anything. It literally took years of practice before I could look at an object, or invent one in my head, and reproduce it on paper.

Digital Enterprise Painting
A freehand digital painting for my dad on Father’s day.

I would have given anything to be able to draw without all of the classes and practice. Many of my lessons involved tracing on a light board. It was a great way to learn how to make complex shapes, master scale, and understand the composition of objects or places. If you have a PC, tablet, or phone with a stylus you can use it in the same manner as a lightboard and I’m going to show you how easy it is.

You’re going to need a good drawing app. I like Autodesk’s Sketchbook. It’s free, powerful, and easy to use. It also runs on everything: iPhone, iPad, Mac, Android, and Windows all have a version. Check your device’s app store or the Autodesk web-site. You’ll need to create an Autodesk account after you install the software, but it doesn’t cost anything either.

After you have the app installed on your device, spend a few minutes on Bing or Google’s image search to locate and save a picture of something that you would like to draw. Just right click or tap and hold on the picture you like and choose the option to save a copy. You can also use a picture that you have taken with your camera.

Watch the short video below to see the details, but essentially we are going to create two layers. One to hold the picture we are going to trace and another to draw on. Once we’ve completed the sketch we’ll remove the picture layer and all that will be left is our drawing. Tracing is easy if you reduce the opacity of the picture layer. To save time I only do a quick outline with a single tool and color below. I suggest using multiple brush types and colors to get the best results.

Knock, Knock, Anybody Home?

True story. While my family and I were in the car on our way down to the Branson area we got a notification from our Ring doorbell. When my wife pulled it up, we watched a guy wait until nobody answered and then walk out to his unmarked truck and grab a ladder. He headed up our drive way and around the side of our house past where the camera could see.

I logged on to our home security bot and piloted it around the interior of our home to be sure nothing was disturbed. The locks and windows were fine and no one had come inside. I parked the drone in the hall where it could see anyone entering from the stairs, back door, or the hall from the bedrooms, and turned on its motion detector with auto-capture and alerts.

The guy was probably just trying to sell a roofing service or something, but what if he hadn’t been? I feel like I would have at least caught him on video and possibly could’ve scared him away by threatening to call the police over the two-way audio on both the Ring and the security drone. Both devices upload to the cloud so even if he had taken them, I would still have had the evidence.

If you’d like to know more about the technology I used to see what was going on at my house when we were out of town, I’ve written about all of this stuff and a lot more in the “Gear I Own” section. https://whatdouknow.com/category/gear-i-own/

Manage personal finances across all of your devices. HomeBudget accounting software.

Who remembers Microsoft Money? It was fantastic software for home accounting. Easy, powerful, and cheap. It worked so well, I know several people who keep a Windows 7 laptop around just to keep running it. Microsoft doesn’t support MS Money anymore but you can still download it for free. A few people have even figured out how to make it run on Windows 10.

One of the reasons Microsoft quit making MS Money was the proliferation of smartphones. People stopped using their computers in favor of phones and tablets. For my family this introduced a problem. My wife uses Apple’s products but I use Android. Actually, I use everything LOL. We both need to track our expenses and bills and we share accounts so separate ledgers didn’t make sense.

There are a few agnostic home accounting apps, many of them are actually websites in disguise. I tried a some of them but decided that my chosen solution would need to work off-line. Neither my spouse or I were keen to share our financial data with a third-party which many of the so-called free solutions require. They promise to protect it and never publish your personal information but so does Facebook. How many times has the old FB been hacked or had a bug that shared your life with the entire Internet? Sometimes free isn’t worth it.

After trying enough demo software that I had to factory reset both of our phones, we picked a winner. Anishu’s Homebudget app runs on Apple (iOS and Mac OS), Android, Kindle, and Windows. It can track your accounts, bills, budget, expenses, and income across all of those devices with ease.

Adding accounts and expenses is easy. All though I do wish they’d add a widget to quickly create an expense. There is a handy feature that allows you to take a photograph of your receipt and this has gotten me out of trouble more than once.

Add Expense
Add Expenses

You can run reports that show your financial status over time, or quickly glance at a Payee to see how much you’ve spent with that vendor.

Payees
See where the money goes

Tracking multiple sources of income and distributing it across multiple accounts is easy. I’ve set up my 401k, stocks, and other income in just a couple of minutes. I distribute the payments across multiple checking and savings accounts and a quick glance at the summary screen when I open the app shows me how much I have, what is spoken for, and forecasts where I’ll be in the next few months.

Income
Track your income

I can’t stress enough how important having a budget and sticking to it is for you financial future. I used to be one of those people who paid zero attention to their finances. Whatever my ATM receipt said I had in the bank, was what I had to spend. After a long time of not getting anywhere, I decided to start tracking everything in detail.

I was shocked to see how much I was spending on trivial things like fast food and movie rentals. I was keeping my local McDonald’s and Subway in the green all by myself. Seriously, if I would have spent that much on the stock instead of chicken nuggets and foot long BMTs, I could have retired by now. I had spent $3600.00 on just lunch in one year!!! Guess who takes their lunch almost everyday now? Lunch out was costing $10 – $15 per day. Taking my lunch costs $2 – $3 per day and it’s better for me to boot. I still get away from work for my break, I just do it in the lunch room with my Switch or a good book.

Budget
Build a budget

Weather you use Homebudget or some other application that suits you better, use something. You won’t know where your money is going until you start tracking it. Don’t be like my younger self and fall for the voice in your head that says you know what you spend. You don’t. Just like you don’t know how much you eat without tracking it. For most of us, our built-in gratification mechanisms keep us from seeing the full truth about things we like or want to do and that little voice that says you don’t need to worry about it, is just part of your ego’s cover-up.

PowerShell Monitoring Part 4. Generating lists of servers.

All of the scripts that we’ve written for the monitoring system have been powered by lists of severs. Where do you get the lists from? You use a script to generate them of course! You could easily configure each of the monitoring scripts to run independently by filtering AD for a specific set of computers and storing them in a variable instead of using a file, but the list method has several advantages.

In our case we want to run multiple scripts against the same group of servers repeatedly. Searching AD over and over again for the same data isn’t very efficient. Especially when it’s a list of machine names that rarely change. That being said, servers do get added and removed. Typing them in a list and calling it a day is a recipe for crap cake surprise. The solution is to script the lists so that they are dynamic.

How you get the lists is going to be dependent on how your Active Directory is structured. I have a pretty strict naming convention in place, so I run filters against the names. You might need to search specific OUs or some other property (see code in box 3).

For example, all my production domain controllers are named PRODAD**** so to build a list of them:

Get-ADcomputer -Filter {name -like "prodad*"} -Properties dnshostname|
select dnshostname -ExpandProperty dnshostname|
out-file C:\Sources\Prod\ad_servers.txt

Create lines like the one above, for each group of systems that you want to monitor. The output path must exist before you run the script or you’ll get errors. My example is C:\Sources\Prod\ so you need to make those folders on your C drive or change the path. I suggest that you create a group of folders on the IIS server you plan on running your monitoring from and storing the files there.

If you need multiple names for a filter just use -or and add as many as you need.

Get-ADcomputer -Filter {name -like "prodexch*" -or name -like "prodmbx*"} -Properties dnshostname|
select dnshostname -ExpandProperty dnshostname|
out-file C:\Sources\Prod\exchange_servers.txt

After you have code for all of your groups, you should consider adding a catch all at the bottom. This will add servers that don’t follow the standards to a file. We all have them LOL. In my environment I search the servers OU that a GPO drops our servers into and add every system that doesn’t match one of my previous groups to a Misc_servers.txt file. Note that the example below uses “-notlike” and “-and” versus the “-like” and “-or” we used above.

Get-ADComputer -Searchbase "OU=Production Servers,OU=Servers,OU=MY_Server_OU,DC=MY_DOMAIN,DC=com" -Filter
{name -notlike "prodad*" -and name -notlike "prodexch*" -and name -notlike "prodmbx*"}|
select dnshostname -ExpandProperty dnshostname|
out-file C:\Sources\Prod\misc_servers.txt

Once you’ve put it all together, run the script and you should end up with a text file for each group of servers in your Active Directory. Open the files and you should see the FQDN for each server that matched its filter, each on a separate line. You can use these lists as the input parameters for the monitoring scripts we’ve already written in PowerShell Monitoring Part 1, PowerShell Monitoring Part 2, and PowerShell Monitoring Part 3.

As you’ll see in a future article regarding remote systems management, these dynamically built lists of servers by type can be used for other useful projects as well. My production script ended up with 19 of the “type” filters plus the “catch all” so expect to spend some time getting this right on your network. Next in this series we’ll configure an IIS server to run all of these scripts as scheduled tasks and display the HTML files.