
The Windows software based controller for your UniFi wireless network is more useful when run as a Windows service. Running the controller as a service allows it to start automatically when your computer reboots, among other things. If you haven’t already configured it to run as a service, see these instructions on the UniFi support site UniFi – Run the Controller as a Windows Service – Ubiquiti Support and Help Center.
The downside of running the controller software as a service is that updates become considerably more painful to accomplish. You have to uninstall the service, install the update, and then re-install the service by issuing a series of commands each time. It isn’t difficult. just annoying.
I wrote the script below to automate most of the process. Copy the code and paste it into notepad. Save the file as Update-UnifiControllerService.PS1 in your documents folder, or wherever makes sense to you. The next time your controller console prompts to download a software update, do so. Then open an elevated PowerShell console (as administrator) and run the script by typing .\Update-UnifiControllerService.ps1 then press Enter.
# Author: Techbloggingfool, https://techbloggingfool.com
# Update-UnifiControllerService.ps1
# This script assumes that you have already configured the UniFi controller to run as a service and are upgrading it with a new version that you have already downloaded to your hard drive or another location Windows Explorer can reach.
# Directions to configure the Windows Unifi Controller to run as a Windows service the first time can be found here: https://help.ui.com/hc/en-us/articles/205144550-UniFi-Run-the-controller-as-a-Windows-service
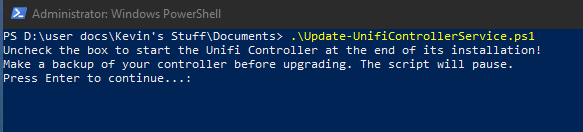
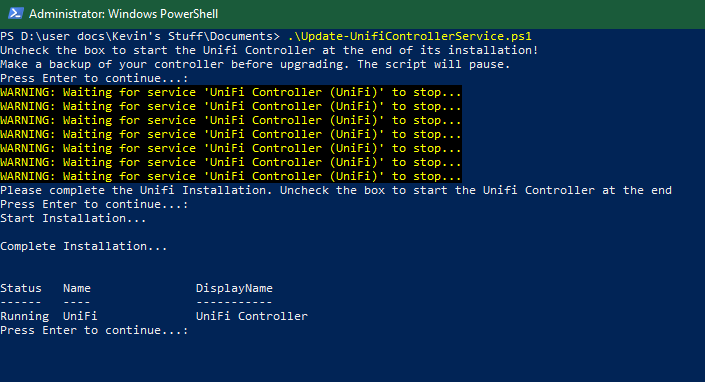
Write-Host "Uncheck the box to start the Unifi Controller at the end of its installation!"
Write-Host "Make a backup of your controller before upgrading. The script will pause."
Pause
#Stop the Unifi Service
Stop-Service -Name UniFi
#Loading VisualBasic interactions to create GUI
[System.Reflection.Assembly]::LoadWithPartialName('Microsoft.VisualBasic') | Out-Null
Function Get-FileName($initialDirectory)
{
[System.Reflection.Assembly]::LoadWithPartialName("System.windows.forms") |
Out-Null
$OpenFileDialog = New-Object System.Windows.Forms.OpenFileDialog
$OpenFileDialog.initialDirectory = $initialDirectory
$OpenFileDialog.filter = "EXE files (*.exe)| *.exe"
$OpenFileDialog.ShowDialog() | Out-Null
$OpenFileDialog.filename
} #end function Get-FileName
#Use the Get-FileName function to find the UniFi Controller Upgrade file
$controller_exe = Get-FileName -initialDirectory $env.userprofile\downloads
#change to the unifi user directory
cd $env:userprofile
cd 'Ubiquiti Unifi'
#execute the java command to remove the existing service
java -jar lib\ace.jar uninstallsvc
# install the upgrade
Write-Host "Please complete the Unifi Installation. Uncheck the box to start the Unifi Controller at the end"
& $controller_exe
Pause
#execute the java command to create the windows service
java -jar lib\ace.jar installsvc
#start the new service
Start-Service -Name UniFi
Get-Service -Name UniFi
Pause
ExitYou will need to run PowerShell as an administrator to start and stop the services.

The script will pause and ask you to make a backup of your controller.
Logon to the UniFi web interface and click the gear icon at the bottom left to go to settings. Click System Settings in the menu and then expand Backup / Restore. Click the Download Backup link and save the file to your PC.

Return to the script (click it on your task bar) and press enter to continue. The script will stop the running UniFi service and open an explorer window. Locate the downloaded update file and click the Open button.

The update installer does not have command line options so you will need to use its GUI to complete the installation. The script will pause and open the installer. Click the Install button.

Click Yes when asked if you want to upgrade.

Click the Yes button when asked if you have made a backup.

Uncheck the box to start the controller and click the Finish button.

Now return to the script (click it on your task bar) and press Enter to continue. The service will be installed and started. The script will pause one more time to show you that the service is running. When you press Enter, you are done. The upgrade has been completed, close the PowerShell window. Anytime an update is available, download it and repeat the process.

Hello There,
Thank you for the blog. Really helpful.
I normally move the UNIFI directory to c:\program files.
When i need to upgrade i stop the unifi service copy the unifi folder back to my user profile upgrade it and copy it to program files again.
Does the script do that or any modifications needs to done to the script to achieve this?
Thank you very much
LikeLike
The script assumes that the Unifi files are in their default location. You could try chainging the lines in the “Change Directory” section to compensate for your customizations.
LikeLike
Thank you for your response, Much appreciate it. Just want to check if there is any reason to uninstall the service as below:
#change to the unifi user directory
cd $env:userprofile
cd ‘Ubiquiti Unifi’
#execute the java command to remove the existing service
java -jar lib\ace.jar uninstallsvc
Cannot we just install and start the service
java -jar lib\ace.jar installsvc
java -jar lib\ace.jar startsvc
Thank you very much
LikeLike
I’ve run into issues when trying to apply updates while the jar file was still registered as a service. I added that line before the 6.x line of controller software so it may not be needed anymore. Feel free to remove it and see what happens.
LikeLike