
Introduction
In today’s data centric world, everybody wants to know what you’re doing on-line. The free Wi-Fi at fast food restaurants and hotels allows them to mine your data usage habits for marketing purposes. The “Guest” Wi-Fi at your place of business can also be monitored. What’s a private person supposed to do? There are lots of articles on the Internet regarding VPN services but few of them are free and all result in the purveyor of the service being privy to all your data habits.
One solution is to route all your mobile traffic, personal device at work, phone/tablet connected to public Wi-Fi, etc. through your home network over a VPN. There are several services on my home network that I’d like to access from anywhere; Remote Desktop to my family’s computers, in-home Wi-Fi console, my router / firewall dashboard, and my email server just to name a few. I prefer to not punch that many holes through my firewall. A personal VPN solves these challenges.
In today’s post I’ll walk you through setting up OpenVPN on Pfsense. OpenVPN is a popular open source VPN solution that is included on some firewalls and runs on most distributions of Linux. If your device includes it as an option the principal steps in this guide will apply but the screens and locations will vary.
Instructions
I will be posting a full setup guide for Pfsense at some point in the near future. If you’re not familiar with the software, it is a commercial class firewall and router package that you run on a PC. You can get a lot of information about it from their excellent website.
Create User Account(s)
You will need a user account to logon to your new VPN with. The software supports certificate based authentication. However, self-signed certificates (issued ourself vs. purchased) are difficult to work with on modern operating systems. For the purposes of this guide we’ll stick with a basic username and password.
- Open the web configuration
- Click System -> User Manager -> Add
- Complete the form
- Do not check the box to create a user certificate
- Click Save

You may be tempted to make a single account for everyone to share. However, I recommend creating a separate account for each person that may use the service. This makes troubleshooting easier and advances your security stance.
Install VPN Client Exporter Package
Once OpenVPN is up and running you’ll need to install and configure the client software on your mobile, laptop, etc. The easiest way to accomplish this is by sending yourself (email, Dropbox, etc.) a pre-packaged configuration file. To export the configuration file we’ll need to add some software to Pfsence.
- Open the web configurator
- System -> Package Manager -> Available Packages
- Search for openvpn-client-export
- Click the Install button

Create an Internal CA
OpenVPN’s private connections are built using TLS encryption; it’s not important that you understand the details but we need to set up Pfsence as a certificate authority so that it can issue the encryption certificates required to make this work.
Depending on how you installed Pfsence, you may find there is already a CA present in which case you can skip this section.
- Open the web configurator
- System -> Cert Manager -> CA -> ADD
- Complete the form and click Save

Issue Certificate
Now that we have a Certificate authority, we’ll need to issue the TLS server certificate the encrypts our data as it travels over the VPN.
- Open the web configurator
- System -> Cert Manager -> Certificates -> ADD
- Complete the form and click Save
- Be sure that you set the Certificate type to Server Certificate
- Add your public IP address as an alternative name
- Click Save

OpenVPN Wizard (Setup the service)
- Open the web configurator
- Click VPN
- Select OpenVPN
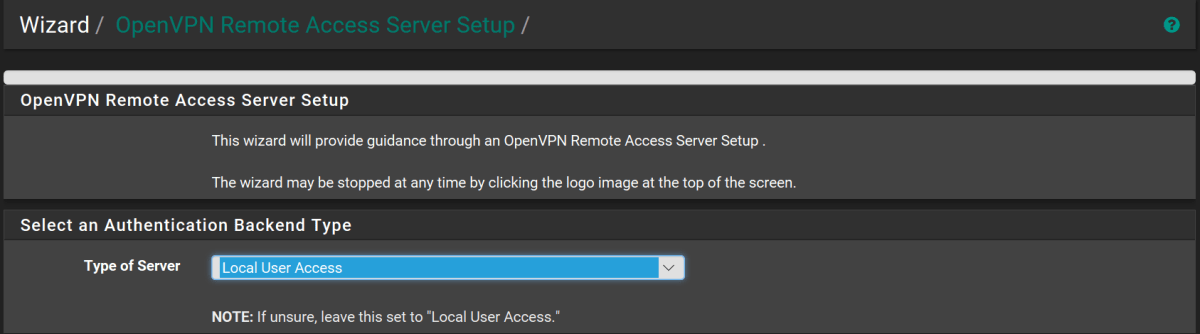
- Click the Wizards Tab
- Leave type of server as Local User Access
- Next
- Certificate Authority, select the CA you created
- Click Next
- In the certificate drop down, select the server certificate we issued from our CA
- Click Next
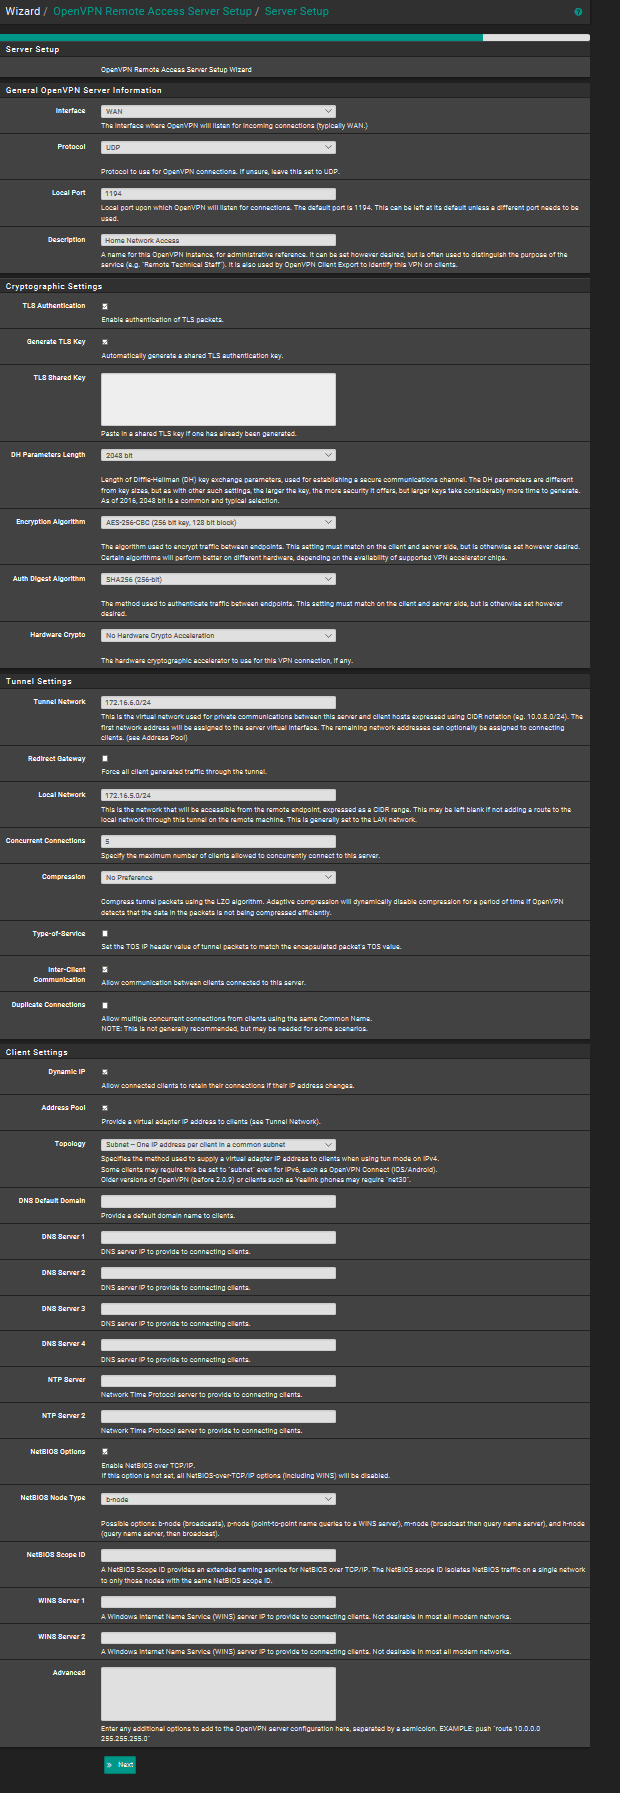
- The next form has a lot of options on it. Change the following:
- Description, name your connection
- Tunnel Network = CIDR network separate from your primary LAN subnet. For example; if your current primary network is 172.16.5.0/24 then you would want to put 172.16.6.0/24 here. Incoming VPN clients will receive addresses in this range.
- Local Network = your primary LAN range. In the example, 172.16.5.0/24
- Redirect Gateway = Select this option, it is the magic sauce that prevents the networks you connect to from snooping on your usage habits by sending all your network traffic through your home router instead of theirs.
- Concurrent Connections = How many devices will you allow at once.
- Select allow Inter-Client Communications
- DNS Server 1 = IP address of your Pfsence firewall
- Enable NetBIOS options
- NetBIOS Node Type = b-node
- Next
The wizard will automatically add the required firewall rules and routes for us. However, it defaults to certificate based authentication and we want to change that (see create accounts).
- Click System-> VPN -> OpenVPN
- Select the pencil icon to edit the settings
- In the drop-down for server mode, choose Remote Access ( User Auth)

At this point our VPN server configuration should be complete. To use it we will need to install and setup the client software on our mobile device. There are a lot of client applications that support OpenVPN my personal favorite is OpenVPN CONNNECT. It is available on both the iOS Itunes App Store and Google Play for Android. The software works the same way on both mobile operating systems.
Google Play download (Android)
Itunes download (Apple iOS)
Export the Configuration File

- Open the web configurator
- Select the VPN menu
- Click OpenVPN
- Click Client Export
- Scroll down to the OpenVPN Clients section and click the button labeled OpenVPN Connect (iOS/Android)
- Save the file to your disk
- Send the file to an email address that you can access from your mobile or place it in your cloud storage. (You could also connect your device and side load it)
Configure the client application
- For Apple devices,
- Open the configuration file from your device
- Select OpenVPN CONNECT as the application to open the file with
- Choose YES to import the profile
- For Android devices,
- Save the file to your device from your email or cloud app
- Launch the OpenVPN CONNECT application
- Tap the three dots button in the upper right
- Tap Import
- Tap Import Profile from SD Card
- Browse to the Downloads folder (default save location) on either your internal storage or SD card
- Tap the file you saved
- Tap the Select button
- Enter the correct username and password (choosing save is optional)
- Click the Connect button.

Validate your setup
Obtain your mobile public IP address by opening your device’s browser and going to http://www.ipchicken.com (not connected to VPN). Then connect to your VPN and open the page again. Your IP when connected to the VPN should be the same as a computer on your home network. If it is, everything is working. If not, try looking in the OpenVPN connect client logs and in the logs of Pfsense for clues.
