Companies want control of their data. HIPPA has healthcare companies on edge about using cloud services like Dropbox or Onedrive, for good reason. The fines a company can incur for leaking personal data are staggering, not to mention the loss of customer trust and bad publicity. The situation can lead corporate security teams to block web-based file repositories all together.
Unfortunately, blocking the services most suited for transferring data between branch offices, clients, or customer’s companies doesn’t remove the need to do so. You still need to move the data, now you must meet the requirement with one hand tied behind your back.
I personally encountered this situation at an employer. They had subsidiary operations all over the world that needed to synchronize several different sets of data with headquarters. The Security team prohibited all file sharing services. The companies’ network segmentation did not allow for any common file shares.
The issue was described during a team meeting one afternoon after several IT departments had struck out with various solutions. SFTP was too difficult, EDI was too expensive, and we didn’t own licenses for SharePoint. I suggested that Microsoft Exchange could be used to transfer the data, everyone thought I was joking. “Sure, we’ll just email the whole database as an attachment every couple of hours.”, someone had commented. “Exactly!”, I answered.
Every subsidiary had an Exchange environment and TLS encryption was mandatory between all of them, so the data would be encrypted in transit automatically. All that was required were a few little tweaks to attachment sizes and some development. This solution is a two-part process. A sending script (details below) will run on the external Exchange servers that attaches the files to a message addressed to a mailbox on the collecting side. An EWS script will check the receiving mailbox and strip the attachments out of them. The attachments will be transferred to a file share where they can be processed further.
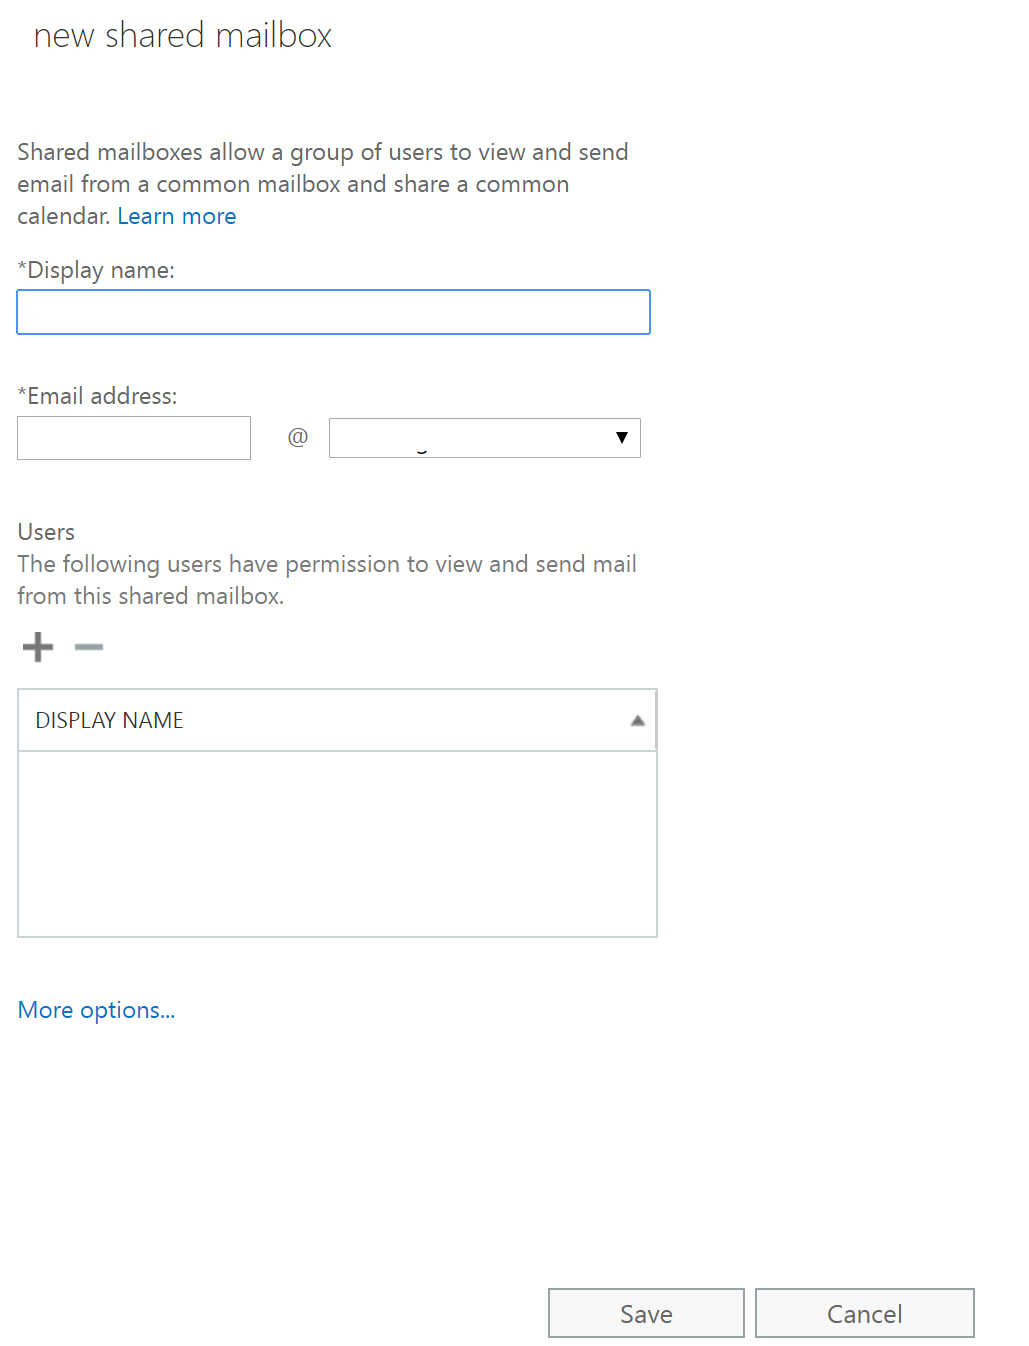
First up, I created an appropriately named mailbox for the project on the receiving Exchange server. In my case, a shared mailbox made sense. Under the inbox I made a “processed” folder. The PowerShell and EWS code will move messages to this folder after the attachments have been copied to a fileserver. Next, create mailboxes on the sending servers, if yours require authentication to send mail. If you don’t need to logon to send mail, there’s no need for this step. Depending on the attachments you plan on processing, you may need to adjust the Exchange attachment size limits. In addition, you will need a file share on the receiving network for the attachments to be collected in.
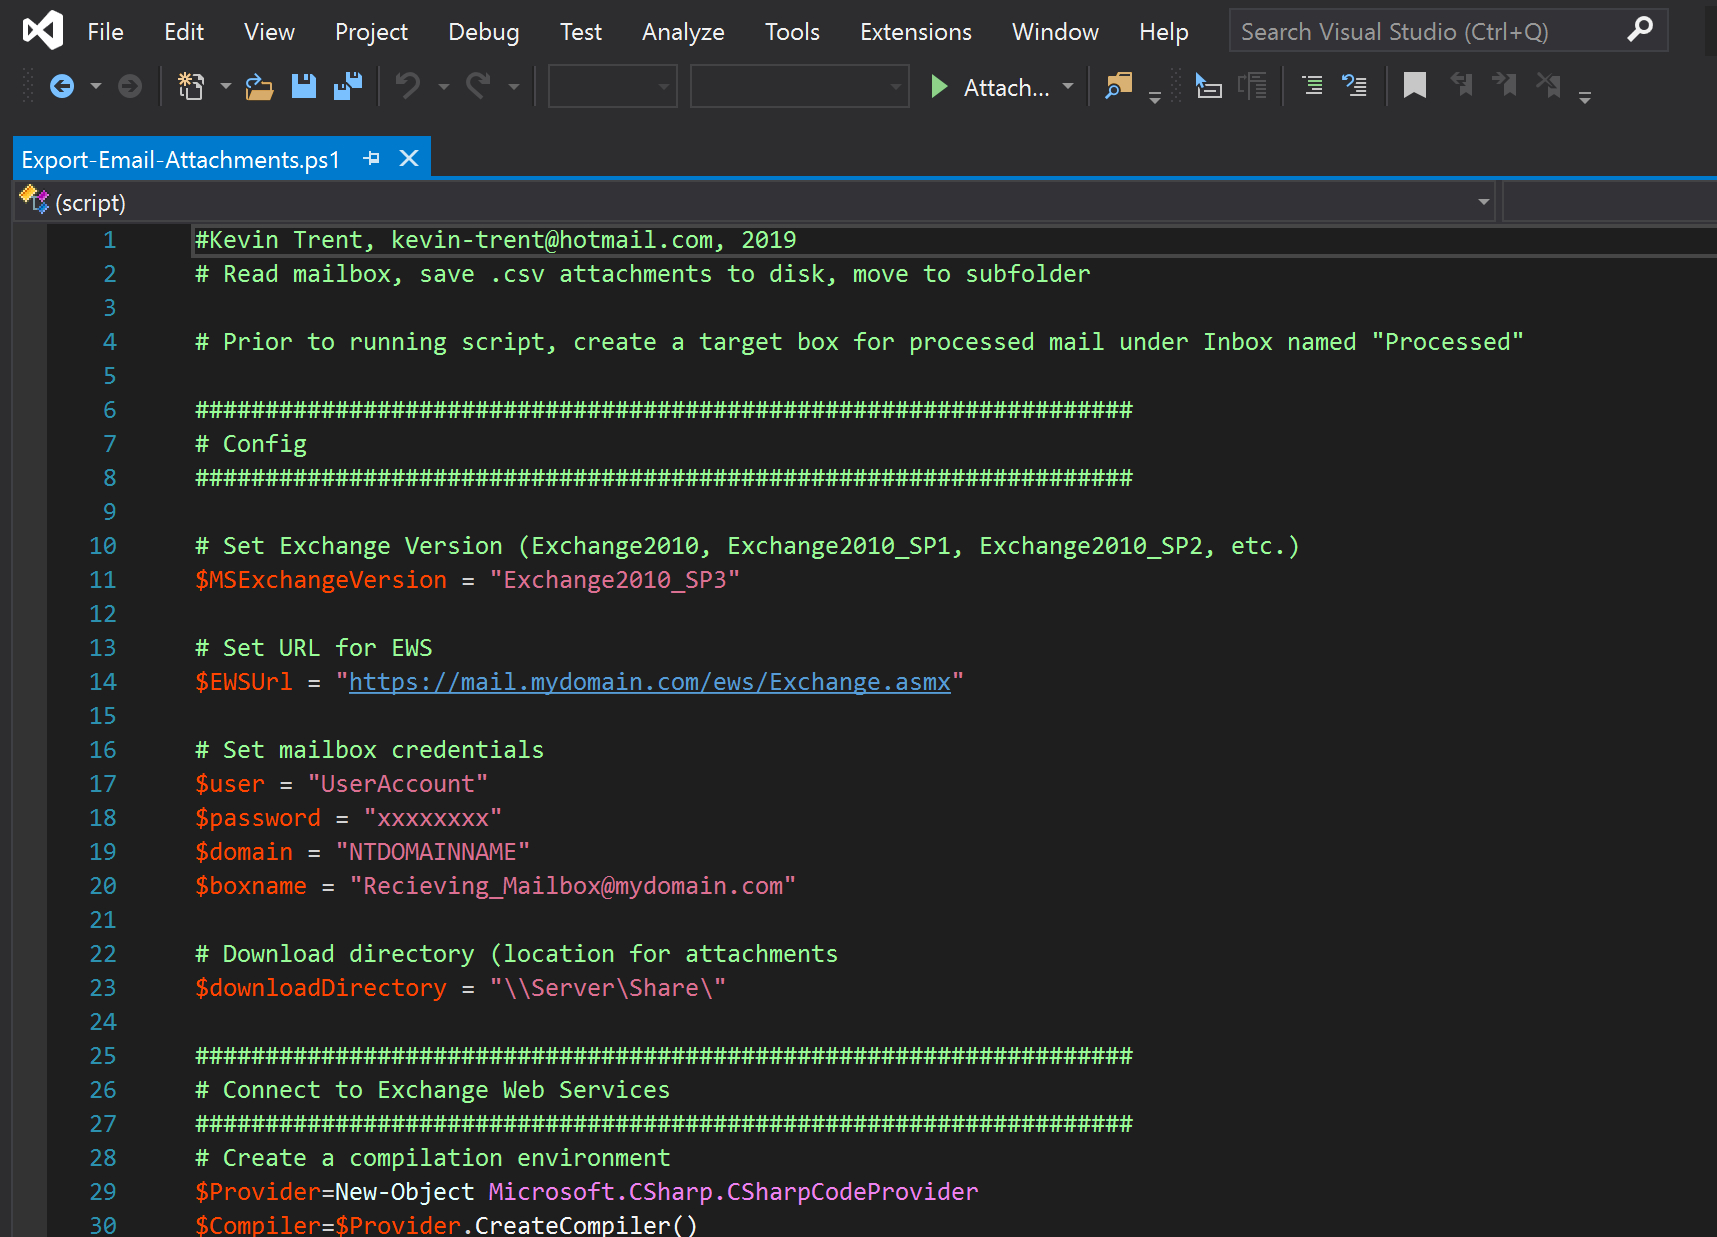
The code below uses Exchange Web Services to logon to the receiving mailbox, find new messages, and export the attachments to a file share. Be sure to adjust the variables to match your environment. I suggest that you create a scheduled task to run it at appropriate intervals. EWS is available in all versions of Exchange since 2010, including Office 365’s Exchange On-Line.
The code is currently configured to look for CSV file attachments. If you are working with a different file type, change the extension in line 88 of the code.
#Kevin Trent, kevin-trent@hotmail.com, 2019
# Read mailbox, save .csv attachments to disk, move to subfolder

# Prior to running script, create a target box for processed mail under Inbox named "Processed"

###################################################################
# Config
###################################################################

# Set Exchange Version (Exchange2010, Exchange2010_SP1, Exchange2010_SP2, etc.)
$MSExchangeVersion = "Exchange2010_SP3"

# Set URL for EWS
$EWSUrl = "https://mail.mydomain.com/ews/Exchange.asmx"

# Set mailbox credentials
$user = "UserAccount"
$password = "xxxxxxxx"
$domain = "NTDOMAINNAME"
$boxname = "Recieving_Mailbox@mydomain.com"

# Download directory (location for attachments
$downloadDirectory = "\\Server\Share\"

###################################################################
# Connect to Exchange Web Services
###################################################################
# Create a compilation environment
$Provider=New-Object Microsoft.CSharp.CSharpCodeProvider
$Compiler=$Provider.CreateCompiler()
$Params=New-Object System.CodeDom.Compiler.CompilerParameters
$Params.GenerateExecutable=$False
$Params.GenerateInMemory=$True
$Params.IncludeDebugInformation=$False
$Params.ReferencedAssemblies.Add("System.DLL") | Out-Null

$TASource=@'
  namespace Local.ToolkitExtensions.Net.CertificatePolicy{
    public class TrustAll : System.Net.ICertificatePolicy {
      public TrustAll() {
      }
      public bool CheckValidationResult(System.Net.ServicePoint sp,
        System.Security.Cryptography.X509Certificates.X509Certificate cert,
        System.Net.WebRequest req, int problem) {
        return true;
      }
    }
  }
'@
$TAResults=$Provider.CompileAssemblyFromSource($Params,$TASource)
$TAAssembly=$TAResults.CompiledAssembly
# Create an instance of the TrustAll and attach it to the ServicePointManager
$TrustAll=$TAAssembly.CreateInstance("Local.ToolkitExtensions.Net.CertificatePolicy.TrustAll")
[System.Net.ServicePointManager]::CertificatePolicy=$TrustAll

# Load EWS API and attach to CAS & EWS

Add-Type -Path "C:\Program Files\Microsoft\Exchange\Web Services\2.0\Microsoft.Exchange.WebServices.dll"

# Create Exchange Service Object
$ExchangeVersion = [Microsoft.Exchange.WebServices.Data.ExchangeVersion]::Exchange2010
$service = New-Object Microsoft.Exchange.WebServices.Data.ExchangeService($ExchangeVersion)

$creds = New-Object System.Net.NetworkCredential($user,$password,$domain)
$service.Credentials = $creds

$MailboxName = $boxname
$uri=[system.URI] $EWSUrl
$service.Url = $uri
###################################################################
# Process mailbox
###################################################################

# Bind to the Inbox folder
$Sfha = new-object Microsoft.Exchange.WebServices.Data.SearchFilter+IsEqualTo([Microsoft.Exchange.WebServices.Data.EmailMessageSchema]::HasAttachments, $true)
$folderid= new-object Microsoft.Exchange.WebServices.Data.FolderId([Microsoft.Exchange.WebServices.Data.WellKnownFolderName]::Inbox, $boxname)
$Inbox = [Microsoft.Exchange.WebServices.Data.Folder]::Bind($service,$folderid)

# Find attachments, copy to download directory

$ivItemView = New-Object Microsoft.Exchange.WebServices.Data.ItemView(100)
$findItemsResults = $Inbox.FindItems($Sfha,$ivItemView)
foreach($miMailItems in $findItemsResults.Items){
	$miMailItems.Load()
	foreach($attach in $miMailItems.Attachments){
		# Only extract CSV attachments. If you need additional filetypes, include them as an OR in the second if below. To extract all attachments, remove these two if loops
		If($attach -is[Microsoft.Exchange.WebServices.Data.FileAttachment]){
			if($attach.Name.Contains(".csv")){
				$attach.Load()

				# Add random # to filename to ensure unique

				#$prefix = Get-Random
				$fiFile = new-object System.IO.FileStream(($downloadDirectory + "\" + $attach.Name.ToString()), [System.IO.FileMode]::Create)

				$fiFile.Write($attach.Content, 0, $attach.Content.Length)
				$fiFile.Close()
			}
		}
	}
}
# Get the ID of the folder to move to
$fvFolderView =  New-Object Microsoft.Exchange.WebServices.Data.FolderView(100)
$fvFolderView.Traversal = [Microsoft.Exchange.WebServices.Data.FolderTraversal]::Shallow;
$SfSearchFilter = new-object Microsoft.Exchange.WebServices.Data.SearchFilter+IsEqualTo([Microsoft.Exchange.WebServices.Data.FolderSchema]::DisplayName,"PROCESSED")
$findFolderResults = $Inbox.FindFolders($SfSearchFilter,$fvFolderView)

# Define ItemView to retrive just 100 Items
$ivItemView =  New-Object Microsoft.Exchange.WebServices.Data.ItemView(100)
$fiItems = $null
do{
    $fiItems = $Inbox.FindItems($Sfha,$ivItemView)
    #[Void]$service.LoadPropertiesForItems($fiItems,$psPropset)
        foreach($Item in $fiItems.Items){
            # Move
            $Item.Move($findFolderResults.Folders[0].Id)
        }
        $ivItemView.Offset += $fiItems.Items.Count
    }while($fiItems.MoreAvailable -eq $true)
Now you’ll need a few lines of code to send the email and attachments to your collection mailbox. Again, I suggest you create a scheduled task to run this process automatically. Without knowing what you are planning on sending with this technique I can only give you a PowerShell one-liner for sending an attachment.
Send-MailMessage -SmtpServer $smtpserver -To collectionmailbox@mydomain.com -From exchangefiletransfer@mydomain.com -Subject "Transfering Files" -Body "Please see the attached file" -Attachments C:\Temp\myfile.csvThis method of sending files has proven to be an excellent tool in my portfolio. I have used it many times at multiple companies for various reasons. I hope you find it as useful as I have.

One thought on “Dropbox and Onedrive Blocked? Use Exchange Server as a Secure File Mover”