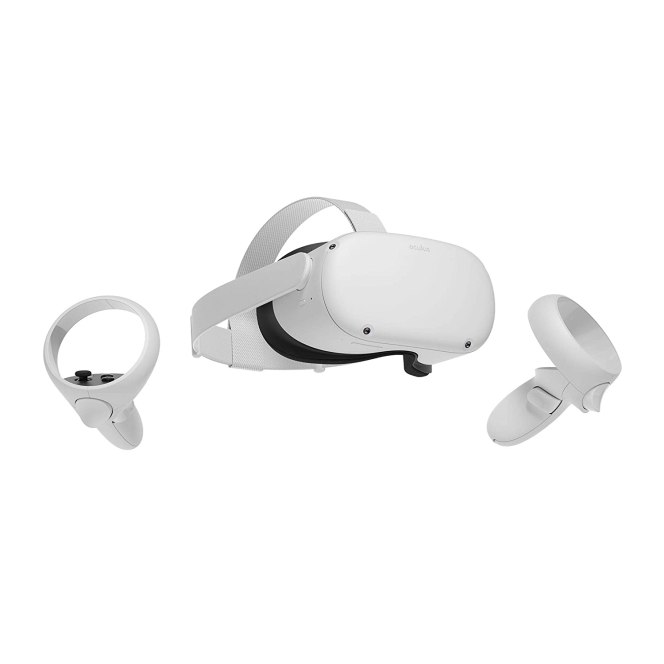
Pretty much the first thing people realize after spending a few minutes in virtual reality via the Oculus Quest or Quest 2 headset is that VR should never have wires. The experience is more immersive without a tether bouncing off your back and the worry of tripping. The trade off is a loss of processing power.
Don’t get me wrong, the Quest, and especially the Quest 2 are packing some serious hardware and can deliver amazing experiences. However, the electronics inside them are similar to a Nintendo Switch or high-end phone and this means the games are limited to those types of environments. If you have a Rift or Hive you are probably enjoy playing AAA titles like Project Cars 3, Star Wars Squadrons, or the new Half-Life; all of which require a powerful desktop PC.
There are ports of popular games like Beat Saber, Onward, and Robo-Recall for the Quest headsets, but they don’t quite stack up to the full versions that I play on my Rift. Of course, you can use a link cable to connect your Quest to a PC and use it to play Oculus Rift or Steam VR games. Linking works really well with the right cable, but even a single cable can be bothersome once you’ve experienced wireless freedom.
It turns out that with a little ingenuity and a couple of apps, you can have your cake and eat it too. Virtual Desktop is a desktop streaming app that allows you to control your desktop PC from your VR headset. It is available in the Quest store for $19.99. There is a side-loaded add-on from the developer that converts the Oculus USB development drivers to function over a wireless network. Before you head down this road, know that your PC and network need to be robust to support a pleasant wireless streaming experience.
There are a lot of steps to complete in this project. Use this outline to stay on track.
- Check Wi-Fi connection speed in headset
- Check Computer GPU
- Install Oculus app on phone
- Setup Quest Headset and link to Facebook
- Purchase and install Virtual Desktop application on your Oculus
- Install Oculus PC application sign in with Facebook account
- Install Steam PC Application sign in or create account
- Purchase and install Steam VR game
- Download and install the VR desktop streamer app on your PC
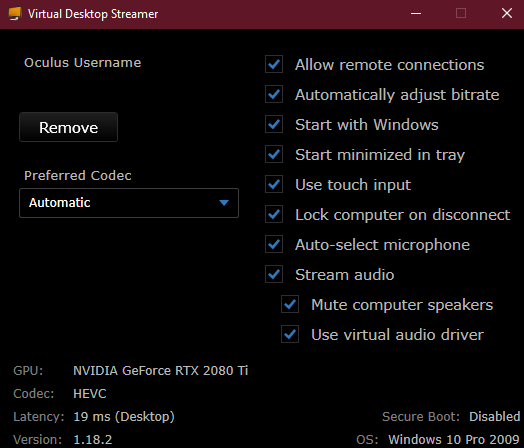
- Configure the VR Desktop Streamer App
- Register for Oculus Developer Account
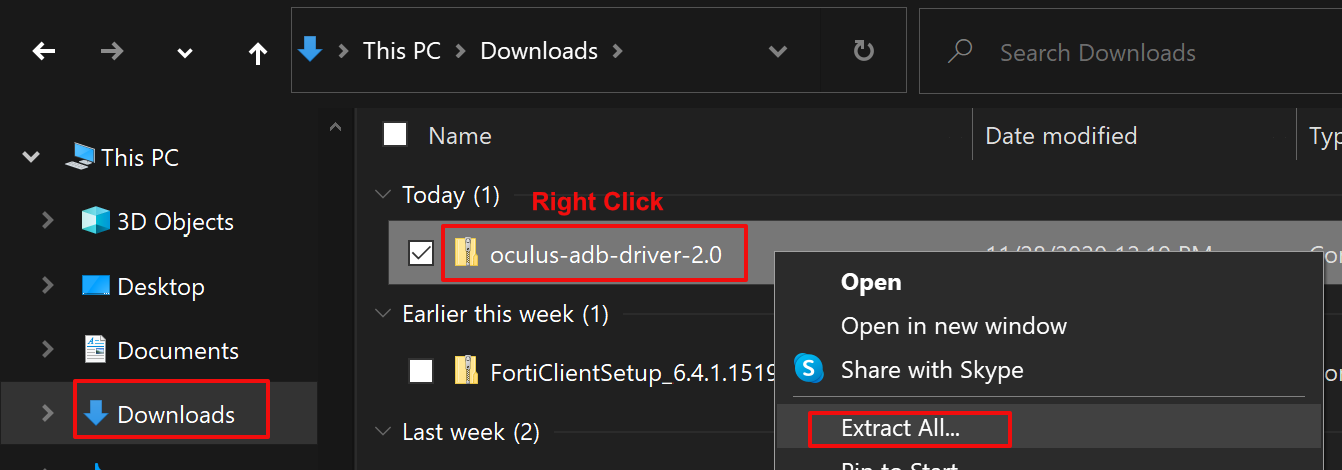
- Download and install the Quest ADB Drivers
- Enable Developer Mode on the Oculus app
- Download and install SideQuest on your PC
- Connect the Oculus headset to your PC with USB C cable
- Accept USB Content prompt
- Accept USB debugging mode prompt
- Install the Virtual Desktop Steam VR add-on from SideQuest
- Tune Virtual Desktop
- Tune VR Game
- Enjoy
Your wireless network needs to sustain a 300 Mbps (Megabits per second) or faster connection to your headset for game streaming to be smooth. I experienced stuttering, visual artifacts, and fuzzy video anytime my bandwidth dropped below this mark. Check your network speed by selecting the Wi-Fi symbol on the menu bar while in your headset. Then click the SSID of the Wi-Fi network that you are connected to. Scroll down and click on the Advanced menu. Scroll down some more to see the send and receive speeds.
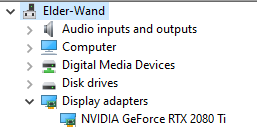
Your computer needs to be strong enough to run VR applications. On the lowest-end you’ll need at least an RX-480 8GB or GeForce 970 GPU. Check which GPU you have by right clicking on the Windows Start button. Then choose device manager from the menu. Click the chevron next to Display Adapters. If you have a lower end GPU you will need to carefully tune the graphics settings of your game. Disable SuperSampling, turn shadows to low, and use the least expensive anti-aliasing option to improve performance.
After you are reasonably sure that your network and computer can support VR game streaming, get started by downloading the Quest App on your mobile phone. Continue by setting up your Quest (put on the headset and turn it on) and link it to your Facebook account. The headset and app will walk you though this process. A tutorial will show you how the controls work. A Facebook account is required to install the streaming add-on, so you might as well use it for everything.
You’ll need to purchase and install the Virtual Desktop app from the Quest Store in your headset or the mobile app. Next you will need to download and install the Oculus and Steam VR applications on your PC. Sign into the Oculus Software with your Facebook account. Sign into or create an account for Steam. You’ll also need a Steam VR game installed and ready to go.
You will also need to download and install the VR streamer application for the Virtual Desktop software onto your PC and provide it with the Facebook account name that you setup in your Quest. In general you will want to select all the boxes in the application’s configuration screen.
At this point you should be able to open the Virtual Desktop app in your headset and use it to access and control your desktop. To gain the ability to stream VR games we will need to install the add-on that the Virtual Desktop developer releases for free. The add-on gets side-loaded onto the Quest headset. To side-load applications you’ll need a developer account, don’t worry its free and easy. Go to Oculus Developer Dashboard and sign-in with your Facebook account. Provide any unique organization name that you like and accept the agreement. Should you ever publish an Oculus store app, the name you pick here will be shown in the store.

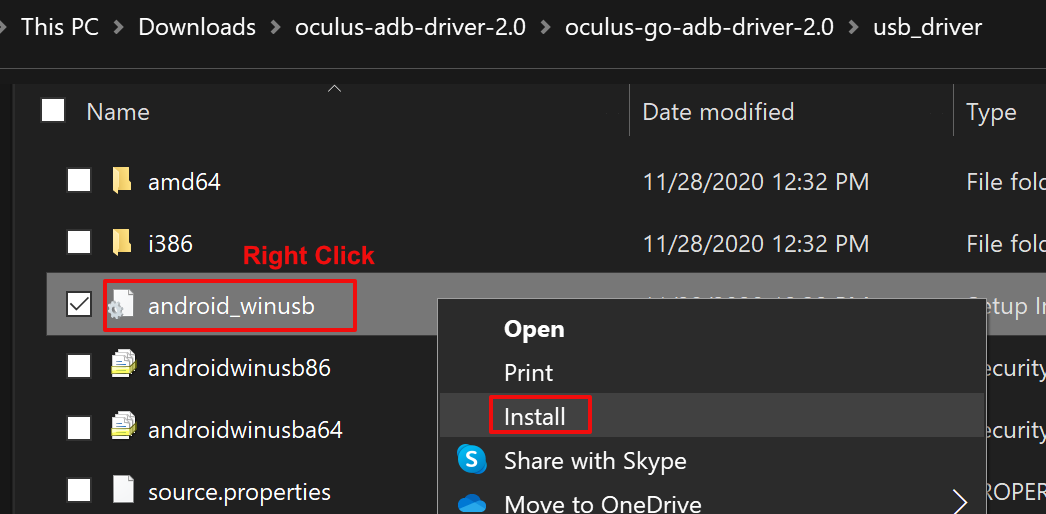
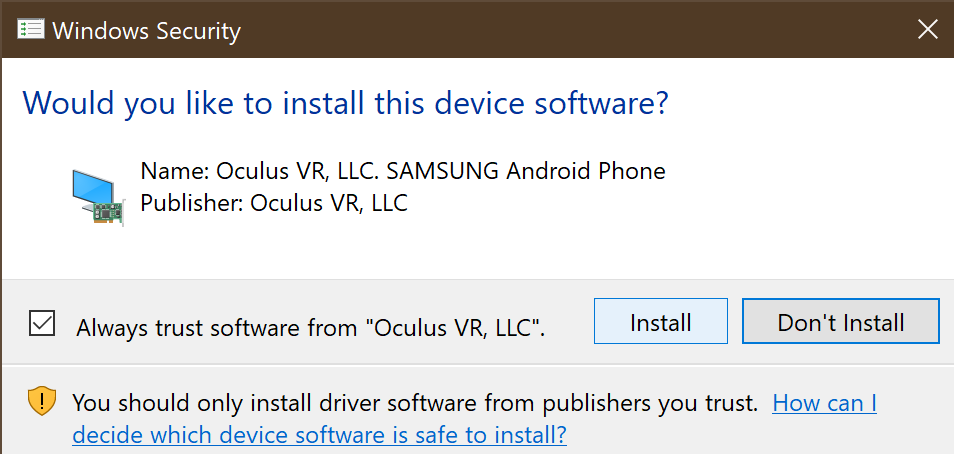
Now you’ll need to download and install the Quest ADB Drivers. On your PC, go to Oculus ADB Drivers | Developer Center | Oculus click the “I agree to the terms….” box and hit the download button. Open Windows Explorer and find the the downloaded file. Right click on it and choose Extract All from the menu then click the Extract All button. A new window should open, double click the “oculus-go-adb-driver-2.0” folder, then the “usb-driver” folder. Right click on the file named “android_winusb” and click Install from the menu. On the next screen click the Open button, then click Yes, then click Install.
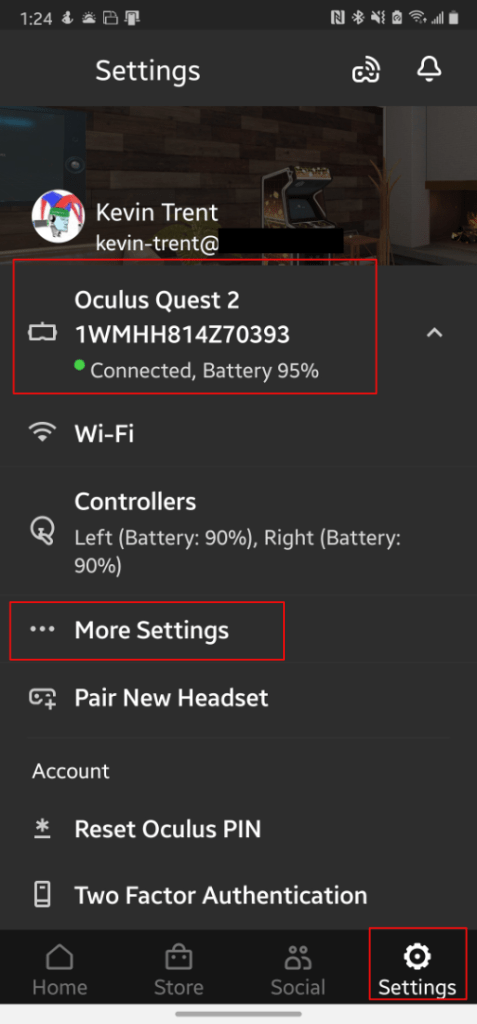
Now we need to enable developer mode on your headset. Open the Oculus app on your phone. Tap on your headset to connect to it, then tap the settings button in the bottom right. In the menu that appears, tap on more settings, then tap developer mode and the slide the setting to on.
SideQuest is a 3rd party app store for your Quest headset. The Virtual Desk add-on is published here and that makes installing it much easier. In addition, there are lots of games and apps for your headset that are not available in the Quest store and many of them are free. On your PC head over to SideQuest (sidequestvr.com) download and install the software. You’ll notice they have an installation guide on the download page, you have already completed those steps, but it is a good idea to double check everything. Open SideQuest when the install finishes. You’ll notice that is says it can’t connect to a headset. This is normal.

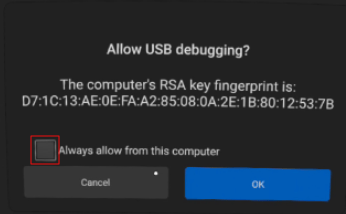
Now we are ready to connect your headset to your PC via the USB cable that came with it. Put your headset on and select a stationary boundary. You will be presented with a prompt to allow your PC to access content via the USB cable, accept it. Then another prompt asking to enable USB debugging will be shown, check the box that says to always allow from this computer and accept it as well. Do not enable the Oculus Link option if you are prompted to. Remove your headset (leave it connected) and the top right of the SideQuest app should show a green dot along with the name of your headset. If it doesn’t, you probably missed one of the security prompts, unplug and try again.
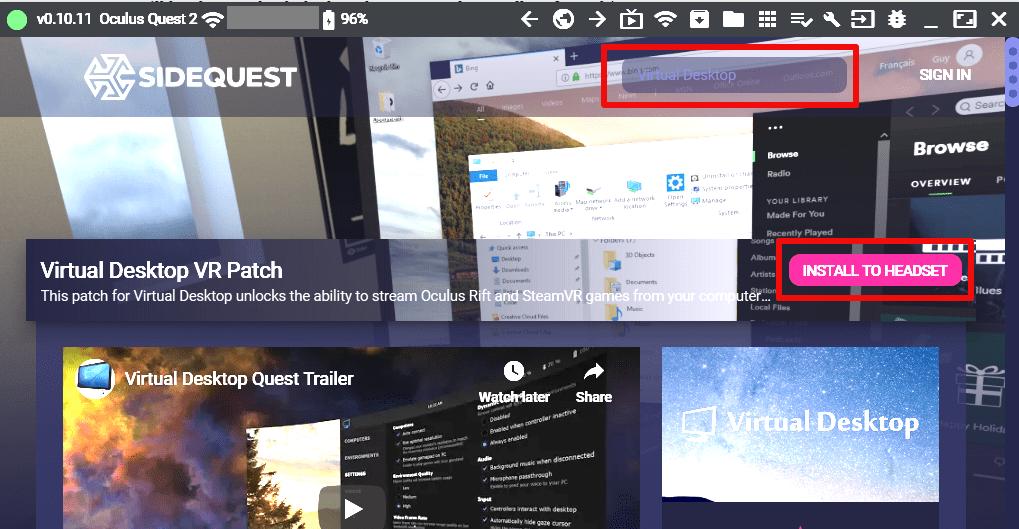
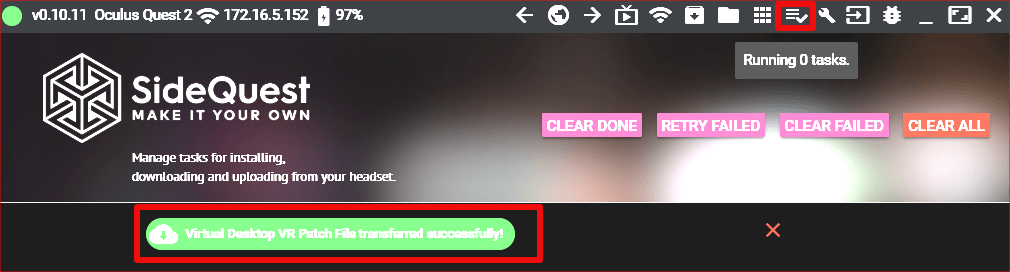
In the SideQuest app on your PC (with your headset still connected). Search or browse for Virtual Desktop. Click the Install To Headset button and watch for the message that the install task has been completed at the bottom. You can also use the task manager icon on the toolbar to verify the install has completed. When the install finishes, unplug your headset and close SideQuest.
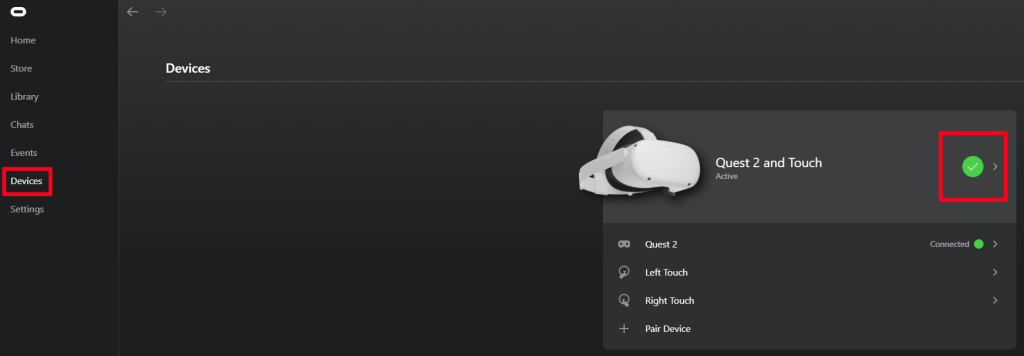
The install is complete. Put on your headset and select / draw a play area sized boundary. Open Virtual Desktop and wait for it to connect to your PC or pick it from the menu. Once you are connected, quickly press and release the menu button on your left controller to access the Virtual Desktop settings menu. Long pressing (holding for a couple seconds before releasing) will access the Steam VR menu.
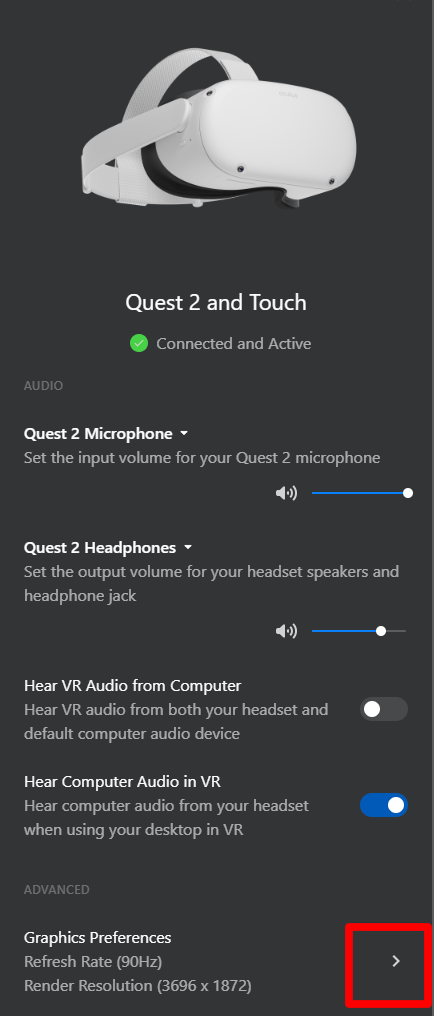
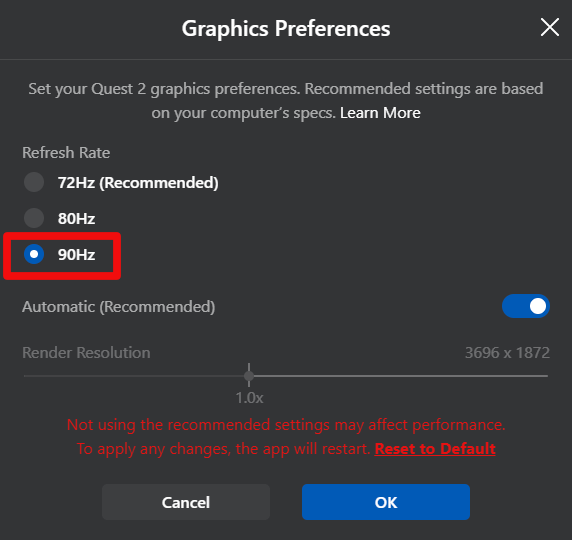
You will need to tune the application to align with your network and PC capabilities. I like to turn everything to the max settings try my game and then back the settings off until I find a good balance between looks and performance. Running everything on their highest settings is a fantastic experience, but requires some very beefy hardware in both your computer and network. Dropped frames and lagging game play tend to mean that you need to lower the graphics settings in your game. Fuzzy video, black screens, and lockups are usually related to the bitrate of your Wi-Fi which require you to tune Virtual Desktop settings.