The sixth generation of wireless networking, technically named 802.11ax, has been available for around a year. However, mainstream devices are just now starting to take advantage of the upgraded capabilities. Wi-Fi 6 access points can be difficult to obtain, I was able to order one for my UniFi system straight from the manufacturer’s online store. Amazon, BestBuy, and other vendors were continually sold out.

Before we get into the particulars of how to install the equipment, a word on why you might want to. Fifth generation wireless networks also known as 802.11ac have a maximum speed of 866 megabits per second. 802.11ax devices can reach 1200 megabits per second. In my case, I stream Steam VR games from my PC to my Oculus Quest 2 and the extra bandwidth will let me crank the graphics to their max.

I ordered the Unifi 6 Lite access point and am blogging the experience of adding the unit to my network as I do it in real-time. My entire network is based on the UniFi system; the controller, router, switches, and access points. If your topology incorporates another vendor’s products your experience may be different. The 6 Lite unit does not include a PoE injector, if your network switch does not support power over ethernet you will need to purchase a separate adapter.
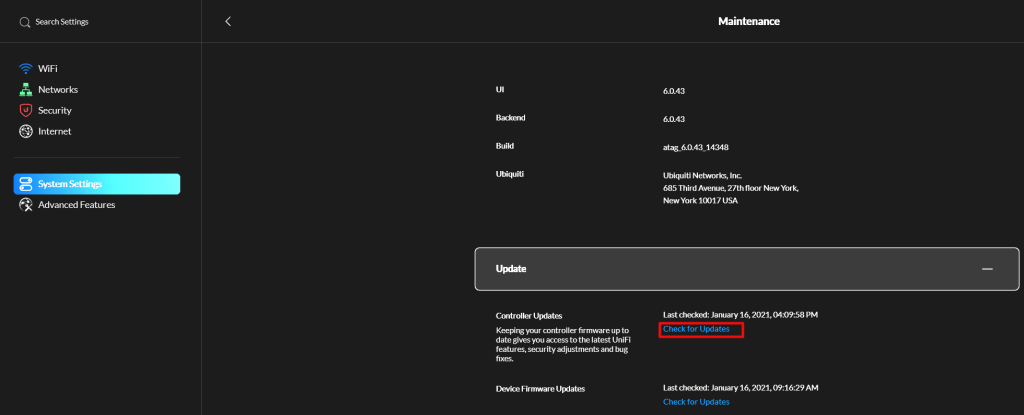
Anytime I start a project like this the first thing I do is make sure that all the software is up to date. At the time of this writing 6.0.43 is the newest edition of the Windows UniFi Controller software. Go to System Settings -> Maintenance -> Update and use the link to check for updates.
Unbox the unit and connect it to a PoE switch port using a suitable RJ-45 connection. Logon to your UniFi controller. The WAP should power on as indicated by the ring light on top flashing, then the unit will be detected by the controller, look in the devices section to locate it. Click on the device and then select Adopt in its pop-out panel. This process can take several minutes so be patient.


Before adding the new WAP to any of your AP Groups or creating one just for it, you’ll want to upgrade the firmware. While still in the Devices section of the controller, hover your mouse over the newly adopted access point and a menu will appear at the far left. Press the upgrade button and then click Confirm. Again, the process can take several minutes.

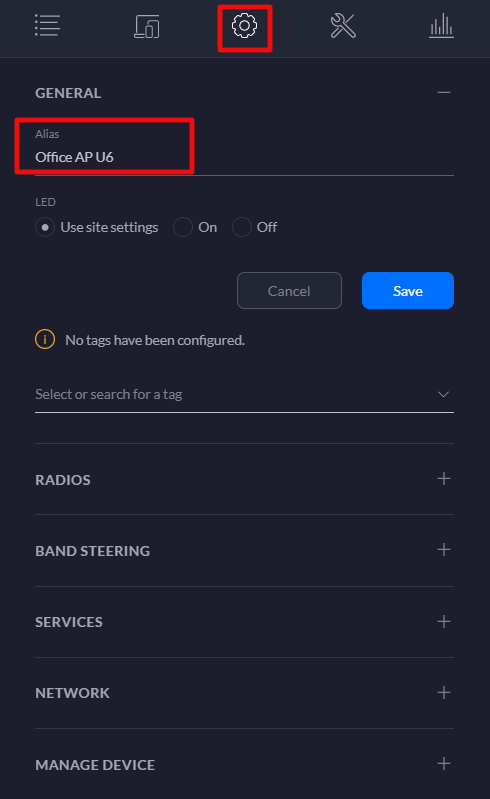
While still in the Devices section of the controller, click on the device after its firmware upgrade has completed to access its pop-out panel. Click the settings (gear) icon and name the device something appropriate for your network. You can also adjust any other settings that may be required for your environment in this panel. Save and Apply the changes.
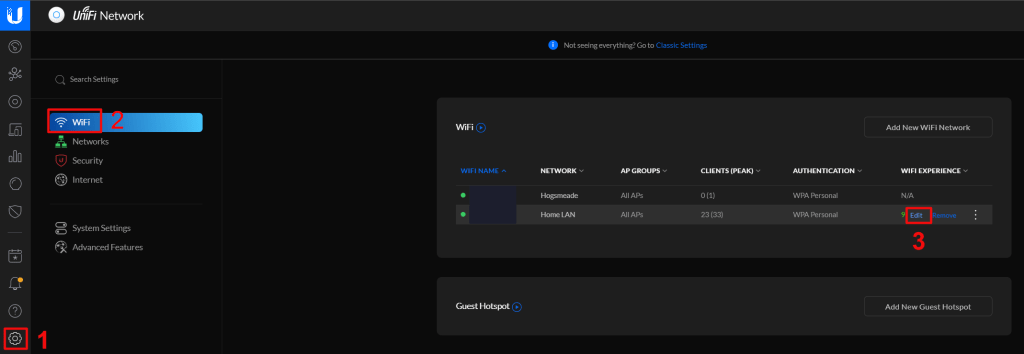
In my case, I am adding the UniFi 6 unit into the same AP group as the rest of my access points and will let the controller decide what clients should connect to it. So, my project is complete at this point. You could also create a separate AP group for the new WAP and add it to a stand-alone WLAN (Wireless LAN / SSID) to enable manual selection of the Wi-Fi 6 network. While logged on to the controller click the settings (gear) icon in the menu on the left. Then go to Wi-Fi. Hover your mouse over your WLAN (SSID) and click the Edit button when it appears.
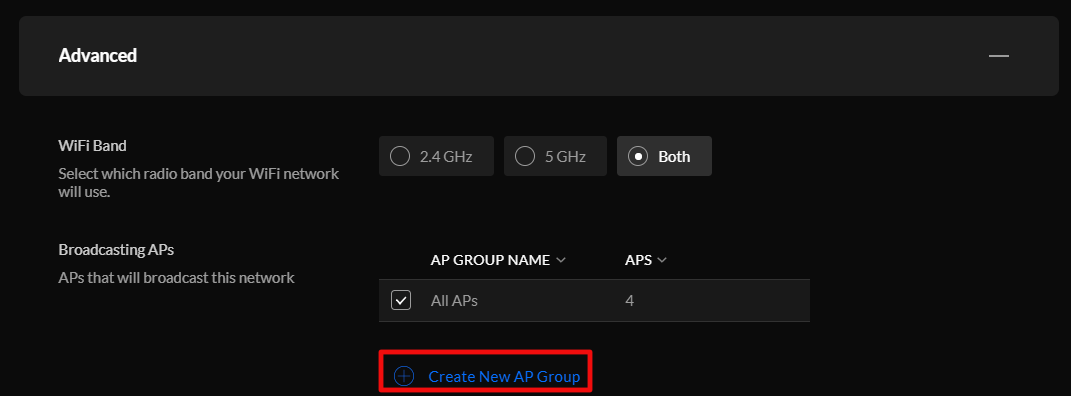
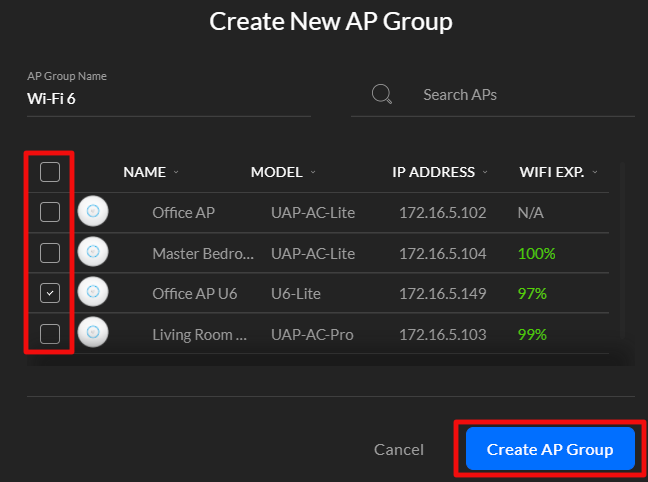
Use the Advanced menu to access the AP Groups. To isolate your Wi-Fi 6 unit into its own SSID you will need to create two new groups. Click the New Group button and select the devices that compose your current SSID, leaving the new unit unselect. Name this new group something appropriate (suggest same as SSID) and the click the create group button. Now create another group that contains only your Wi-Fi 6 WAP and name it. Select the first group you created to bind it to your current SSID. Save and apply the changes.
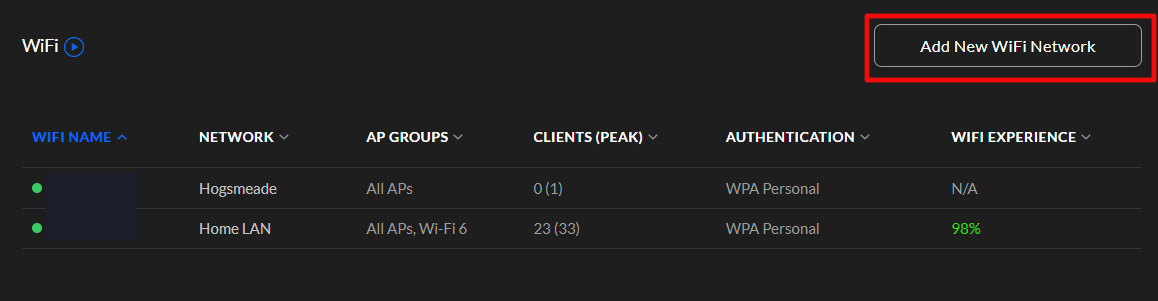
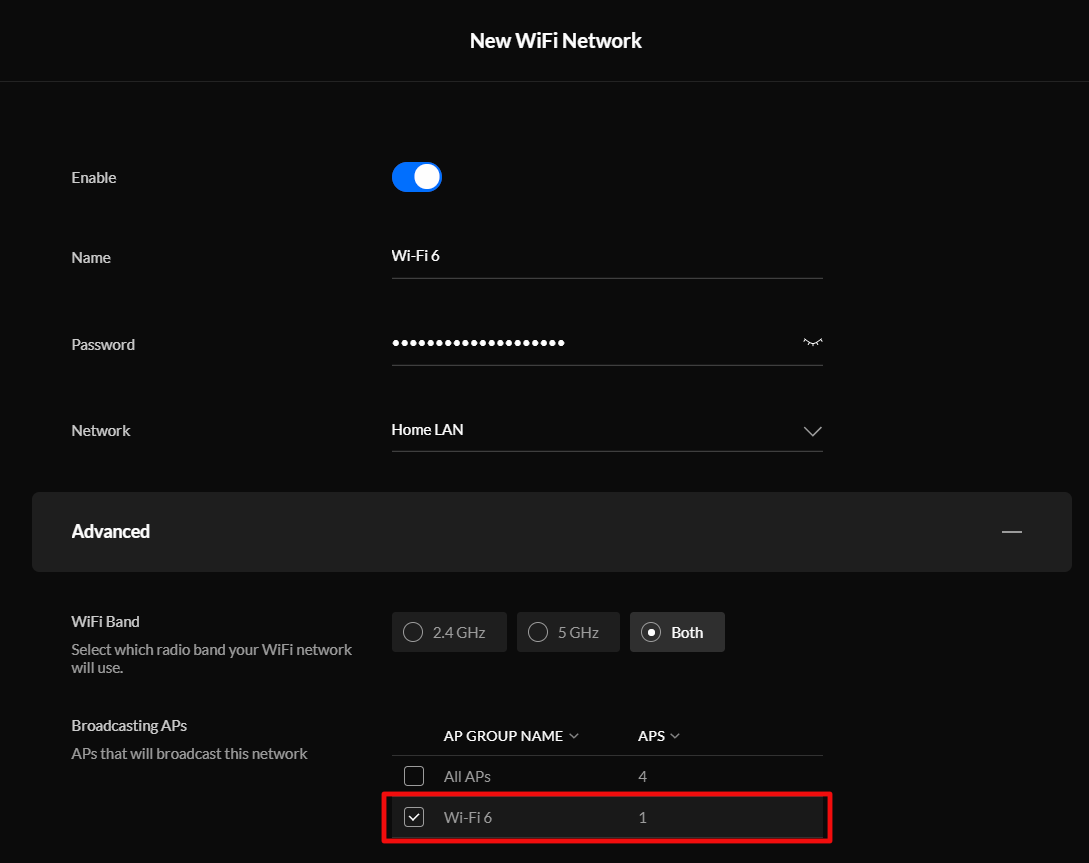
Now create a new WLAN from the Wi-Fi settings screen and choose the Wi-Fi 6 AP group after you have configured all the SSID settings. Devices that you manually join to this new SSID will be connected to Wi-Fi 6 access point. If you add new Wi-Fi 6 access points you can add them to this group using the same method.
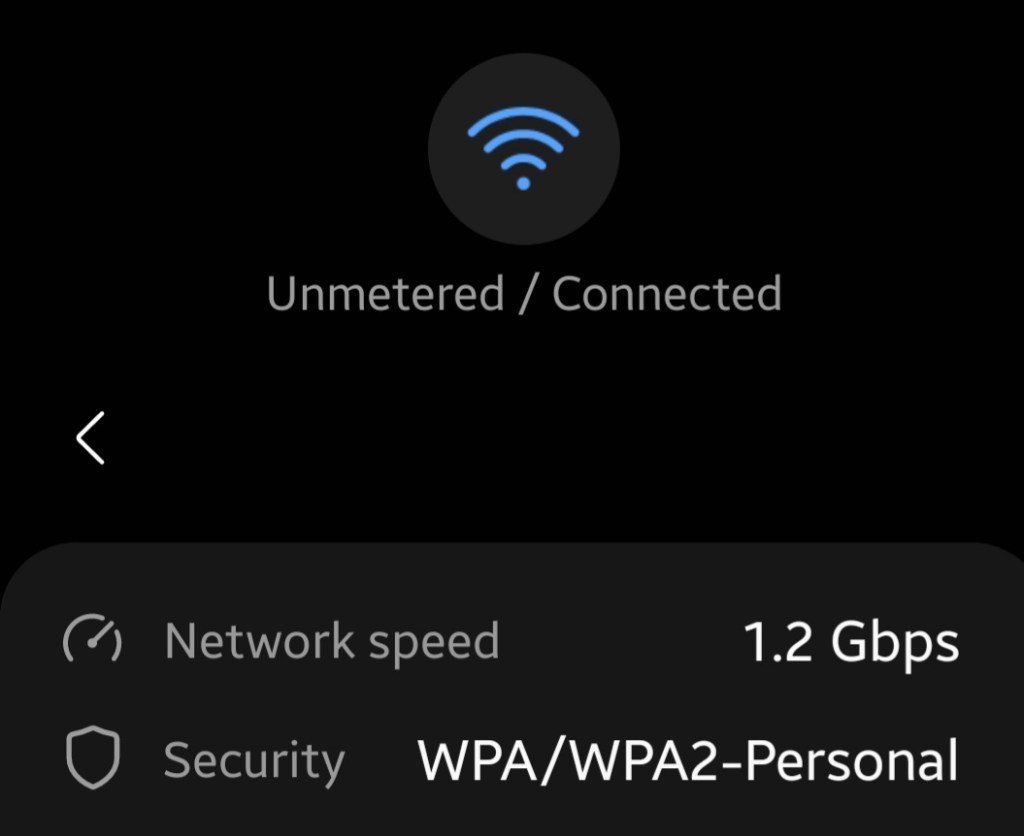
Once you have provisioned your Wi-Fi 6 access point and bound it to a wireless network connect a device to it and prepare to be astonished. On Windows systems and notification pops up to inform you that you’re using a more advanced network. On Android devices a little number 6 appears next to the wireless connection symbol. Checking the properties of the connection should show that you have 1.2 Gb/s of bandwidth available.