
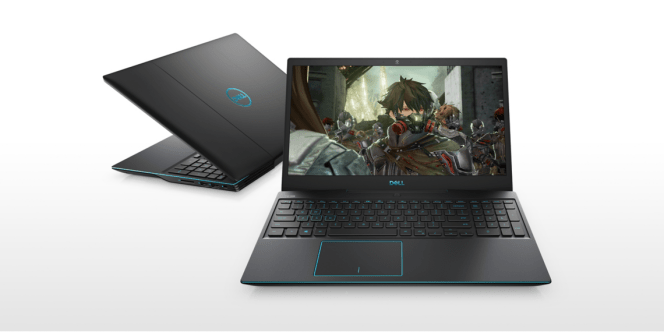
The Dell G3 laptop that I bought my son for Christmas last year has been a good choice. It runs all of his games, graphics editing, and CAD software with ease. A few months ago we doubled the RAM to 32GB and added another 1TB SSD so that he can run VMs for his development machines and even host some Minecraft servers for his buddies. All in all it has proven to be a great system except for one thing.
About a year and a half after we purchased it, the laptop’s lid stopped closing properly. When you shut the lid it made a cracking sound and shifted to the left on its way down. Clearly there was something wrong with the hinge. I hopped on the web and found a page in Dell’s forums where numerous people were complaining about this particular laptop having a design flaw in its hinge system. Inspiron G3 15 3590, hinge broken – Dell Community
Like us, many of these people are upset. It seems the hinge usually fails just outside of the system’s warranty. At least one person was able to get Dell to repair it anyway. According to the post if the system is part of a certain batch they are acknowledging that it is a manufacturing flaw. My kid’s laptop was one that they will repair, but the parts are on backorder with no estimate of an arrival time. I decided to fix it myself.
This repair is difficult. If you are not experienced working on laptops, tablets, or phones I caution you against attempting the procedure yourself. There are numerous ways you could damage the screen, motherboard, and other components while working on a laptop’s internal components. If you choose to proceed you are doing so at your own risk.
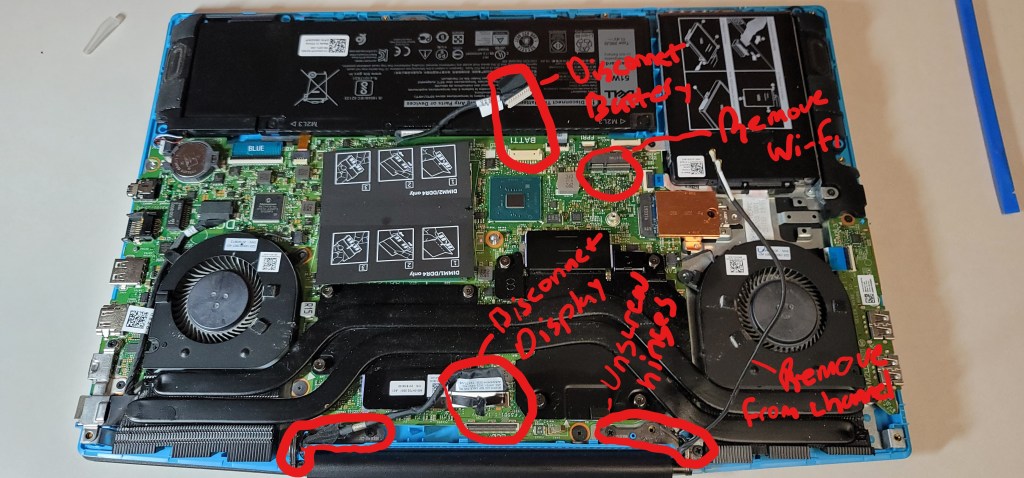
You will be removing the case, disconnecting the battery, removing the Wi-Fi adapter, disconnecting the display, and removing the display’s case. I was able to find a video (not English) that shows the process step by step. I suggest that you watch it both before you decide to proceed and while doing it. How to fix laptop Hinges Dell G3 15 3590-Easy Tutorial – YouTube
You’ll need a clean dry work surface with good lighting. Remove any drinks or other containers of liquid from the area. It is best if you have an anti-static mat to work on. If you don’t, avoid standing on carpet and ground yourself before touching anything inside the case. You will need a number 1 Philips head screw driver, tweezers, plastic pry tools, plastic pics and something to put the screws and parts you remove on to keep them organized. If you don’t have these types of tools you can find kits that have them on-line and in many stores.
Follow along with the video. First remove the back of the laptop by taking out the screws. Then disconnect the battery by pulling its connector out. The antenna is a wire that is looped around the outside of the display, it needs to be disconnected before the display can be removed. Unscrew the wi-fi adapter’s antenna guard and remove it. Disconnect the antenna leads and remove the wi-fi adapter, slide the antenna cable out of it’s channel.
Now disconnect the display’s lead from the mother board by pulling straight up on it. Carefully open the display so that the hinges are extended and remove their screws. The display should come off of the laptop now. Set the laptop’s bottom cover and motherboard assemble to the side.
Now that you have the display separated from the lower half of the laptop we need to remove the top cover from the screen so that we can access the hinge assembly. In the video the man uses a sharp piece of plastic to slip down between the bottom of the cover and the screen. He actually cuts part of the display cable’s outer sheath doing this. I used the plastic picks (guitar picks) from my tool kit to remove the lower portion of the cover with no damage. Slide the pics in to open up some space and use your fingers to unsnap the clips one at a time. Go slowly. Be careful not to dislodge the camera or wi-fi antenna wires.
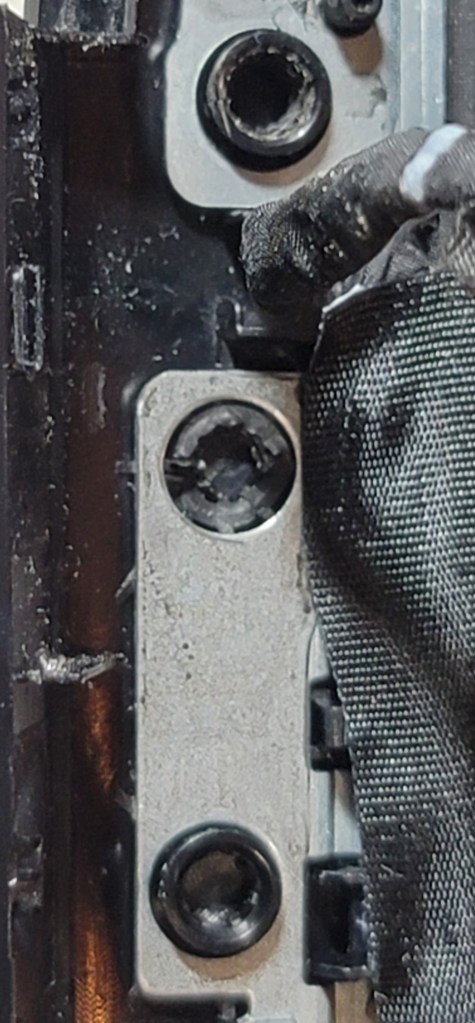
Once you get the display shell off the cause of the problem will be apparent. The failure occurs because the brass thread inserts twist in the plastic as the lid is opened and closed. Eventually they break the plastic entirely. They will fall out when you remove the case covering the hinge.
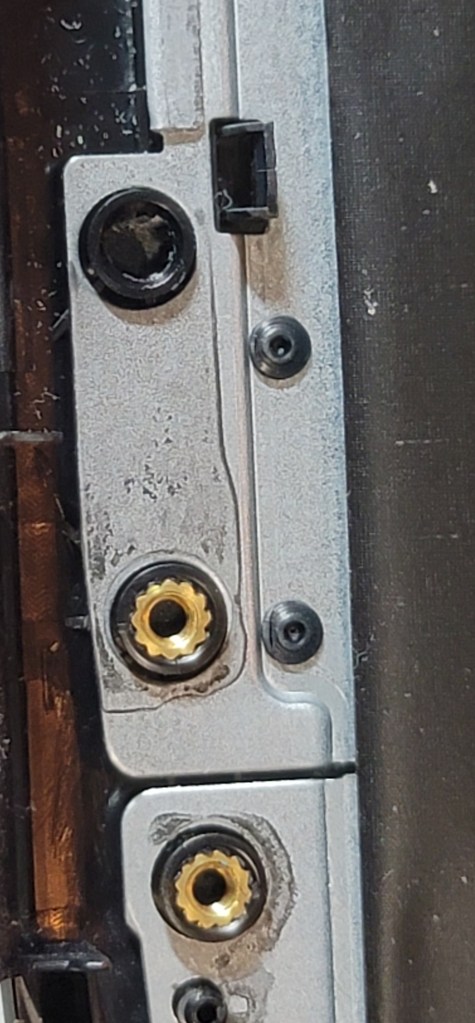
In the video the gentleman winds the screws in cotton and covers that with a layer of super-glue to enlarge them and fill the void that is left in the hinge mounts when the brass threads come out. Our laptop was more damaged than that. When the brass inserts failed they broke the plastic badly.
I used two-part epoxy to repair the hinge mounts. Working on one hinge at a time, dip a paper towel in rubbing alcohol and clean the hinge as well as the surface it mounts to. Mix the epoxy according to the directions and spread a thin layer on the mounting surface and in the screw holes. Put the hinge back in place and use your screw driver to hold it down firmly for a minute or two. Insert the screws back in their holes holding each one in place for ten seconds or so.
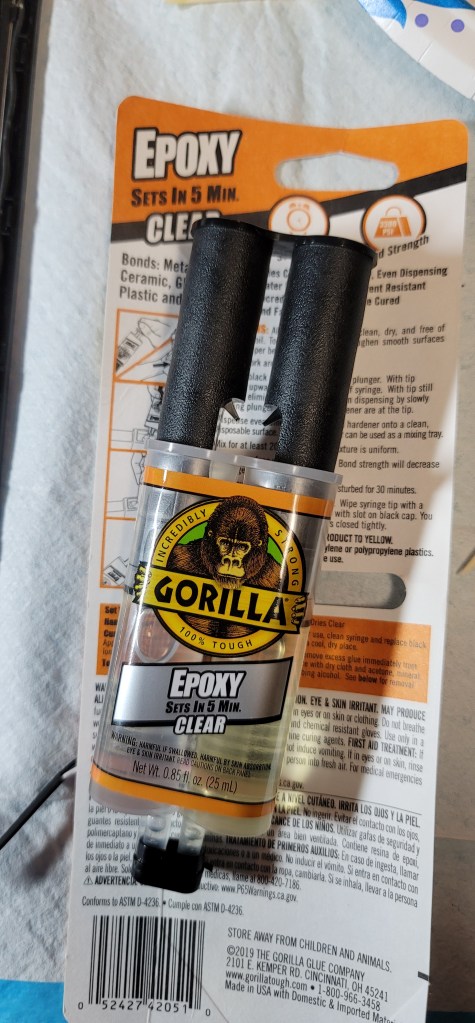
I let the hinges dry overnight before reassembling the case. The epoxy I used says that it sets in 5 minutes but the fine print adds that it takes 24 hours to fully cure. When you put the cover back on the display be sure the antenna and display cables are back into their channels before you try to snap the cover back down. I used a few pieces of double sided tape to help secure the bottom of the cover.
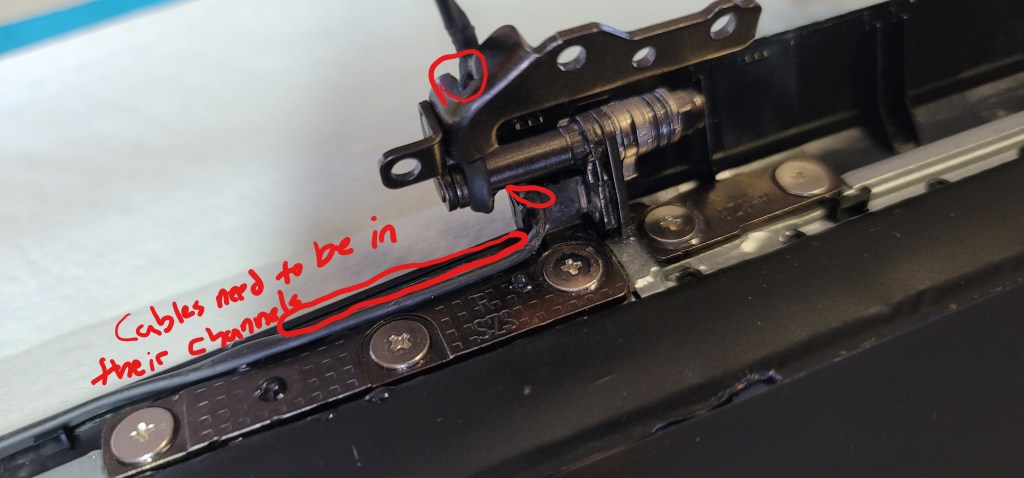
Reassemble the laptop, be sure to run the antenna cable back through its channel before you screw the display on to the lower chassis. I found the Wi-FI adapter antenna leads quite difficult to reattach. They are very small, a magnifying glass came in handy to see them. Use your fingers to squeeze them back into place, tools might break the fragile card. Don’t forget to hook up the battery and display cable too.

Hi,
How do I find out if my G3 hinge is a manufacturers defect?
I scrolled through the forum you linked but could not see it anywhere.
Cheers
LikeLike
You have to call Dell’s technical support. 1-800-624-9896
LikeLike
Wow, what a lifesaver! 😍 This blog post came just in time for me. My Dell G3 3950 laptop has been giving me hinge trouble for ages, and I was at my wit’s end trying to find a solution. 🙈 But thanks to your detailed guide, I feel confident enough to give it a shot myself! 💪 Your step-by-step instructions and clear photos make the whole process seem much less daunting. 📸 I can’t wait to try it out and hopefully say goodbye to those pesky hinge issues once and for all! 🎉 Thanks a million for sharing this invaluable resource! 🙏✨
LikeLike