
If you have a 1080 or newer Nvidia GPU (Graphics Card) in your Windows gaming PC, you can play your desktop’s games on almost any screen in the house that you can pair a controller to. Modern Nvidia graphics cards are designed to support streaming video games to the Nvidia Shield series of devices. Unlike typical remote desktop options, the Shield console protocol known as “Gamestream” offers high performance remote play of games over high-speed Wi-Fi.
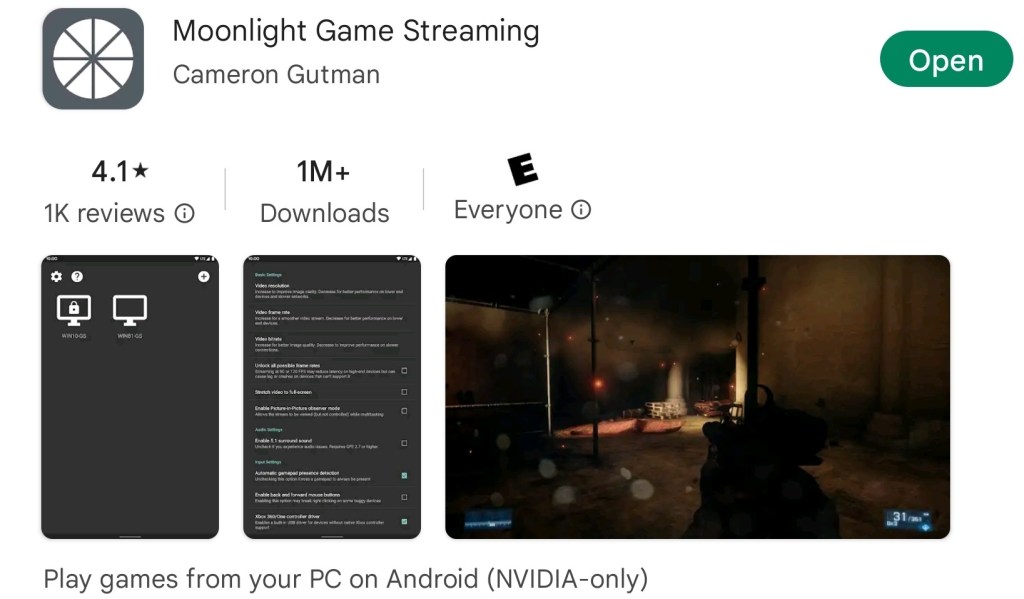
A group of developers have written a universal Gamestream client app named Moonlight. The free software will let you stream your desktop games to numerous tablets, phones, consoles, and computers. The latency is low enough that I am able to play on-line multiplayer games with my equipment. The performance you experience will vary widely depending on the host system specs, client device capabilities, and the network underpinning it all.
If you are considering a Moonlight / Gamestream setup, be aware that Nvidia has announced they are removing Gamestream from Shield devices. Not discontinuing, but actively removing. I haven’t seen an official answer on if the protocol will be removed from their GeForce Experience software on the PC.
Removing the streaming option from the GeForce Experience software would stop Moonlight from working. If that happens, or if your GPU is another brand, you can use software named Sunshine to host your stream. See their GitHub at https://github.com/LizardByte/Sunshine for the downloads and instructions. The difference between using Gamestream or Sunshine versus something like Steam Link is that the Gamestream options supports any game from any store, rather than just Steam.
To get started with the NVIDIA solution (easiest) you will need to download and install the newest version of GeForce Experience that matches your video card from Nvidia’s download site. I highly recommend reading though Moonlight’s excellent documentation and setup guide @ https://github.com/moonlight-stream/moonlight-docs/wiki/Setup-Guide. It will step you though the entire setup and device pairing process.
The Moonlight application for your device(s) should be available in it’s associated app store. If you have one of the rare devices that does not feature the app in its store, check the Moonlight download page at https://github.com/moonlight-stream/moonlight-qt#downloads.
Download, install, and run Moonlight’s Internet Hosting Software to automatically configure the Windows defender firewall on your gaming PC. The tool will also attempt configure your network’s firewall to allow Gamestream access to your computer from the Internet. For the Internet part to work, your Internet firewall must allow the UPNP protocol, or be running IPv6.

Warning: Some IT Experts consider UPNP to a be a security risk. To manually configure your network for Internet streaming allow the following network ports: TCP 47984, 47989, 48010 and UDP 47998, 47999, 48000, 48002, 48010 between the server and client devices. All of the network setup, including manual firewall setup tips are documented @ https://github.com/moonlight-stream/moonlight-docs/wiki/Setup-Guide#streaming-over-the-internet
If you have programable network equipment and are familiar with it, enable Multicast DNS on your network. It allows your network devices to communicate by name instead of IP addresses when you do not have a local DNS server. While you are in there, enable IGMP Snooping, it lets your switches forward packets to groups of devices more efficiently, which frees up those resources for other duties.

In some cases, the activation of the rumble effect causes the client app to crash at the moment the buzz should be activated by the in-game action. I disable the rumble feature as a result. I also frequently disable HDR support. You can see the difference it makes in the graphics, but it also causes instability (dropped frames and lagged controls) on my setup.
If you are experiencing issues, try adjusting the client application settings to compensate. Generally speaking, you can improve stability by lowering the resource demands of the software. Done by turning off toggles and lowering numbers in the app’s graphics settings menu.
I frequently experience an issue with some on-line games in which the client abruptly returns to the home screen within a few minutes of starting a match. I am usually able to reselect the game from the Moonlight Menu and resume the same game session. I have not discovered the cause, or precise pattern of occurrence for this issue yet.
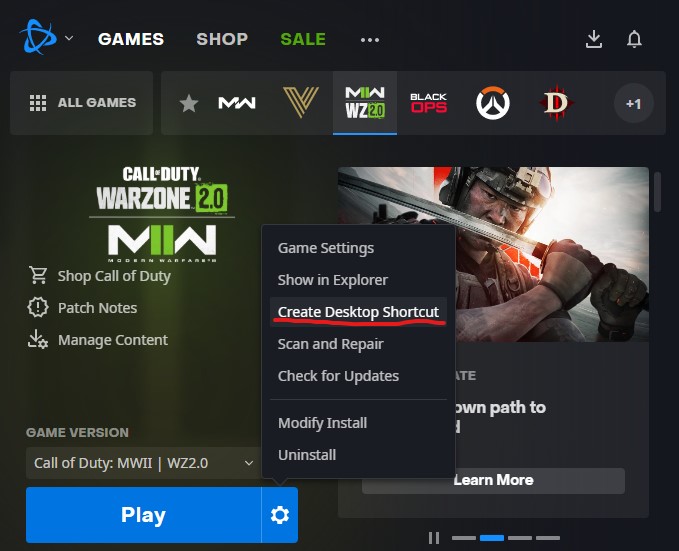
The process for adding games is well documented in the Moonlight setup guide linked to above. Experience has taught me to publish shortcuts created from the game’s launcher, rather than the game’s direct exe file. Multiplayer authentication and anti-cheat systems stay happy that way. In most of the launcher apps like Steam, Xbox, and EA Desktop you can create a shortcut for a game by right-clicking on it in the app’s library.
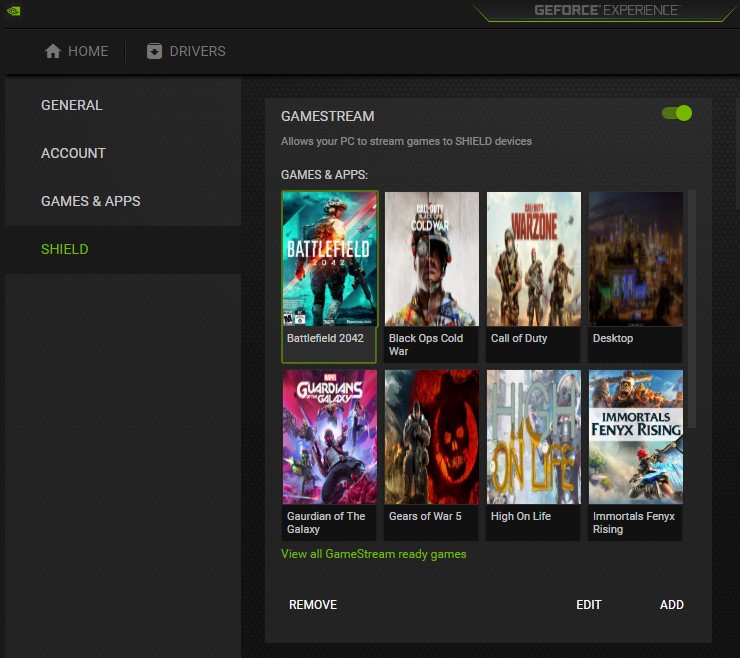
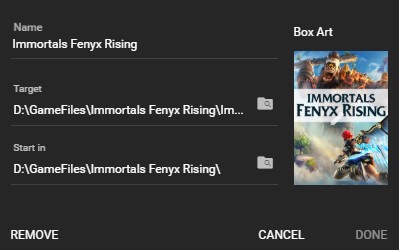
To keep the client game carousel looking clean, I use image search and my device’s screen clipping feature to grab a sample of each game’s cover art which I save as a .PNG. I put the images in a folder, each named for the corresponding game. Then on my PC, in the GeForce Experience App, I assign the appropriate image to each game by selecting the Edit Button under Settings -> Shield -> Games & Apps. Click the Box Art space for the game and browse to the folder I saved the box art snips in. While I am in this location, I edit the name to something short to prevent messy line-wrapping on my Moonlight device’s screen.
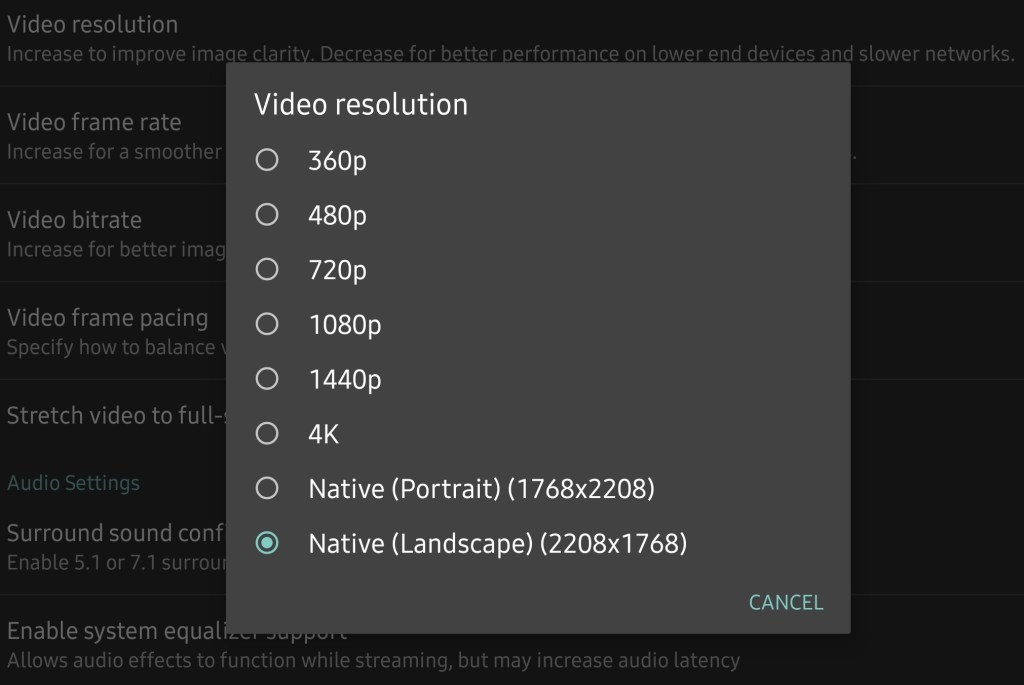
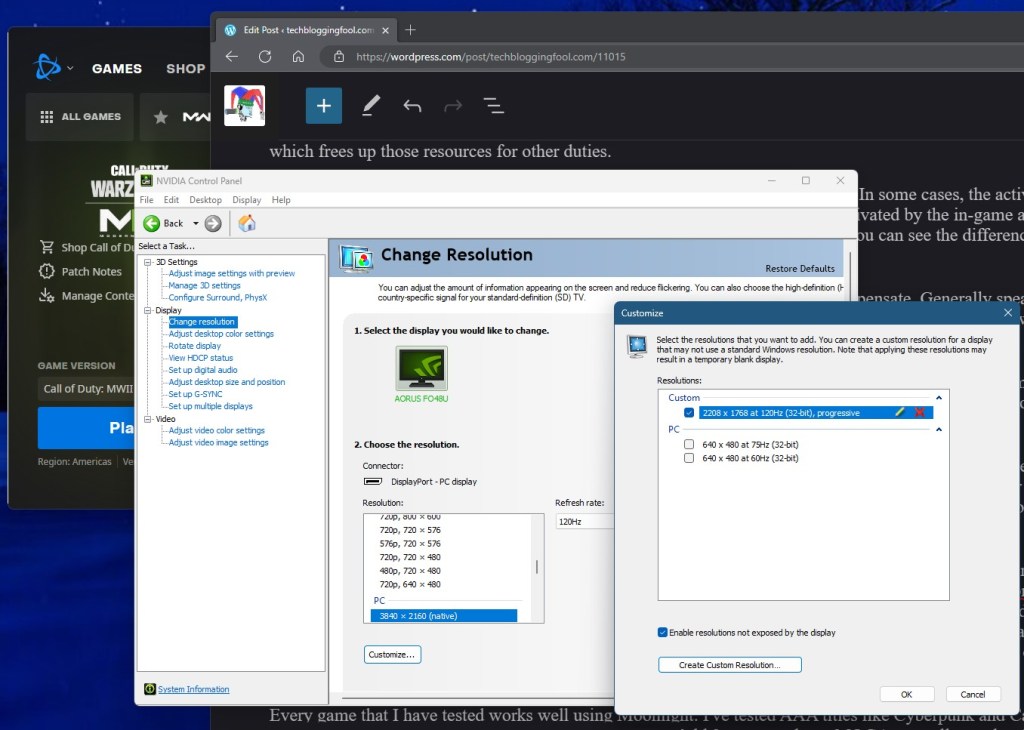
To use your devices native screen resolution in games you’ll need to create it on your desktop first. The Moonlight client app tells you as much when you enable the feature in its menus. To create a custom resolution, use the GeForce Control Panel. You should fully understand the risks to your monitor before proceeding and are doing so at your own risk.
Every game that I have tested so far works well using Moonlight. I’ve played AAA titles like Cyberpunk and Call of Duty, along with emulators like Dolphin. Gamepass PC games, Steam games, EA Desktop games, and even Ubisoft games, all work. You can play either with a controller, or with a mouse and keyboard connected to the client device. I find the freedom to play my games from any location in my home to be worth the trouble of getting it all working. It takes between one and four hours depending on your experience and the speed of your systems and connections, good luck.

2 thoughts on “Play Your PC Games On Other Screens with an Nvidia GPU and Moonlight”