I started my tech career working with Apple’s equipment. Then I shifted to business IT spent most of my time in Windows / Linux, Databases, switches and routers. Now MacBooks have made enough inroads into SMBs that I need to learn.
In this day and age, your digital identity can be as important as your real life persona. Just as you use fashion to convey your desired public image, usernames, email addresses, and the like can influence how people view your on-line identity. For the longest time, everyone just used one of the big free identity pools like gmail.com, outlook.com, or their ISP’s domain.
Recently I discovered that the family and personal editions of Microsoft 365 will allow custom domain names. That got me thinking, what about the Apple side of tech? It turns out that paid iCloud accounts will also host your custom email domain.
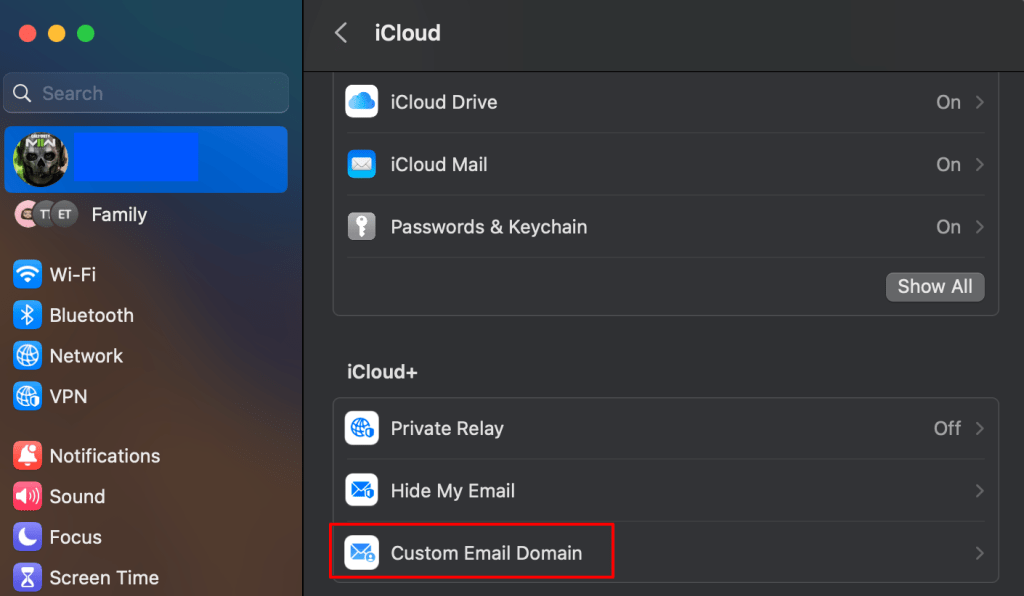
On a iPad, iPhone, or MacBook, open settings then click on your account in the menu on the left. Click on iCloud and scroll down to tap “Custom domain name”. You should also be able to go straight to the iCloud page in Safari https://www.icloud.com/icloudplus/customdomain. If you visit the site from a non-Apple device you will face some authentication hurdles, but I’m told it can still be done.
The easiest way to get started is from the settings app on your Apple Device.
Sign into iCloud when prompted and the setup process will start. The first thing you’ll need to decide is whether to use a domain you already own, or purchase a new one. Click the appropriate button and follow the instructions. I’m using a domain I already own in these instructions.
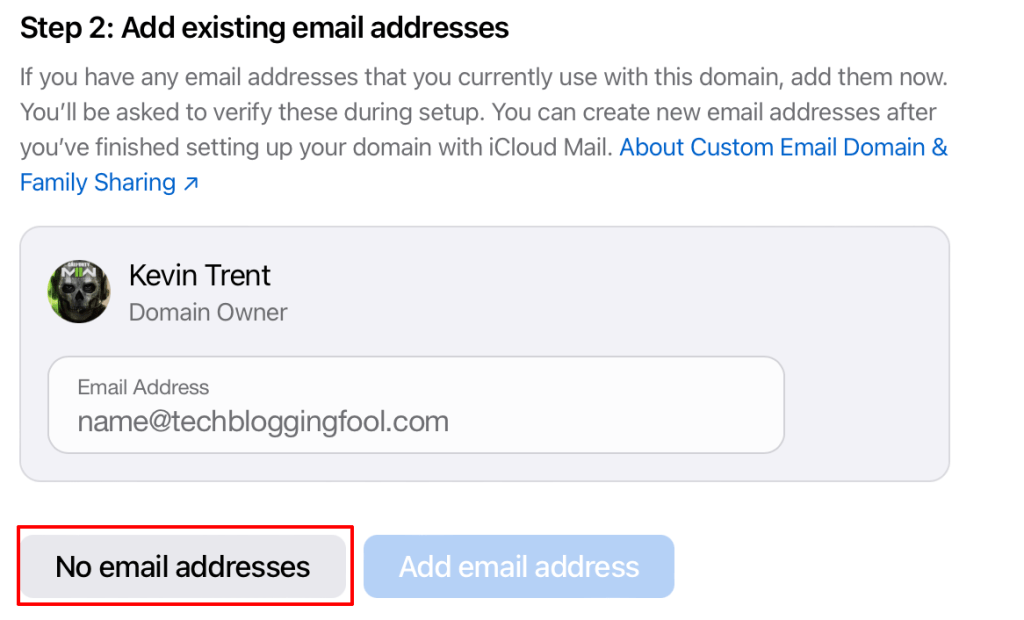
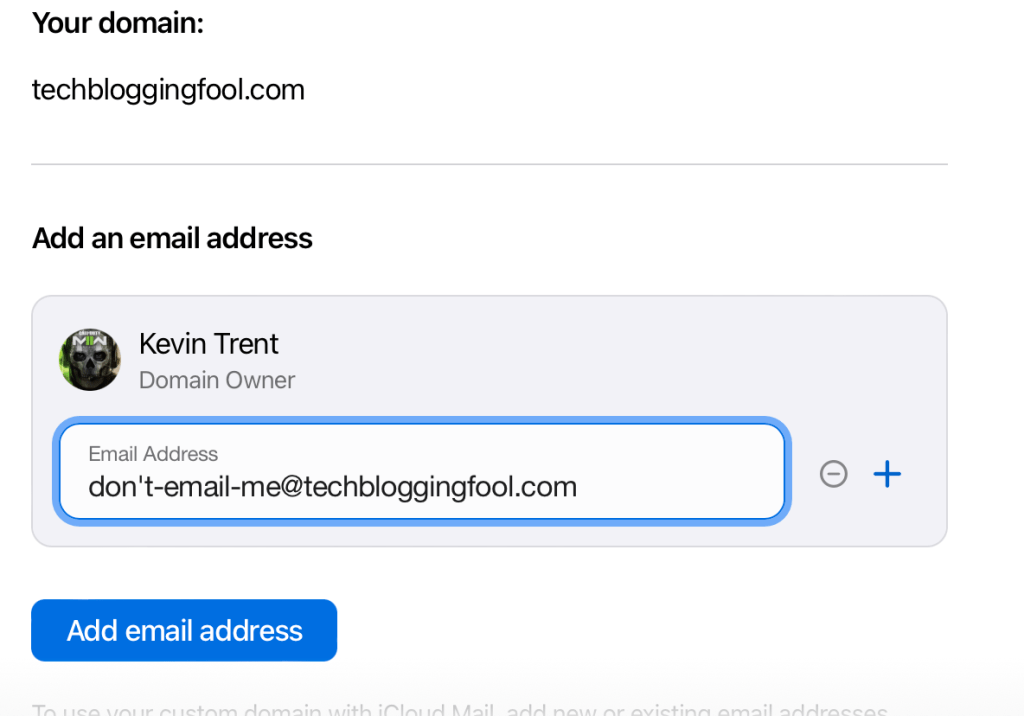
When you reach the step regarding existing email addresses, pay close attention. This is not where you setup up new addresses. If you are not moving email hosting from another service to iCloud, you should click the “No email addresses” button. If you try to add existing addresses, apple will send a verification email and you will be stuck. If you get stuck, use the back button to go to step one and remove the domain to start over.
Adding existing addresses from this screen sends verification emails to them. Use the “No email addresses” option unless you are migrating from another SMTP host.
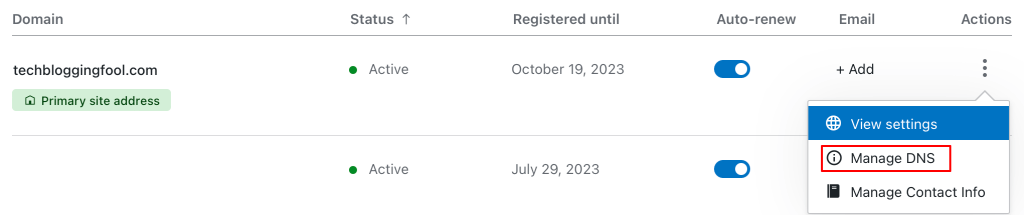
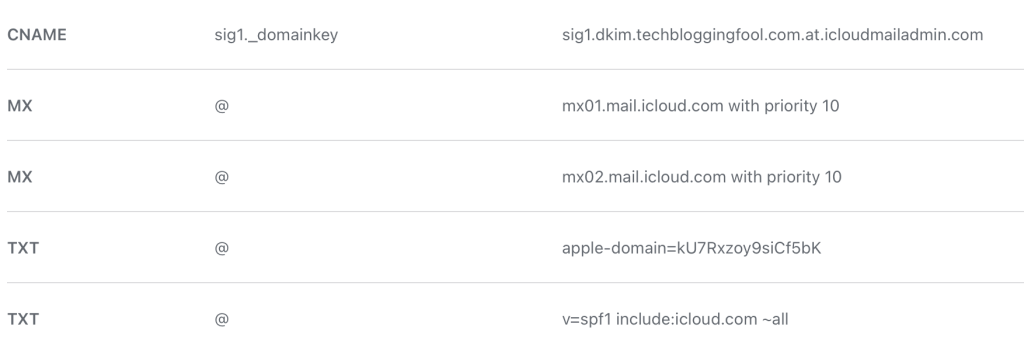
If you have chosen to use a domain that you already own, there are some DNS records that you will need to create. This is typically done on the domain registrar site that you purchased the name from. Logon to their control panel and find the Manage DNS (will vary in name and location) option. Create the records exactly as they appear in the setup portal (View button). Apple also emailed you the records to your iCloud address when you reached this step (look in the Apple Mail app).
Most domain registrars also host your DNS.
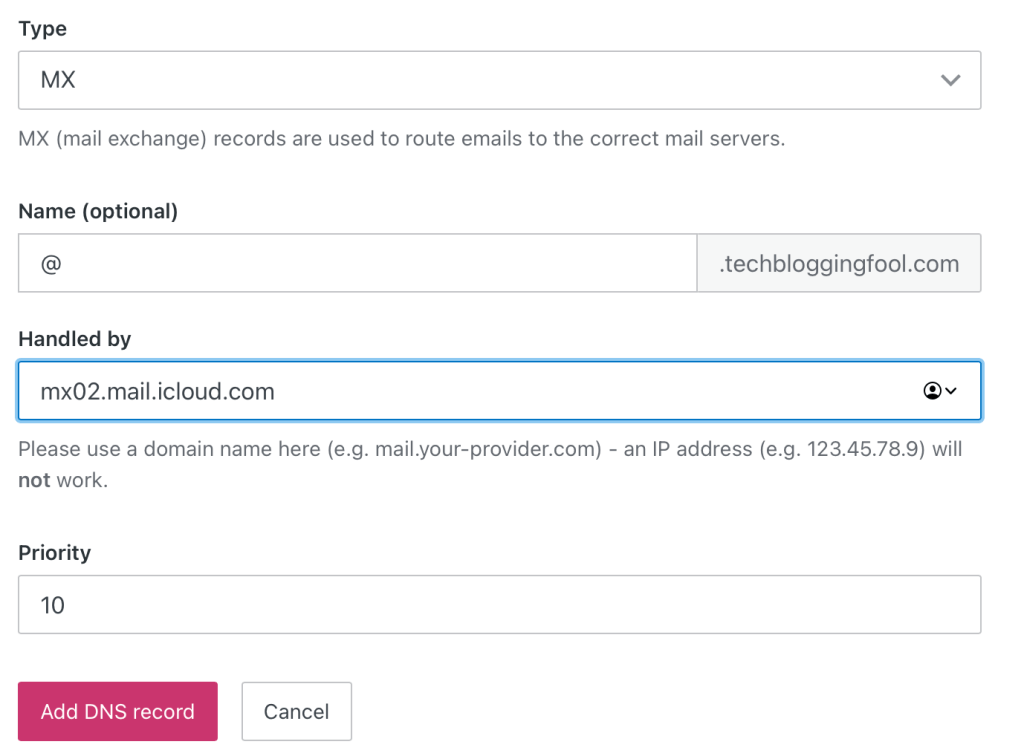
Note: The screen that shows the records you need to create includes a trailing period after some of the values. However, most DNS servers cannot accommodate a trailing period in their fields. If your DNS server will not accept the pasted copy, remove the period.
Create each record, remove trailing periods in the values if they keep you from proceeding.
In all you should have created four DNS records. They should look similar to mine below. The data is different for each domain so do not use the values from my screenshot.
Back on the iCloud setup screen click Finish. Then click Confirm and Apple will verify that you have setup the records correctly. On the next screen you will add your email address(s). You can add up to 5 addresses to your own account or to iCloud family members.
Use the – and + buttons on the right to remove and add addresses to your account.
That’s it, you are all setup to use your custom domain. It can take up to 48 hours for the email addresses you created to become fully useable on the internet. You can manage your email settings by access the Custom domain option in the settings app as described above or by visiting https://www.icloud.com/icloudplus/customdomain in your browser. Enjoy.
Once upon a time, I had an idea for home entertainment nirvana. I would purchase the same brand of smart TV for each screen in my home. I reasoned that it would simplify the cable-cutting experience for the whole family.
For the most part, it worked. I ended up going with various models of Samsung smart TVs. They all used the same operating system and had very similar remotes. They could also synchronize favorites, apps, and settings if you logged on to a Samsung cloud account. It was very convenient, nobody missed cable at all.
Fast forward several years, and it was time to replace one of the screens. I really liked OLED, and the best bang for my buck was an LG. The LG features a remote that resembles a Wii controller. LG’s WebOS is vastly different than Samsung’s Tizen. Not too long after, we also eventually ended up with an Amazon Fire-TV based screen in the kitchen area.
Remotes that come with the screen control the it well, but can struggle with all the connected gear and apps.
There went my master-plan. Now, we were using three different operating systems and three vastly different and uniquely ackward remotes. Adjusting to different functionality and layout of the remotes and in the streaming apps themselves, was fun to a tech-head like me. Not so much for the family. I started thinking along the lines of getting the same universal remote for each system to at least lessen the confusion.
The Sony Remote Commander was one remote to rule them all back in the day. Mine would even operate the garage door.
A few minutes of research online nixed that idea. Universal remotes are not as robust as they used to be. Most of them do not support modern radio frequency based televisions. Of those that did, I couldn’t locate one that would do everything else I wanted. I really prefer to have one remote that controls everything. The fewer buttons, the better, but I don’t want to have to look at the remote for every function either.
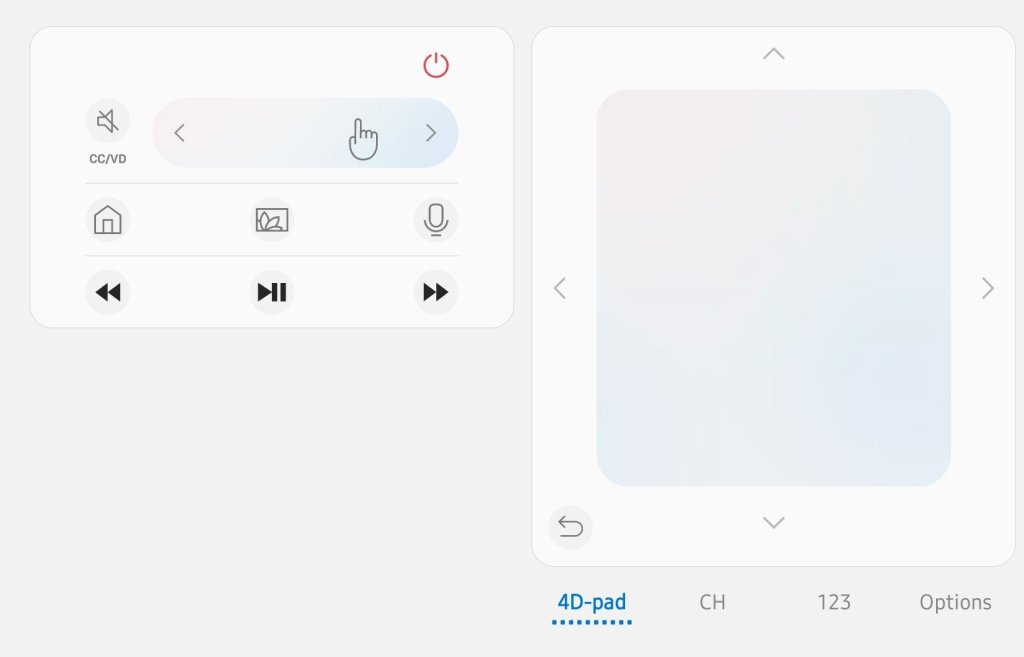
I tried using the smartphone apps, and they work but are also vastly different between Apple and Android versions. The three different apps for each TV have very unique interfaces and functionality. The lack of tactile feedback makes the touchscreen apps difficult to use. You have to look at (and sometimes unlock) your smartphone every time you change the channel, adjust the volume, fast forward, etc. It’s a lot of looking and switching between active apps. There’s more of a “works in a pinch” feel overall.
Phone apps feel unintuitive.
While discussing the remote situation with my partner, she casually said something along the lines of “almost makes you miss the good ole’ days of cable boxes.” My brain jumped from her remark to “Why not use a streaming box to do the same job?”
I started my little project by hooking up a Roku to the living room TV. It worked fine, but if truth be told, it was clunkier to use than Samsung’s SmartTV OS. It also seemed a little under-powerd. Switching between the streaming apps was annoyingly slow, so was flipping channels in any of the live-TV apps. To be fair, it was a low- level Roku that I had won in a raffle. It’s my understanding that the higher-end models do not suffer the same performance problems.
I learned several things from the Roku. First, it convinced me that the idea of using streaming boxes to get a consistent experience across the screens was going to work. Second, it convinced me that a minimalist remote control backed by the right software would be able to control my screens, audio systems, and streaming apps. Lastly, I had decided that it would be worth purchasing wired network boxes for less chance of issues and better overall streaming performance.
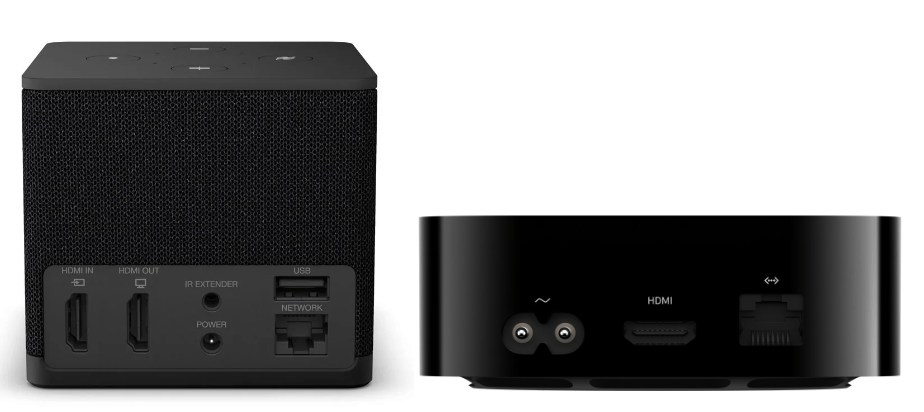
Over the next few weeks, I contemplated and researched the options. In the and, it came down to an Amazon cube, or Apple TV. They’re both high-performance devices with multi-core processors, plenty of RAM, gaming capable graphics, and gigabit wired ethernet.
Amazon Fire-TV Cube and Apple TV Wi-Fi + Ethernet are both high-powered streaming boxes.
The Amazon Fire-TV operating system is based on Android. However, like all Fire based devices, they don’t have access to the Google Play store (without extra work). The Amazon shop has most of the apps people are looking for, but not all. The UI is a little frustrating at times. Unexpectedly most of the annoyances seem to be caused by a lack of notification.
For example, after certain updates, the Amazon Fire OS needs to reboot. There’s no on-screen notification that you need to initiate a full restart from the advanced options menu buried in the control panel. The way many Fire-TV owners discover the situation is by searching online for troubleshooting instructions after noticing that apps are not working properly.
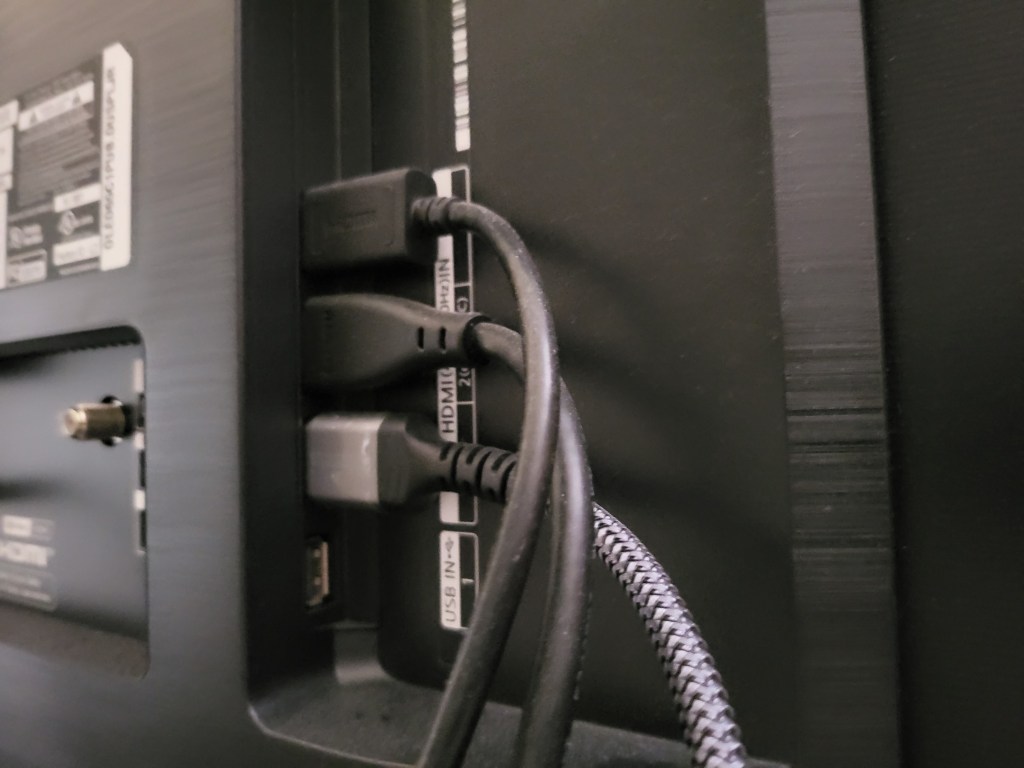
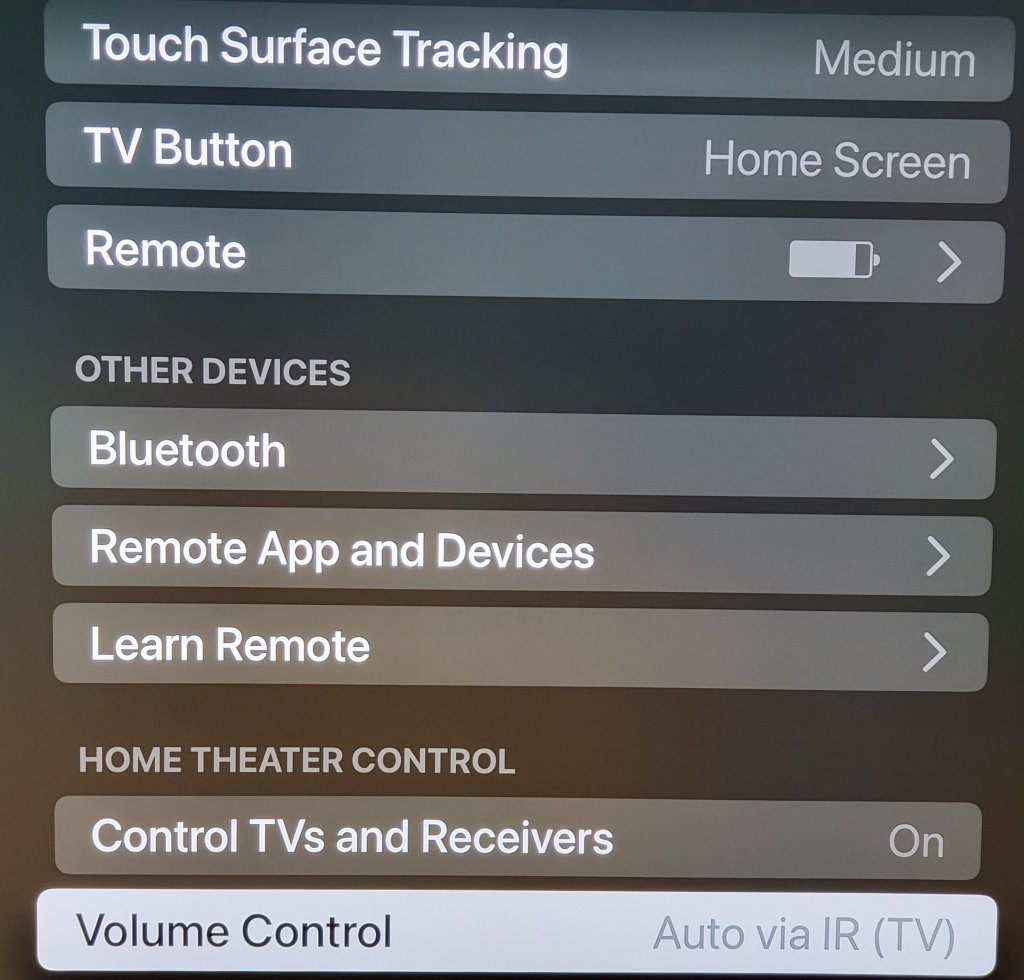
The Apple TV hasn’t had any type of technical issue in all the months I’ve been using it. I have it connected to the LG OLED screen and wired to the network. My cheap Visio surround sound bar is connected to the TV via an optical cable. The Apple TV detected and configured everything on its own as soon as it booted up and finished its “hello world” routine. I was impressed.
My hardware was automatically detected even though it was infrared only.
I find the Apple TV remote to be the best overall media controller I’ve ever used. It’s small, light, made of cool metal, and rounded in all the right places. The main interface is a large depression that your thumb naturally gravitates toward. Clicking in is the Ok or action button, and sliding your finger over the surface moves the cursor like a laptop’s touch pad. Each cardinal edge of the circle can be clicked in to activate a D-Pad function. I find myself holding a nd fidgeting with the remote even when I’m not changing the channel.
It is a fantastic remote for app, device, and media control.
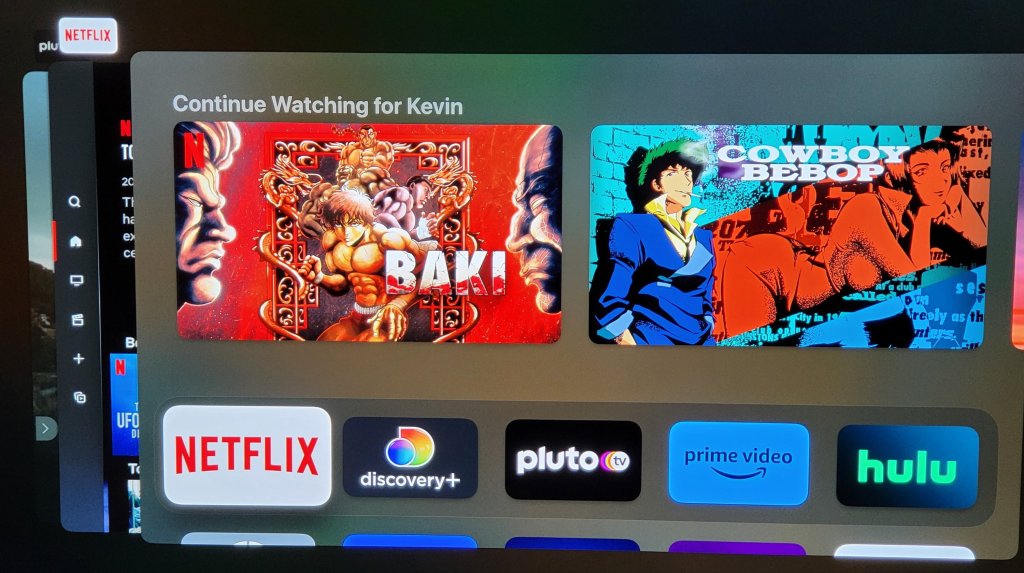
Like all things Apple, it is the little things and attention to detail that helps the Apple TV stand out in the crowd. Double-click the home button, and a card deck of all your open apps makes getting back to your previous activities a breeze. Hold the same button down for a couple of seconds and a quick access menu appears to change users or adjust common settings. Click the same button once to wake up the screen, audio system, and automatically switch everything to the correct inputs and outputs.
The app deck works the same as your iPhone you can select or dismiss previously open apps with ease.
Eventually I installed the Moonlight streaming app on the Apple TV and paired a Bluetooth Xbox controller to it. The game streaming experience is great, but the Apple TV had an unexpected surprise that I use as a result. When you have paired a gamepad you can also fully control the apps and TV with it. I also noticed the my iPhone and iPad both immediately detected the Apple TV units and allowed me to fully control it without doing anything, no app, no setup, just pull down the quick menu and there’s my TV.
If you use the Nebula software with your Air glasses to emulate free floating monitors, you should be aware that the latest MacOS update is not compatible. The glasses will connect and work as a single display. Launching the software results in a black screen.
I recently started using a MacBook Air as my primary laptop. In my line of work, I interact with Microsoft 365 and Azure AD through PowerShell on a regular basis. Modern authentication protocols require that the management modules be installed locally. I found the process of getting the MS365 PowerShell modules running on my MacBook Air to be a little more complicated than doing the same on Windows, but it wasn’t difficult.
The first step is to install PowerShell itself. The direct method is simple, but you can also use Brew after we install it for OpenSSL in the next step. For the direct route, download the latest (not pre-release) edition as a package from GitHub at https://github.com/PowerShell/PowerShell/releases Once the file finishes downloading, right click on it and chose “Open With” then pick the installer. Follow the on-screen prompts to complete the installation.
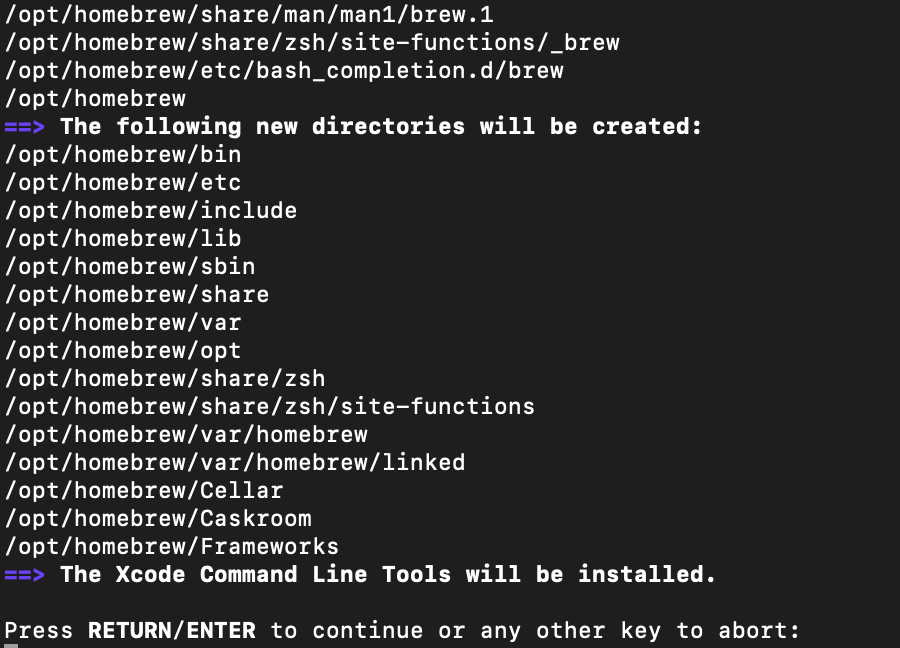
The admin modules we want to run require OpenSSL. It is used to facilitate PowerShell remoting. Getting it installed is the next step. The easiest method to install OpenSSL is to use the Homebrew package manager. Follow the instructions on their web site and run the newest version of the installation script in the Terminal app on your MacBook. You can use Brew to install PowerShell as well if you like (Bing/Google it).
Follow the scripts prompts to complete the Brew install, be sure to follow the steps at the end to add Brew to your path.
Once you have Brew installed run the following commands (one line at a time, enter after each) to update Brew, install OpenSSL, and add it to your path.
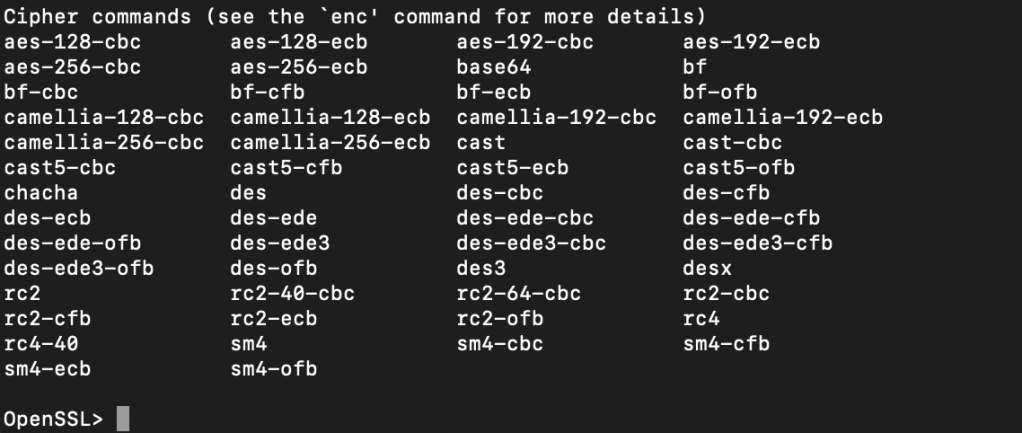
To test the results type “OpenSSL” in the terminal and it should open to a OpenSSL> prompt. Type Help and press enter at that prompt to see a list of OpenSSL commands. Type exit and press enter to leave the OpenSSL session and return to your user prompt.
Now we can install the Web Services for Management (PSWSMan) modules for PowerShell. Again this is to enable PowerShell remoting so that our MacBook can exchange commands with the remote Exchange Online server(s). Open the Terminal and run the following commands, pressing enter after each line. Ignore the REM lines (being with #).
sudo pwsh
#Enter your password when prompted
Install-Module -Name PSWSMan
Exit
sudo pwsh
#Enter your password when prompted
Install-WSMan
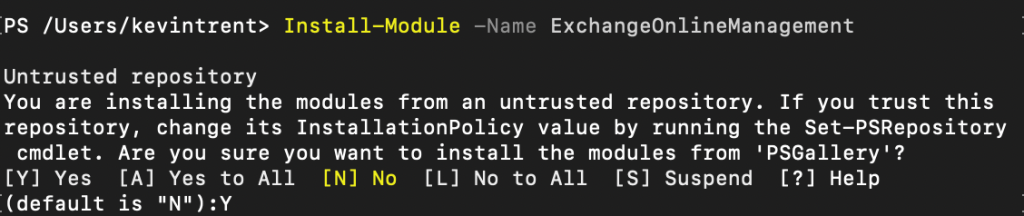
Now we’re ready to install the admin modules themselves. In the same PowerShell console run the line below. Hit Y when prompted.
Install-Module -Name ExchangeOnlineManagement
You can verify that it, or any of the other modules installed with an easy one-liner. Run after each install, change the name to match each time. The command will list information like the version and path so you know it is installed and available.
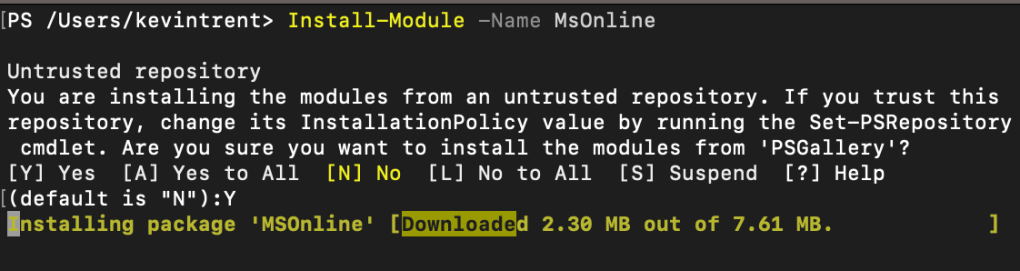
To manage, report on, and incorporate Azure AD objects in your other code, install the MsOnline module with the line below. Again, you’ll need to enter Y when prompted.
Next up is SharePoint. I admit that I don’t use it for much, but it does come in handy for migrations. You know the drill, the line is below.
There are a few more modules available but these are the ones I use enough to warrant pre-installing them. You see how easy it is to add more on-demand. Any that you install will need to be updated to function optimally, that process is out scope for this post but generally the command Upgrade-Module -Name ***** does the job. For information about maintenance and tips on how to use the modules you’ve just installed, see the source documents from the vendors below.
MacBooks are gaining lots of ground in business deployments. Now that mainstream workers are using them as their only computer, providing support requires a deeper understanding of Apple’s products. I need to install obscure software, control them en masse, connect them to various peripheral devices, and troubleshoot advanced issues quickly and effciently.
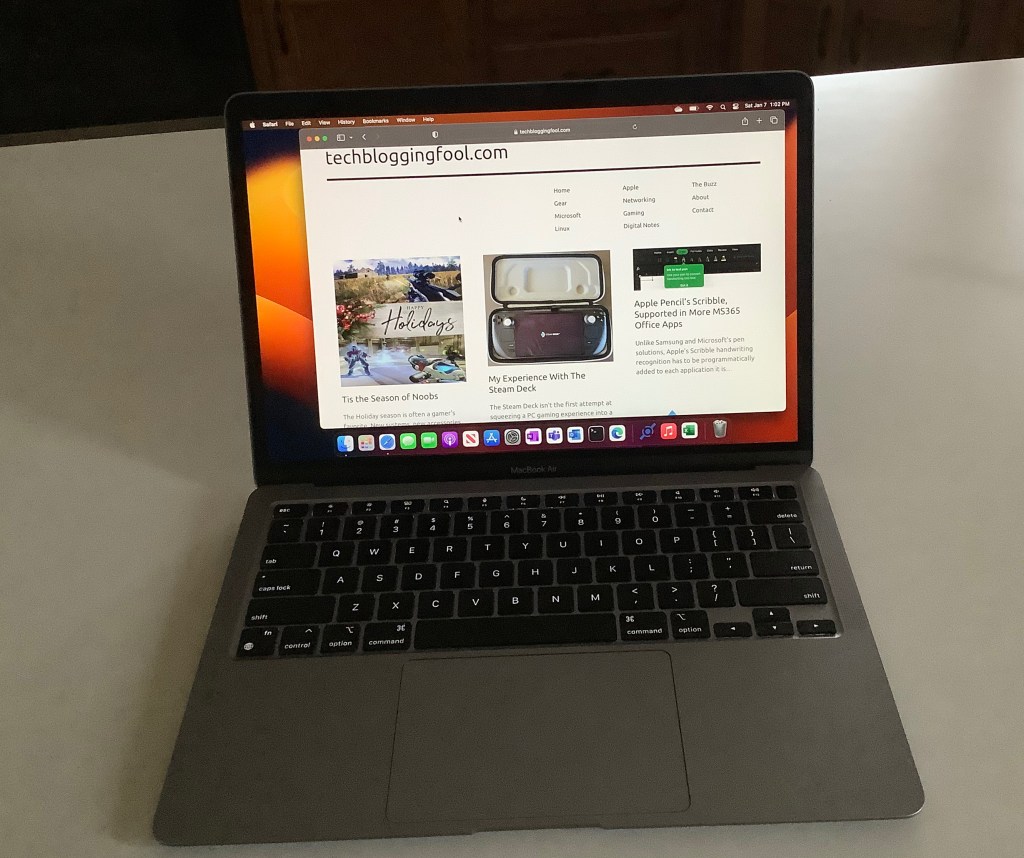
In my opinion, there’s no better way to learn a system, than by using it everyday. I decided to take advantage of the holiday shopping season to purchase a M1 MacBook Air from BestBuy. At $799 it was the least expensive way to get an Apple silicon based computer. $200 off the normal bill.
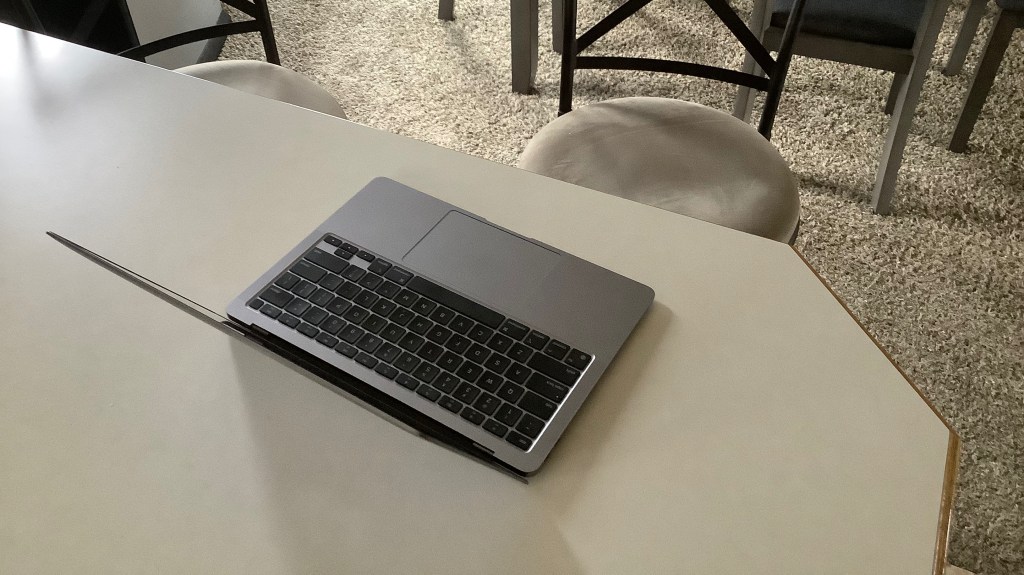
I’ve had the unit for a few weeks. I am thoroughly impressed. The fit and finish of the hardware is fantastic and the operating system has facilitated easy adoption. I purchased it intending to use it primarily on my lap. The size and weight of the Air make it ideal for that role.
The retina screen looks just as phenomenal on my new laptop as it is does on an iPhone. Bright, clear, and crisp are words that come to mind. The text is so razor sharp that it seems to defy the abilities of a screen with these specs. It almost appears to float above the background of this post as I type.
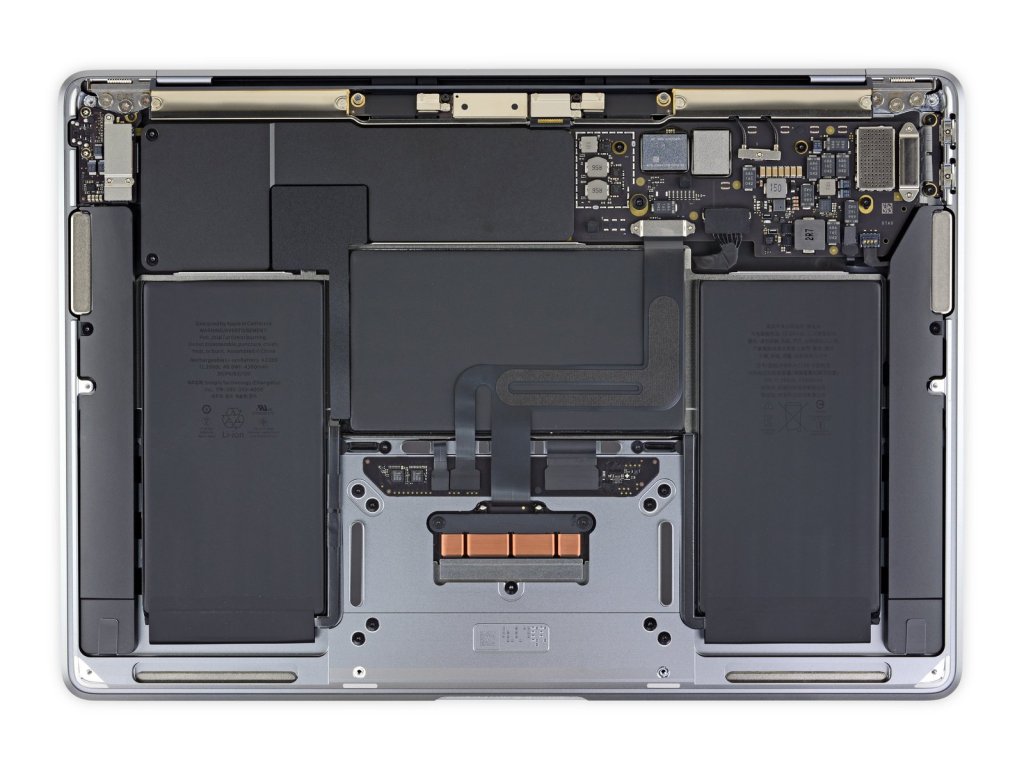
The laptop is totally silent. There are no cooling fans in an M1 Air. I cannot over exaggerate how amazing of a feat this really is. Previous fan-less options traded performance for silence. The Air doesn’t make similar concessions, it runs at impressive speed without overheating.
The battery life is astonishing. I have only charged up twice in the last 8 days and I’ve been using it pretty hard. I’m half convinced there’s some type of Sci-Fi space generator hidden inside. There aren’t many systems that come close to matching the 14 plus hours of runtime that the M1 air is capable of.
Thanks to iFixit.com we can see the internal design is as fantastic as the outside, there isn’t a cooling fan in sight.
Switching between platforms has never been easier, there’s no technical skill involved. Most of it comes down to knowing where your stuff is. All of my data is in the cloud and remains fully usable by all of my computers. I’ve just added another one to the collection, lol. The most tedious task was having to look up a ton of usernames and passwords.
It took me about four hours to get the laptop configured to be my main computer which is pretty average for setting up one of my systems. The most difficult install was the driver/control software for my Logitech MX Anywhere 2S mouse. It took a surprising amount of effort to get my forward and back buttons working properly. I got there eventually, but I’m still not exactly sure how.
My work life requires living in Microsoft’s world no matter whose hardware I’m riding on. To that end, installing the Edge browser was a good move. Microsoft Office and Onedrive were next. I also installed Visual Studio Code and the PowerShell extension for it. All of which already had Apple Silicon compatible editions ready to go.
I was able to easily find the apps, or equivalents for all of the software that I use. All but one program worked natively with the M1’s ARM based architecture. Rosetta mark 2 installed automatically when the app that didn’t required translation from the Intel Mac to the Apple Mac. The Rosetta utility worked perfectly for it.
Microsoft and Other Vendors make it easy to work from a MacBook
Tip: I noticed that some of the software packages would only install if I right-clicked on them and used the Open With option to start the installer.
Apple’s computers are generally not considered gaming machines. So, I was pleasantly surprised at the number of familiar titles I found in Apple’s on-line store. Most iPad software will also install and run on the M1 and M2 MacBooks, and that includes some games.
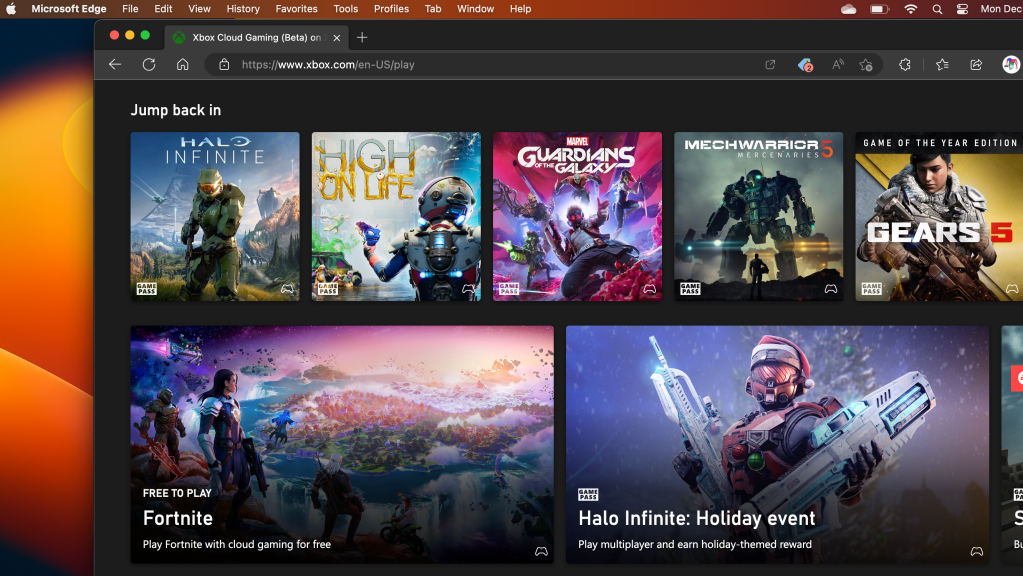
I used the “Install App” feature of Microsoft’s Edge browser to “install” my GamePass Ultimate Subscription as an app. Saving my creds and creating a shortcut makes starting up a game a seamless experience. I also found Steam Link in the App Store which let me stream some of my favorites from my Gaming PC.
Xbox GamePass Ultimate is My Favorite Subscription Service
I expected the learning curve to be steepest while configuring the operating system and software, but that isn’t what threw me for a loop. The adoption challenges have come from the little things. A good example; screen snipping is built-in to both operating systems but activated with a slightly different set of key presses in each.
One of the most troublesome changes has been the lack of interoperability between the new laptop and my phone. I did not realize how fantastic Windows Phone Link really is, or how much I used it until it was no longer available. I know that if I swap to an iPhone I could get the integration features back.
Should my computer manufacturer choose my phone for me? I’m not saying it will never happen but, Apple doesn’t make a mobile with an expandable screen. I did setup a 5th gen iPad mini to experience the tight integration Apple is famous for. I really like the sidecar function.
I have enjoyed my re-introduction to Apple computers. The MacBook Air is perfect for working on the couch and taking on the go. It makes me wonder what the M2 MacBook Pro must be capable of….
Unlike Samsung and Microsoft’s pen solutions, Apple’s Scribble handwriting recognition has to be programmatically added to each application it is used in. This has contributed to a slow rollout of the popular feature.
Microsoft Word mobile was the app I wanted it to work most in. I had given up checking whether or not it had been added a while back. Just out of necessity, I accessed the draw tab in Word on my iPad today and noticed a new icon in the pen carousel, it activates Scribble.
Activate Scribble in the Draw Menu
I checked Excel and it works the same way there. It is also available in PowerPoint, but it is missing from the OneNote app. Open the Draw tab from the file menu and select the Apple Pencil icon to enable Scribble, then you can use your Apple Pencil to write on the screen in any space that would normally take typed text as input.
For a better experience, keep your handwriting as straight as you can. Writing a little larger than you are used to also helps. Print will probably be the most accurate, but Scribble can understand cursive and the combo I seem to write in most often.
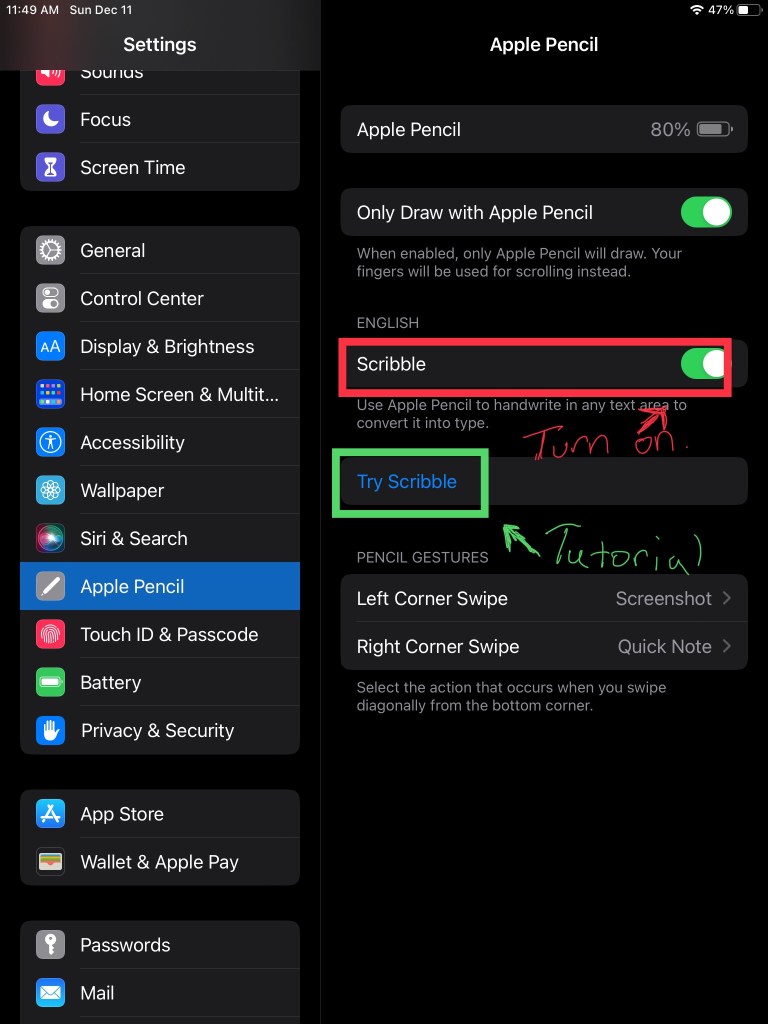
If it doesn’t work with your Apple Pencil, make sure that you have the latests software updates installed. Check in settings to be sure the feature is enabled. There’s also a tutorial wizard that teaches you how to use Scribble in the settings app.
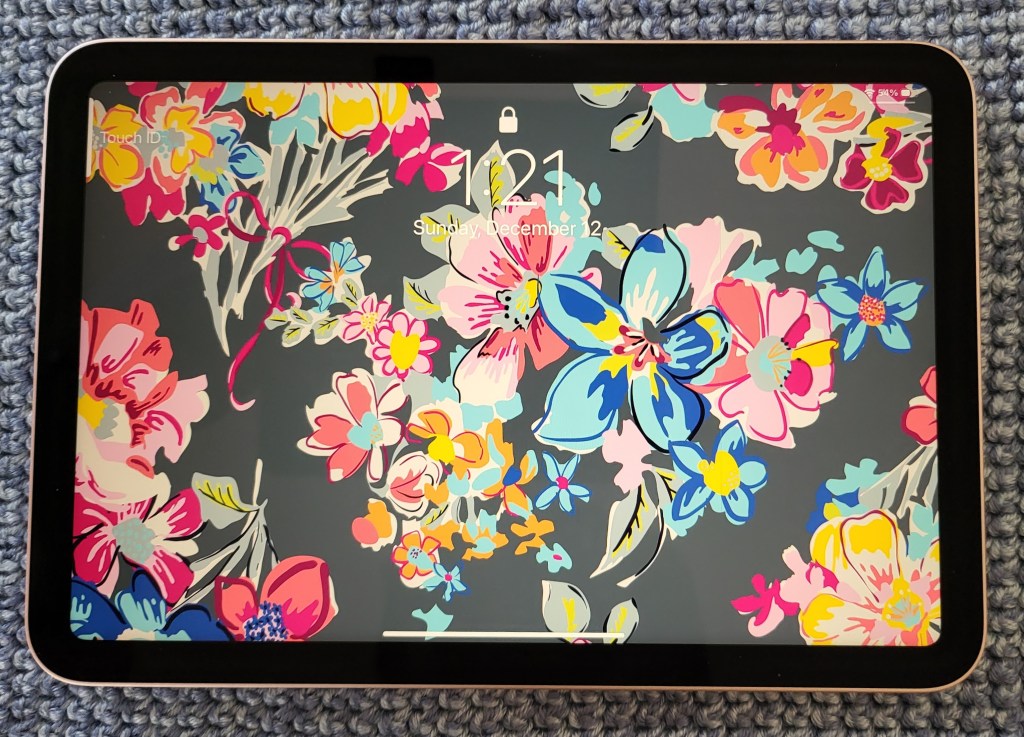
An iPad Mini is the lesser-known middle sibling that sits between a full-size tablet and a phone. The diminutive tablet is often skipped over in Apple’s upgrade cycles. Not this time though. The new Mini has been completely redesigned and the results are spectacular.
First up on the long list of upgrades is the screen. Apple reduced the size of the bezels and rounded their corners which drastically updates the look of the tablet. The 8.3-inch screen is larger but doesn’t consume any more physical space. HDR and 327 pixels per inch mean everything is bright and crisp. Gamers will be disappointed with the 60 FPS limit.
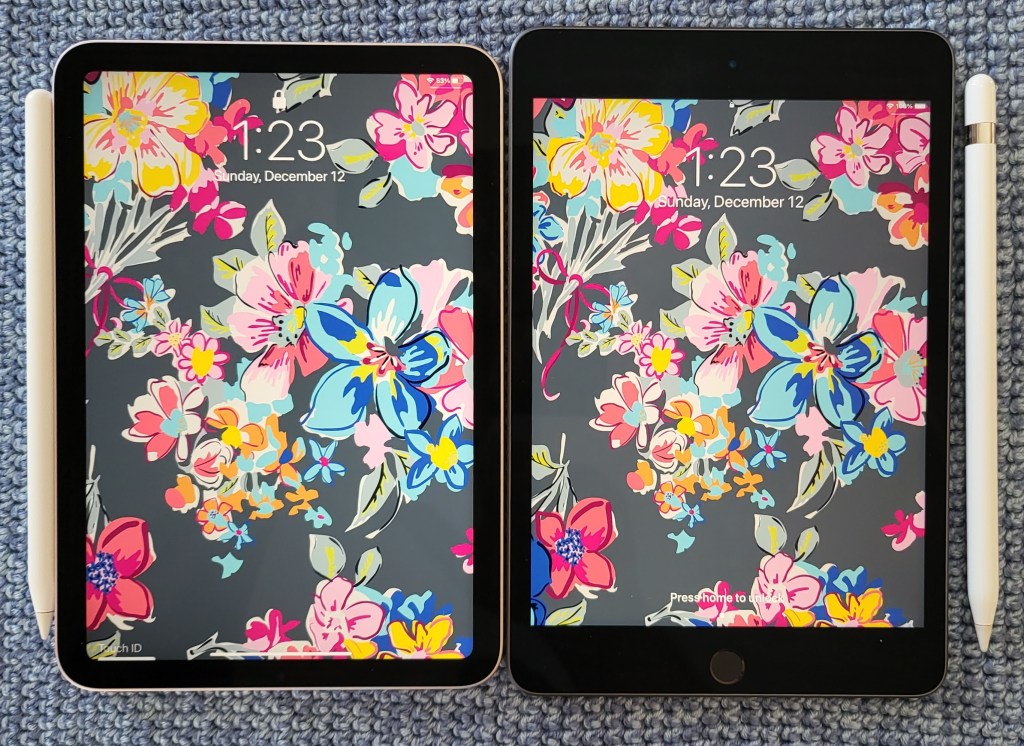
The 6th gen screen is considerably larger than the 5th’s despite the tablet itself being smaller.
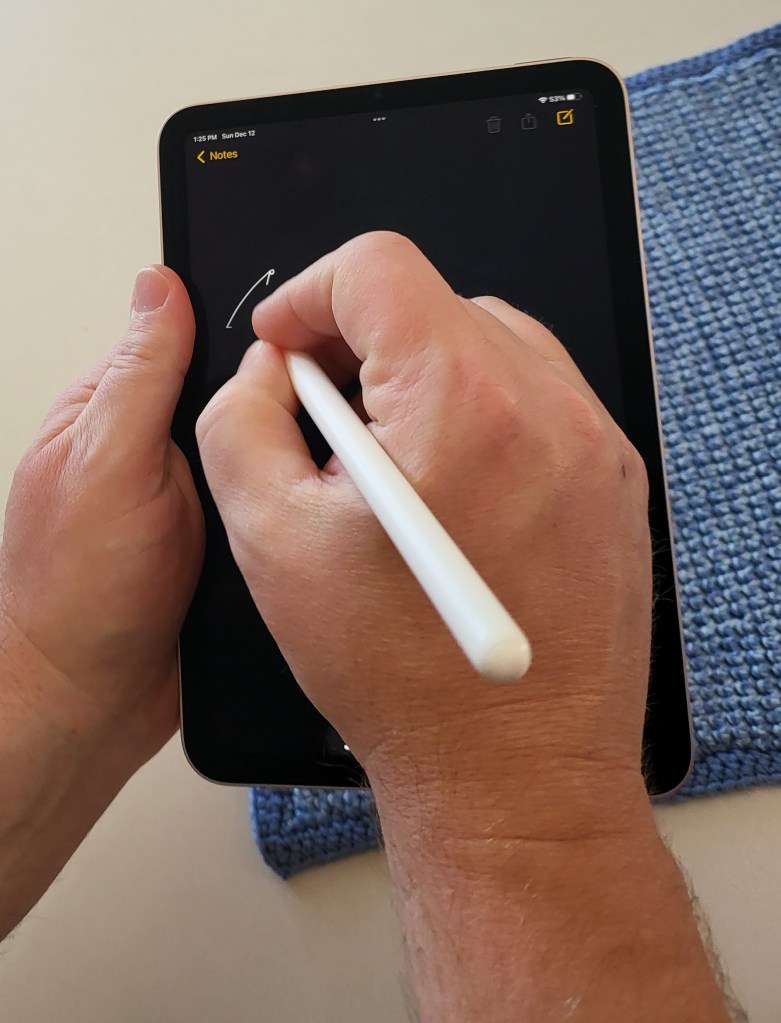
For the last year my spouse has needed to keep track of two Apple pencils. The iPad Mini line picked up support for the stylus a generation back, butter for the proverbial sliced bread. In true Apple, “milk it for all its worth” form, support was only for the first gen tool, even though the second gen stylus was available. This time around, you can use the new magnetic pencil and it sticks right on the side like it should. For writing on a screen, it is hard to beat the experience of a fast tablet that weighs just over half-a-pound.
The 6th Gen iPad Mini delivers one of the best digital writing experiences you can have on any device.
Speaking of fast, the A15 chip is impressive. With Wi-Fi 6 and optional 5G LTE hoovering up the net’s charms at up to 1.2 gigabits per second, you need a CPU / GPU combo that can keep up. The A15 is more than up for the task. Even split screen multi-tasking with a game and a video doesn’t cause it to lag. Only the screen’s slower refresh rate will keep the hardcore mobile gaming community from flocking to this system.
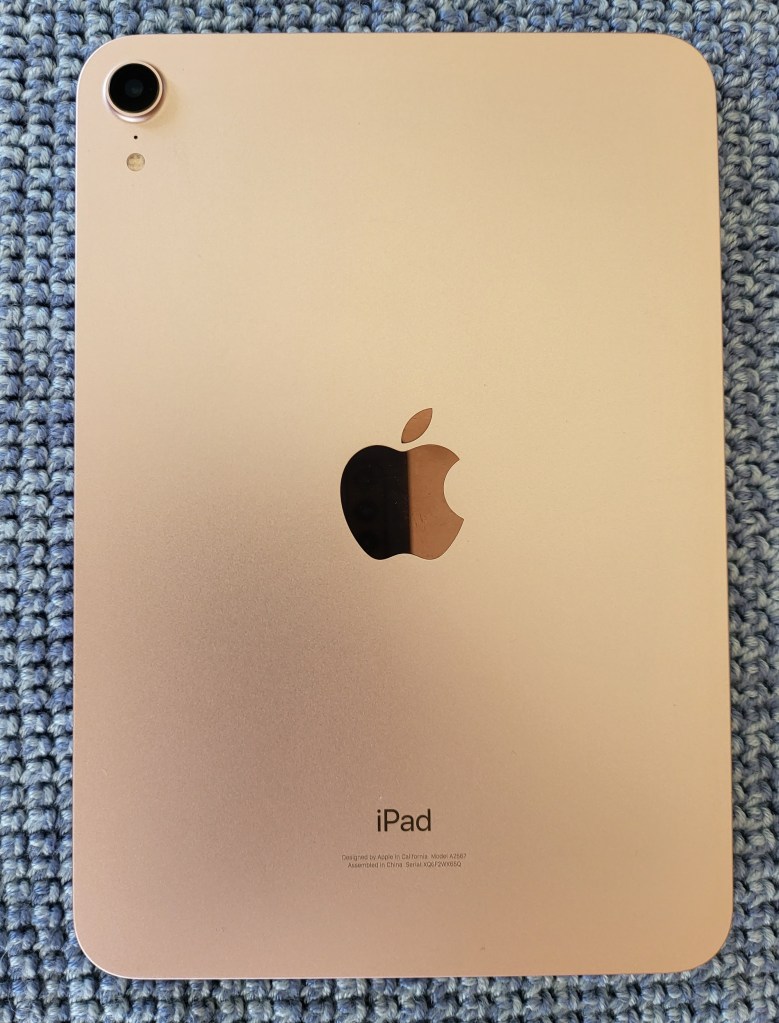
Add a ten-hour battery, Touch ID, a 12 MP camera, stereo speakers, almost every aspect of the Mini has been upgraded to the most modern technology available (except for that refresh rate). Out of the entire Apple line up, this Mini is my personal favorite. It delivers all of Apple’s magic in the largest visual, best sounding, comfortably handheld, experience possible.
We are a house divided, the females are all Apple everything. The males are Android and Windows. The newest edition of the iPad mini is almost good enough to change that balance. It’s everything a tech geek wants in a tablet. Light, powerful, thin, with stylus support, and an excellent display.
A lot of people dismiss the Mini with a ” same as my phone” shrug. They’re missing out. There are lots of times between working and being out that call for an in-between screen. Sitting on the couch surfing, writing with a stylus, and reading in bed are examples of times when an iPad is too big and a phone is too small.
The iPad Mini provides far more screen space than the iPhone 11
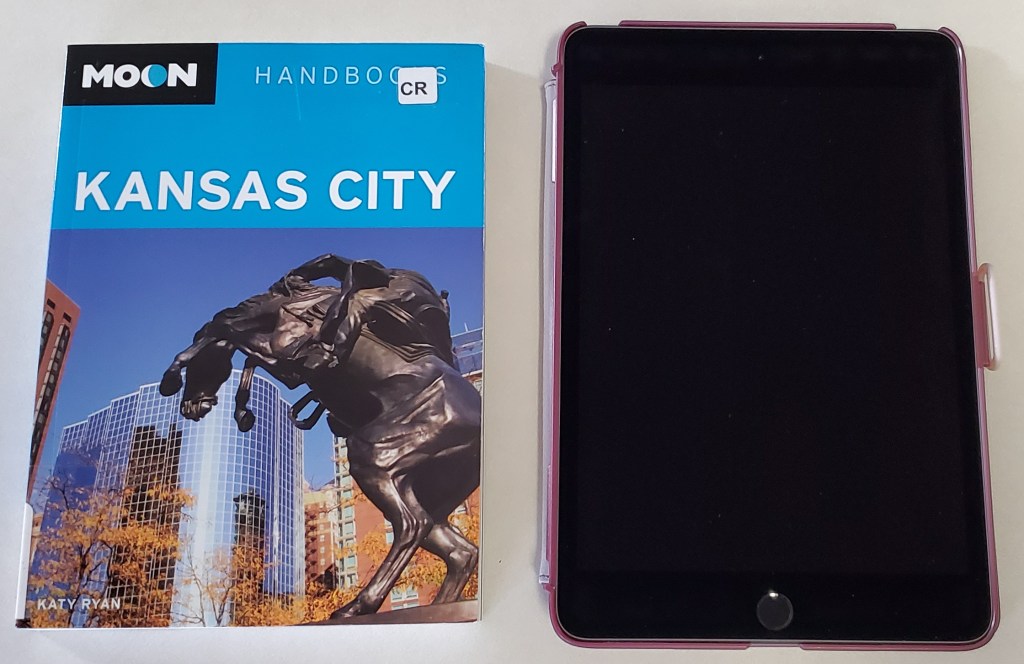
The newest Mini is 8.0 inches (203.2 mm) tall, 5.3 inches (134.8 mm) wide, 0.24 inch (6.1 mm) thick, and weighs 0.68 pound (308.2 grams). There’s something about eight inch devices that makes them the perfect size to read on. Maybe its because they’re the same size as an average paperback book?
As a dedicated Windows user, I wish Microsoft’s OS would scale well on an eight inch system. I have a Dell Venue 8 Pro and while the operating system and many Microsoft apps shrink to fit, most third-party software doesn’t. Apple has a leg up on Microsoft or even Google in this regard. Their tight control of the App Store means that they are able to ensure usability for all of their form factors. Every app that I have tried so far looks great on the 2048-by-1536 resolution at 326 pixels per inch screen.
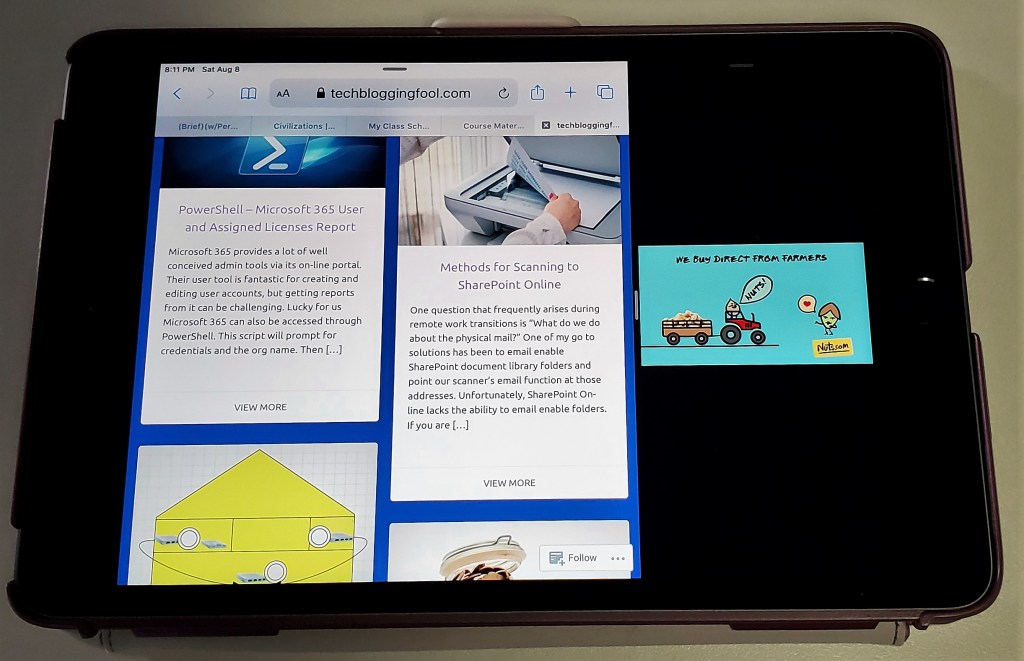
The fifth generation iPad Mini is fast, really fast. The A12 Bionic chip means pages load in the blink of an eye. Multitasking is a breeze. I like to play Netflix or YouTube on the side while I write or browse in the larger section. Even the most taxing games like Call of Duty Mobile run stutter free. At everyday tasks like checking email, or reading the news it is faster than an average laptop.
The Mini is more than powerful enough for multitasking
As always, my biggest gripe with the Apple tablets is that there is no native support for handwriting. At least now there are some really well done third party apps that fill the gap. See my review of Selvy PenScript for an excellent example. You can also pair a Bluetooth keyboard for input duties, Logitech makes one specifically for the Mini.
If you are in Apple’s ecosystem and spend much of your time in the digital world the new iPad Mini will be a welcome addition to your compute devices. It is just the right size for kicking back in your favorite chair and doing whatever on.
A while back, I got my wife a twelve inch iPad Pro. She adores it. I have a difficult time writing about it because she rarely leaves it where I can get my hands on it.
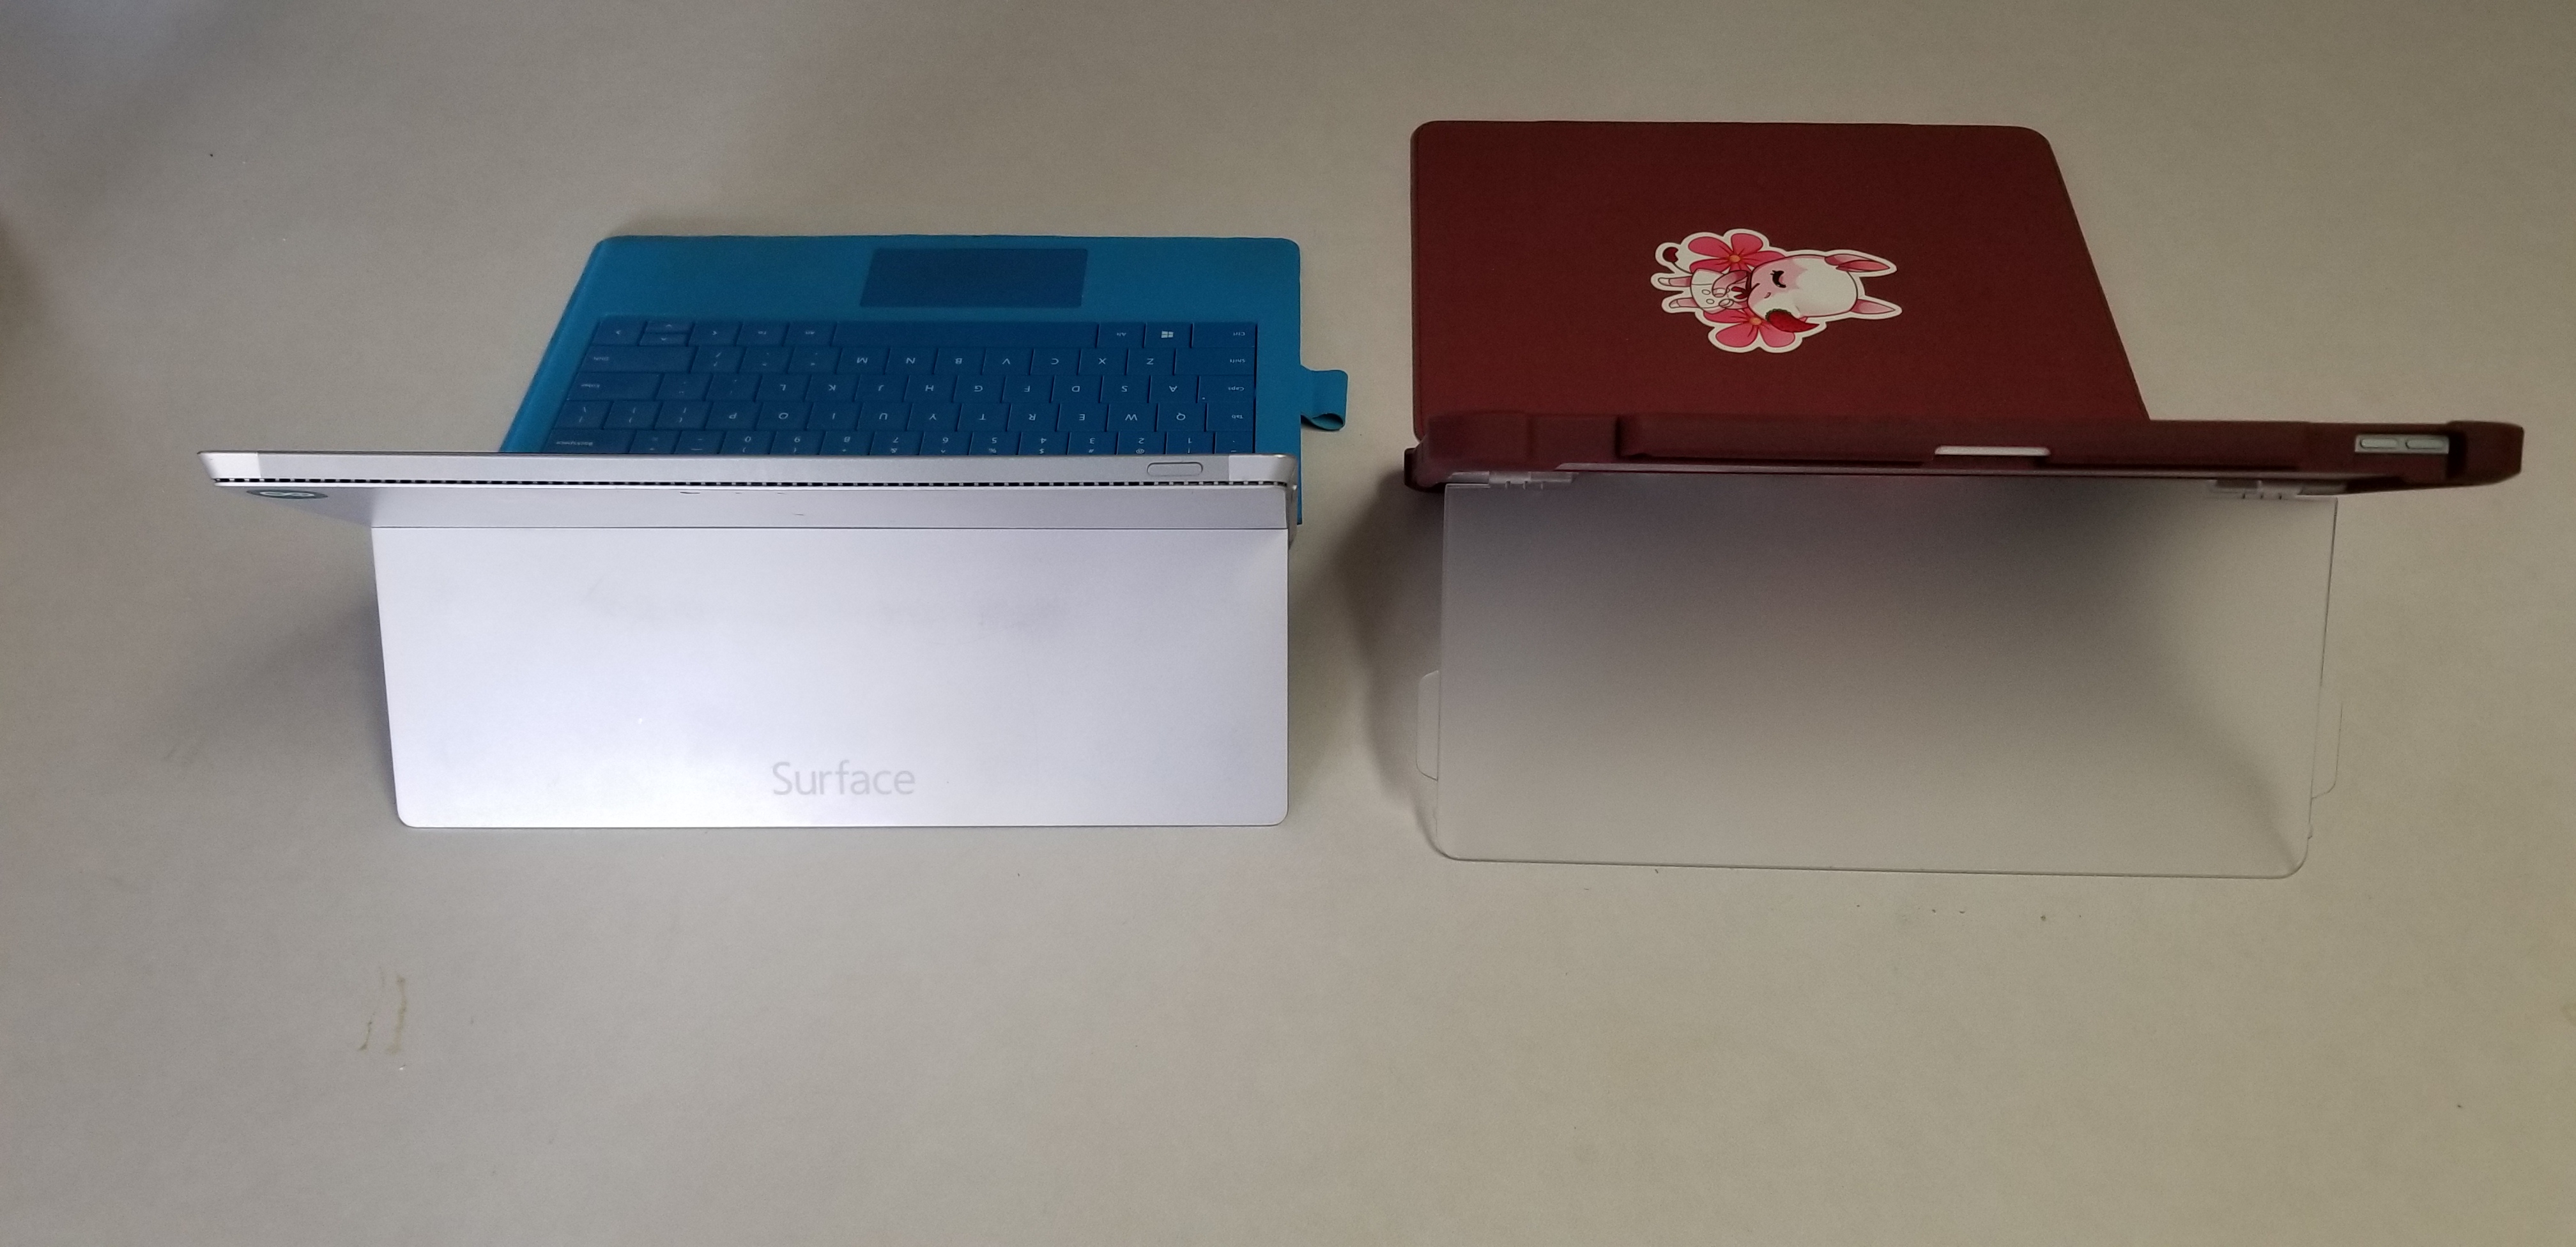
I could go on and on about the machine’s positive attributes. It is unbelievably thin and lite weight. The battery lasts seemingly forever. In fact, the iPad’s biggest flaw only becomes evident when somebody pulls out a Microsoft Surface Pro next to you.
The Surface Pro’s kickstand creates instant feelings of jealousy for anyone that has spent much time drawing or writing on the iPad. It allows for the perfect angle in any situation. Why didn’t Apple include such a glorious feature on their premiere device?
Maxjoy’s iPAD pro case adds the infinitely adjustable kickstand that you’ve been missing. It hold the tablet in any angle you choose and is not dependant on slots, gears, or other clunky mechanisms to do so.
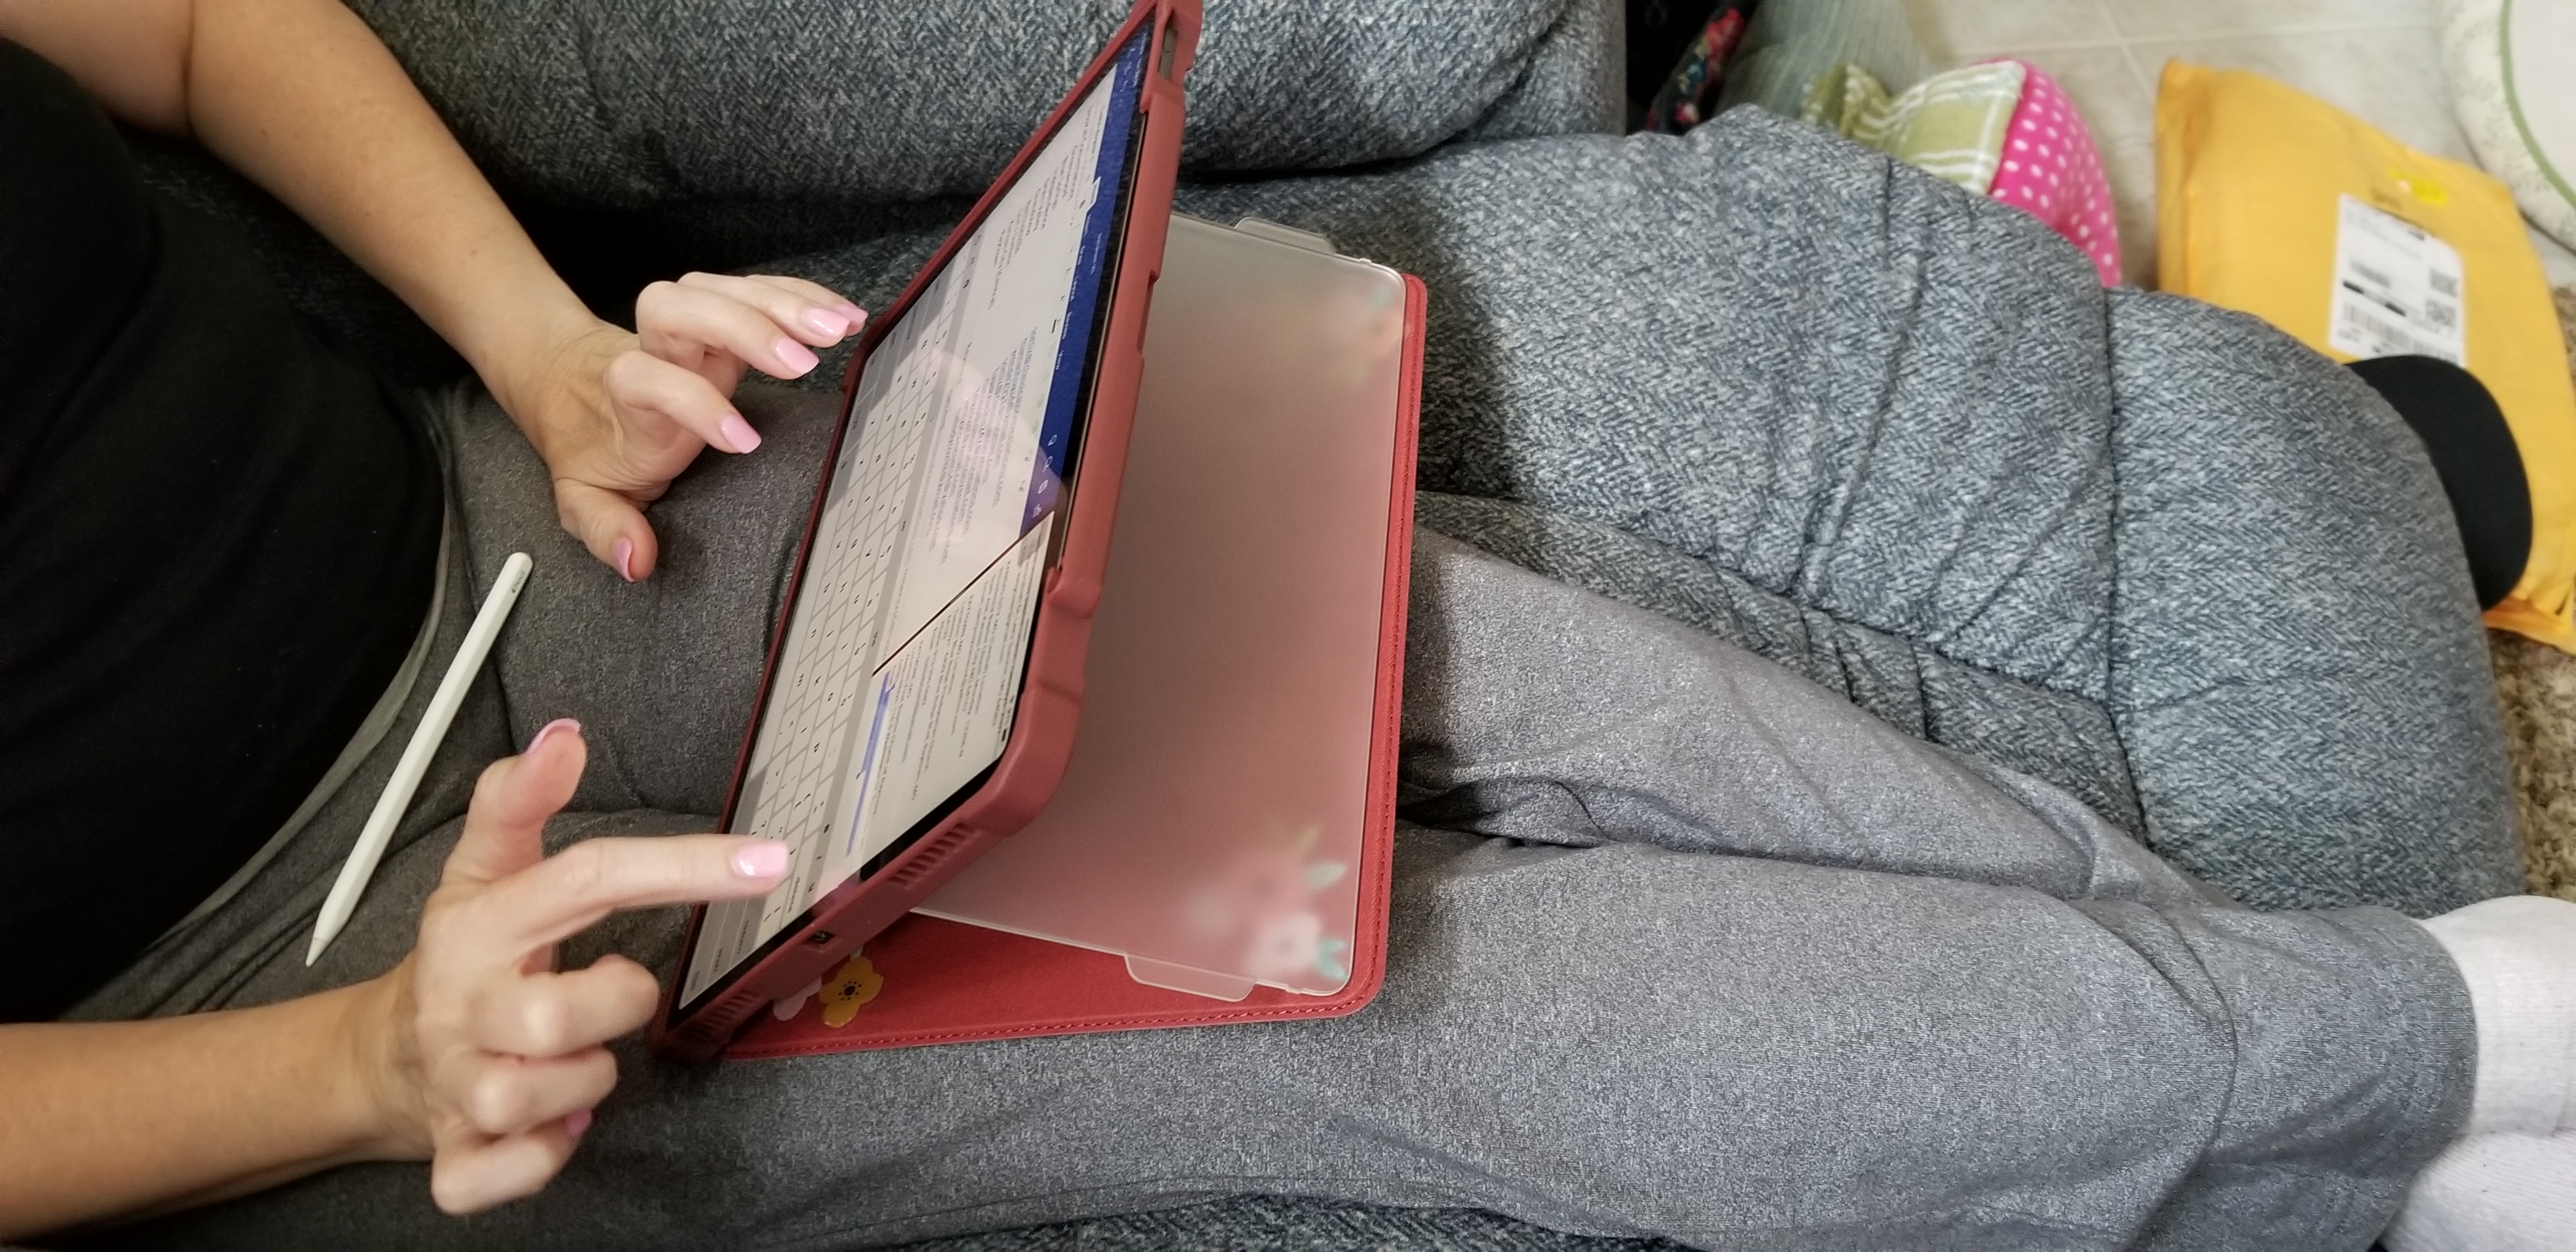
In addition the case offers corner protection, an optional screen cover, and a place for your iPad pencil to live. The case is thick enough to be protective but not bulky. I like that that cover can be removed when not needed or folded back under the kickstand to keep it from digging into your legs while typing or drawing on the screen.
It comes in multiple colors and sizes for the 11″ or 12.9″ 3rd Gen iPad Pro. We got ours on Amazon. If you’ve been looking for a great case for your iPad Pro, I highly recommend this one. Especially for the 12.9″ model, there aren’t very many choices out there for the larger tablet.