Add a Keyboard and Mouse to Your Android to Work from Anywhere

Since the beginning of my infatuation with technology and gadgets, I’ve dreamed of a computer that would fit in my pocket. Something that would always be with me, should inspiration or work come calling. In an attempt to realize this desire, I have owned nearly every type of portable computing device made. The TRS-80 Pocket, Palm Pilots, Windows CEs, Pocket PCs, Windows Mobiles, Blackberrys, Androids, and iOS devices. I’ve had multiple iterations of them all. I’m far from alone in this endeavor, the portable computing market easily out paces desktops and laptops.

Why do I and countless others keep spending untold fortunes to reach an aloof goal like portable computing? For me, I think it is a subconscious rebellion against sitting. I was the kid in class that was always in trouble for not staying still. I like to be moving and going more than resting. I don’t understand why we train our children to sit motionless for most of their childhood and then are surprised when many of them end up with sedentary lifestyle issues as adults? Do we need to sit in order to learn or work?

My desire to be on the move has often been constrained by my love of computers. Powerful computers that can do anything my restless, creative mind conceives of, have traditionally not been very mobile. I want something that I can pull out of my pocket and do whatever has popped into my head, wherever I happen to be. Powerful laptops are great, but require a backpack to haul around with you. Tablets have promise in the “Post PC” era, but they don’t fit in your pocket.

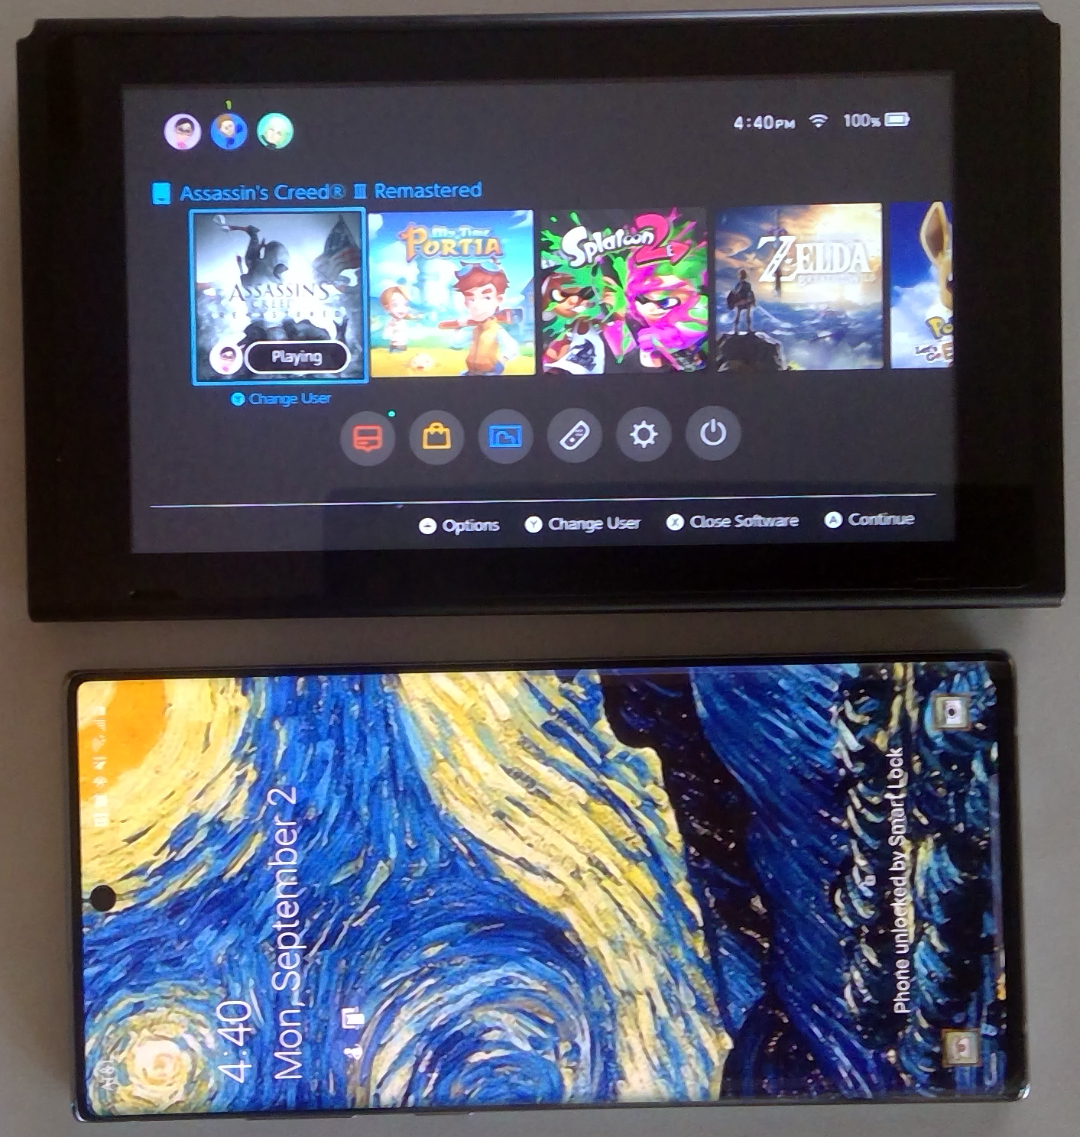
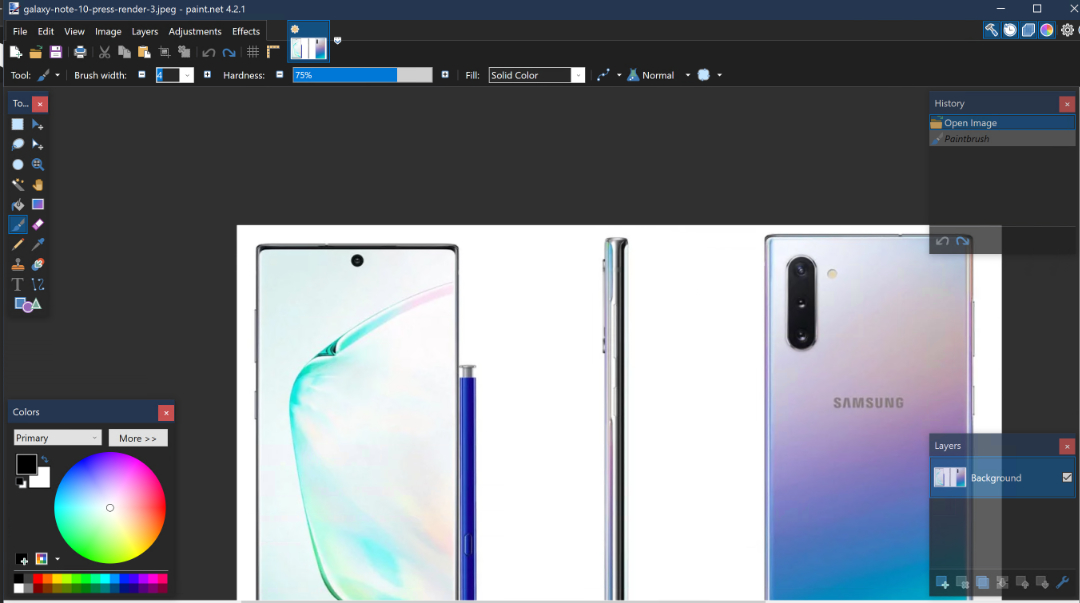
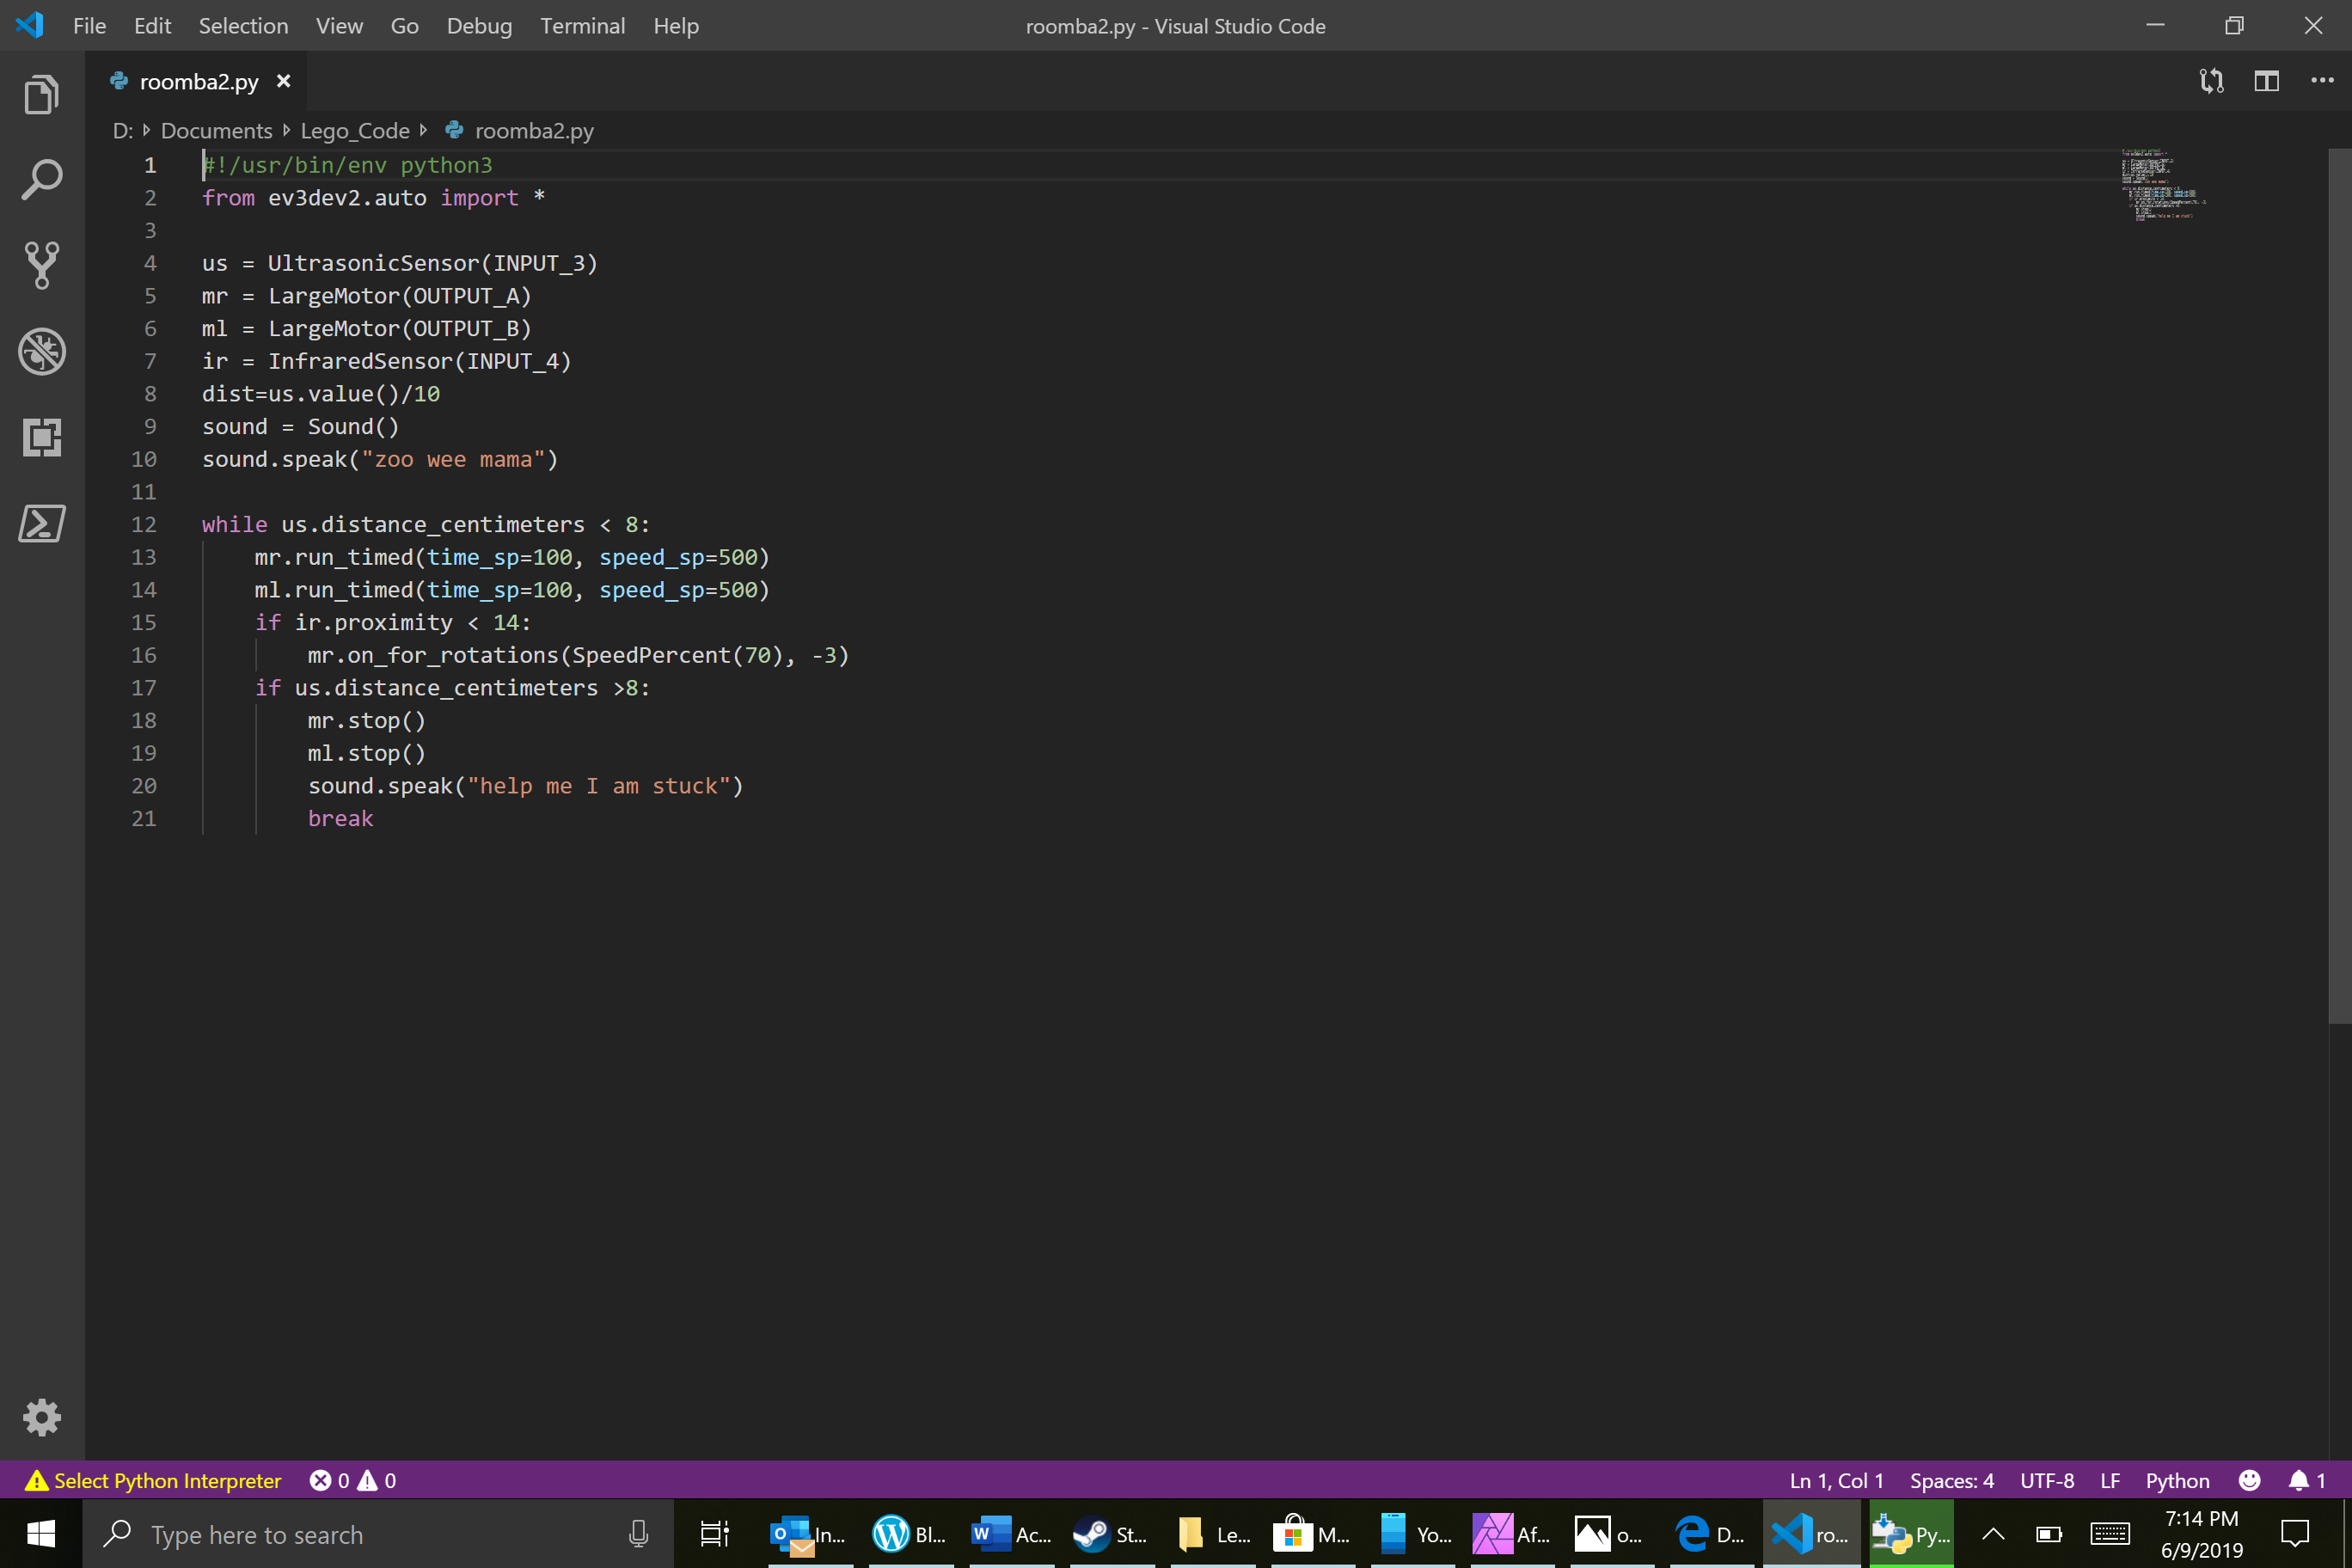
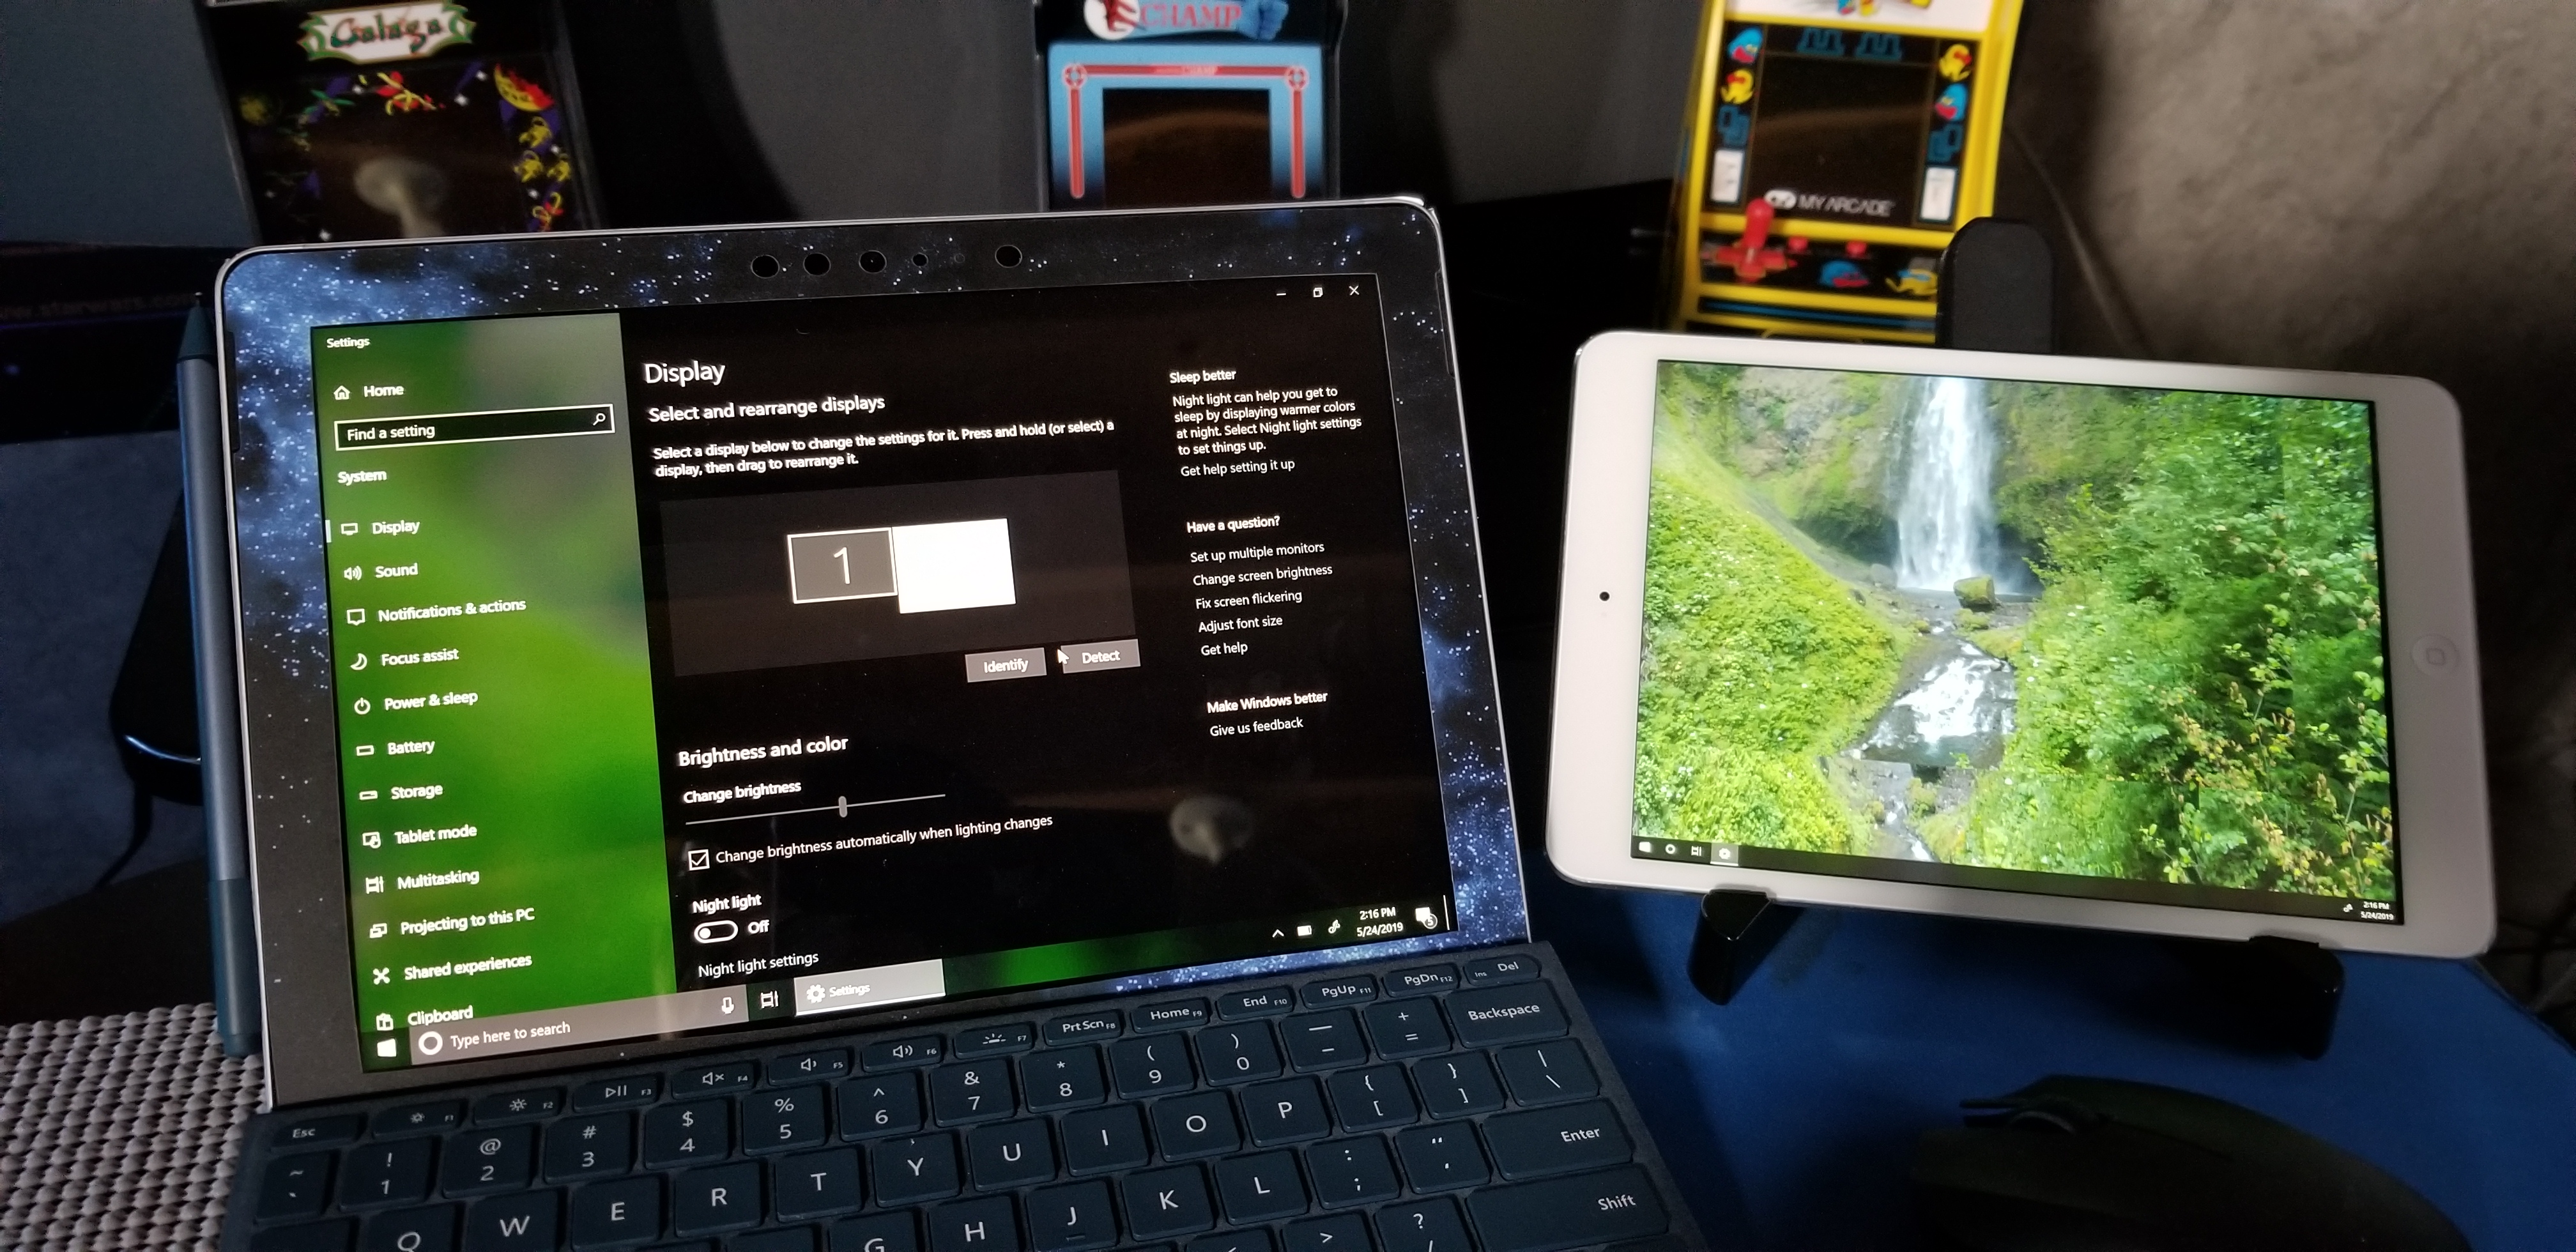
My Galaxy Note 10 Plus is more powerful than some laptops. Its battery and screen are big enough to work from. To be a full solution it would need a keyboard and mouse. The S-Pen is great and I use it everyday, but there are just some things you cannot do very well without a keyboard. For example, writing code with a pen is not a pleasant experience. I hopped on Amazon and did some research on portable keyboards and mice. There are a lot of manufacturers trying to solve this issue for the mobile crowd.

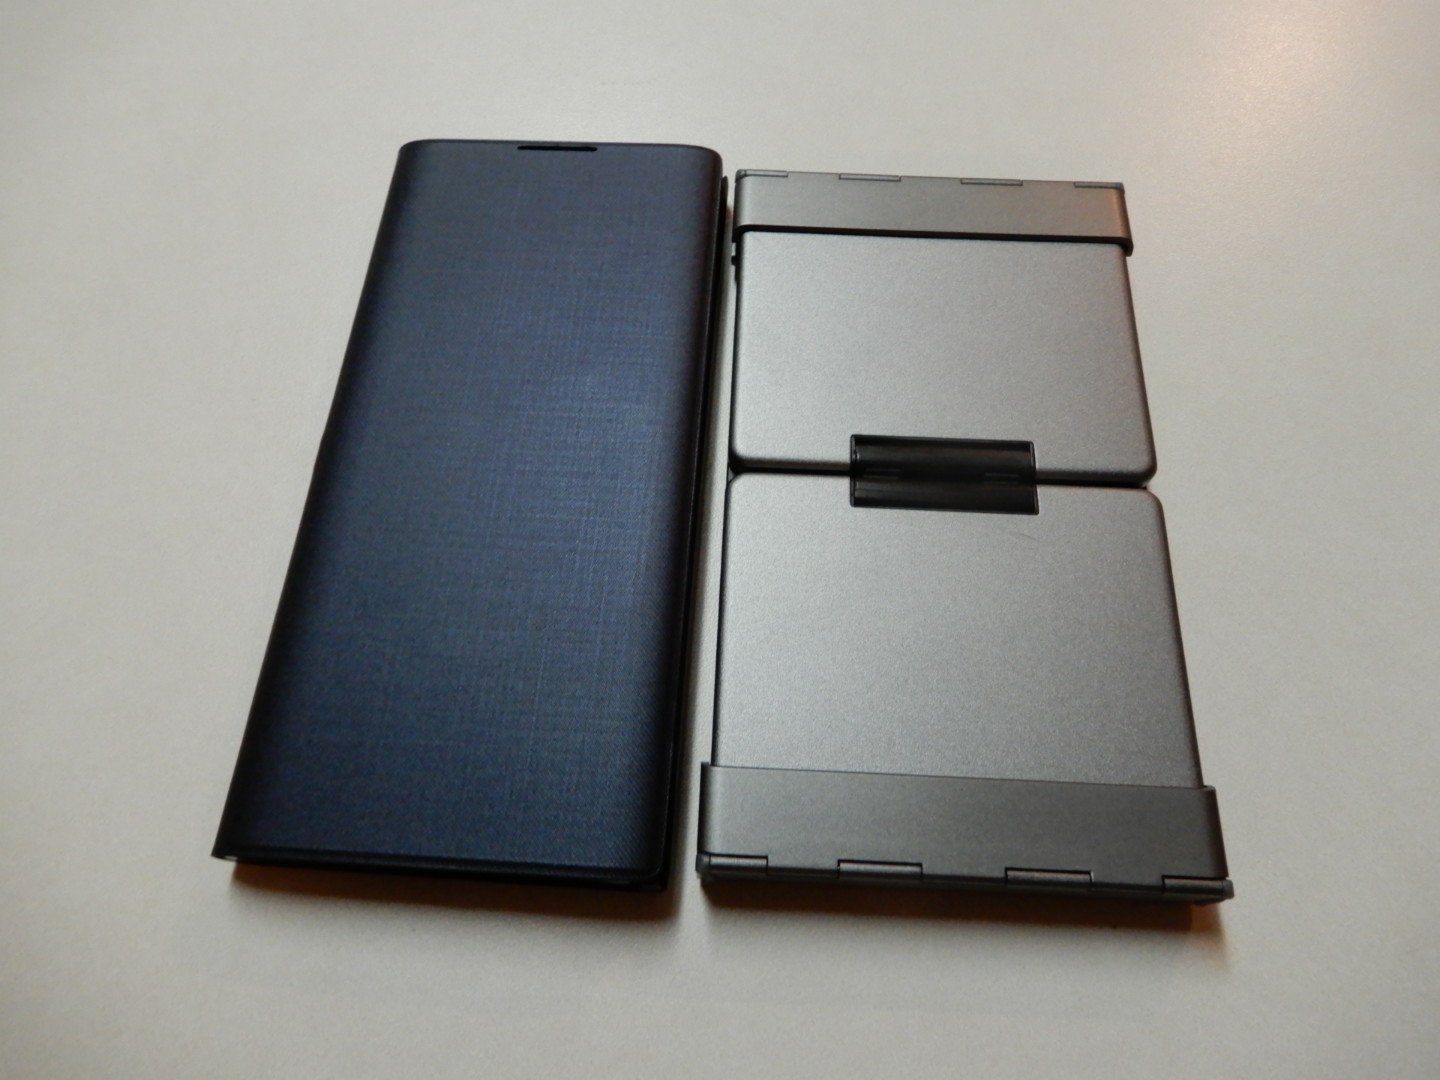
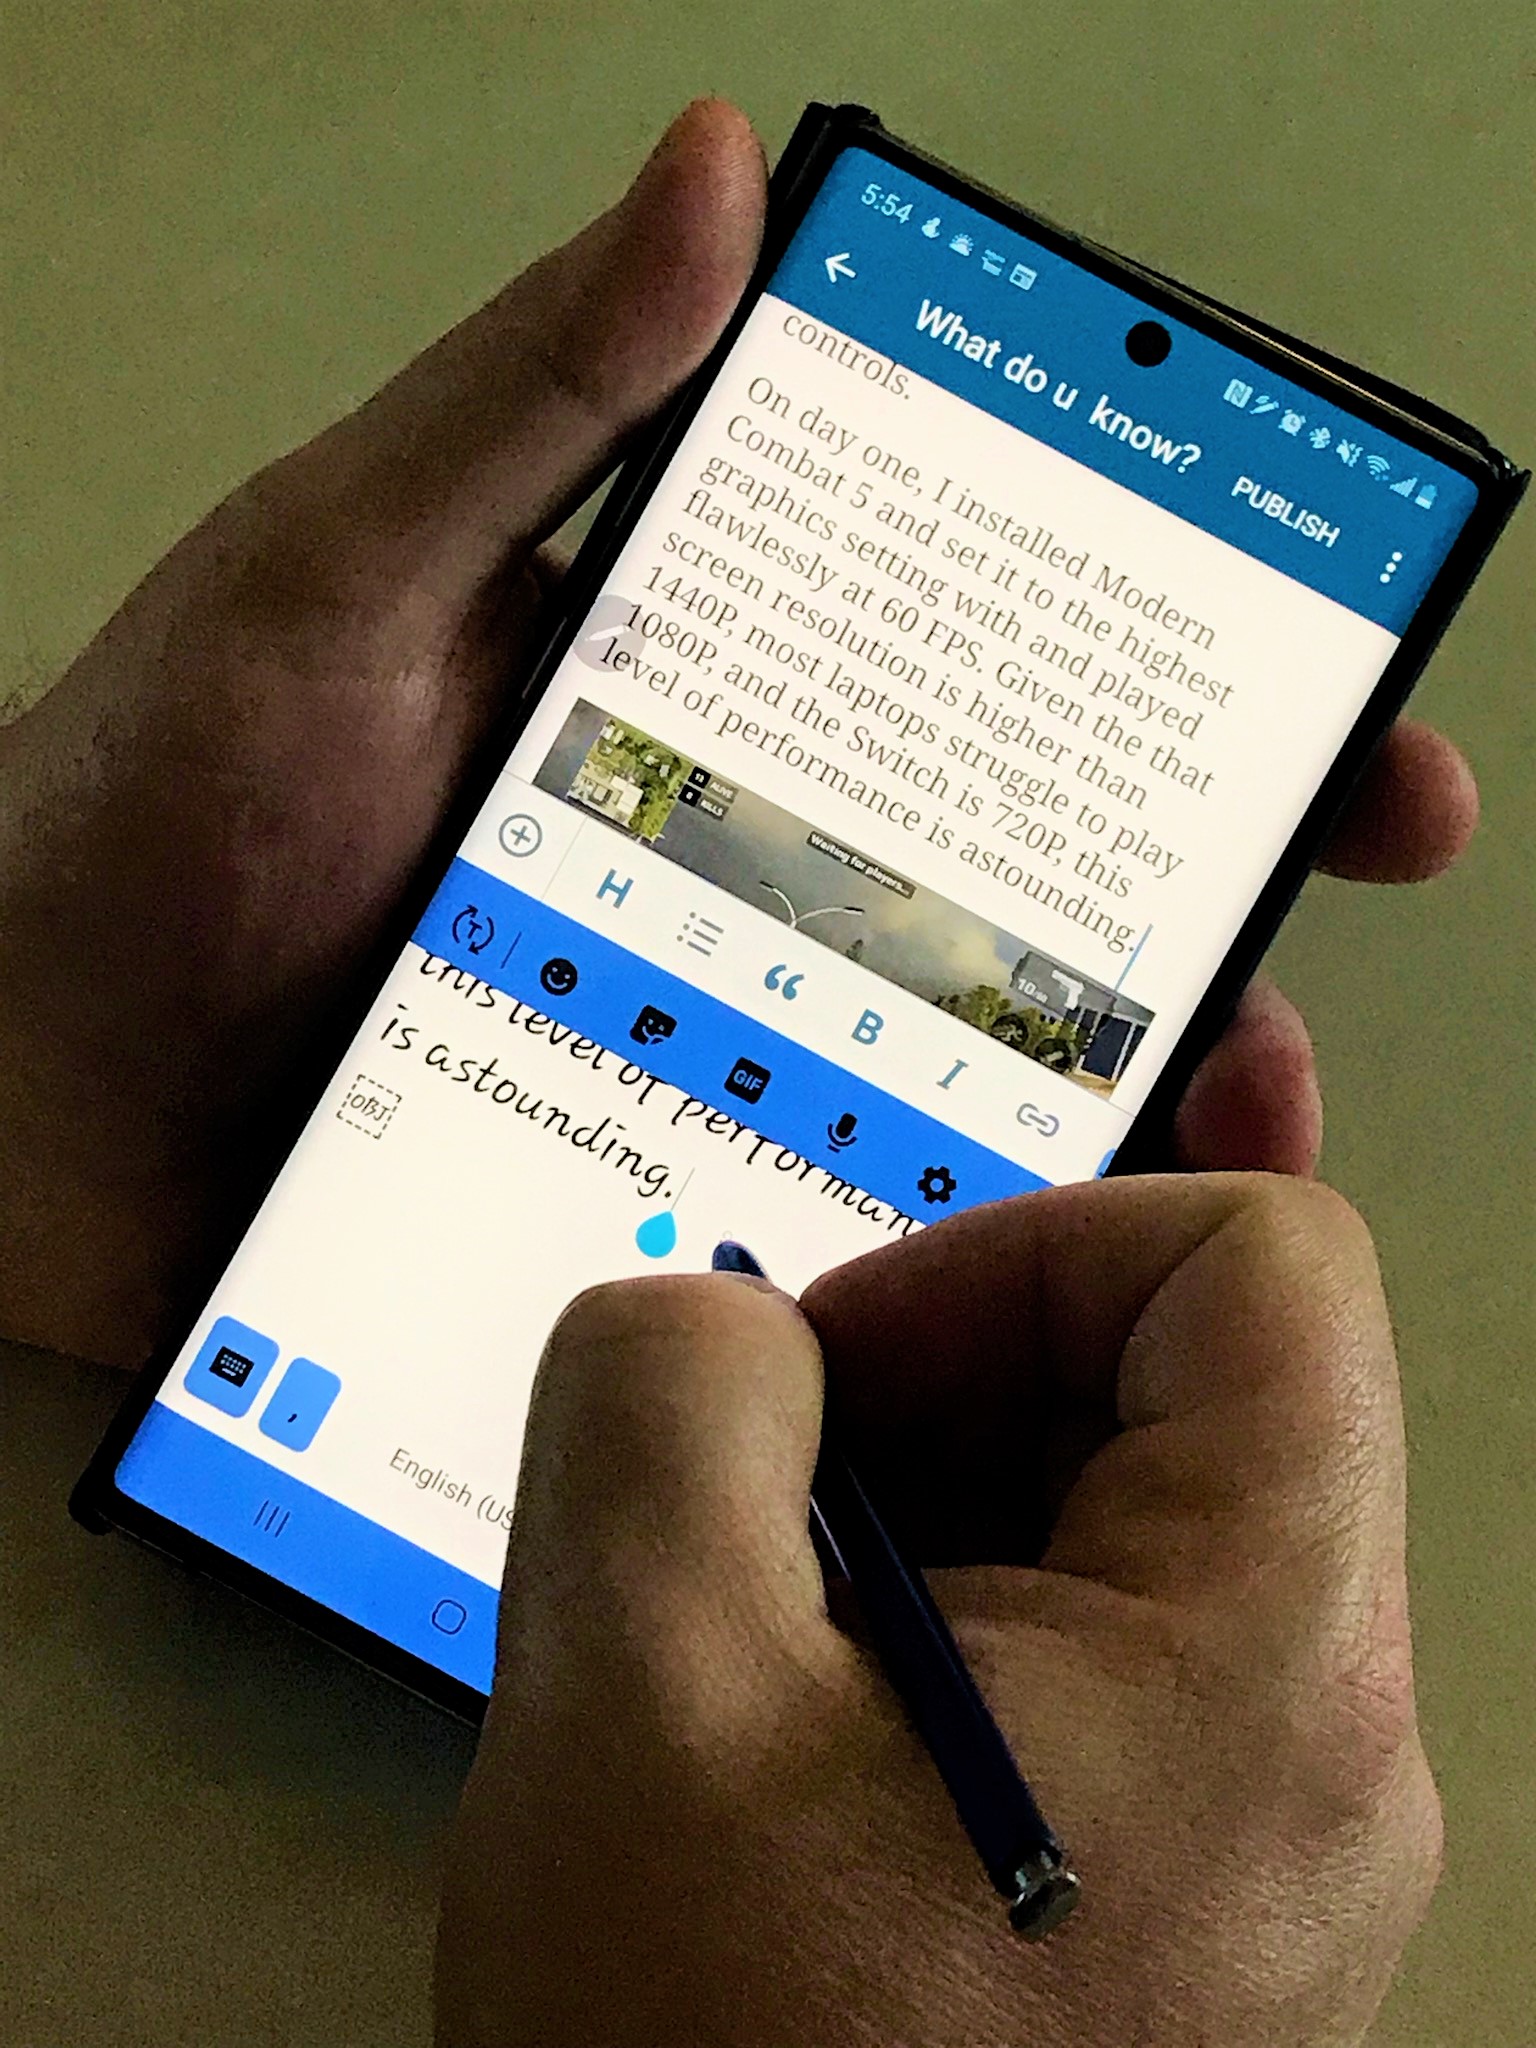
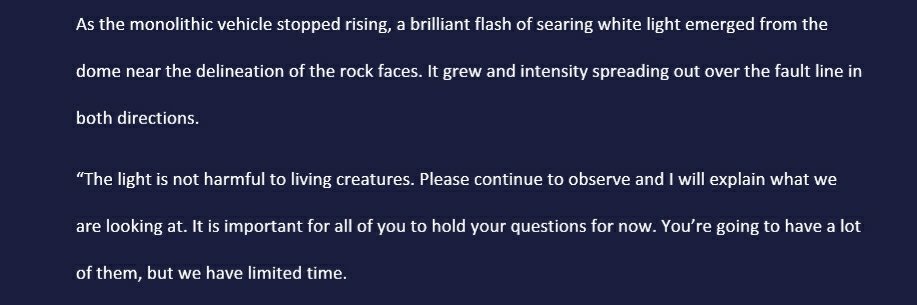
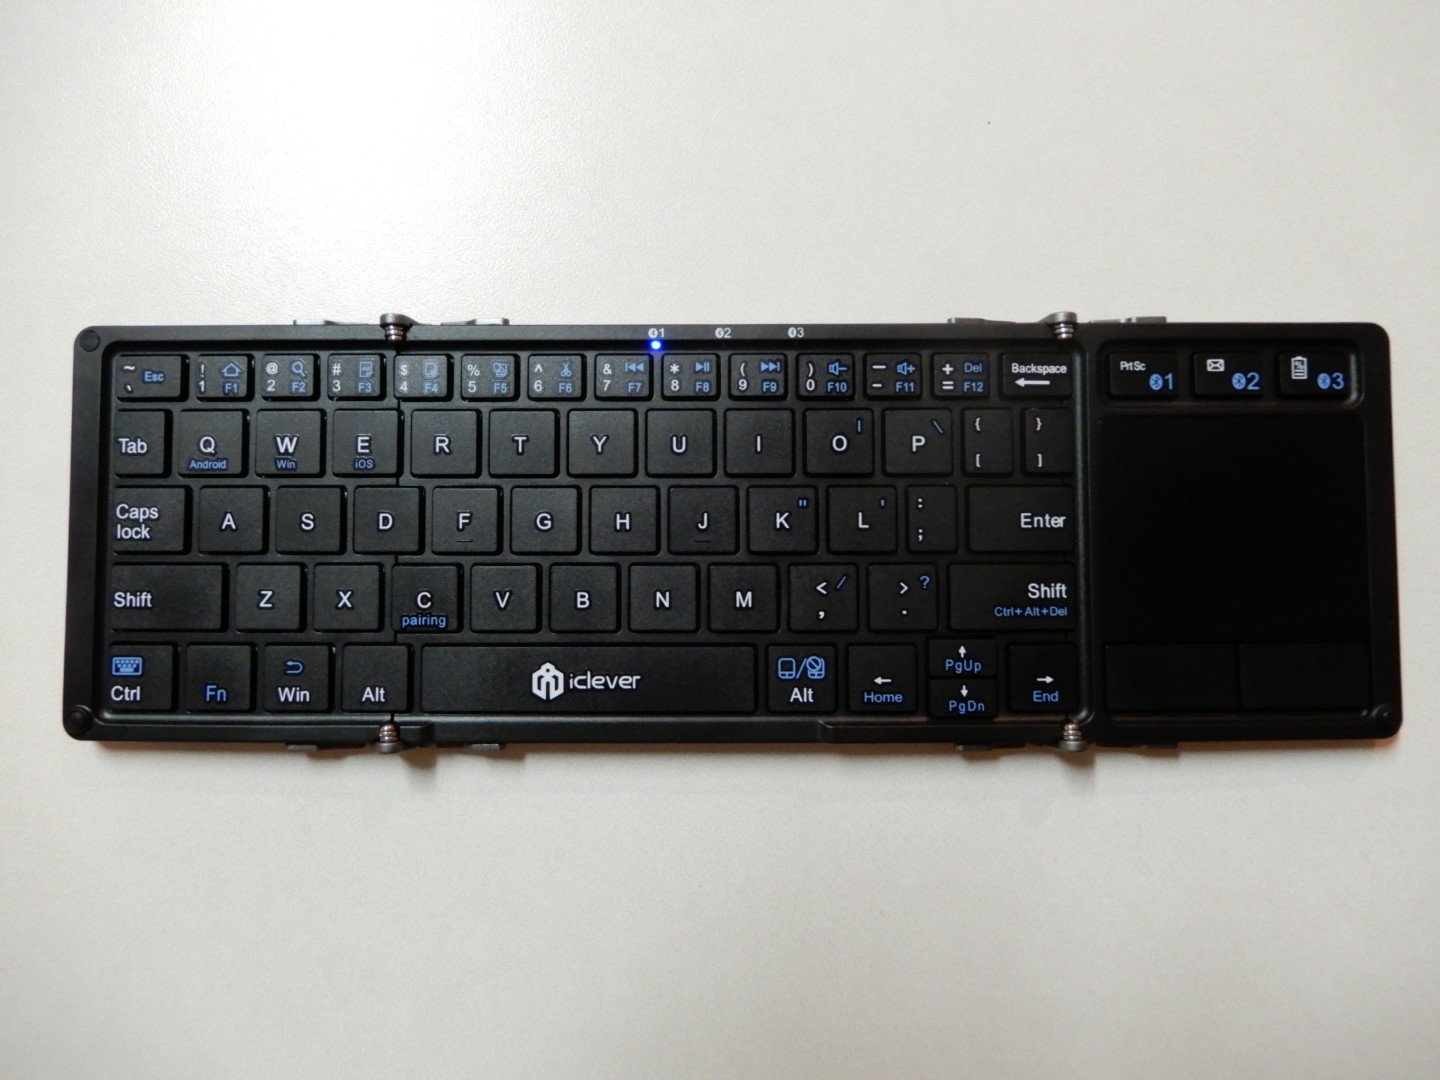
I chose the iClever IC-BK08 fold-able Keyboard and touch-pad. I am writing this article with the tri-fold device right now. When folded, it is about the same size as my Note 10 Plus. Open it up and you have a keyboard that is only 9% smaller than a full size laptop and includes a touch-pad. In addition it can connect to three devices simultaneously and change between them at the press of a button.

I find that I am able to type at full speed on the diminutive keyboard without much trouble. The only issues I’ve had so far are with some of the symbol keys. Typing an apostrophe requires pressing the FN key first, which is annoying but not insurmountable. To make a keyboard and touch-pad this small, something had to give.

The touch-pad is surprisingly excellent. It is better than some of the touch-pads I have run into on various laptops. There are two physical mouse buttons, but the pad is sensitive enough to pick up on taps accurately as well. The iClever powers on and connects to the last device you used it with as soon as you open it. Likewise, folding it shut turns it off.

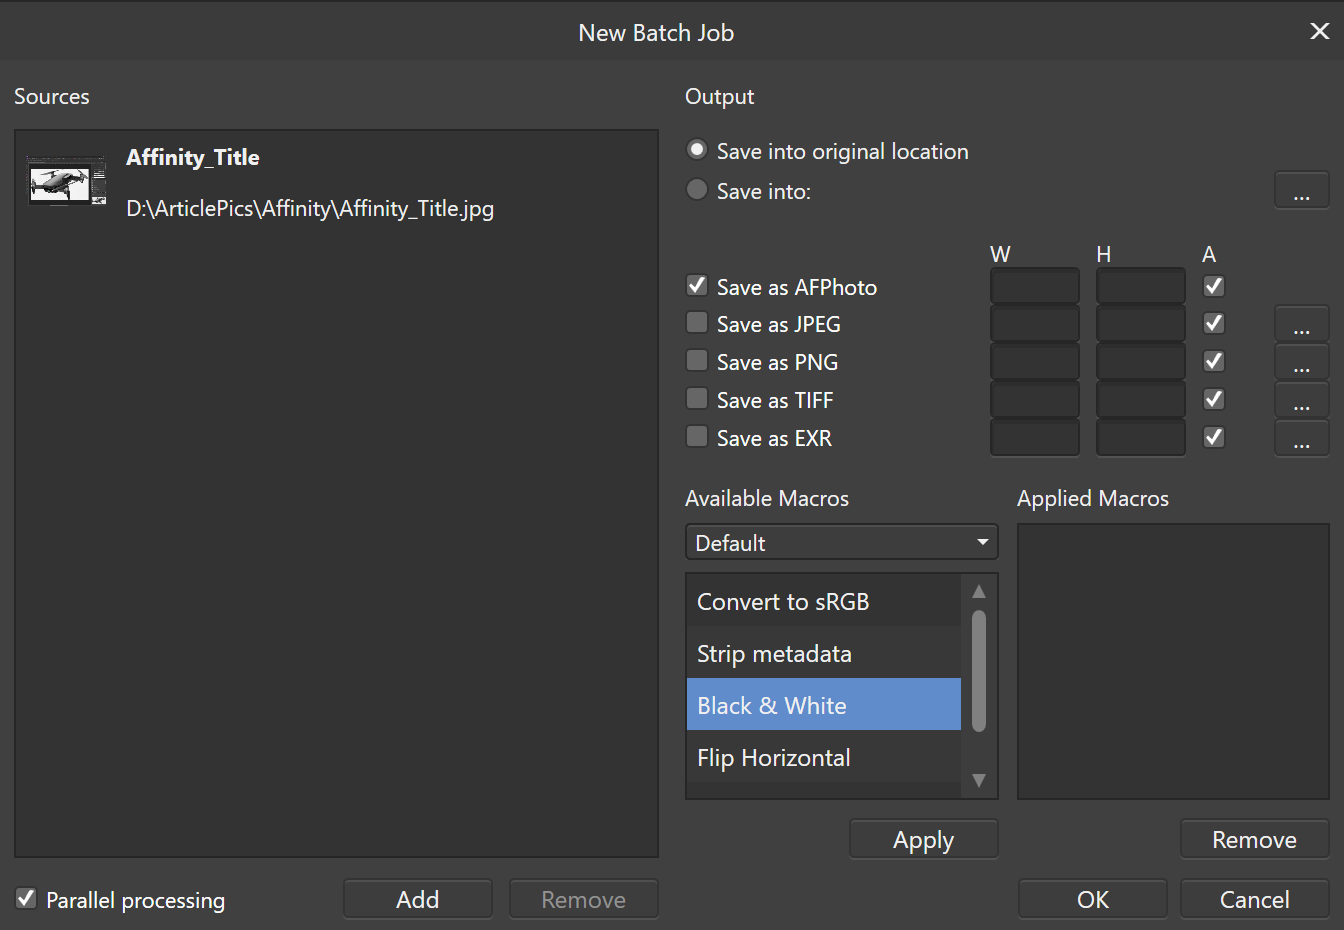
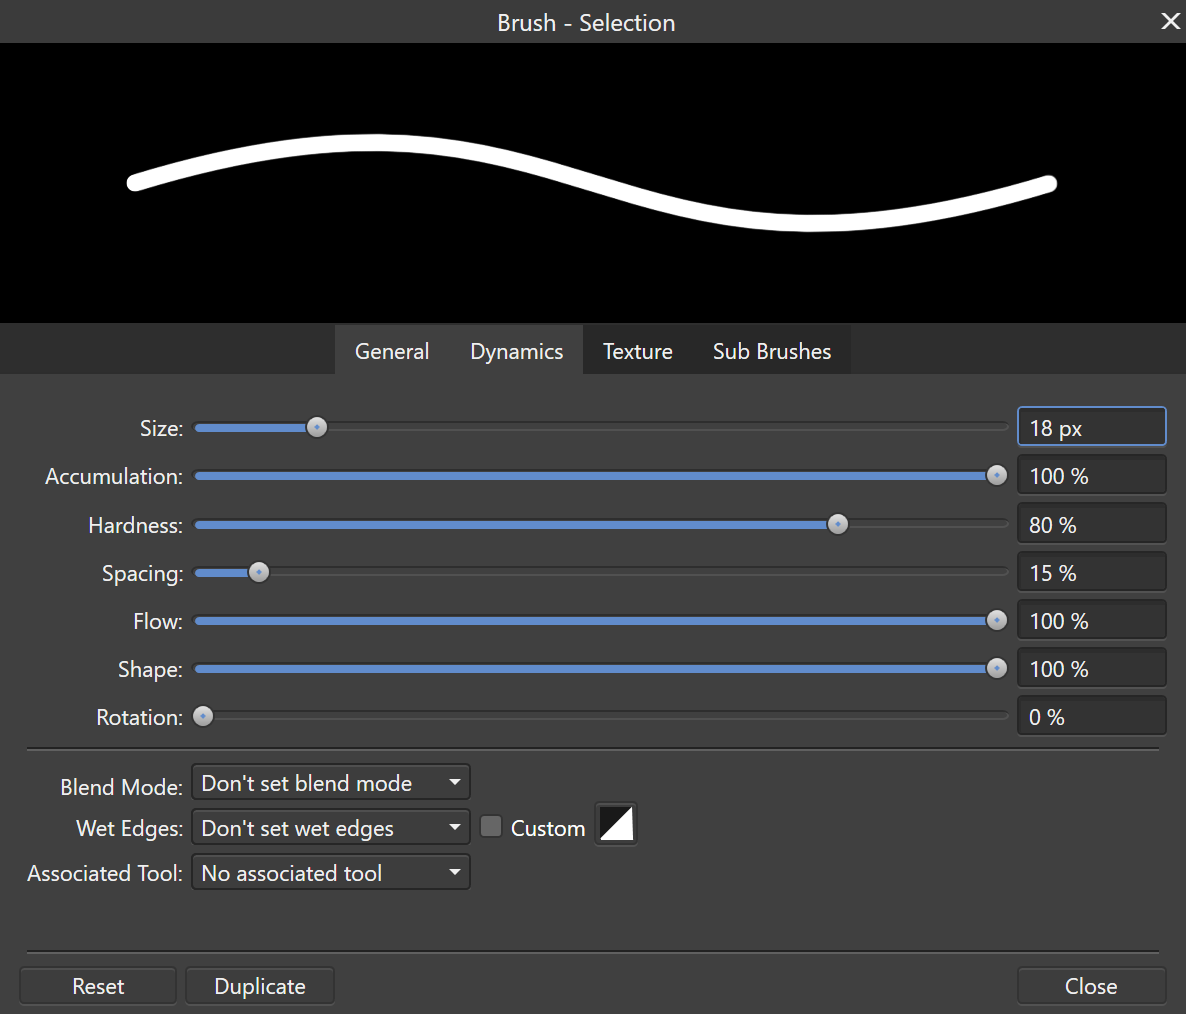
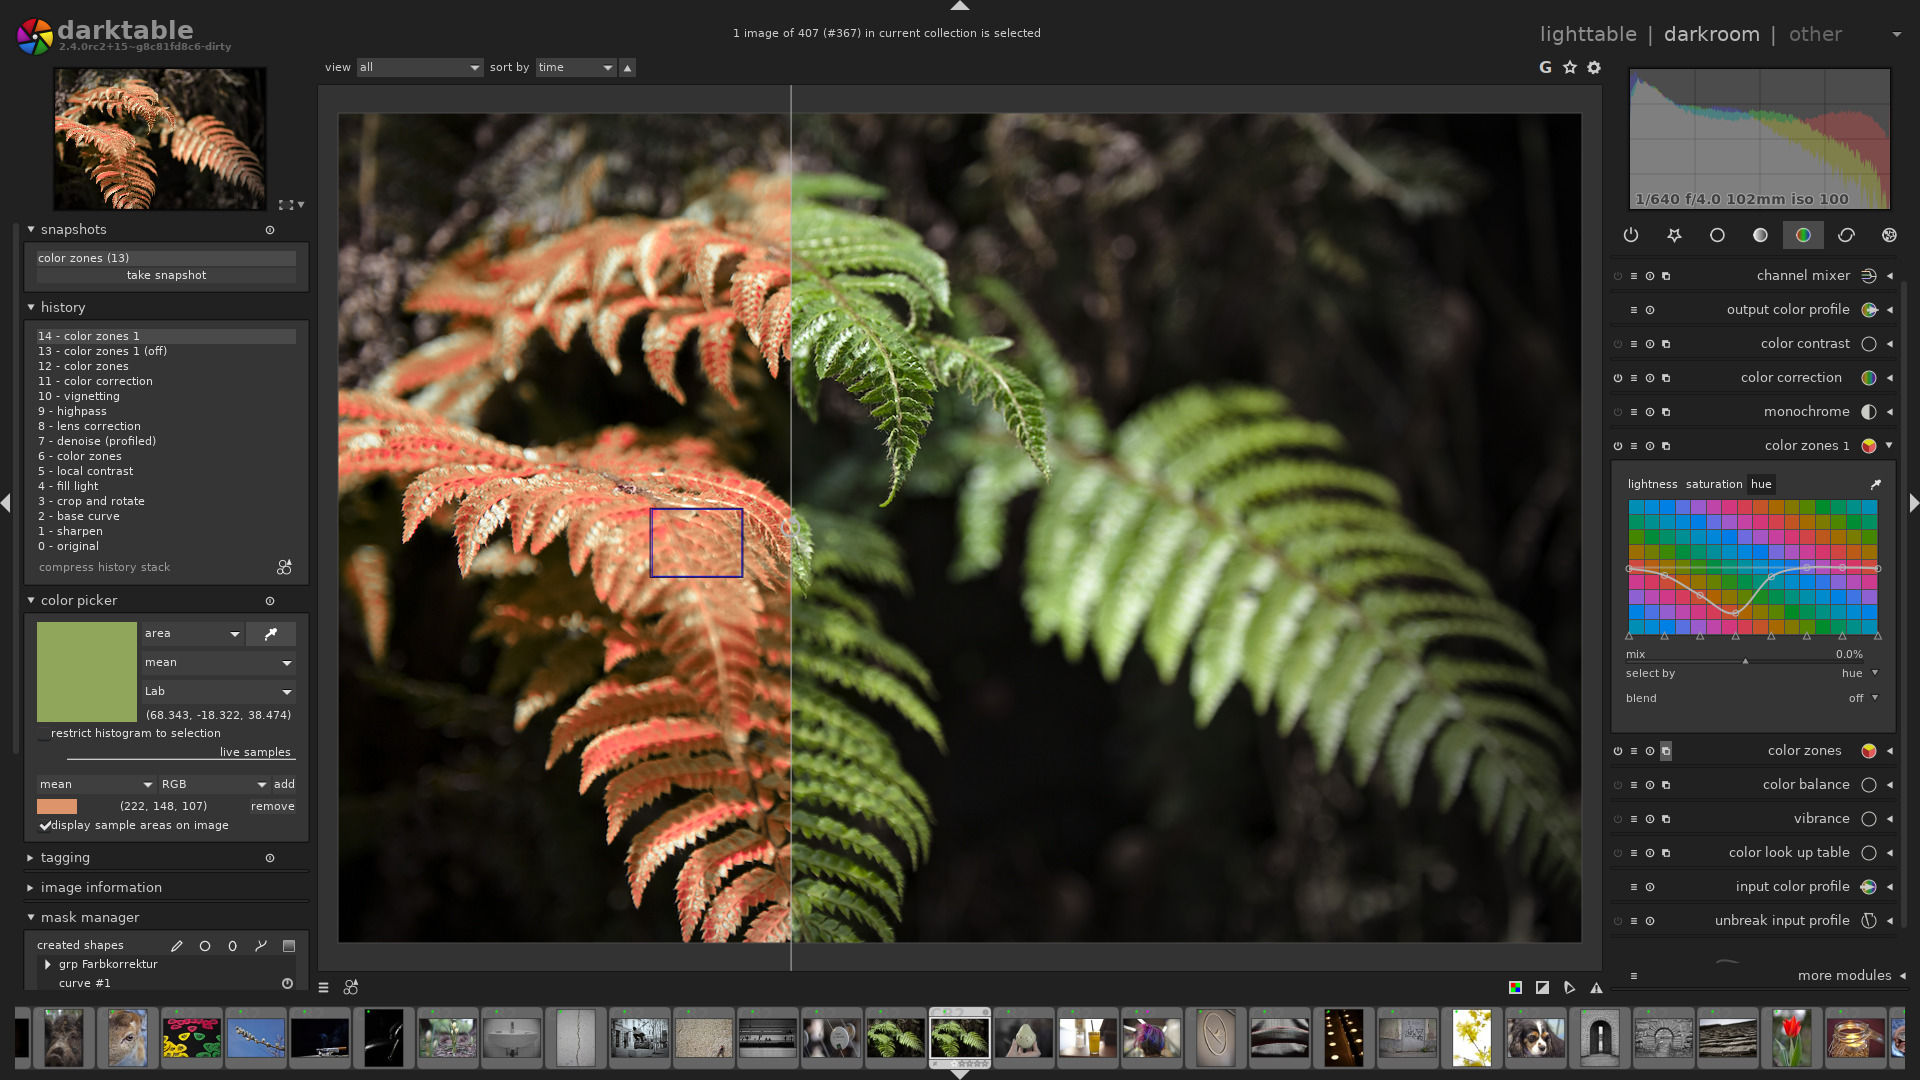
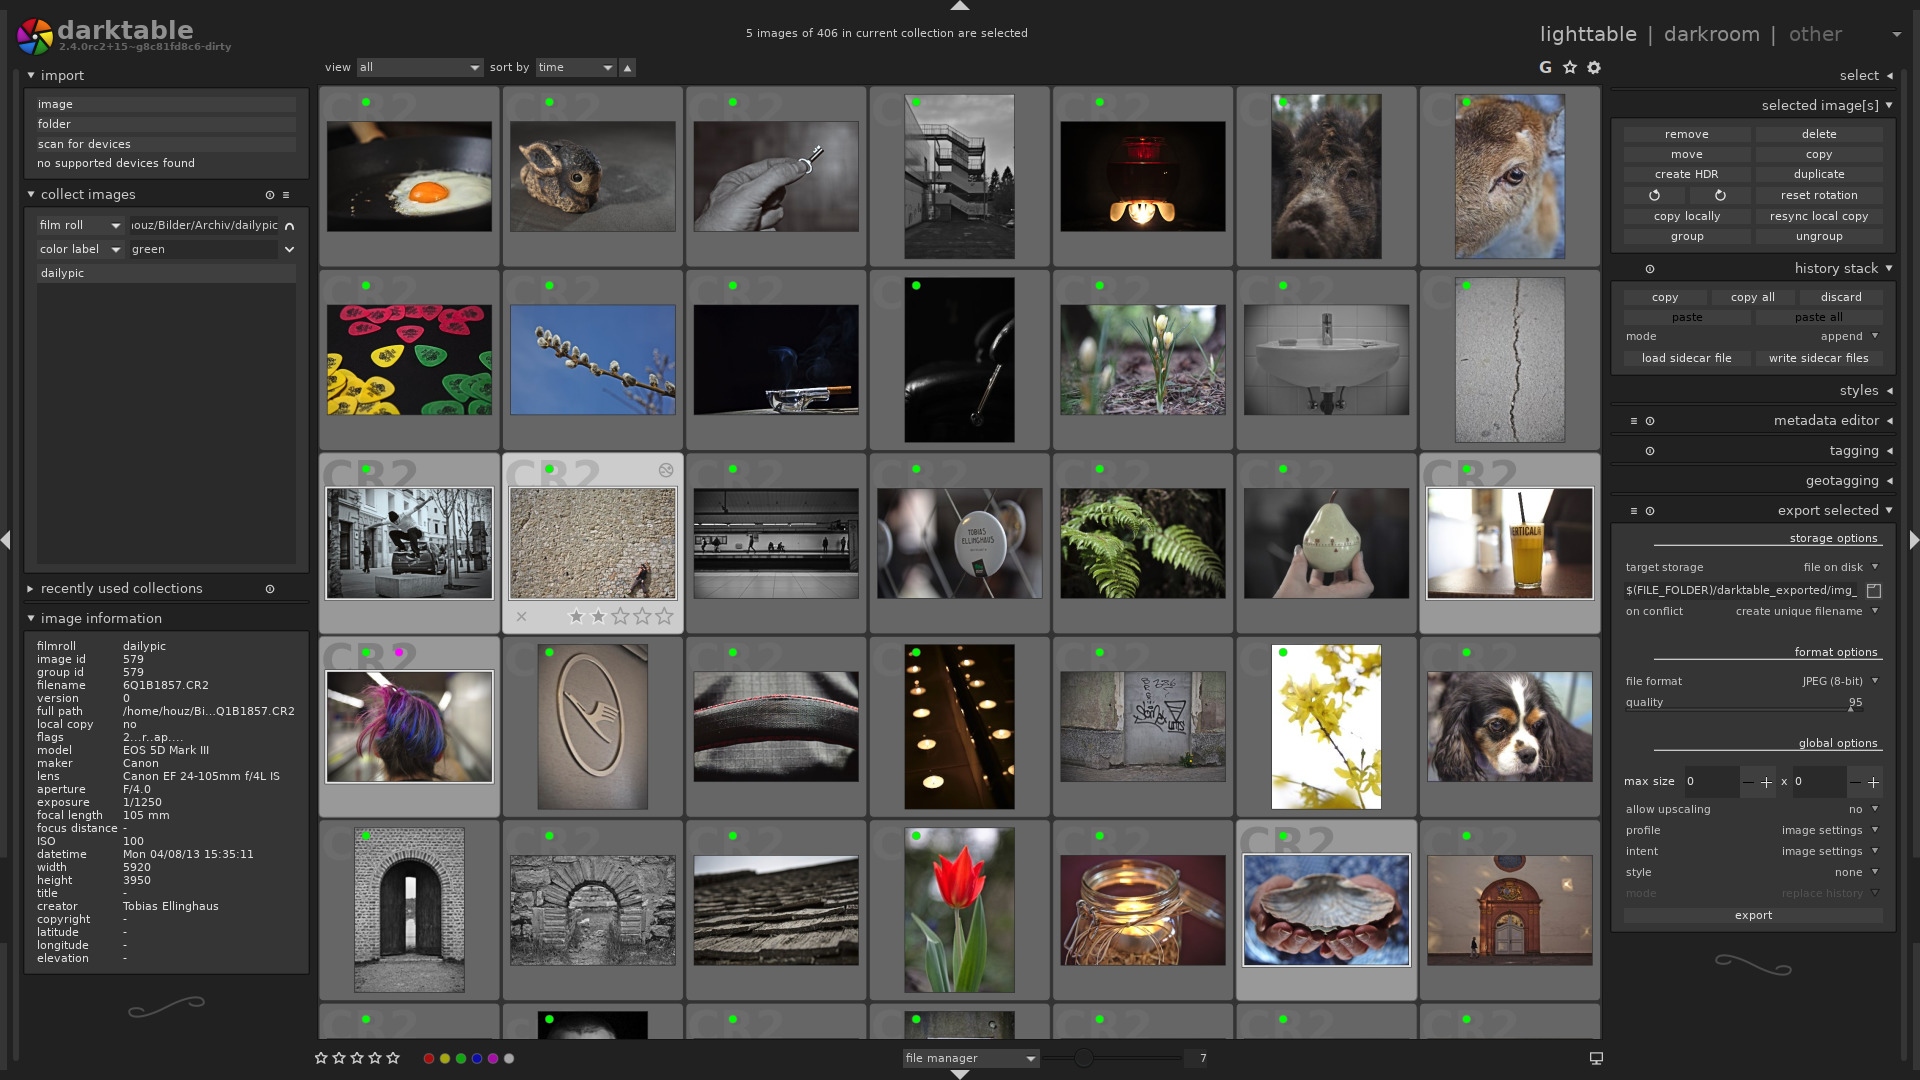
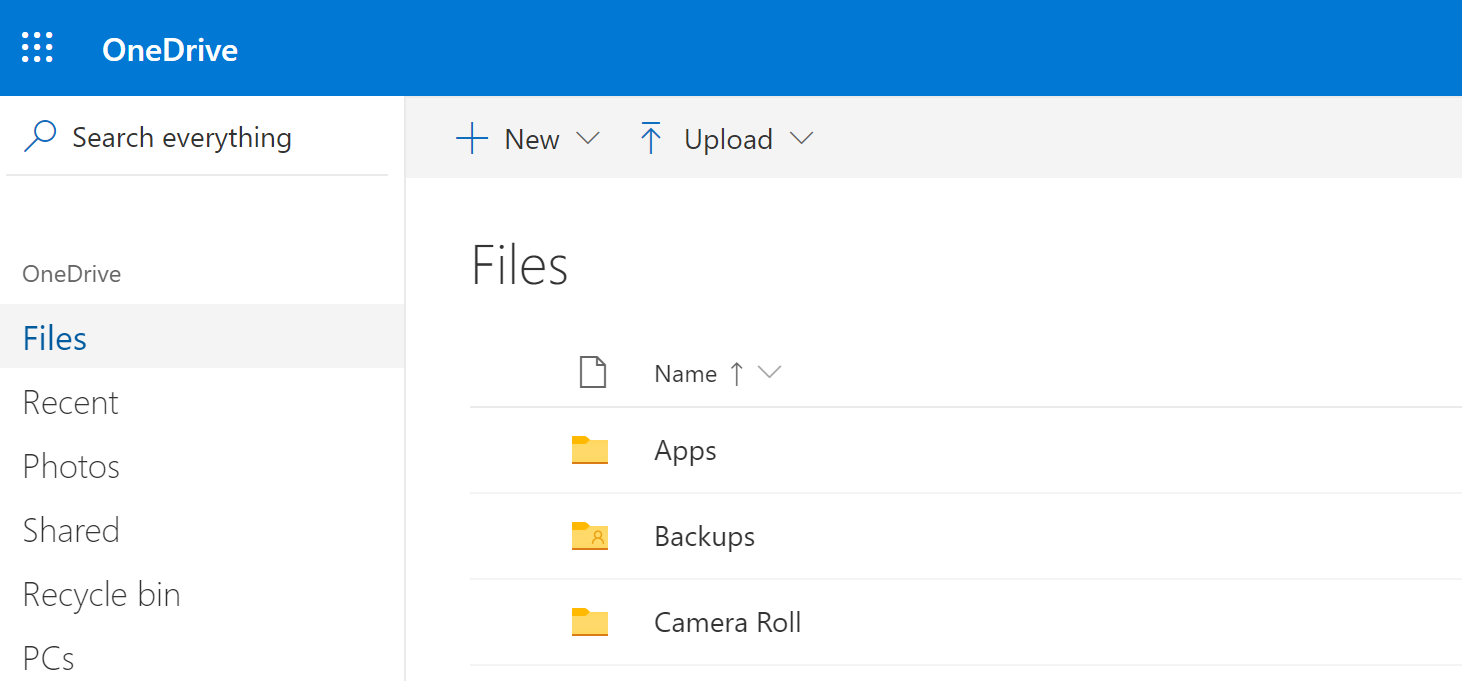
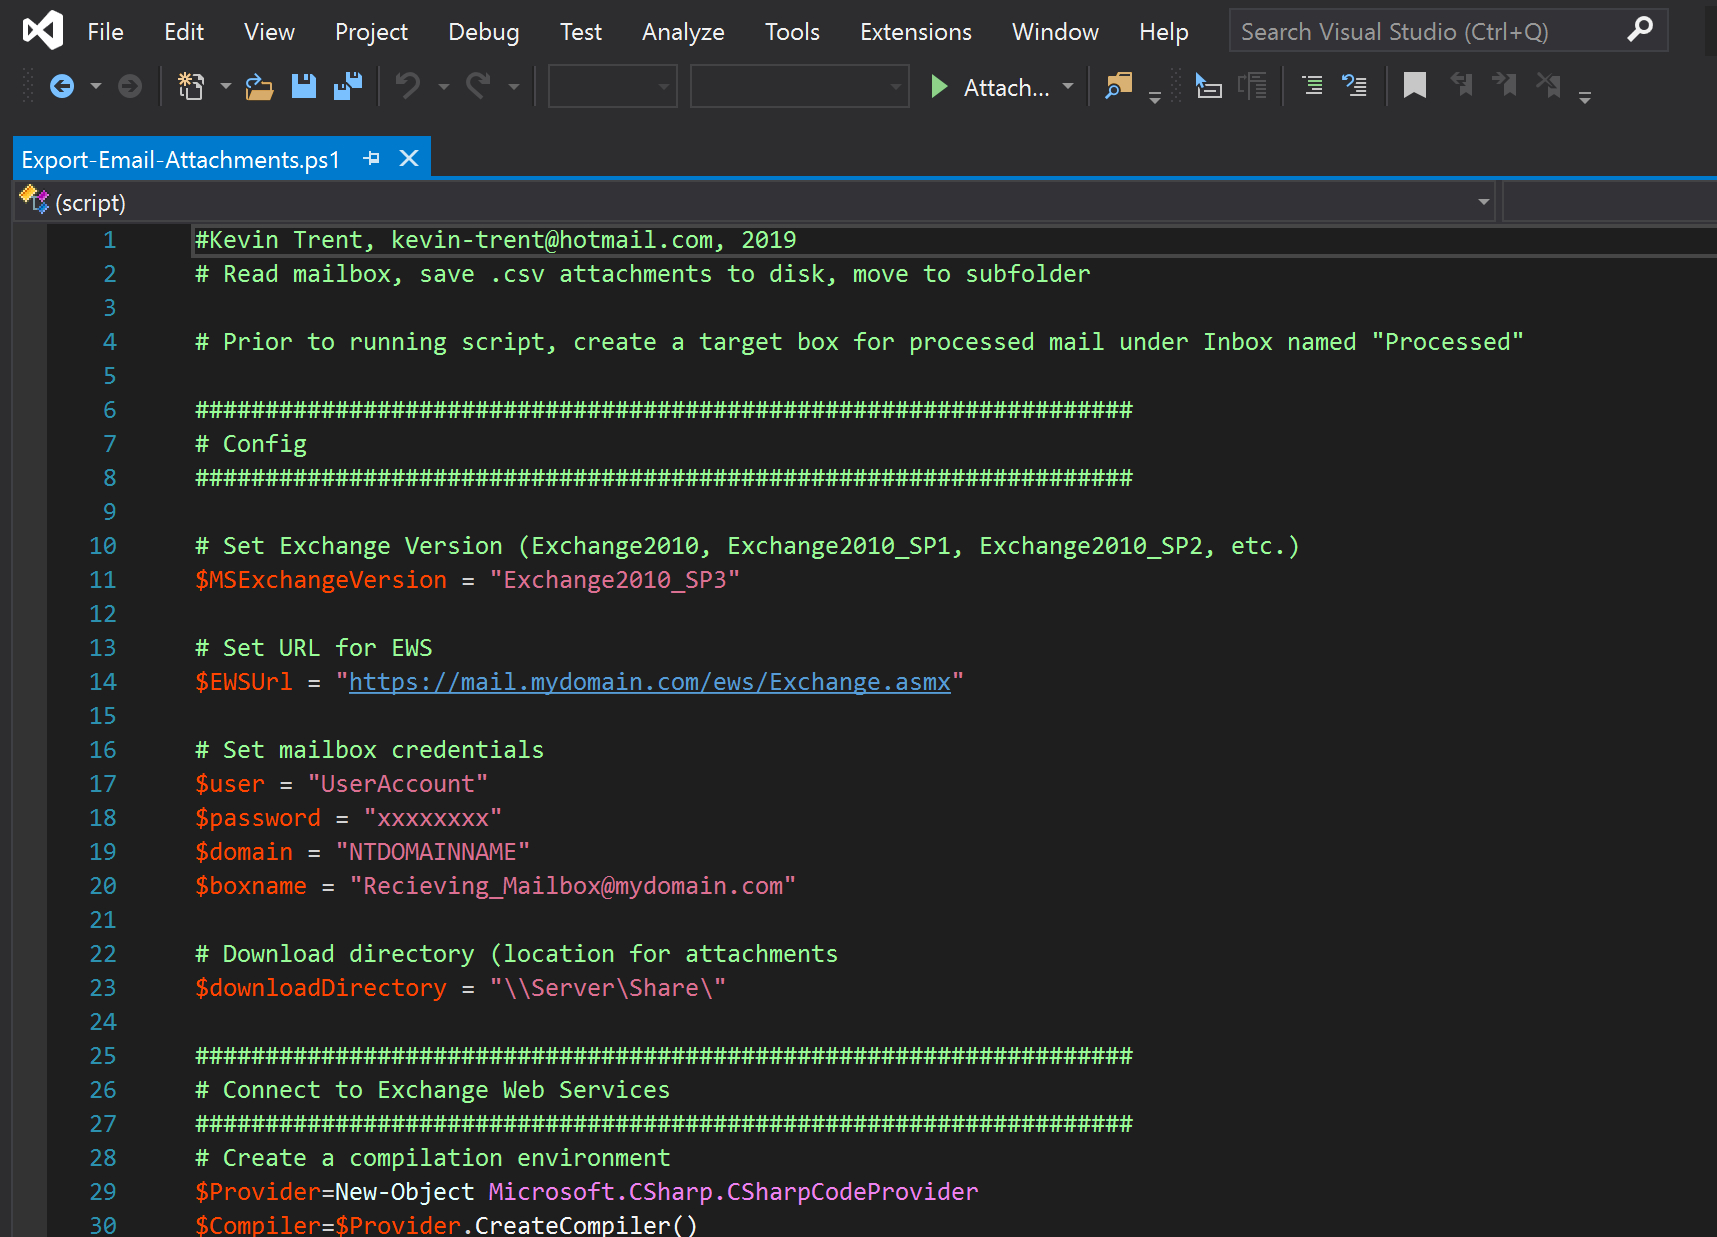
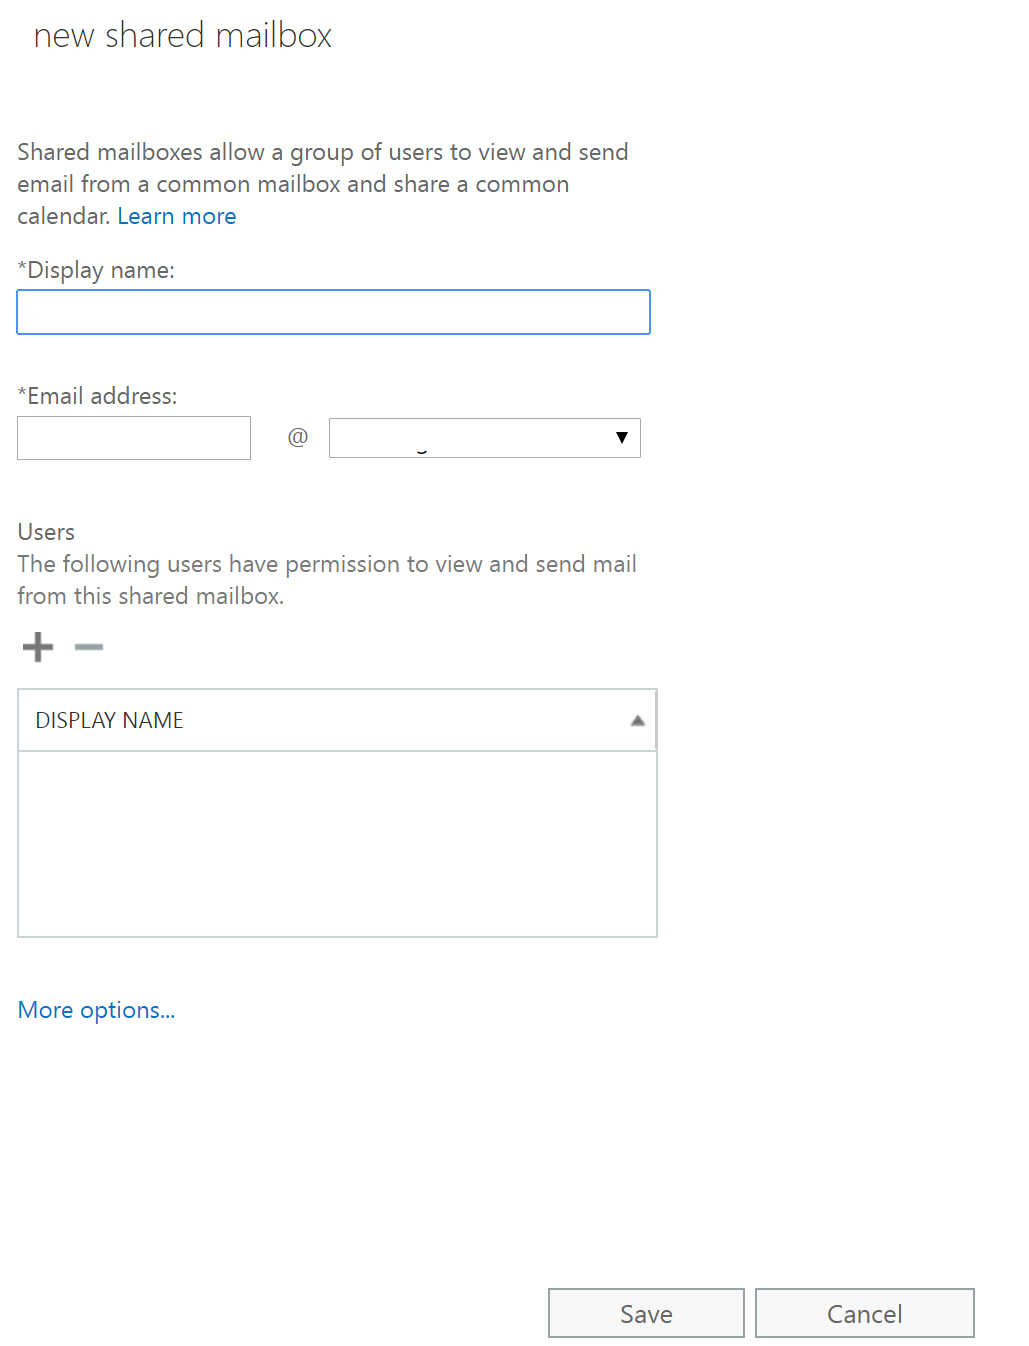
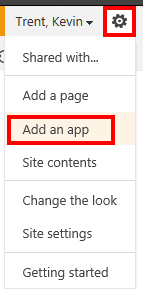
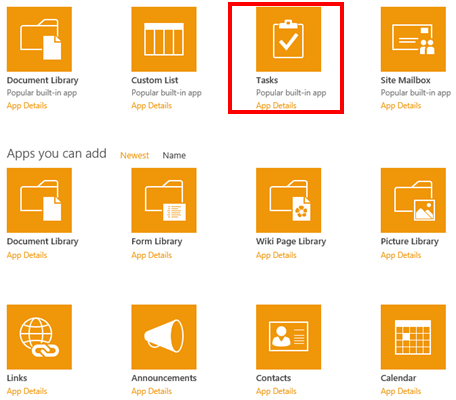
I have been able to do my entire job from my phone now that I’ve added the keyboard and mouse. In the last few days I have: worked on multiple documents, edited photos and video, remoted into several systems, written two scripts, and finished a presentation. I never took my laptop out of my bag to do any of it.

Would I work this way all of the time? No, but that isn’t the point. I still have a high-end gaming PC. I still have a laptop, and I still have a desk at my office. The point is for my compute options to fit into whatever I am doing, rather than me making arrangements to fit my activities around my device’s abilities. Have you every tried to lug a laptop around Disney World?

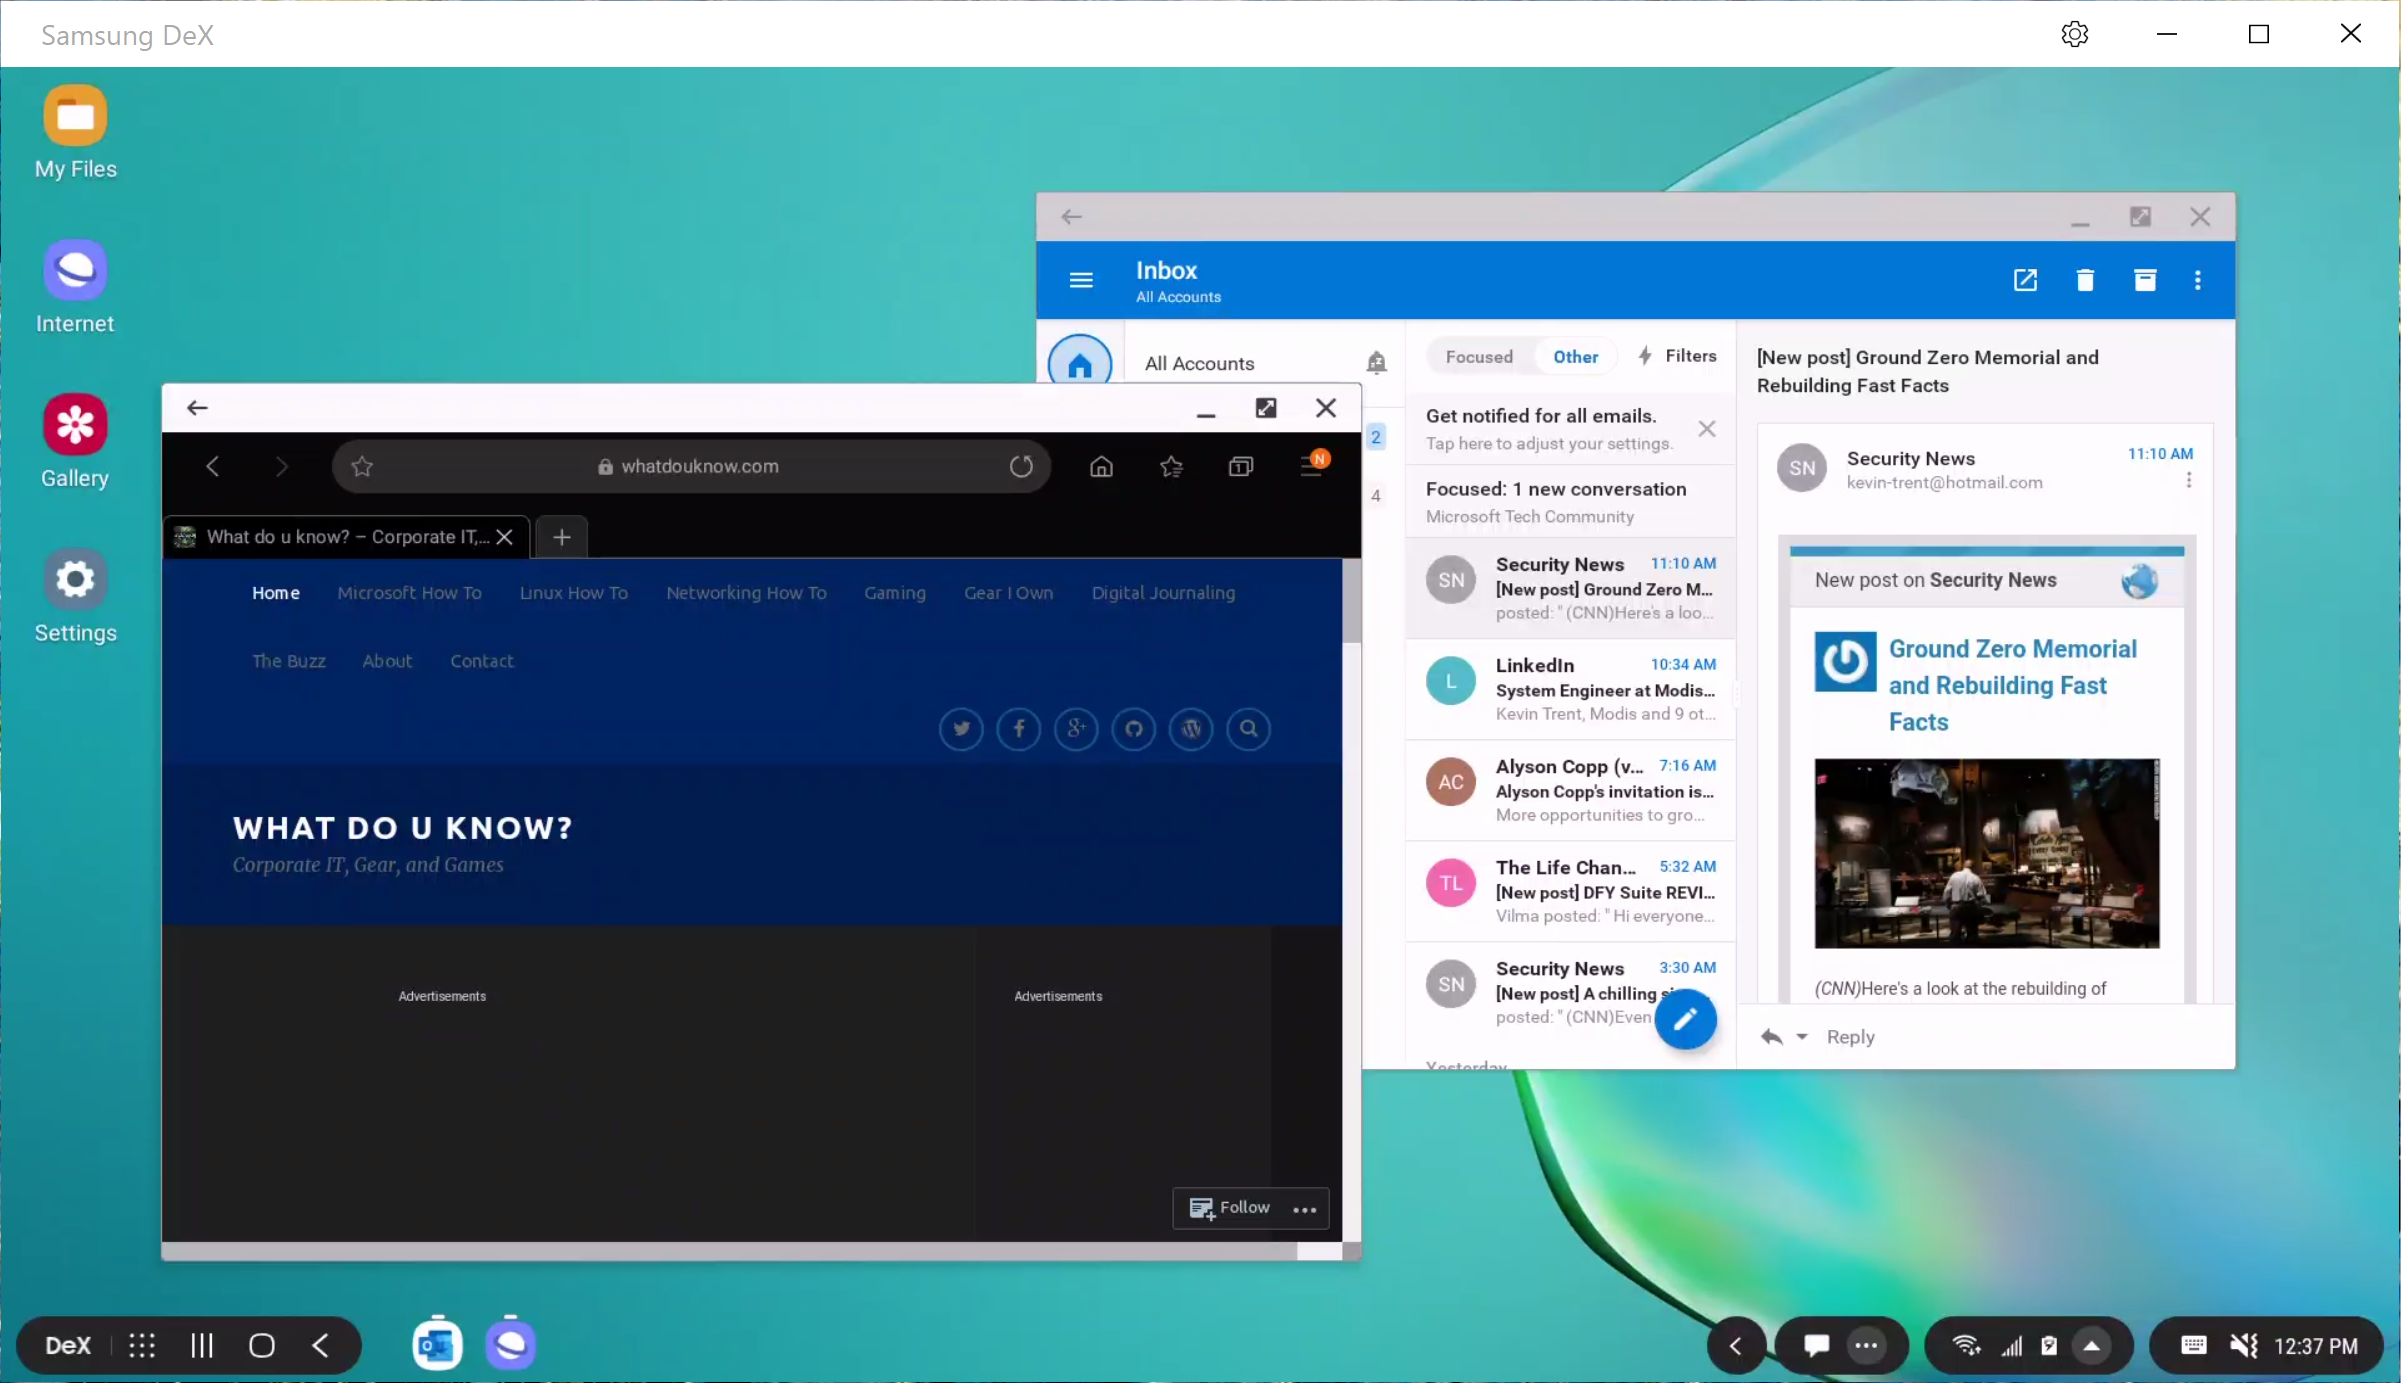
When my family and I head out for vacation next week the only compute devices making the trip will be my phone, its Dex dock, and the iClever keyboard; all of which easily fit in my pockets. If my employer needs me to assist with a customer while we are out, I will be able to logon and help solve the problem. My family won’t need to head back to the hotel or finish the day without me while I sit in the car.

That is the dream realized for me. Being able to spend more time with the people I love while fulfilling my professional responsibility and pursuing my personal passions. Mobile computing tech is at an amazing stage of development and its only going to get better from here.

One Week In with the Nintendo Switch Lite; A Great Second System

Somebody please tell me why they didn’t call it the Lite Switch. It seems like such a lost opportunity. I’ve had my Switch Lite since launch day. It is smaller, lighter, and tougher than the original. It’s controllers do not detach and it cannot hook up to an external display in any way.

Why would I get one when I already own a Switch? I carry my console everyday. My bag is pretty full of gear these days, so saving space and weight is a big plus for me. If you don’t need your original, you can almost break even by trading it for a Lite at Vintage Stock or Gamestop. My spouse took this route, she only plays in handheld mode.

Personally, I purchased the Lite with the intent of keeping it in my bag and leaving the original system at home. If you plan to do the same, review Nintendo’s documentation on linking multiple systems to a single account. There are specific requirements and limitations that may change your mind. You will need a Nintendo On-line subscription.

Essentially, you will want to make the Switch-Lite your primary device to ensure that it will work anywhere. Your original switch will be a secondary device linked to your account and will only allow downloaded content to play when there is an Internet connection available.

I’ve played games on my Switch Lite while out and about and then resumed playing on my original, hooked up to the TV, without issue. The only catch is that you need to exit the game on the Lite so that its saved games will upload to the cloud. There’s a slight delay before the cloud saves download to your secondary device but you can speed it up by going into the Data Management menu.

If you’re going on vacation or need your original unit to travel with you for some reason, chaining which unit is primary is easy. Open the eShop app, click on your avatar in the upper right hand corner and scroll down, you’ll see a deregister device button. Click it, then which ever device you sign in with first will be registered as the primary.

The Switch Lite is more comfortable to play on than the original is in handheld mode. The reduction in weight and the location of the thumb sticks reduces fatigue on my wrists and fingers. The case’s texture makes the device less likely to slip. With the controls being part of the chassis, the Lite feels sturdier than having the Joycons attached to the original did.

Overall I am very happy with the Switch Lite. It is an improvement in portability without compromising the performance of the games. Deciding between the two will be a tough choice for new players.

Windows 10 OEM Images with Secure Boot and Office 365, Part 1

One of my employer’s customers is upgrading their entire network. The job includes replacing all the company’s workstations with brand new Windows 10 units. They have a lot of software which requires a lot of configuration. While discussing the project, my teammate and I decided that a golden image was the way to go. We wanted each system to be exactly the same to cutdown on errors and enable identical user experiences across the organization.

The first hurdle on the track to golden image nirvana is licensing. Microsoft has changed things up since the last time I tried cloning. I’m not a lawyer or a licensing expert and you should not take my writing as advice. The research I did and my interpretation of Microsoft’s imaging rights documentation , led me to believe that you cannot use a pre-installed OEM edition of Windows 10 in any type of golden image project. The process requires at least one Volume License.

Once you’ve gotten the licensing straightened out, the next hurdle is the sheer number of techniques and software available. There are two main types of image deployment. The first and most popular are dumb clones like those made by Norton Ghost and Achronis. The other types use a workflow to assemble the components of your deployment on demand. Microsoft’s own MDT solution falls into this camp.

For our project, clones would suffice. We were deploying desktops that were comprised of identical hardware and each needed the same software as they would all be used for the same tasks. There are quite a few choices for cloning applications, including the afore mentioned Achronis, Windows Backup, and AOEMI Backupper. We settled on CloneZilla because it is open source and works well with Windows 10.

We booted up our bench PC and spent a lot of time installing all the software and configuring everything just right. Then we launched sysprep (C:\Windows\System32\Sysprep\) and selected the generalize and OOB settings. The sysprep utility tells Windows to create new unique identifier, called a SID. It also configures Windows to run the out of box setup experience the next time it is booted. Contrary to popular belief, this step is not optional. Duplicate SIDs cause all kinds of issues on a network.

We created a Clonezilla live disk and booted the system from it. Within a few minutes we had captured our image. I won’t bore you to tears by making you read these steps. They are well documented on the clonezilla.org web site. I used the Rufus method of creating a live boot disk because I was already familiar with the process. Once we had our image, we used the same live disk to deploy it onto one of the workstations for a test.

We prepared to celebrate our success and hit the power button on our test rig as soon as the imaging process was complete. Well @!#*, blue screen. Not only did the test system show a BSOD, so did the source machine when we powered it back on to diagnose the issue! To make a long story and several hours of analysis short, we traced the problem to a security feature named secure boot.

Secure boot is a security standard created by the PC industry to ensure that a system is starting up with OEM certified software. Essentially the protocol was built to thwart root kits and it works, a little too well in our case. There are several posts on-line that indicate the fix for this issue is to run some commands that delete and then recreate the secure boot keys database for each machine. Who wants to do that? Having to do this on each computer would largely negate the benefits of making the image in the first place.

With some research and experimentation, we were able to come up with a work around. Disable secure boot in the source system’s BIOS. Then install a fresh copy of Windows. Be sure to delete all of the existing disk partitions and create new ones during the installation wizard.

We found that using the standard Windows 10 ISO from Microsoft’s download site allowed the systems to activate using their OEM keys, stored in the UEFI BIOS. If yours don’t activate, you can run the following command in an elevated PowerShell session to retrieve the key and enter it manually: ((Get-WmiObject -query `select * from SoftwareLicensingService’).OA3xOriginalProductKey) .

The process to turn off the secure boot function is a little different for each manufacturer. On the HP systems that we were working with, it shows up in the security menu. Other systems place the option in the boot menu. Turning it off will probably generate a warning message of some kind. Don’t worry, we’ll be turning it back on after the image is captured.

Once Windows is up, download and install all of the manufacturer’s drivers and software. Install any of the applications that you want to include on your image. Get all the configurations set just right, and sysprep the system. Now capture your image with your chosen imaging solution.

You will be able to enable Secure Boot on the source system after the image capture process is complete. You will also be able to deploy your image to the other machines, without disabling secure boot first. Secure Boot will function normally on all the systems after the image has been applied. If you need to understand the technical details around why this method works, read Microsoft’s documentation on the subject. Step 3 of the boot sequence is the key to our success, we haven’t introduced any foreign boot agents or drivers.

In part two of this series we’ll discuss how to pre-install the Office 365 edition of Microsoft Office on to an image and a few tweaks that you might find useful.

Is that a Projector in Your Pocket? Are Portable Big Screens a Reality Yet?

You know me, I’m a gadget geek. You only have to read my blog’s “Gear I Own” section to see how bad my addiction is. It’s not something new, I’ve been this way since I was a kid. The devices I write about are not review units on-loan from their manufacturers, they’re mine forever, or at least until I sell them on.

One piece of tech gear that has always intrigued me is a portable mini projector. What could be better than a big-screen you could take and use anywhere? I first remember seeing one in a Brookstone store at my local mall several years ago and almost reflex bought it. My wife pointed out that I didn’t have an actual use-case for one. Her logic stopped me cold. Beyond playing with it for a few hours, what purpose would having one serve?

After gazing at them longingly in the stores and messing around with the display units, I discovered they had some severe weaknesses. First and foremost, they weren’t bright enough to use anywhere but in a very darkened room. The first-generation devices also required some complicated cables and accessories to hook up your source device up with. Still though, a big-screen that fit in your pocket was an extremely alluring thought that would not go away.

I kept dreaming of having an extra screen with me everywhere I went, being able to hook up my laptop, phone, or gaming consoles at home or on the road. Fast forward a few years, I had gotten back into computer consulting and ran into a situation where I was trying to explain a complex distributed computing environment to a customer. I wanted to show some examples, but there wasn’t a shared screen in sight. We ended up hunching over my laptop, but the experience wasn’t ideal. Ha, take that wife! I have a reason to get one!

Now that I have my excuse, err reason, I had to brush up on the latest options. A quick search of Amazon returns an unbelievable number of devices. I can’t believe the market is big enough to support this level of manufacturing, I don’t know anyone that has one of these things, but judging by the number available, they sell like smart phones. How do I decide? They range in price from fifty bucks to over a thousand.

The tech is all over the place on specs, options, sizes, and functionality. I spend a fair amount of time breaking it all down to filter out the fluff. The features that matter are: Brightness (measured in ANSI Lumens), the native resolution (this one is tricky), connection options (wireless is nice), the size, battery’s runtime, and the operating system. These specs vary widely and are confused by all kinds of useless marketing terms so pay attention to the details.

Most of the devices under two-hundred dollars are rated for fifty lumens. They aren’t bright enough to compete with a standard light bulb. If you’re not going to use your projector in a nearly dark environment, then you need to shoot for at least one-hundred, and more is better. The claimed resolution is obscured in the marketing materials by the mis-leading term “supported resolution”. The supported resolution means essentially nothing. The native resolution gives you an idea of how sharp the text and graphics you project will be. Higher is better, I would shoot for 720P as a minimum. Most of the inexpensive devices, even those marketed as HD, are only 480P (technically the lowest end of HD).

The more connection options a projector has, the more useful it will be. At a minimum you are going to want one that has an HDMI port. Most modern video sources: laptops, gaming consoles, tablets and phones, can support HDMI. Some (Tablets, Phones) will require and adapter. Wireless options are the a great feature. There are two basic types of wireless, Miracast works with most Windows 8 and newer devices as well as, most Android tablets and phones. AirPlay is the Apple flavor of wireless. Personally, I needed both.

The size and battery are personal choices, go for the options that best fit your requirements. Some of these devices can also act as a portable battery pack to charge your other gear. As for the operating system, I wanted one that ran full Android. An OS that includes an App store, the ability to view documents off an SD card, run Netflix and Amazon Video, and be easily upgradable were important to me.

After hours of research, I ended up with a Vivitek QUMI Q38-BK. It’s rated for 600 ANSI Lumens, has a native resolution of 1900 x 1200, runs full Android, and has a battery rated for 2.5 hours. The projector has HDMI, supports both Miracast and Airplay, and will join a Wi-Fi network. It also has a micro SD card slot, two USB ports, and a 3.5mm audio jack. I especially like the built-in lens cover. It’s not pocket-sized but it easily fits in the front pocket of my laptop bag and only weighs a couple of pounds.

After reading all of this you are probably left wondering, does it live up to the expectation of having a big screen everywhere that I go? The anwser is, yes. The experience and usability are better than I thought they would be. The unit I purchased is bright enough to use in a normally lit office space and will connect to almost anything. I find myself using it several times per week.

I’ve used it for impromptu team-meetings, tossing my screen up on the wall behind our cubes. Gotten it out at people’s houses to show them pictures and vids. Used it as a big-screen monitor for my laptop while working at a customer’s location. Hooked it up to my Switch so a group of friends could play Mario Kart at happy hour. I even projected the Star Tracker app from my mobile phone onto the side of the house during a family telescoping session.

Now that I’ve had it for a few months and found that I use it often, I will probably always have a similar device in my kit. I can’t imagine how I got along without one all this time.

One Week in with the Galaxy Note 10

I got my Galaxy Note 10+ on launch day. I am coming from my beloved Galaxy Note 8, aka my favorite portable device ever. The 8 had no issues and still did everything I asked of it well. To be honest, before I saw the 10 in person, I had already decided to skip it.

I happened to be in Best Buy on launch-day and fell in love with the massive screen on the 10+. I gave in and picked one up. In a word, this thing is awesome. Every time that I pull it out of my pocket, I feel like pulling a He-Man and shouting “I have the power,” at the top of my lungs while pointing the S-Pen to the sky. Samsung should make that the default sound for removing the pen from its slot.

The screen is noticeably larger than the previous Note, or my wife’s iPhone+, but the footprint of the chassis is barley larger than either and it isn’t noticeably heavier. The display stretches from edge to edge and thanks to the punch-hole camera, from top to bottom. Various reviews either praise or hate the punch hole personally, I like it. It gets rid of the notch and is less likely to break than a pop-up.


Note8_Note10_iPhone7Plus

The in-display fingerprint reader has been another point of contention amongst reviewers. Again, I personally love this change. I’ve had zero issues with it scanning my fingers so far but, maybe my fingerprints are somehow easier to detect than other peoples’? In any case, not having to reach around to the back of the device is a huge improvement from my point of view.

Speaking of the back of the device. Samsung chose to remove the heart-rate and blood-oxygen sensors. I will miss them, but not enough to switch back to my old phone. To be honest, my smart-watch does this job and I rarely used the phone’s sensors anyway. I’m guessing Samsung assumed this was the case for most of us by now.  

On the subject of removals, the headphone jack has also met it’s demise. I think the media in general, is alwasy looking for an emotional reaction and has settled on the headphone jack as their issue de’jour. I switched to bluetooth headphones long ago and hadn’t used my 3.5mm jack in years. If you still need wired headphones, the adapters are everywhere, get one and be happy. 

Note10_Back

The cameras (there are five) are fantastic. I know that the big publications have requirements to find the flaws in everything, but they’re reaching on the negative points of this camera system. The pictures are just awesome. The ability to edit them in real-time with precision is ridiculously futuristic. I especially appreciate the Pro mode, it gives you DSLR-ish controls like ISO, manual focus, and adjustable exposure times. 

The wide angle can capture an entire room. Two true telephoto lenses are something I never thought that we would see in a phone with a flat back. I’ve had all the gimmick camera phones like the Lumia 1020, trying to get a camera that could replace my point and shoot. They worked but putting up with the big bump on the back was a high price to pay. The multi-camera setups are a much better solution. I’ve taken quite a few pics but haven’t put the cameras through the ringer yet so check back for more on this subject.

Wide_Angle

In my day job, as a consultant, I am constantly using my Galaxy Note. Whether it be to jot down meeting notes or reply to emails when I’m out in the field; I need a battery that can last through a full day of use. The Note 8 could struggle in this regard. I always kept a battery pack in my bag and had to resort to it on several occasions.

Just a few days ago I used my Note 10+ to document (notes, diagrams, video, and pictures) an entire multi-building network and computer infrastructure. When I got in my vehicle to head back to the office, I was shocked to see my battery still had 54% left. I had been at it for more than 4 hours, the 8 would have been in dire need of a recharge.

OneNote_ScreenShot

I’ve always been a fan of Dex mode on the Samsung devices. It has enabled me to travel without lugging a laptop on the plane many times. It also allows my phone to act as an extra computer when my main system is engaged in other tasks. For example, if my main computer is processing video, I check my email, update documents, and chat with my co-workers from Dex mode. You just need a Dex compatible dock, keyboard, mouse, and monitor.

Dex_Mode

The Note 10 has a new Dex mode trick. You can link your phone to your Windows or Mac computer via a USB-C cable (one in box) and use Dex mode with your PC or Laptop’s screen and input devices. This still works in the example I gave above. You are only remotley controlling Dex, so your main computer’s resrouces (CPU, Memory, etc.) are free for other tasks.

Finally we can talk about my favorite part of the phone. The S-Pen is stellar, as usual. I’ve written pages and pages of text with it already, including this post. I’ve edited photos and videos, and used it as a mouse when remote controlling systems. The new gesture features turn the S-Pen into a Wii-Mote and aren’t overly impressive to me yet, but I can see developers taking advantage of the option in games. 

Writing

Phones can’t be all work and no play. The Note 10+ is a gaming monster. With twelve gigabytes of RAM and a vapor-chamber cooled processor it has power to spare. The phone’s screen size rivals the one on the Nintendo Switch which really helps with immersion and makes it more comfortable to hold for dual thumb controls. 

Note_VS_Switch

On day one, I installed Modern Combat 5 and set it to the highest graphics setting with and played flawlessly at 60 FPS. Given the that screen resolution is higher than 1440P, most laptops struggle to play 1080P, and the Switch is 720P, this level of performance is astounding.  

MC5_ScreenShot

I look forward to spending the next couple of years with this phone in my pocket. I’m sure it will serve me well. 

Fix Microsoft Word Missing Mobile View on Galaxy Note

I’ve been an avid mobile writer for quite some time. I’m writing this post with my S-Pen on my new Note. A problem that I first experienced on my Galaxy Note 8, followed me to my new device. The mobile edition of Microsoft Word has a layout called “Mobile View” that reflows the document you are working with to be easily readable on a phone.

Without the mobile view, it is nearly impossible to read or edit Word files on a phone. Starting with my Note 8, the button that turns mobile view on or off would randomly disappear. I searched Google and read countless posts that never helped. I reinstalled the app, reset my phone and everything in between.

I was disappointed that even a new device didn’t solve the problem. I was also more determined then ever to resolve the issue. After a lot of troubleshooting I have found the problem.

It’s being caused by the Note’s impossibly high screen resolution. Word Mobile assumes that tablet devices don’t need the mobile view feature. It makes the device type determination by the display’s resolution on launch.

If your display is running higher than 1080 when you open Word, the full ribbon is displayed and it doesn’t have the mobile view button.

Close Word. Go to Settings -> Display -> Screen Resolution and choose 1080P or lower.

Then open Word and the mobile ribbon will be displayed along with the all important button. After Word has opened you can raise the resolution and retain the mobile view until Word is closed.

Finally! My frustration with Word Mobile is over.

PowerShell; Set Office 365 Passwords in Bulk

Recentley, I needed to set a new password for Office 365 users in bulk without Azure AD Connect. I needed to be sure that I didn’t give service accounts new passwords. In addition, this was for a multi-state organization and we wanted to set the new passwords one city at a time.

I was able to use PowerShell and the MsOnline module to meet all of the requirements. If you haven’t already, you’ll need to install the MsOnline module before running the code below. Open an elevated PowerShell console (Run as Administrator) and type Install-Module MsOnline; select Y (Yes) for any prompts.

$UserCredential = Get-Credential
       Connect-MsolService -Credential $UserCredential

$City = Read-Host "Enter city's name to set a new password for all users in that location"
$NewPassword = Read-Host "Enter new password for all user's in the specified city"

$O365_Users = Get-MsolUser -All| where {($_.city -eq $City) -and ($_.isLicensed -like "True")}|select UserPrincipalName
       foreach ($user in $O365_Users)
              {
                 Get-msoluser -UserPrincipalName $User.UserPrincipalName |set-msoluserpassword -newpassword $NewPassword -forcechangepassword $false
              }

When you run the script it will prompt you for your Office 365 admin credentials, the city, and the new password that you would like to specify. You can force a password change after the first logon by chainging $false to $true.

Photoshop and Lightroom Too Expensive? Try Affinity Photo and Darktable Instead

I’ve been editing pictures on computers since the beginning of digital photography. I started with one of the first consumer grade digital cameras, the Casio QV-11 and never went back to film. I’ve used countless photo editing apps but nothing compared to Adobe’s Photoshop.

Adobe changed to their current subscription only model in 2013 and I signed up. I paid sixty dollars a month for access to all of Adobe’s software and one-hundred gigabytes of cloud storage. For a while the cost seemed justified. Eventually, I started thinking about its cost compared to how often I used it and decided I needed to find an alternative.

Photoshop

I began testing alternative applications to see if any had improved enough, or if there were any new offerings that could replace Photoshop for my needs. Paint.Net and GIMP are great, but they lack true digital pen support, advanced brushes, batch processing, and some of the other tools that I’ve come to rely on. My goal wasn’t to find free software, but if it was I would probably be using Paint.Net (can still download free from the web site).

Paint.Net

I had looked at Serif’s Affinity Photo in the Microsoft Store before. It was coincidentally on-sale so I purchased and installed it. I launched the new software with a skeptical mindset. How could a forty-dollar app compete with a powerhouse like Photoshop? The skepticism didn’t last long.

What sets Photoshop apart from other photo editing software is the number of options, customizations, plug-ins, brush packs, and the ecosystem around it. While Affinity is not on the same scale as Adobe, it does have many of these features. Places like Frankentoon make custom brush packs for Affinity. All of the tool panes can be customized to your liking. Lots of Photoshop plug-ins can be imported into Affinity.

You can process jobs in batches, create your own custom brushes, export your work into almost any format you can think of, and more. Affinity Photo supports the Surface Dial and other digital tools, it even allows you to select from multiple GPUs. For me the only Photoshop feature I use on a regular basis that was missing from Affinity Photo was Lightroom.

I was able to find the perfect open-source replacement. Darktable runs on Windows, Linux, and Mac OS. It costs nothing, and works great for my needs. There’s both a lightroom for pursuing your photo collections and a darkroom for adjusting images.

Photoshop is still the king of photo editing solutions. Its high-price can be prohibitive for average use cases. If you’re a power-user like myself, give Affinity Photo and Darktable a try (both have trial editions). I bet you’ll be shocked at how easily you can transition into these apps.

Visio too Expensive? Try Grapholite Instead

Microsoft’s Visio has been the de facto diagraming application for almost two decades. I’ve used it to draw networks, floor plans, swim lanes, org charts, and countless random things for as long as I can remember. It is a truly great application. In my opinion its only flaw is the price tag.

At two-hundred and fifty dollars for the standard edition and almost six hundred for the professional version, it is just to pricey to justify for anyone that doesn’t need to decigram on a regular basis. Even as an IT professional that uses it frequently, I find the cost prohibitive.

Over the years I have tried numerous alternatives: OpenDraw, Google Drawings, and Dia to name a few. None of them were able to do the job for me. Don’t get me wrong, the applications work, they always missed some feature or function I needed to complete my work.

Earlier this year I purchased a new laptop, I was using it to write some documentation for a job. I needed to add a technical drawing to my document, but I didn’t have Visio on my personal computer. I didn’t want to fork over a few hundred dollars so, I opened the Windows store and found Grapholite.

Grapholite is available for Windows, Android, and iOS. I was able to install the software and create the drawing I needed without issue. The software is intuitive and specifically designed for touch screens. All the main features I use in Visio are available in Grapholite. Grouping, layers, auto-connectors, import pictures, a wide array of stencils, themes, and snap grids are all available in easy to use side bars.

To be honest, I didn’t expect the software to work as well as it does. It cost less than $30.00, I was shocked to find myself preferring it over Visio for basic diagraming. It seems like everytime that I use the software I find a new feature. For example; just the other day I learned it could export drawings to a VDX (Visio Drawing File Format).

Don’t get me wrong, there are still things Visio does that Grapholite has no way of accomplishing; dynamic data graphics, auto-discover, and importable stencil packs are all missing. I still haven’t installed Visio on any of my personal systems. I find Grapholite easily does the job. If your diagraming needs don’t involve advance shape data, or complex coding, it will probably do the job for you too.

Exchange Global Address List Synchronization

If your company has more than one Exchange environment or you are in the process of migrating, you will inevitably discover that the email platform does not have a native method for synchronizing contact information between multiple installations. When administrators first run into this situation the first thoughts are something along the lines of, “That’s ridiculous!” followed by, “Now what?”.

Run a Web search for GAL Sync and you will find a plethora of commercial tools made to do the job. I have personal experience with a couple of them and for the most part they work well. The issue is sticker shock. If you administrate a large environment, some of these tools can exceed six figures by the time you’ve purchased everything that you need.

Before you plunk down a giant wad of cash, consider doing it yourself with a little PowerShell know how. The last article on my blog described how to use Exchange to securely transfer files between organizations. If you use that technique to send contact data in the form of a CSV, it can be easily imported into AD on other domains.

Setup the Exchange File Transfer technique as described in this blog post. Now we’ll need to adjust the sending script to send Exchange contact data that can be imported into AD.

For true synchronization, you’ll need to run the sending and receiving process on all of the AD / Exchange environments involved. However, in most of the cases I’ve personally run into, only the Headquarters environment needed to have contact data for all the locations and companies.

#Author: Kevin-Trent@Hotmail.com 2019
# Export-ExchangeContactData.ps1
#This script will scan your Exchange Mailbox users and capture each person's Displayname and PrimarySmtpAddress. 
#The data will be put into a csv and e-mailed as an atttachment. 
#The Companyname variable below is used to name the files we send. The SMTP server is the fqdn of an SMTP relay to send the emails from.
#This script should be scheduled to run on an Exchange server once a day.

$UserCredential = Get-Credential
$Session = New-PSSession -ConfigurationName Microsoft.Exchange -ConnectionUri http://exchangeserver.mydomain.com/PowerShell/ -Authentication Kerberos -Credential $UserCredential
Import-PSSession $Session

Import-Module ActiveDirectory

#Variables:
$companyname = "MyCompany"
$smtpserver = "MyMailServer"
$reportname = $companyname+"-"+(get-date -f MM-dd-yyyy)

#Retrieve and format data. Add Properties in select line as needed.
Get-Mailbox -IgnoreDefaultScope -ResultSize Unlimited | 
Select Displayname,PrimarySmtpAddress | 
Export-CSV c:\temp\$reportname".csv" -NoTypeInformation

#Email the report:
Send-MailMessage -SmtpServer $smtpserver -To mailbox@mydomain.com -From mailbox2@mydomain.com -Subject "Contacts from $companyname" -Body "Please see the attached file $senderdomain" -Attachments C:\Temp\$reportname.csv
Start-Sleep -Seconds 60
Remove-Item -Path c:\temp\$reportname".csv"

Now all that is needed is an import of the contact data into Active Directory. Again, a few lines of PowerShell code will do the job.

#Author: Kevin-Trent@hotmail.com
#Import-Contacts.ps1
#Imports CSV data as AD contacts into the OU that you specifiy.
#Add Properties to match the data you've exported from the other exchange server. 

Import-Module ActiveDirectory
$Path = \\Server\Share\FileName

Import-Csv $Path | foreach{New-ADObject -Type Contact -Name $_.DisplayName -OtherAttributes @{'displayName'=$_.DisplayName;'mail'=$_.PrimaryEmailAddress} -Path "OU=$ou1,OU=$ou2,DC=$dc1,DC=$dc2,DC=$dc3"}

The Best 3rd Generation (2018) iPad Pro Case

A while back, I got my wife a twelve inch iPad Pro. She adores it. I have a difficult time writing about it because she rarely leaves it where I can get my hands on it.

I could go on and on about the machine’s positive attributes. It is unbelievably thin and lite weight. The battery lasts seemingly forever. In fact, the iPad’s biggest flaw only becomes evident when somebody pulls out a Microsoft Surface Pro next to you.

The Surface Pro’s kickstand creates instant feelings of jealousy for anyone that has spent much time drawing or writing on the iPad. It allows for the perfect angle in any situation. Why didn’t Apple include such a glorious feature on their premiere device?

Maxjoy’s iPAD pro case adds the infinitely adjustable kickstand that you’ve been missing. It hold the tablet in any angle you choose and is not dependant on slots, gears, or other clunky mechanisms to do so.

20190801_073240

In addition the case offers corner protection, an optional screen cover, and a place for your iPad pencil to live. The case is thick enough to be protective but not bulky. I like that that cover can be removed when not needed or folded back under the kickstand to keep it from digging into your legs while typing or drawing on the screen.

20190728_182051

It comes in multiple colors and sizes for the 11″ or 12.9″ 3rd Gen iPad Pro. We got ours on Amazon. If you’ve been looking for a great case for your iPad Pro, I highly recommend this one. Especially for the 12.9″ model, there aren’t very many choices out there for the larger tablet.

20190801_073443

A Year with the DJI Mavic Air

I began my journey with quadcopters several years ago. I started out with in-expensive micro drones and gradually progressed up to a DJI Mavic Air. I’m an accomplished pilot now and have captured thousands of pictures and countless hours of video. You can read about my experience in a previous post here.

I’ve had the Mavic Air for a year and I’m more impressed with it now, than I was the day I bought it. One of the most surprising aspects of the powerful little flyer is how durable it is. Even after a year of being hauled around in backpacks, laptop bags, car trunks and plane luggage, there isn’t a mark on it. I’m still using the original props! I can ‘t think of any other flying vehicle that I’ve owned that didn’t need at least, new props a few weeks or months in.

There have been several major software updates for the Mavic Air since I unboxed it. The updates can catch you off guard; you’ll boot up to catch some video of your dog only to be hit with the firmware required message. Thankfully they’ve added a feature to update later. The phone app can hang on the unzipping of files during big updates, but you just need to close and restart it. The software has been noticeably improved. The user interface has remained largely the same but multiple bugs have been corrected. I can’t remember the last time the app froze or crashed during flight, which was a frequent occurrence at the start.

The AI has been in school for the last few months, it now flies the drone better than I do. Object avoidance, pre-programmed dramatic shots, follow me, return to home, and TapFly are all improved. My use of the quadcopter has evolved from that of a flying toy to a camera platform, so I find myself using these automated functions much more frequently.

You might be wondering what a drone could be used for besides taking pictures. They’re surprisingly versatile machines; here are a few of the cases I’ve encountered so far:

  • Lost pet locator
  • Sky surveys of friend’s homes and property
  • Examining roofs for hail damage and lost toys
  • Chasing off various unwanted creatures: stray dogs & cats, racoons, opossums, bats, it’s a long list
  • Getting close to dangerous things: Fire, Fireworks, Wildlife, Guns, Bees, Wasps, etc. the FPS view makes you feel like you’re there in the action

While looking back through the photos and videos for this article, I can’t help but smile. I’ve got some fantastic shots that would be impossible to get without the little machine. Quadcopters are not just for aerial pictures and videos. They’re great for anywhere that a human doesn’t easily fit, or places that would be too dangerous to be in, they make great tripods too.

Now that I’ve had a great camera drone for a year, I can’t imagine not having one. Especially a compact unit like the Mavic Air. I carry it with me almost everywhere since it folds up and fits in my laptop bag. I was a little skeptical about how much I would use it when I first purchased it and was concerned that it would be a waste of a considerable amount of money. Luckily, it turns out that my instinct to get one was justified. I consider it to be one of my favorite gadgets and look forward to all the things I’ll be doing with it in the future.

The Surface Book 2. A laptop that Adapts to You.

I’ve had a laptop in one form or another since the late nineteen-eighties. Sufficed to say, I’ve had a lot of them. Some of my favorites have been various models of the Sony VAIO, Dell XPS, MacBook Air, and the Microsoft Surface line. I’ve had huge, almost suitcase sized machines, miniscule eight point nine inch netbooks, and everything in between.

What makes a laptop a good fit for most people tends to revolve around how they use it. A road-warrior that mostly checks email and writes Word documents, it isn’t likely to rank a six-pound gaming laptop as one of the best. Likewise, a gaming enthusiast is probably not going to pine over a super-thin notebook that lacks a GPU. Therefore, people typically purchase a system designed for their primary use case. This method works but has some issues. What happens when that road warrior is bored in the hotel room and wants to play a game of Overwatch? Likewise, how does the gamer deal with dragging their system around an all-day convention?

I use my portable machines for a wide range of tasks. I travel, write, game, design graphics, write code, and crunch numbers. For me, the best laptops are the ones that can do it all. I need something that can adapt to my requirements on the fly. It doesn’t have to be the best at any one thing, it needs to do everything reasonably well.

This year alone, I’ve had a Lenovo ThinkPad, an HP Elite Book, a Surface Go, a Surface Pro 6, and a Surface Book 2 as daily drivers. All of them are great systems but only the Surface Book 2 manages to do it all. It’s one of the fastest tablets you can buy. A laptop that can run all-day on one charge. It can play AAA games better than an Original Xbox One, and still fits in fourteen-inch sleeve.

Pair an Xbox One S Controller for easy gaming

The Surface Book is Microsoft’s very own transformer. The screen is a tablet that houses a 13.5″ (or 15″) HDR touch screen, an Intel I-7 Quad Core CPU (or I-5), 16GB of RAM (or 8GB), and a 512GB SSD (or 256GB, 1 TB). The base has the keyboard, trackpad, another battery and an Nvidia 1050 GPU (or 1060).

The two halves attach and detach via an electromagnetic hinge. When the tablet is docked to the base the system is a high-end laptop capable of almost any job. Play games, edit video, get into some serious diagrams, the GPU handles it all. The system is well balanced and feels like a single unit unlike some other two-in-one devices.

A dedicated gaming laptop with a more powerful GPU will game better, but this thing runs Overwatch at 1900 x 1200 in full screen with everything on high at 60 FPS, more performance than the original Xbox One or PS4 can offer. I wish that the 13.5″ model was available with thunderbolt and/or HDMI out, but it isn’t a deal breaker for me. The 15” model is available with HDMI out and a slightly higher power Nvidia 1060 GPU.

When you disconnect the base, you are left holding one of the most powerful tablets in existence. It’s screaming fast and ridiculously light for its size. The screen is mesmerizing. There’s plenty of storage and memory to open countless browser tabs and apps. I have owned the original Surface Pro, the Surface Pro 3, the Surface Go, and a Surface Pro 6; the tablet on the Surface Book is the best that Microsoft makes for writing, taking notes, drawing, and most non-keyboard tasks.

When the tablet is separated from the base it has no ports of its own. Only wirelessly connected peripherals (except headphones) are available. The battery life is shorter than most tablets and there’s no built-in kickstand. None of that matters once you start using it. The speed of the full Intel CPU and available memory means that this tablet runs Windows 10 and all your apps and full desktop software just as fast as your desktop does. The lack of the stand and re-enforcements required for it, means the tablet is lighter than a Surface Pro even though the screen is larger.

If you’re looking for a portable system that can do it all you would be hard pressed to do better than a Surface Book 2. Other 2-n-1 tablets and laptops are either good tablets and mediocre laptops or vice versa. A very select few systems are excellent at both roles.

Xbox One X vs. Xbox One S vs. Xbox One

I play almost as many console games, as I do PC titles. I had been playing my original Xbox One and ruled out an upgrade. My logic being that I’d use the PC for 4K and HDR. It turns out that plan was a little short sighted.

I play console games with a lot of friends and family. To be honest, the friends and family thing is the reason I still have consoles at all (except for the Switch). I kept finding myself missing the higher end graphics during these sessions, especially after I got my new HDR screen. Lucky for me, Microsoft discounted the Xbox One X to $399.00 for the Fallout 76 bundle.

At this point, I’ve played hundreds of hours of games: Titan Fall 2, Halo 5, Apex, Battlefield 5, Gears of War 4, and more on all three models of the Xbox One. I’ve even hooked them up side by side just to eyeball the differences.

The differences are both less and more than you might think. Allow me to explain. The Xbox One has great graphics especially when running games that were created specifically for it. I could get all technical about resolutions and frames per second, but specs don’t really matter, experiences do. The Xbox One provides a much better gaming experience than its predecessor was able to.

The Xbox One S introduces HDR (high dynamic range) and slightly higher resolution and FPS. If your screen and the game you are playing supports HDR, the change is dramatic. Colors are richer, shadows deeper, and everything is generally more defined. The improved controller supports Bluetooth connectivity which makes hooking it up to your PC easier and the One S is physically smaller than the original.

The Xbox One X allows for full 4k HDR 60 FPS gaming on the titles that support it. Several games have been updated, just look for Xbox One X Enhanced in their descriptions on the store. The differences between 1080P and 2160P are realized in the texture of materials and objects more than anywhere else. Skin looks almost real, the line between leather and cloth in clothing is clearly defined, wood looks like it would give you a splinter.

The differences in game play are the greatest between HDR and NON-HDR. With HDR capabilities, spotting a sniper hiding in the distance is easier because the character is more clearly defined. Nailing the corner at eighty miles per hour feels safer because the road’s surface and transitions are more obvious.

With the addition of 4K, games are more photo-realistic than ever before. However, beyond pure ascetics, the high resolution doesn’t add anything to the game play. In-fact, you might be able to argue that it causes more mistakes. More than once I was fragged in a game of CoD or Titan Fall 2 because I was busy admiring the scenery instead of watching where I was going. Granted, I got used to the new looks after a while.

I really enjoy my Xbox One X and highly recommend it to anyone looking to get their first unit or to those who are upgrading from the original. If you already have the Xbox One S, I can’t say the upgrade to the X is entirely worth the expense. If you already have an S and aren’t dying to play 4K games right now, holding off for Project Scarlet may be a wiser financial decision. Of course games are rarely about smart money choices.

4K HDR TVs Can Be Good Monitors

A while back, I added an Nvidia 2080 Ti to my gamming computer. I had been using a 40″ 4K TV as a monitor but it was an older model that lacked HDR. Time for an upgrade! Read on to find out what I chose and why.

A colleague is lucky enough to have a 4K ASUS Predator and it is fantastic, but out of my price range. If at all possible, I need a screen that can serve as a computer monitor, a screen for my consoles, and possibly a TV. I know that is asking for a lot, but I have a lot of stuff and not a lot of space.

Most monitors will support multiple types of connections but can have a difficult time downsizing their resolutions. Many “TV” screens have slower pixel response times and extra signal processing that introduces lag, but they handle multiple sources and resolutions more effectively.

Is a dedicated monitor going to have a better picture? Absolutely. When hooking a computer up to a TV, you lose a little quality and even with game modes and the like. Televisions are just slower. However, if you want to hook up your Nintendo Switch to a 4K HDR gaming monitor you will probably be disappointed with the results. So it comes down to a trade off, performance versus flexibility. Cost is probably in there too LOL.

I limit the screen size to 40″ because anything bigger is too large to be on a desk three feet in front of my face. The 40″ size running 4K means that I can open multiple “full size” windows and do not need multiple monitors. Games take my full field of vision without requiring me to turn my head to see the edges.

The trick to using a TV as a monitor is to turn the “Sharpness” setting down as far as it will go and to carefully adjust the brightness and contrast. If you get the balance right, you can get a decent picture without ghosting (blurry text). Some smart TVs will detect that you’ve hooked a computer up to them and make the changes automatically.

I was able to talk my local electronics store into connecting a few of their TVs up to a laptop so that I could get an idea of how they would perform as a monitor. That experience, combined with research on-line, led me to choose the Samsung RU7100. It’s game mode reduces lag by disabling most of the signal processing features. It’s smart functions include Apple Air Play and my cable provider’s app.

I’ve had the screen up and running for almost a month now and am very happy with my choice. I flip between my computer, iPad, Cable TV, and game consoles effortlessly. The picture looks great no matter what source is selected. I’ve received multiple compliments on it from both my techie and non-techie visitors. Many of them are surprised to learn its a four hundred dollar TV and not something much more expensive.

Python Programable Robots with LEGO?

A few years back, I picked up a Lego Mindstorms kit when they went on sale. My family had fun building all of the robots that the kit provides instructions for. We also tried several of the designs people have published on-line.

Mindstorms are comprised of Lego bricks, gears, shafts, wheels, and other various pieces similar to those found in the Technic sets. In addition to the bricks they also have motors, sensors, wiring, a remote, and a brain box to programmatically control your creations via a simple to use drag-n-drop app on your mobile or PC.

ourbot

Once we’d had our fun with them, they went back in the box. Fast forward a few years, my now teenage son, approached me saying that he wanted to learn how to code in Python. He asked if I had any ideas for a project he could use for motivation. Having just gone through a bunch of items to put in the neighborhood garage sale, I thought of the Mindstorms. I had recently read an article regarding a Python runtime someone had created for the control box. “Let’s build a robot.”, I answered.

He thought of building a Roomba like bot, that could navigate its environment. We would need to write software to tell the machine to make a reverse J-turn when either the forward or downward facing sensors detected an obstacle. He used the TRACK3R plans from LEGO as the basis for the vehicle. Basically, we built a tank with a sonic sensor facing downward and an IR sensor facing forward.

Track3r

Once he had assembled the bot, the next step was to load the Linux based OS onto a MicroSD card. We followed the well written instructions on the Lego education site and at Ev3Dev.org to get our controller to dual boot Linux with an embedded Python framework. If you are planning a similar project, the best advice I can give is to be patient, go slow, and follow each instruction exactly.

There is a extension for Microsoft’s Visual Code IDE that makes getting up and coding a breeze. The Ev3DevPython site has some great documentation for installing and using the extension. They also have some sample code, video instructions, and a lot of other useful information. I would suggest visiting the site before starting your own build.

2019-06-09

After all the moving parts were sorted, we began testing various solutions for the code that would allow our bot to autonomously drive around the house. At first, we struggled trying to get the tank to run straight. We were trying to use the “MoveTank” method, but couldn’t keep it running in a loop. We solved the problem by running each motor, individually, in a while loop. The finished “Roomba” code is below. Feel free to use it in your own projects. You may need to change the Output ports to match the way your bot is wired.

#!/usr/bin/env python3
from ev3dev2.auto import *

us = UltrasonicSensor(INPUT_3)
mr = LargeMotor(OUTPUT_A)
ml = LargeMotor(OUTPUT_B)
ir = InfraredSensor(INPUT_4)
dist=us.value()/10
sound = Sound()
sound.speak("zoo wee mama")

while us.distance_centimeters < 8:
    mr.run_timed(time_sp=100, speed_sp=500)
    ml.run_timed(time_sp=100, speed_sp=500)
    if ir.proximity < 14:
        mr.on_for_rotations(SpeedPercent(70), -3)
    if us.distance_centimeters >8:
        mr.stop()
        ml.stop()
        sound.speak("help me I am stuck")
        break

Don’t buy a second screen for your laptop, use your tablet instead

A few days ago, I was using my Surface Go to do some work while sitting on the back yard patio. It was a pleasant spring day. The birds were chirping, the grass was green, and my wife’s flowers smelled great. It was nice to be outside, except for one thing.

A lack of screen real estate was hindering my workflow. I normally use 3 monitors. Trying to do everything on one was causing a disruption. I began day dreaming about acquiring one of those USB companion monitors that you see at Best Buy or advertised on Amazon.

Not one to waste an excuse to buy new equipment, I was researching the options when I remembered that there was a software solution for this issue. I had tried it a few years back and liked it. iDisplay was a set of programs that you installed on your PC and Mobile, to turn the mobile a secondary display. Once I’d moved my digital life over to the Surface, my iPad mini had been collecting dust in my junk drawer. I wondered if the app was still available?

I dug out the iPad, updated it, and checked the app store. Sure enough, iDisplay was in my purchased apps, so I installed it. Then I visited the company’s web site http://www.getidisplay.com/ to get the Windows component. A few minutes later I had my second screen up and running. This solution has a few advantages over standalone USB monitors.

Once connected, the iDisplay operates like any other monitor.
  • The app is less than $20.00, but a new USB monitor is more than $100.
  • The secondary tablet has its own battery and doesn’t draw power from your main system.
  • It is wireless (cabled is an option on some systems).
  • The tablet’s touchscreen functionality still works.

There are of course some drawbacks. When run wirelessly, the frame rate on your companion screen is going to be in the fifteen to twenty frames per second range. This is fine for emails and spreadsheets, but not so great for video. The is also a small bug in the Windows application. Once you’ve connected your iDisplay(s) and then disconnected, you can’t connect again until you restart the program.

While writing this post, I noticed there are quite a few apps in the app store for this purpose. I didn’t investigate any of them since I already owned iDisplay. It fit my requirements but, if you’re new to this concept there may be some benefit in trying the others. I should also mention that iDisplay isn’t only for Apple devices, it works on Android and Windows too. You can also run multiple iDisplays, just install the app on each device.

Manage Teamwork Like A Boss

Often, the most difficult aspect of managing a team of employees is keeping on top of all the work. Making sure that nothing is being neglected while ensuring the load is properly distributed, is challenging. When you have a good system all worked out it is difficult. Without one, you’re toast.

There are literally thousands of work management systems on the market. How are you supposed to figure out which one you should be using? Like any project, start with a list of requirements. What do you need to track? Do you want notifications? Do you need access from mobile devices? Chief among your concerns should be user adoption. You can have the most expensive software in the world or the cheapest, both have the same value if your employees won’t use it.

The Outlook task list has been highly efficient people’s secret for years. I know because I am one. Drag an email to the task icon, toss in some categories, set a due date, and boom you’re organized. It’s one of the first things that I setup at a new gig. Being able to insert pics, videos, files, and notes, along with tracking dates, progress, and importance make it an invaluable tool. If you have an on-premises Exchange server, or Office 365 you can even sync your task list with your favorite mobile devices.

If only we could make this tool work for a whole team? Chances are, if your employer has an Exchange sever, they probably have SharePoint too. With a little know how, we can use these products together to manage our team’s work load. Outlook is a ubiquitous communications application, so adoption should not be an issue.

You’ll need a few things before you start creating the group task list.

  • You will need a SharePoint Team site and enough permissions to add an app to it or, you SharePoint site admin’s help.
  • A list of the categories your team will assign their work to. Project, Maintenance, Automation, Planning, Presentation, are some examples of categories.
  • A list of your team’s user names or a group that they all belong to.

Once you have all of your lists, the first thing is to add the Task App to your SharePoint team site. Logon with an account that has enough permissions to add an app. In the upper right of the browser will be a gear icon, click it and choose “Add an app”. Then click the icon for tasks and enter a name. This is the name your team will see in Outlook so choose carefully.

If you check the properties of your new task list (use the SharePoint ribbon), you should see that the column names match the field names of the Outlook task list. Look closely and you may notice an important one that is missing; SharePoint does not have a “categories” column. Most teams and managers will probably want to organize their work by categories; fear not, we just need to add the missing column.

Select the List tab in the ribbon and then click the list settings button.

About half way down the page select the Create Column link. Name the new column Categories, set the type to choice, and enter you desired categories into the choice list’s box. Copy the categories you’ve create when you are finished and send them to your team. They will need to create the same categories in their Outlook tasks list in order for the syncronization to work.

Now go back to the list settings page and under Permissions and Management, click on the “Permissions for this list” link. Make sure that each memeber of your team has at least “Edit” permissions. That’s it for setting up the SharePoint side. Email your team a list of the categories you created and a link to the task list.

Once they get their email, they will need to open Outlook and create matching categories. The process varies a little in all of the different versions of Outlook, but in general, you create a new task and click the drop down under the categories button in the ribbon. Followed by clicking All Categories.


Now each team member needs to link the SharePoint task list to their Outlook. If your organization blocks the creation of PST files you may need to talk to your IT department and ask them to adjust the GPO to allow Shareing PST files, this can be done through an ADMX template or through the registry.

Once you get the PST situation squared away, each memeber on your team will need to visit the task list in their browser and then use the “Connect to Outlook” button in the list’s ribbon. If this button is greyed out, there are several SharePoint settings that could be the cause. Ask your SharePoint administrator to give you a hand. If you are the SharePoint administrator, try reverting to classic Exchange integration (google it), or enabling data export for the site/list.

After you have everybody setup, you and your employees can manage team tasks from either the SharePoint site or from their Outlook tasks. All of the features will work as they always have including reminders. Be sure to “Assign” tasks to the appropriate team member so that you can tell who is working on what. You will find that sorting by category and the assigned to colums are very useful.

Add colums to your Outlook tasks to adjust the information you see, for example the afore mentioned “assigned to” column is not displayed in Outlook by default.

Both Outlook and SharePoint have numerous views, filters, and rule capabilites. You will undoubtadley be surprised with how effective a solution this setup can be. Especially given that it probably didn’t cost you anything to implemeant. If your team wants to sync their tasks with their mobile devices they can either run the SharePoint client for their particular device or use Activesync. Using activesync will require that they copy their team tasks to their personal mailbox task list.